Month: June 2025

21 day keto diet pdf

Embark on a transformative journey with our 21-day keto plan! This guide offers a complete meal plan, nutritional details, and shopping lists for beginners seeking effective weight loss.

What is the Ketogenic Diet?

The ketogenic diet is a high-fat, very low-carbohydrate eating plan designed to shift the body’s primary fuel source from glucose (from carbs) to ketones (from fat). This metabolic state, called ketosis, occurs when carbohydrate intake is drastically reduced – typically to under 50 grams per day.

By limiting carbs, the body begins to break down stored fat into ketones, which are then used for energy. This process can lead to weight loss, improved blood sugar control, and increased energy levels. A 21-day keto diet aims to quickly establish this fat-burning state, offering a structured approach for beginners to experience these benefits.

Benefits of a 21-Day Keto Challenge

A focused 21-day keto challenge can jumpstart weight loss by promoting efficient fat burning and reducing water retention. Beyond weight management, participants often experience increased energy levels and mental clarity as the body adapts to using ketones for fuel. This short-term commitment fosters discipline and establishes healthy eating habits.

Furthermore, a 21-day plan can improve insulin sensitivity, potentially benefiting those with blood sugar concerns. It’s an excellent way to explore the ketogenic lifestyle and determine its suitability, offering a tangible experience of its potential health advantages before committing long-term.

Understanding the Basics of Keto for Beginners

The ketogenic diet centers around high fats, moderate proteins, and very low carbohydrates, shifting your body to burn fat for energy instead of glucose.

Macronutrient Ratios (Fat, Protein, Carbs)

Achieving optimal ketosis relies on precise macronutrient ratios. Typically, a ketogenic diet consists of approximately 70-80% of calories from fat, 20-25% from protein, and a very limited 5-10% from carbohydrates. This breakdown forces the body to utilize fat as its primary fuel source.

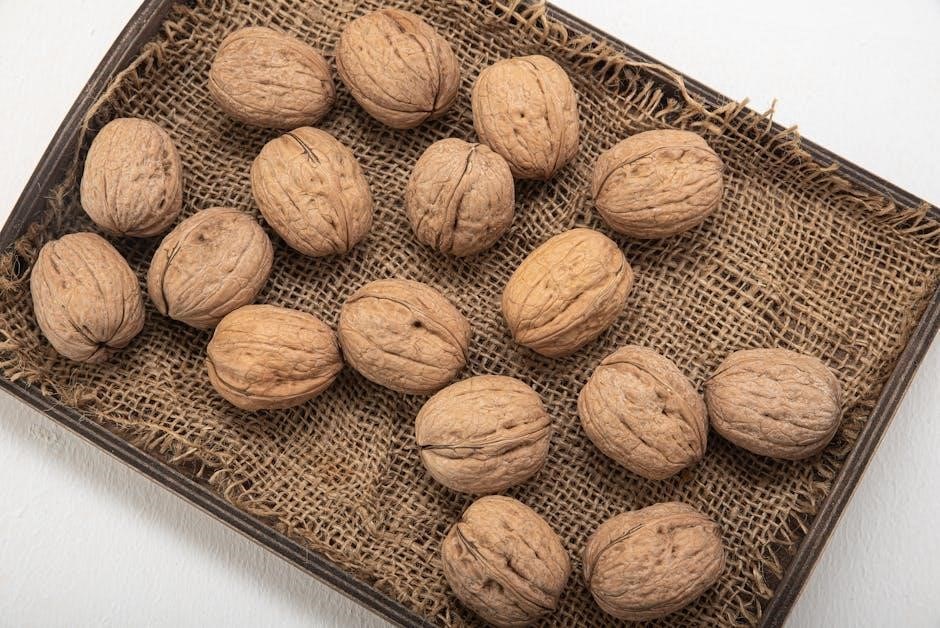
Carefully tracking these ratios is crucial, especially when starting. Utilizing a food tracking app can simplify this process. Remember, individual needs may vary based on activity level and metabolic rate. Prioritizing healthy fats like avocados, olive oil, and nuts is key, alongside moderate protein intake to preserve muscle mass.

Foods to Eat on a Keto Diet

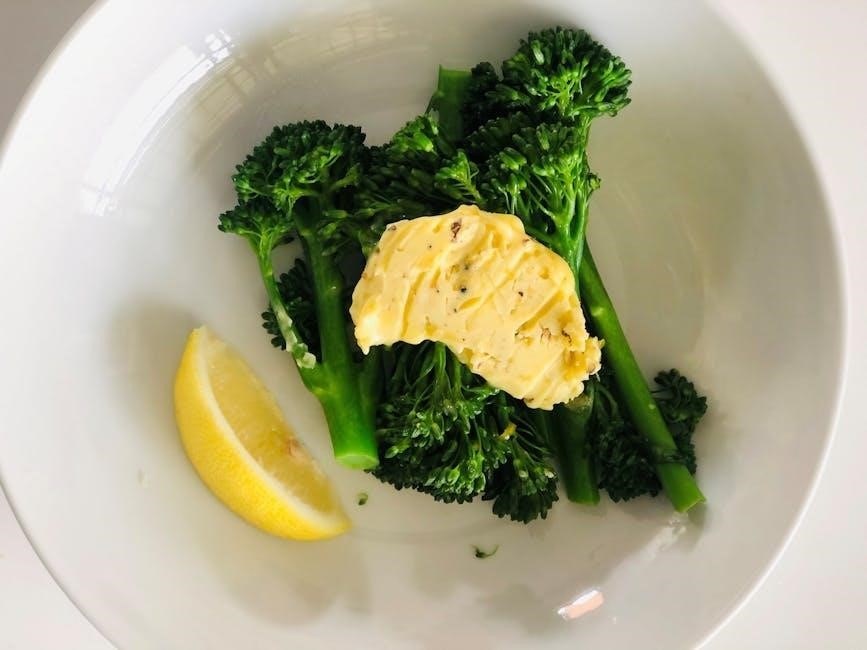
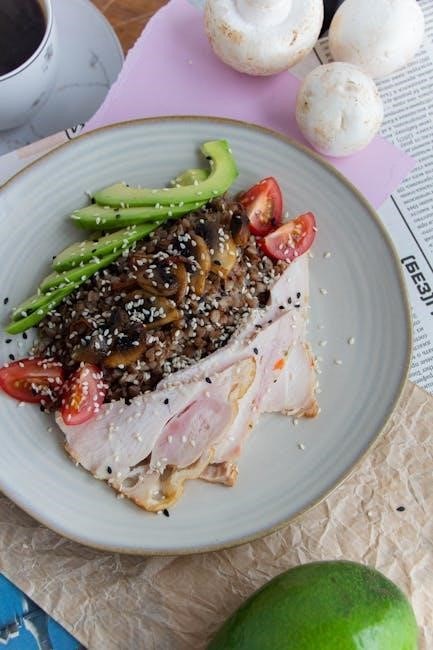
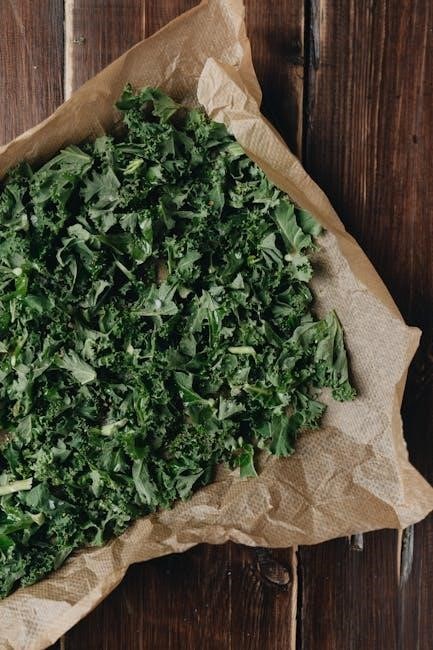
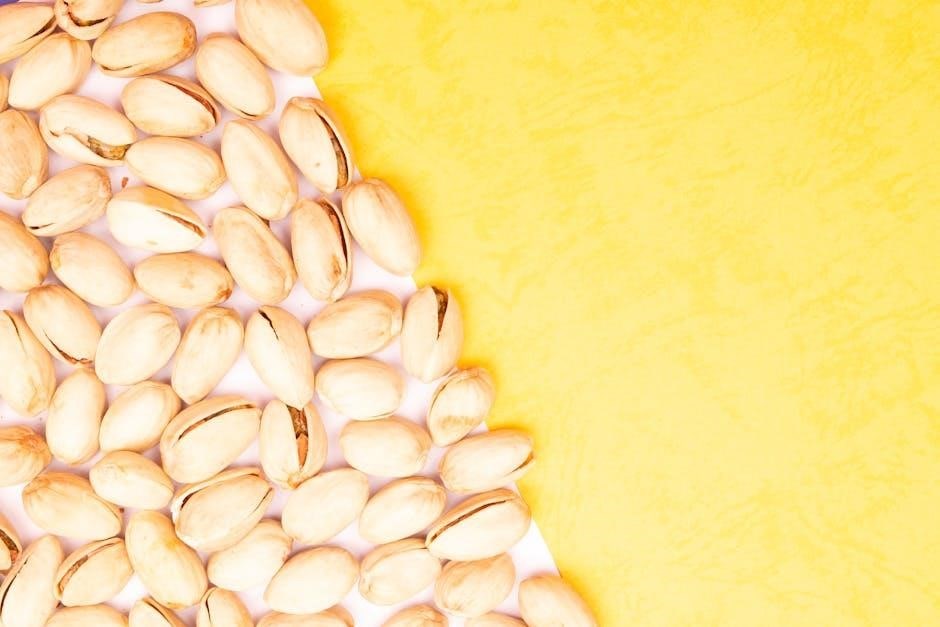
A successful keto diet centers around nutrient-dense, low-carb foods. Embrace healthy fats like avocados, olive oil, coconut oil, and nuts & seeds. Protein sources should include meat, poultry, fish, and eggs. Non-starchy vegetables – spinach, kale, broccoli, and cauliflower – are essential for vitamins and fiber.

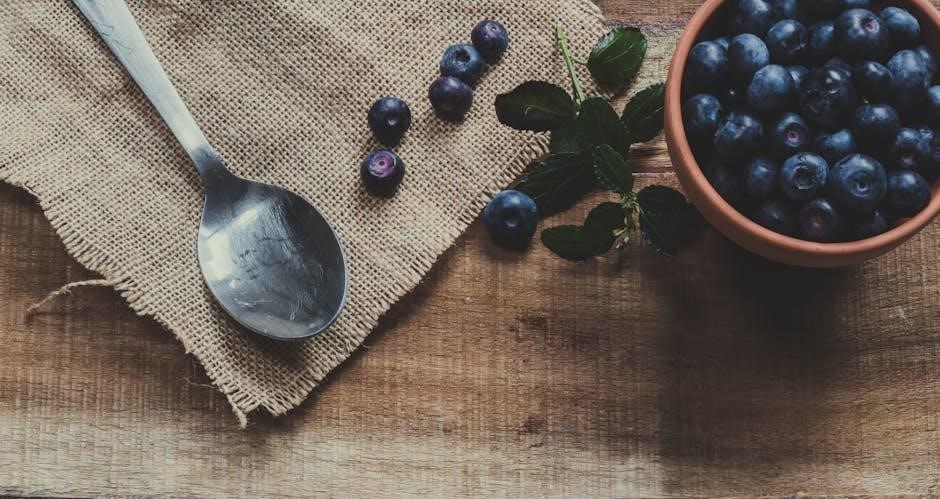
Dairy can be included in moderation, opting for full-fat options like cheese and heavy cream. Berries, in small portions, offer a sweet treat without significantly impacting carb intake. Prioritize whole, unprocessed foods to maximize nutritional benefits and support sustained energy levels throughout your 21-day challenge.

Foods to Avoid on a Keto Diet

Strict carbohydrate restriction is key on keto, demanding careful food choices. Eliminate sugars entirely – this includes soda, juice, candy, and most desserts. Grains like wheat, rice, and corn are also off-limits, as are starchy vegetables such as potatoes and sweet potatoes.

Most fruits are too high in carbs, with limited exceptions like berries in small quantities. Legumes (beans, lentils) should be avoided due to their carbohydrate content. Processed foods, often containing hidden sugars and unhealthy fats, are best excluded. Focus on whole, unprocessed options to maintain ketosis and achieve optimal results during your 21-day plan.

The 21-Day Keto Meal Plan Structure

Our plan delivers a structured, three-week approach. It includes weekly overviews, essential shopping lists, and detailed nutritional information for each delicious, keto-friendly recipe.

Weekly Meal Plan Overview

Each week of the 21-day plan is strategically designed to optimize your ketogenic experience. Week one focuses on a “Keto Kickstart,” gently introducing your body to fat-burning mode with simple, satisfying meals. Week two, “Building Momentum,” introduces more variety while reinforcing keto principles, helping you adapt and enjoy the process.

Finally, week three, “Sustaining Results,” emphasizes long-term adherence with flavorful recipes and strategies for maintaining your progress. The plan provides breakfast, lunch, and dinner menus, ensuring a balanced and enjoyable dietary approach. This structured approach, coupled with a dedicated shopping list, simplifies your journey towards achieving your weight loss goals.

Importance of a Keto Shopping List

A well-prepared keto shopping list is paramount for success on this 21-day journey. It eliminates impulse purchases of carb-laden foods and ensures you have all necessary ingredients readily available. This proactive approach minimizes temptations and streamlines meal preparation, saving you valuable time and effort throughout the week.

Each weekly list is tailored to the specific recipes included in the meal plan, categorizing items for efficient grocery shopping. Staying organized with your shopping prevents derailment and supports consistent adherence to the ketogenic diet, maximizing your chances of achieving optimal results and enjoying the process.

Nutritional Information per Recipe

Each recipe within this 21-day keto meal plan is accompanied by comprehensive nutritional information. We provide detailed macronutrient breakdowns, including total fats, protein, and net carbohydrates, allowing for precise tracking of your daily intake. This transparency empowers you to stay within your ketogenic goals and understand the impact of each meal on your body.

Serving sizes are clearly indicated, ensuring accurate calculations. This detailed data is crucial for beginners navigating the keto diet, fostering informed food choices and promoting sustainable, healthy weight loss. Knowing exactly what you’re consuming is key to success!

Sample Meal Ideas for Each Week

Discover delicious keto recipes for breakfast, lunch, and dinner! Each week introduces new flavors and variety, keeping your 21-day journey exciting and sustainable.

Week 1: Keto Kickstart

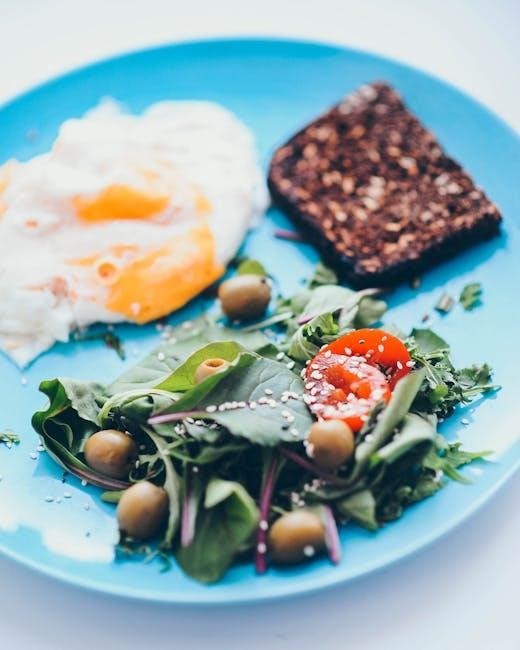
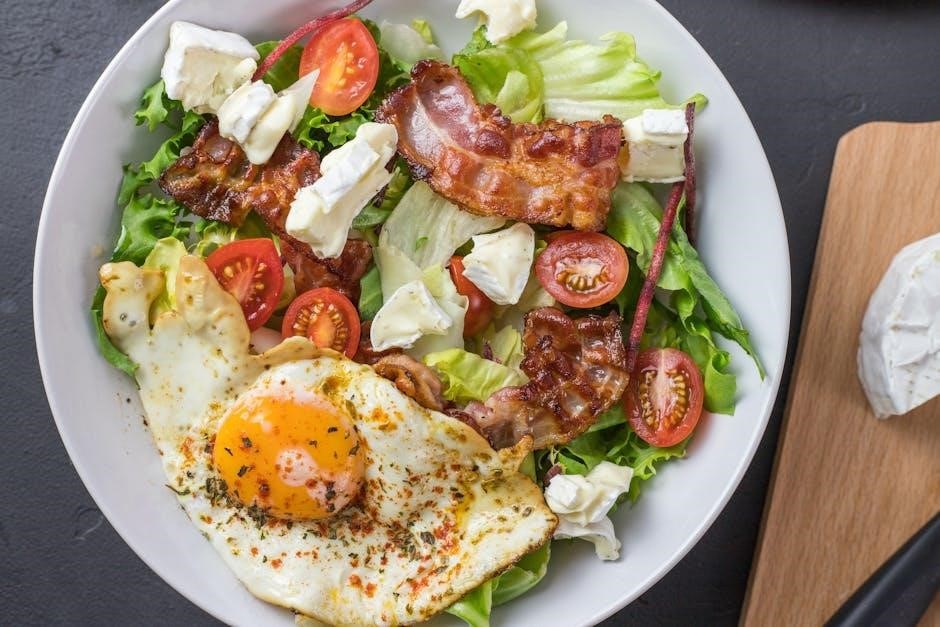
Welcome to your first week! This phase focuses on transitioning your body into ketosis. Expect to see initial water weight loss as glycogen stores deplete. Meals emphasize simple, satisfying recipes like scrambled eggs with avocado for breakfast, a hearty chicken salad for lunch, and baked salmon with asparagus for dinner.

Prioritize healthy fats, moderate protein, and very low carbohydrates. A detailed shopping list is provided to ensure you have everything needed. Remember to drink plenty of water and monitor how your body responds. This week is about establishing a solid foundation for success!

Week 2: Building Momentum

Now that your body is adapting, Week 2 introduces slightly more variety while maintaining strict keto principles. Explore recipes like keto-friendly chili, ground beef and broccoli stir-fry, and creamy mushroom chicken. Continue prioritizing healthy fats and moderate protein intake, keeping carbohydrates minimal.

Focus on incorporating more non-starchy vegetables for added nutrients and fiber. Utilize the provided shopping list to streamline your grocery trips. Track your progress and note any changes in energy levels or cravings. Consistency is key to building momentum and achieving optimal results!

Week 3: Sustaining Results

Congratulations on reaching Week 3! This phase focuses on solidifying your keto lifestyle for long-term success. Introduce recipes like salmon with asparagus, cauliflower mac and cheese, and keto chicken salad. Continue to monitor your ketone levels and adjust macronutrient ratios as needed.

Experiment with different seasonings and herbs to keep meals exciting. Remember that mindful eating and portion control are crucial. Utilize the weight loss tracking template to celebrate your achievements and identify areas for improvement. Embrace keto as a sustainable way of eating!

Tracking Progress and Staying Motivated

Monitor your success! Utilize our weight loss template and ketone level tracking to stay focused and achieve lasting results on your keto journey.

Weight Loss Tracking Template

Consistent monitoring is key to success! Our detailed template allows you to record daily weight, measurements, and overall feelings throughout the 21-day challenge. Track your starting weight and body measurements – waist, hips, and thighs – for a comprehensive view of progress.

Record your weight each morning, under similar conditions, for accuracy. Note any non-scale victories, like increased energy or improved clothing fit. Visualizing your transformation with graphs and charts can be incredibly motivating. This template isn’t just about numbers; it’s about acknowledging your dedication and celebrating every milestone achieved during this keto journey!

Monitoring Ketone Levels

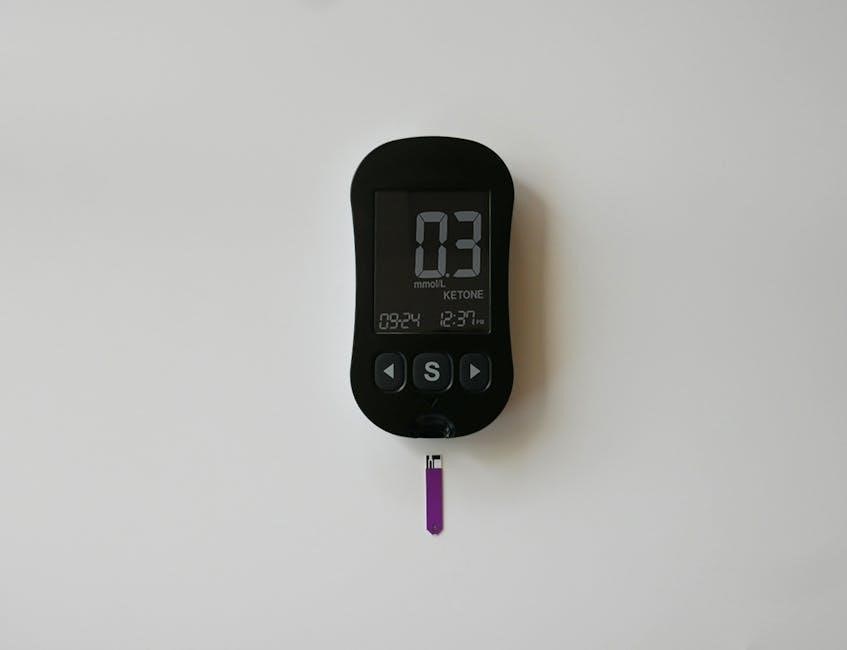
Confirming ketosis enhances your results! While not mandatory, tracking ketone levels provides valuable insight into your metabolic state. Utilize methods like urine strips, blood ketone meters, or breath analyzers to measure ketone concentration.

Optimal ketone levels generally range between 0.5-3.0 mmol/L, indicating successful carbohydrate restriction. Remember that individual responses vary, and levels aren’t the sole indicator of success. Focus on consistent adherence to the diet and observing positive changes in energy and weight. Monitoring helps fine-tune your macronutrient intake for optimal ketosis and sustained weight loss.

Keto Recipes & Alternatives

Discover delicious keto-friendly options! Enjoy breakfast, lunch, and dinner recipes, plus satisfying desserts – all designed to fit your low-carb lifestyle perfectly.

Keto-Friendly Breakfast Recipes

Start your day right with these flavorful keto breakfasts! Imagine waking up to fluffy keto pancakes, a delightful alternative to traditional, carb-laden versions. Or perhaps a savory keto breakfast bake, packed with cheese and your favorite low-carb veggies, will tantalize your taste buds.

Don’t forget about quick and easy options like scrambled eggs with avocado, or a creamy chia seed pudding sweetened with a keto-approved sweetener. Even keto bread is achievable, allowing for delicious toast with almond butter. These recipes provide sustained energy and keep you feeling full and satisfied, setting a positive tone for a successful keto day. Explore these alternatives and enjoy a breakfast that aligns with your goals!

Keto-Friendly Lunch & Dinner Recipes

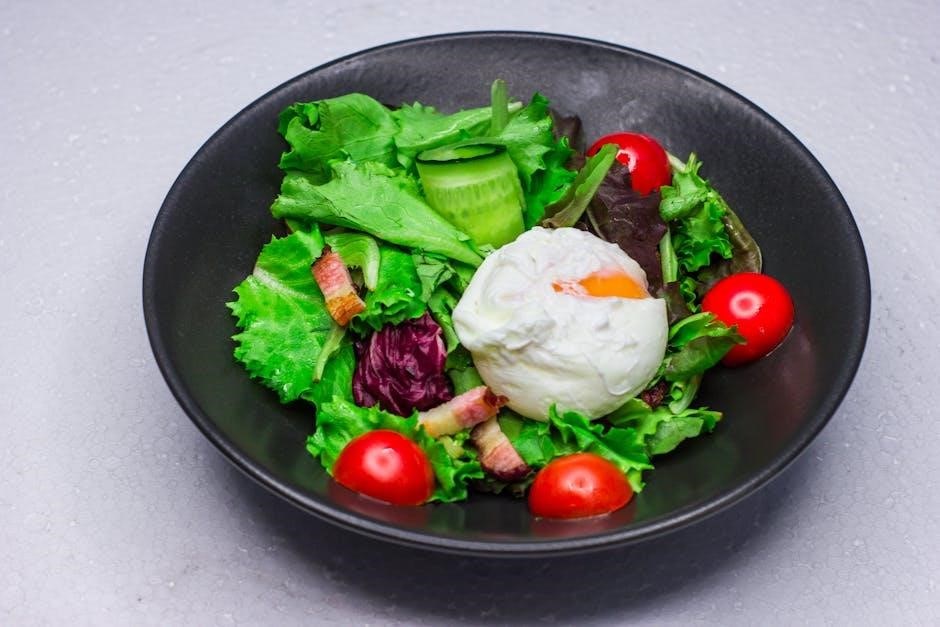
Fuel your afternoons and evenings with these satisfying keto meals! Picture a juicy keto-friendly burger, wrapped in lettuce instead of a bun, paired with a side of creamy coleslaw. Or savor a flavorful salmon with roasted asparagus, a perfect combination of healthy fats and essential nutrients.

For quick lunches, consider a large salad with grilled chicken or shrimp, dressed with a vinaigrette. Dinner options include hearty keto chili, cheesy chicken casseroles, or even a surprisingly delicious keto pizza. These recipes prioritize protein and healthy fats, keeping you feeling full and energized throughout the day, while staying within your macronutrient goals.

Keto Dessert Options

Indulge your sweet tooth without derailing your keto progress! Satisfy cravings with decadent keto chocolate mousse, made with avocado for a creamy texture and rich flavor. Explore sugar-free cheesecake recipes, utilizing almond flour and erythritol for a guilt-free treat.

Berry-based desserts, like strawberry shortcake with a keto biscuit, offer a refreshing option. You can also enjoy keto-friendly cookies, brownies, or even ice cream, all crafted with low-carb ingredients. These desserts prove that you don’t have to sacrifice enjoyment while adhering to a ketogenic lifestyle, offering delightful sweetness without the sugar spike.

Potential Side Effects & How to Manage Them

Navigating initial adjustments is key! Expect potential “keto flu” symptoms; stay hydrated and replenish electrolytes to minimize discomfort during this transition.

The “Keto Flu” and Remedies

The “keto flu” is a common, temporary cluster of symptoms experienced when transitioning to a ketogenic diet. These can include headache, fatigue, nausea, muscle cramps, and irritability – resembling flu-like symptoms. It arises from electrolyte imbalances and the body adapting to using fat for fuel instead of carbohydrates.

Fortunately, several remedies can alleviate these effects. Prioritize hydration by drinking plenty of water with added electrolytes like sodium, potassium, and magnesium. Bone broth is an excellent source of electrolytes. Gradually reducing carbohydrate intake before starting keto can also lessen the severity. Rest and light activity are also beneficial during this adjustment period.

Electrolyte Imbalance & Supplementation

A ketogenic diet often leads to electrolyte imbalances due to reduced insulin levels and increased water excretion. Sodium, potassium, and magnesium are crucial for nerve function, muscle contraction, and fluid balance, and are easily depleted on keto. Symptoms of imbalance include fatigue, muscle cramps, headaches, and heart palpitations.

Supplementation is often necessary. Increasing salt intake is vital – consider adding a pinch to water or broth. Potassium can be obtained from keto-friendly foods like avocados and spinach, or through supplementation. Magnesium supplements, like magnesium citrate, can also be beneficial. Monitoring electrolyte levels and adjusting supplementation accordingly is recommended.

Resources and Further Learning

Expand your keto knowledge! Explore recommended websites, blogs, and cookbooks for continued support, diverse recipes, and a deeper understanding of the diet.

Recommended Keto Websites & Blogs

Dive deeper into the keto world with these fantastic online resources! Diet Doctor (dietdoctor.com) provides comprehensive guides, meal plans, and recipes, catering to all levels of keto experience. Ruled.me (ruled.me) offers in-depth articles on the science behind keto, alongside practical tips for success. For visually appealing recipes and lifestyle inspiration, check out Perfect Keto (perfectketo.com).

Additionally, explore blogs like KetoConnect (ketoconnect.com) for engaging video content and delicious meal ideas. These platforms offer a wealth of information, support communities, and tools to help you navigate your 21-day keto journey and beyond, ensuring long-term success and enjoyment.

Keto Cookbooks and Recipe Resources

Expand your culinary horizons with these excellent keto cookbooks! “The Keto Diet” by Leanne Vogel is a comprehensive guide with over 125 recipes, focusing on hormone balance. “Keto Comfort Foods” by Maria Emmerich offers delicious, keto-friendly versions of classic comfort meals. For quick and easy recipes, consider “Keto in 28” by Jenna Fischer.

Beyond books, explore online recipe databases like All Day I Dream About Food (alldayidreamaboutfood.com) and Wholesome Yum (wholesomeyum.com). These resources provide a diverse range of recipes, catering to various tastes and dietary needs, supporting your 21-day keto plan and beyond.

logan’s take and bake rolls instructions

Logans Take and Bake Rolls Instructions: A Comprehensive Guide

Logans Roadhouse offers convenient take and bake rolls, bringing their famous yeast rolls to your home! Enjoy a restaurant-quality experience with minimal effort, baking in just 10 minutes.

Understanding Logans Roadhouse Rolls

Logans Roadhouse has become synonymous with incredibly soft, buttery, and slightly sweet yeast rolls. These aren’t just a side dish; they’re a cornerstone of the Logans dining experience, often cited as a primary reason for customer loyalty. The recipe, carefully guarded for years, centers around a homemade yeast dough, resulting in a uniquely tender crumb and a flavor profile that’s both comforting and addictive.

What sets these rolls apart is the generous application of melted butter, often served with a sprinkle of cinnamon. The rolls are traditionally served warm, enhancing their aroma and texture. Logans understands the importance of these rolls, even extending their availability through take and bake options, allowing customers to recreate the experience at home. The consistent quality and delightful taste have cemented their place as a beloved American comfort food.

These rolls are a testament to simple ingredients expertly combined, creating a truly memorable culinary delight.

What are Take and Bake Rolls?

Take and bake rolls represent a convenient bridge between bakery-fresh goodness and home-baked comfort. Unlike fully baked rolls, these are sold in a partially prepared state – typically unbaked dough, pre-portioned and ready for the oven. This allows consumers to enjoy the aroma and taste of freshly baked goods without the time and effort of traditional baking.

The concept gained popularity as a way to offer a premium, homemade experience without requiring extensive baking skills. Logans Roadhouse’s take and bake offering specifically delivers their signature yeast roll dough directly to your kitchen. You simply follow the baking instructions, and within minutes, you have warm, delicious rolls that rival those served in the restaurant.

It’s a perfect solution for busy individuals or families craving a special treat without the fuss. Essentially, it’s the best of both worlds – bakery quality with home-baked convenience!

The Appeal of Logans Rolls

Logans Roadhouse rolls have cultivated a devoted following, becoming synonymous with the restaurant’s overall dining experience. Their appeal lies in a unique combination of texture and flavor – a soft, fluffy interior with a slightly sweet, buttery taste. These aren’t just any dinner rolls; they’re a highlight of the meal for many patrons.

The secret reportedly lies in a homemade yeast roll recipe, carefully crafted to achieve that perfect consistency. The aroma alone is enough to entice, and their ability to complement Logans’ hearty American fare makes them incredibly popular.

The take and bake version extends this enjoyment beyond the restaurant walls. Now, you can recreate that Logans experience at home, enjoying warm, fresh rolls with your family. It’s a taste of comfort, convenience, and a little bit of Logans magic, all in one delicious package!

Preparing to Bake Your Logans Rolls

Before baking, review the package instructions for specific details. Gather a baking sheet and ensure the rolls are at optimal room temperature for proper rising.

Checking the Package Instructions

Prior to initiating the baking process, meticulously examine the packaging of your Logans Take and Bake Rolls. The package contains crucial, specific guidance tailored to that particular batch, ensuring optimal results. Pay close attention to any stated rise times, as these can vary.

Specifically, note the recommended baking temperature and duration. While 350°F (175°C) is a common setting, always defer to the package instructions if a different temperature is indicated. The package will also detail if any special preparation is needed, such as lightly greasing the baking sheet or covering the rolls during the initial baking phase.

Furthermore, check for any allergy information or ingredient lists if dietary restrictions are a concern. Ignoring these details could lead to unsatisfactory results or potential health issues. The package is your primary resource for a successful baking experience, so read it thoroughly!

Necessary Baking Equipment

To successfully bake your Logans Take and Bake Rolls, gathering the right equipment is essential. A standard baking sheet is the foundation; consider using a non-stick surface or lining it with parchment paper to prevent sticking and ensure easy cleanup. An oven, of course, capable of reaching 350°F (175°C) is required, and an oven thermometer is helpful for accuracy.

Additionally, a clean kitchen towel will be useful for covering the rolls during the rising process, creating a warm and humid environment. A timer is crucial for precise baking, preventing over or under-baking. While not strictly necessary, a pastry brush can be used to lightly glaze the rolls with melted butter for added richness and a golden-brown finish.

Finally, having a cooling rack available allows the baked rolls to cool evenly, maintaining their soft texture. Ensure all equipment is clean and in good working order before you begin for a smooth and enjoyable baking experience.

Optimal Room Temperature for Rising

Achieving the perfect rise is crucial for fluffy Logans Take and Bake Rolls. The ideal room temperature for this process falls between 68°F and 75°F (20°C ⎼ 24°C). This range provides a warm enough environment for the yeast to activate and expand the dough without being excessively hot, which could kill the yeast.

Avoid placing the rolls in direct sunlight or near drafts, as these can create uneven temperatures. A consistently warm spot, like a kitchen counter away from cold windows, is best. If your kitchen is cooler, you can create a warmer environment by placing the rolls in a slightly warmed (but turned off!) oven or near a warm appliance.

Allowing the rolls to rise for 4 to 6 hours, or until doubled in size, is generally recommended. Patience is key; a proper rise ensures a light and airy texture. Monitor the dough’s progress and adjust rising time as needed based on your room’s temperature.

Baking Instructions: Step-by-Step

Follow these simple steps for perfectly baked Logans Take and Bake Rolls! Preheat your oven, arrange the rolls, and bake for 8-10 minutes at 350°F.

Preheating Your Oven

Proper oven preheating is crucial for achieving the ideal texture in your Logans Take and Bake Rolls. Begin by setting your oven to 350°F (175°C). Allow sufficient time for the oven to reach this temperature – typically around 10-15 minutes, depending on your appliance.

Using an oven thermometer is highly recommended to ensure accuracy, as oven dials can sometimes be inaccurate. A consistently heated oven guarantees even baking, preventing some rolls from being undercooked while others are overdone.

Ensure the oven rack is positioned in the middle. This placement promotes uniform heat distribution around the rolls. Avoid opening the oven door frequently during preheating, as this can cause temperature fluctuations. Patience during this initial step sets the foundation for fluffy, golden-brown Logans Rolls!

Arranging the Rolls on a Baking Sheet

Carefully remove the Logans Take and Bake Rolls from their packaging. A lightly greased or parchment paper-lined baking sheet is essential to prevent sticking and ensure easy removal. Gently place the rolls onto the prepared baking sheet, leaving approximately 1-2 inches of space between each roll.

This spacing allows for proper heat circulation during baking, contributing to even cooking and a delightful, fluffy texture. Avoid overcrowding the baking sheet, as this can lead to unevenly baked rolls. If necessary, use two baking sheets to accommodate all the rolls comfortably.

Do not attempt to separate the rolls before baking; they are designed to bake connected. Ensure the rolls are placed flat on the baking sheet for consistent browning. Proper arrangement is key to achieving Logans Roadhouse quality at home!

Baking Time and Temperature (350°F/175°C)

Preheat your oven to 350°F (175°C) – this is crucial for optimal rising and baking. Place the baking sheet with the arranged Logans Take and Bake Rolls onto the middle rack of the preheated oven. Bake for approximately 8-10 minutes, though baking times may slightly vary depending on your oven.

Begin checking for doneness around the 8-minute mark. The rolls are ready when they are golden brown on top and sound hollow when lightly tapped. Avoid opening the oven door frequently during baking, as this can cause temperature fluctuations and affect the rise.

Consistent temperature is key to achieving that signature Logans Roadhouse texture. A slightly longer baking time won’t harm the rolls, but overbaking will result in dryness. Monitor closely and enjoy the aroma as your kitchen fills with the scent of freshly baked goodness!

Achieving the Perfect Texture

Golden brown color and a hollow sound when tapped indicate doneness. Proper baking yields soft, fluffy interiors, mirroring the beloved Logans Roadhouse experience.

Determining Doneness: Visual Cues

Successfully baking Logans Take and Bake Rolls relies on recognizing key visual indicators. The most prominent cue is a beautiful, golden-brown color across the tops of the rolls. This indicates the Maillard reaction has occurred, creating that desirable flavor and texture.

Beyond color, gently tapping on a roll should produce a hollow sound. This signifies that the interior has fully cooked and is no longer doughy. Avoid relying solely on baking time, as ovens vary.

Observe the rolls closely during the final minutes of baking. If they are browning too quickly, you can loosely tent them with aluminum foil to prevent burning while ensuring the inside continues to cook through;

Remember, a slightly golden hue is preferable to pale, underbaked rolls. Consistent visual checks are the best way to guarantee perfectly baked, restaurant-quality Logans Rolls at home!

Avoiding Overbaking

Overbaking Logans Take and Bake Rolls is a common pitfall, leading to dry, hard rolls that lack the signature soft texture. The key to prevention lies in vigilant monitoring during the final stages of baking. Start checking for doneness a couple of minutes before the recommended baking time concludes.

Pay close attention to the color; a light golden-brown is ideal, while a deep, dark brown signals impending dryness. If the rolls appear to be browning too rapidly, reduce the oven temperature slightly or loosely cover them with aluminum foil.

Remember, carryover cooking will continue even after you remove the rolls from the oven. Therefore, it’s better to err on the side of slightly underbaked than overbaked. A gentle press should reveal a slight give, indicating a soft interior.

Prioritize a moist, fluffy texture – the hallmark of a perfect Logans roll – by carefully observing these cues and adjusting your baking accordingly.

Ensuring a Soft and Fluffy Interior

Achieving a delightfully soft and fluffy interior in your Logans Take and Bake Rolls requires attention to both preparation and baking technique. Proper rising is paramount; allowing the rolls sufficient time at a comfortable room temperature – typically 4 to 6 hours – encourages optimal yeast activity.

This results in a lighter, airier crumb. Avoid rushing this process, as under-proofed rolls will be dense. During baking, maintaining the correct temperature (350°F/175°C) is crucial. Too high a temperature can cause the exterior to cook too quickly, trapping a dense core.

A gentle touch when handling the dough also helps preserve its delicate structure. Avoid excessive kneading or pressing. Finally, a brief cooling period on a wire rack after baking prevents condensation and maintains that coveted fluffy texture.

Enjoy the taste of Logans Roadhouse with every bite!

Storage and Reheating

Leftover Logans Take and Bake Rolls can be stored in airtight containers or Ziploc bags. Reheat for optimal flavor and texture, enjoying their deliciousness!

Storing Leftover Rolls

Proper storage is key to maintaining the freshness and delightful taste of your Logans Take and Bake Rolls. Once cooled completely after baking (or reheating), transfer any remaining rolls to an airtight container. This prevents them from drying out and absorbing unwanted odors from the refrigerator.

Alternatively, you can place the rolls in a resealable plastic bag, ensuring all air is squeezed out before sealing. This method is particularly effective for short-term storage. Stored correctly, Logans Rolls will generally remain palatable for up to two to three days in the refrigerator.

However, for extended preservation of their quality, consider freezing. Individually wrap each roll in plastic wrap before placing them in a freezer-safe bag or container. This prevents freezer burn and helps maintain their texture. Properly frozen, these rolls can be enjoyed for up to two months, offering a convenient treat whenever the craving strikes!

Reheating Options for Best Results

To recapture the warm, soft goodness of freshly baked Logans Take and Bake Rolls, several reheating methods are available. For a quick refresh, wrap a roll in a slightly damp paper towel and microwave for 10-15 seconds. Be cautious not to overheat, as this can make them tough.

For a more even and flavorful reheat, preheat your oven to 350°F (175°C). Place the rolls on a baking sheet and warm for 5-7 minutes, or until heated through. This method helps restore some of the original texture. Another excellent option is using a toaster oven, which provides focused heat for a crispy exterior and soft interior.

Wrapping the roll in foil during oven reheating helps retain moisture. Regardless of the method chosen, avoid prolonged heating to prevent dryness. A light brush of melted butter after reheating enhances the flavor and adds a delightful sheen, bringing you closer to that Logans Roadhouse experience!

Freezing for Longer Storage

To preserve Logans Take and Bake Rolls for extended periods, freezing is an excellent option. Allow the baked rolls to cool completely before wrapping them individually in plastic wrap. This prevents freezer burn and maintains their texture. Subsequently, place the wrapped rolls into a freezer-safe bag or airtight container.

Properly frozen rolls can maintain good quality for up to two to three months. When ready to enjoy, thaw the rolls overnight in the refrigerator or for a few hours at room temperature. For a quick thaw, you can use the defrost setting on your microwave, but be mindful not to cook them during the process.

Reheating thawed rolls in the oven at 350°F (175°C) for 5-7 minutes will help restore their soft, fluffy texture. Freezing is ideal for enjoying Logans’ delicious rolls whenever the craving strikes, ensuring minimal waste and maximum enjoyment!

Logans Roadhouse Locations & Gift Cards

Logans Roadhouse has locations across the US, offering their full menu and a family-friendly atmosphere. Check your gift card balance online or at a restaurant!

Finding a Logans Roadhouse Near You

Logans Roadhouse boasts a widespread presence across the United States, making it relatively easy to find a location convenient for enjoying their renowned American cuisine. Currently, you can find Logans in states including Alabama, Arizona, Arkansas, California, Florida, Georgia, Illinois, Indiana, Kentucky, Louisiana, Michigan, Mississippi, Missouri, North Carolina, Ohio, Oklahoma, Pennsylvania, South Carolina, Tennessee, Texas, Virginia, and West Virginia.

To pinpoint the nearest Logans Roadhouse, the most reliable method is to utilize the official Logans Roadhouse store locator available on their website. This tool allows you to search by city, state, or zip code, providing a comprehensive list of nearby restaurants along with their addresses, phone numbers, and operating hours. Alternatively, popular map applications like Google Maps or Apple Maps can also be employed to search for “Logans Roadhouse” in your area, offering directions and additional information.

Visiting a Logans Roadhouse provides the opportunity to experience their full menu, including those incredibly popular yeast rolls fresh from the oven, alongside their signature steaks and other American favorites.

Checking Your Logans Gift Card Balance

Logans Roadhouse gift cards offer a convenient way to enjoy their delicious meals and, of course, those famous yeast rolls! Keeping track of your gift card balance is simple, ensuring you maximize its value during your next visit. Logans provides two straightforward methods for checking your remaining balance.

The quickest and most convenient option is to utilize the online balance checker available on the Logans Roadhouse website. You’ll need to enter both the gift card number and the PIN located on the back of the card. This will instantly display your current balance. However, if your gift card doesn’t have a visible PIN, don’t worry!

You can easily visit any Logans Roadhouse restaurant location and a team member will be happy to check the balance for you in person. This ensures you always know how much you have available to spend on your favorite Logans Roadhouse treats, including those tempting take and bake rolls!

canon sx50 hs instruction manual

The Canon PowerShot SX50 HS offers a comprehensive user guide (pssx50hs-cug-en.pdf‚ 41.96MB‚ version 1.0) detailing its features.

This manual‚ issued in 2012‚ assists users in maximizing the camera’s potential‚ from initial setup to advanced photography techniques.

Overview of the Camera

The Canon PowerShot SX50 HS is a versatile superzoom digital camera designed for both beginner and experienced photographers. Its detailed instruction manual (pssx50hs-cug-en.pdf) guides users through its extensive capabilities.

This camera boasts a powerful 50x optical zoom‚ allowing for incredible reach‚ and features a high-resolution sensor for detailed images. The manual covers everything from basic operation to advanced settings‚ ensuring users can fully utilize its potential for capturing stunning photos and videos.

Key Features and Specifications

The Canon SX50 HS‚ as detailed in its user guide (pssx50hs-cug-en.pdf‚ 41.96MB)‚ features a 12.1MP High-Sensitivity CMOS sensor and DIGIC 4+ Image Processor. It offers a 50x optical zoom lens (22.2–1106mm) and Intelligent IS for stabilized shooting.

Key specs include 1080p Full HD video recording‚ manual controls‚ and various shooting modes. The manual thoroughly explains these features‚ enabling users to optimize image quality and creative expression.

Getting Started

Begin your journey with the Canon SX50 HS by referencing the comprehensive user guide (pssx50hs-cug-en.pdf) for unboxing‚ setup‚ and battery information.

Unboxing and Initial Setup

Carefully unpack your Canon PowerShot SX50 HS‚ ensuring all included accessories are present – the camera body‚ battery‚ battery charger‚ and the comprehensive user manual (pssx50hs-cug-en.pdf).

Before first use‚ thoroughly review the manual to understand component identification and proper handling. Insert the battery as detailed within the guide‚ and connect the charger to a suitable power source.

Follow the on-screen prompts for initial setup‚ including language selection‚ date/time configuration‚ and SD card formatting. This ensures optimal performance from the start.

Battery Information & Charging (ED05F-08-8 Lithium-Ion Battery)

The Canon SX50 HS utilizes the ED05F-08-8 Lithium-Ion battery‚ a Sony-produced US18650V3 cell (UL1642 certified). Optimal performance requires proper charging procedures detailed in the user manual (pssx50hs-cug-en.pdf).

Typical capacity is around 2.5Ah‚ though some cells may display 15 on their casing‚ indicating approximately 1500mAh.

Always use the supplied charger to avoid damage and ensure battery longevity. Avoid extreme temperatures during charging and storage.

Inserting and Removing the Battery

To insert the ED05F-08-8 battery into your Canon SX50 HS‚ locate the battery compartment latch on the camera’s bottom. Release the latch and slide the battery in until it clicks securely.

To remove‚ slide the release button on the battery itself while gently lifting it out.

Refer to the full user guide (pssx50hs-cug-en.pdf) for detailed diagrams and safety precautions regarding battery handling and proper insertion/removal techniques.

Understanding the Camera Controls

The Canon SX50 HS features a mode dial and various buttons for operation. The user guide (pssx50hs-cug-en.pdf) details each control’s function for optimal use.

Power Button and Mode Dial

The Power Button initiates camera operation‚ while the Mode Dial selects shooting modes like Auto‚ Scene‚ or Manual. Refer to the comprehensive user guide (pssx50hs-cug-en.pdf) for detailed explanations.

Understanding the Mode Dial’s positions—including Program‚ Shutter Priority‚ Aperture Priority‚ and Movie—is crucial. The manual clarifies each mode’s function‚ enabling users to tailor settings to specific photographic scenarios. Proper use unlocks the SX50 HS’s full potential.

Button and Dial Functions

The Canon SX50 HS features various buttons and dials controlling zoom‚ shutter‚ menu navigation‚ and function settings. The detailed user guide (pssx50hs-cug-en.pdf) provides a complete breakdown of each control’s purpose.

Mastering these functions—including the control wheel and dedicated buttons—allows for efficient operation. The manual illustrates button layouts and explains customizable options‚ enhancing user experience and photographic control. Familiarity with these controls is key to maximizing the camera’s capabilities.

Navigating the Menu System

The Canon SX50 HS utilizes an intuitive menu system accessed via the MENU button. The comprehensive user guide (pssx50hs-cug-en.pdf) details each menu tab and its associated settings‚ covering shooting‚ playback‚ and setup options.

Users can navigate using the directional buttons and SET button. Understanding the menu structure—including customization options—is crucial for tailoring the camera to individual preferences and unlocking its full potential for diverse photographic scenarios.

Shooting Modes

The Canon SX50 HS offers Auto‚ Scene (Portrait‚ Landscape‚ Sports)‚ and Manual modes‚ detailed in the user guide (pssx50hs-cug-en.pdf) for versatile shooting.

Auto Mode for Beginners

Auto mode on the Canon SX50 HS simplifies photography for newcomers‚ automatically adjusting settings for optimal results. The comprehensive user guide (pssx50hs-cug-en.pdf) explains this mode’s ease of use‚ ideal for everyday snapshots. It intelligently detects scenes‚ optimizing focus‚ exposure‚ and ISO.

This eliminates the need for manual adjustments‚ allowing users to instantly capture quality images without prior photography knowledge‚ making it perfect for casual shooting.

Scene Modes (Portrait‚ Landscape‚ Sports‚ etc.)

The Canon SX50 HS features diverse Scene Modes – Portrait‚ Landscape‚ Sports‚ and more – tailored for specific shooting conditions. The user guide (pssx50hs-cug-en.pdf) details each mode’s function‚ optimizing camera settings for best results.

Portrait mode enhances skin tones‚ Landscape prioritizes sharpness and vivid colors‚ while Sports freezes action. These presets simplify achieving professional-looking photos without manual adjustments‚ offering creative control.

Manual Mode for Advanced Users

Manual Mode on the Canon SX50 HS grants complete control over settings like aperture‚ shutter speed‚ and ISO. The camera’s user guide (pssx50hs-cug-en.pdf) thoroughly explains each parameter and their interplay.

This mode empowers experienced photographers to fine-tune images‚ achieving desired effects unattainable in automatic modes. Mastering Manual Mode unlocks creative potential‚ allowing precise adjustments for challenging lighting or artistic vision.

Focusing and Image Quality

The SX50 HS’s manual (pssx50hs-cug-en.pdf) details autofocus modes and image quality settings. Users can adjust resolution and compression for optimal results.

Autofocus Modes and Settings

The Canon SX50 HS manual (pssx50hs-cug-en.pdf) comprehensively explains the camera’s autofocus (AF) system. It details various AF modes‚ including Single‚ Continuous‚ and Manual Focus. Users can select AF point selection methods – Face+Tracking‚ Flexible Point‚ and Center.

The guide clarifies AF lock functions and how to utilize focus area settings for precise image capture. Understanding these settings is crucial for achieving sharp‚ well-focused photographs in diverse shooting scenarios‚ as outlined within the detailed documentation.

Image Size and Quality Settings

The Canon SX50 HS manual (pssx50hs-cug-en.pdf) provides a detailed explanation of image size and quality options. Users can choose from various resolutions‚ impacting file size and detail. Quality settings include Super Fine‚ Fine‚ and Normal‚ influencing compression levels.

The guide clarifies the implications of each setting‚ helping photographers balance image quality with storage capacity. Selecting appropriate settings ensures optimal results for intended use‚ whether printing or digital display‚ as detailed in the comprehensive manual.

Zoom Functionality

The Canon SX50 HS boasts a powerful 50x optical zoom‚ extensively covered in the user manual (pssx50hs-cug-en.pdf). The guide details how to utilize the zoom lever for precise framing. Digital zoom extends reach further‚ though with potential image quality reduction.

The manual explains zoom speed adjustments and the Dynamic IS feature‚ stabilizing images during zoomed-in shots. Mastering these functions‚ as outlined‚ unlocks the camera’s full photographic potential.

Using the Flash

The Canon SX50 HS manual (pssx50hs-cug-en.pdf) details flash modes: Auto‚ On‚ Off‚ and Slow Sync‚ alongside red-eye reduction techniques for optimal results.

Flash Modes (Auto‚ On‚ Off‚ Slow Sync)

The Canon SX50 HS manual comprehensively explains the available flash modes. Auto mode intelligently determines when flash is needed‚ balancing ambient and artificial light. On mode forces the flash to fire with every shot‚ ideal for dark environments.

Off mode disables the flash entirely‚ relying solely on existing light. Slow Sync combines a slower shutter speed with the flash‚ capturing more ambient light and creating a natural look – perfect for nighttime scenes. Understanding these modes‚ as detailed in pssx50hs-cug-en.pdf‚ is crucial for achieving desired photographic effects.

Red-Eye Reduction

The Canon SX50 HS manual details the red-eye reduction feature‚ designed to minimize the appearance of red pupils in flash photography. This function works by emitting a series of pre-flashes before the main flash‚ constricting the subject’s pupils.

The manual (pssx50hs-cug-en.pdf) explains how to enable or disable this setting within the camera’s menu. While effective‚ it’s noted that red-eye reduction isn’t foolproof and may not eliminate the effect entirely in all situations‚ particularly with certain individuals.

Video Recording

The Canon SX50 HS manual (pssx50hs-cug-en.pdf) outlines video recording settings and sound options for capturing high-quality moving images with the camera.

Video Recording Settings

The Canon SX50 HS manual (pssx50hs-cug-en.pdf) details various video recording settings. Users can adjust resolution (including Full HD 1920×1080) and frame rates (30p‚ 60p) to suit their needs. The manual explains how to enable or disable image stabilization during video capture‚ ensuring smooth footage.

Furthermore‚ it covers options for wind noise reduction and dynamic IS for stable handheld recording. Understanding these settings‚ as outlined in the guide‚ is crucial for optimal video quality.

Sound Recording Options

The Canon SX50 HS instruction manual (pssx50hs-cug-en.pdf) explains the camera’s sound recording capabilities during video capture. Users can select from automatic or manual audio level adjustment. The manual details how to connect an external microphone for improved sound quality.

It also covers the wind noise reduction feature‚ minimizing unwanted background sounds. Proper configuration of these options‚ as described in the guide‚ significantly enhances the overall audio experience.

Connectivity and Transferring Images

The Canon SX50 HS manual (pssx50hs-cug-en.pdf) details connecting to computers via USB and utilizing SD cards for easy image transfer and storage.

Connecting to a Computer

The Canon SX50 HS user guide (pssx50hs-cug-en.pdf) explains connecting your camera to a computer using a USB cable. This allows for direct image transfer and potential use of the camera as a webcam‚ depending on software compatibility.

The manual details the necessary drivers and procedures for both Windows and Mac operating systems‚ ensuring a smooth connection. It also covers troubleshooting steps for common connectivity issues‚ like the camera not being recognized by the computer.

Using SD Cards

The Canon SX50 HS manual (pssx50hs-cug-en.pdf) thoroughly covers SD card usage. It specifies compatible SD card types – likely SD‚ SDHC‚ and potentially SDXC – and maximum supported capacities. The guide details proper insertion and removal procedures to prevent data corruption or damage to the card slot.

Formatting SD cards directly through the camera’s menu is recommended for optimal performance. The manual also addresses troubleshooting steps for card errors.

Troubleshooting Common Issues

The Canon SX50 HS manual (pssx50hs-cug-en.pdf) addresses issues like the camera not powering on or focusing problems‚ offering potential solutions for users.

Camera Not Turning On

If your Canon SX50 HS fails to power on‚ the official user guide (pssx50hs-cug-en.pdf) suggests checking the battery first. Ensure it’s correctly inserted and fully charged using the ED05F-08-8 Lithium-Ion Battery charger.

Verify the battery contacts are clean and free of obstruction. If the issue persists‚ try a different‚ known-good battery. A malfunctioning battery or improper connection are common causes‚ as detailed within the manual’s troubleshooting section.

Focusing Problems

Experiencing focusing issues with your Canon SX50 HS? The user guide (pssx50hs-cug-en.pdf) recommends verifying the selected autofocus (AF) mode. Ensure it’s appropriate for your subject – single‚ continuous‚ or face detection.

Check sufficient lighting conditions‚ as low light can hinder autofocus performance. Clean the lens thoroughly. If problems continue‚ try manually focusing using the manual focus option detailed in the manual’s focusing section.

Downrigger Issues (Canno uni-troll 6)

This section addresses a separate product – the Canno uni-troll 6 downrigger – and is unrelated to the Canon SX50 HS camera or its instruction manual (pssx50hs-cug-en.pdf). Users report issues with the downrigger failing to tighten after reaching the desired depth.

This suggests a potential mechanical problem within the reel or tensioning system‚ requiring separate troubleshooting resources specific to the Canno uni-troll 6‚ not the camera’s guide.

User Guide Resources (pssx50hs-cug-en.pdf)

The official Canon PowerShot SX50 HS user guide (pssx50hs-cug-en.pdf) is a 41.96MB document‚ issue number 0300870001‚ version 1.0.

Accessing the Digital Manual

The Canon PowerShot SX50 HS digital manual‚ identified as ps sx50hs-cug-en.pdf‚ provides comprehensive guidance for camera operation. This resource‚ weighing in at 41.96 MB‚ is readily available online through Canon’s official support website or various photography resource platforms.

Users can easily download and view the manual on their computers‚ tablets‚ or smartphones‚ eliminating the need for a physical copy. The document‚ version 1.0 and issue number 0300870001‚ offers detailed explanations and illustrations to assist users in understanding all aspects of the camera.

File Version and Size Information

Regarding the Canon SX50 HS instruction manual (pssx50hs-cug-en.pdf)‚ specific details regarding its digital format are readily available. The file currently exists as version 1.0‚ designated by issue number 0300870001. Its substantial size of 41.96 MB reflects the comprehensive nature of the documentation.

This large file size accommodates detailed explanations‚ numerous illustrations‚ and a complete index‚ ensuring users have access to all necessary information for optimal camera utilization and troubleshooting.

Advanced Settings

The Canon SX50 HS manual details customization options‚ including white balance adjustments‚ allowing experienced photographers to fine-tune image characteristics for optimal results.

Customizing Camera Settings

The Canon SX50 HS manual provides extensive options for tailoring the camera to individual preferences. Users can adjust image quality‚ autofocus behavior‚ and various shooting parameters.

Explore menu settings to personalize button functions‚ display information‚ and sound effects. Custom White Balance allows precise color control‚ while My Modes store preferred settings for quick recall. These customizations enhance workflow and creative control‚ enabling photographers to optimize the camera for specific shooting scenarios and personal styles.

White Balance Adjustment

The Canon SX50 HS manual details several White Balance settings for accurate color reproduction. Auto White Balance (AWB) generally suffices‚ but Custom WB offers precise control.

Users can select presets like Daylight‚ Cloudy‚ or Tungsten‚ or manually set a value using a white card. Correct white balance ensures colors appear natural under various lighting conditions‚ preventing unwanted color casts. Mastering this feature is crucial for achieving professional-looking images with accurate and pleasing tones.

Maintenance and Care

The Canon SX50 HS manual recommends gentle lens and body cleaning with a soft cloth. Proper storage protects the camera from dust and potential damage.

Cleaning the Lens and Body

To maintain optimal image quality‚ regularly clean the Canon SX50 HS lens using a soft‚ lint-free cloth. Gently wipe away fingerprints‚ dust‚ and smudges in a circular motion. Avoid using excessive pressure or harsh chemicals‚ as these can damage the lens coating.

For the camera body‚ use a slightly damp cloth to remove dirt and grime. Ensure the cloth is wrung out thoroughly to prevent moisture from entering the camera. Never use solvents or abrasive cleaners on any part of the SX50 HS.

Storage Recommendations

Proper storage extends the lifespan of your Canon SX50 HS. When not in use‚ store the camera in a cool‚ dry place‚ away from direct sunlight and extreme temperatures. A dedicated camera bag offers excellent protection against dust‚ impacts‚ and moisture.

Remove the battery when storing for extended periods to prevent potential leakage or corrosion. Keep the battery in a dry location‚ separate from metal objects‚ to avoid short circuits.

suicoke size guide

Suicoke Size Guide: A Comprehensive Overview (Updated 02/08/2026)

Suicoke sizing can be tricky, often running larger; consider sizing down, especially if between sizes, as noted by user experiences and fit guides available online today.

Understanding Suicoke Sizing Philosophy

Suicoke embraces a unique sizing approach, diverging from standard footwear conventions. Their philosophy centers around a comfortable, relaxed fit, often resulting in a slightly roomier feel compared to brands like Nike or Adidas. This intentional design choice prioritizes all-day wearability and accommodates varying foot shapes.

However, this doesn’t equate to simply “sizing up.” The brand’s charts, based on US and UK sizing, serve as a reference point, but individual foot dimensions are crucial. Many users report needing to size down, particularly those accustomed to snug-fitting athletic shoes. The brand acknowledges potential variations, advising users to consult the detailed charts and consider their specific foot measurements in millimeters.

Ultimately, Suicoke aims for a balance between comfort and secure fit, encouraging customers to prioritize accurate measurements over relying solely on their usual shoe size.

General Sizing Considerations

When navigating Suicoke sizing, several factors demand attention. The brand utilizes US men’s and women’s sizing as its primary standard, alongside European and Japanese measurements (in millimeters). It’s vital to accurately measure your foot length in millimeters for the most precise fit, referencing the official size chart.

Remember that Suicoke sandals generally run larger, prompting many to size down, especially if you typically wear Nike or Adidas. Unisex styles are typically listed in US men’s sizing, requiring women to convert accordingly. Consider your foot width; a wider foot might benefit from sticking to your true size, while a narrower foot may necessitate sizing down further.

Always prioritize the millimeter measurement over your conventional shoe size, as discrepancies between brands are common.

Suicoke Size Chart – Key Measurements

The Suicoke size chart is crucial for accurate fitting, as conversions can vary. Here’s a breakdown of key measurements, though always refer to the official chart for the most up-to-date information.

US Men’s Sizing: 4 (220mm), 5 (230mm), 6 (240mm);

US Women’s Sizing: 6 (220mm), 7 (230mm), 8 (240mm).

European (EU) Sizing: 36 (220mm), 37 (230mm), 38 (240mm).

These measurements represent approximate foot length. Remember, Suicoke often runs large, so comparing your foot length in millimeters to the chart is essential. The chart serves as a reference; scaling is based on US & UK sizing. For other sizing systems, consult the chart on the official Suicoke website. Prioritize millimeter measurements for the best results.

US Men’s Sizing

Understanding Suicoke’s US Men’s sizing is vital for a comfortable fit. The brand’s sizing can differ from standard US footwear, often running larger. A size 4 corresponds to a 220mm foot length, while a size 5 fits a 230mm foot. Size 6 accommodates a 240mm foot, and so on.

If you typically wear a size 14 in Nike, consider a size 13 in Suicoke, as one user reported a 10mm difference between their foot length and the chart’s recommendation. Always measure your foot length in millimeters for the most accurate comparison. Remember to account for sock thickness when measuring.

Refer to the official Suicoke size chart for the complete range and detailed millimeter conversions.

US Women’s Sizing

Suicoke’s US Women’s sizing requires careful consideration, as the brand often fits larger than typical US women’s footwear. A US women’s size 6 equates to a 220mm foot length, while size 7 fits a 230mm foot. Size 8 corresponds to 240mm, and the scale continues accordingly.

A user who typically wears a US size 8 in most brands, including Nike and Adidas, recommends sizing up to a US size 9 (or a men’s size 7) in Suicoke. This highlights the potential need to increase your usual size. Accurate foot measurement in millimeters is crucial for a precise fit.

Always consult the official Suicoke size chart for comprehensive details and millimeter conversions to ensure optimal comfort and style.

European (EU) Sizing

Suicoke utilizes European (EU) sizing alongside US and UK measurements, offering broader accessibility for international customers. A US men’s size 4 typically translates to an EU size 36, accommodating a 220mm foot length. Moving up the scale, a US men’s size 5 corresponds to EU 37 (230mm), and size 6 aligns with EU 38 (240mm).

It’s important to note that size conversions can vary slightly between brands, so relying solely on a general conversion chart isn’t always sufficient. The Suicoke size chart serves as the most reliable reference point.

When purchasing from the EU store (now closed, but referencing past data), or through retailers using EU sizing, prioritize millimeter measurements for the most accurate fit.

Comparing Suicoke to Other Brands

Suicoke sizing often presents a unique challenge for those accustomed to mainstream brands like Nike and Adidas. Many users report needing to size down in Suicoke compared to their typical Nike or Adidas size. For example, someone wearing a US size 8 in Nike or Adidas might find a US size 7 (or men’s size 7) in Suicoke provides a better fit.

This difference stems from Suicoke’s distinct footbed and overall sandal construction. It’s crucial to avoid assuming a direct size correlation.

Considering individual foot shape and preferred fit is vital. Referencing online discussions, like those on Reddit (r/Aritzia), reveals consistent recommendations to size down when transitioning from Nike or Adidas.

Suicoke vs. Nike Sizing

When comparing Suicoke to Nike sizing, a consistent pattern emerges: individuals generally need to size down. A common scenario involves those who wear a US size 14 in Nike finding a US size 13 in Suicoke to be a more accurate fit. This isn’t a universal rule, but a frequently reported experience.

Nike tends to run true to size, while Suicoke sandals often have a more generous fit, particularly in length. The difference is attributed to Suicoke’s design prioritizing comfort and a relaxed feel.

It’s advisable to measure your foot length in millimeters and consult the Suicoke size chart, comparing it to Nike’s measurements. Online forums suggest erring on the smaller side if you’re between sizes.

Suicoke vs. Adidas Sizing

Comparing Suicoke to Adidas sizing reveals similar considerations as with Nike – a tendency to size down with Suicoke. Individuals who typically wear a US size 7 in Adidas often find a US size 9 (or men’s 7) in Suicoke provides a better fit, indicating a significant difference in sizing standards.

Adidas, like Nike, generally adheres to standard US sizing, while Suicoke offers a roomier fit. This difference is likely due to Suicoke’s focus on comfort and the sandal’s construction.

To ensure accuracy, measure your foot length and cross-reference it with both brands’ size charts. User feedback consistently suggests choosing a smaller size in Suicoke, especially if you’re accustomed to Adidas’s more precise fit.

Popular Suicoke Models and Their Fit

Suicoke’s popular Moto Cab model frequently requires sizing up, particularly for those accustomed to standard US sizing. Many users report needing to go up a full size – for example, from a US 8 to a US 9 – to achieve a comfortable and secure fit. This is a common recommendation found in online reviews and sizing discussions.

The Depa model, however, tends to run more true to size, though some still prefer to size down half a size for a snugger feel. Considering foot width is crucial with the Depa, as it offers less adjustability than the Moto Cab.

Ultimately, individual foot shape and preference play a role, but these guidelines offer a starting point for selecting the correct size for these sought-after Suicoke styles.

Moto Cab Sizing Recommendations

Suicoke’s Moto Cab sandal consistently receives sizing advice leaning towards going up a size. Individuals typically wearing a US size 8 often find a US 9 (or Men’s 7) provides the best fit, as confirmed by numerous online reports. This is especially true for those who usually wear Nike or Adidas, where sizing can differ.

The Moto Cab’s adjustable straps offer some flexibility, but starting with a larger size prevents the feeling of being cramped. If you’re between sizes, erring on the side of larger is generally recommended. Remember to consider your foot length in millimeters; a 300mm foot might necessitate a size 13, but sizing down is still a possibility.

Always consult the official Suicoke size chart, but be prepared to adjust based on these common experiences.

Depa Sizing Guide

Suicoke’s Depa model, like the Moto Cab, generally benefits from considering a size up from your typical footwear size. While individual experiences vary, many users report a more comfortable fit by choosing a half or full size larger than their usual US size.

If you’re accustomed to an 8 in most brands, a 9 in the Depa is a common recommendation. Those with wider feet may particularly appreciate the extra room. The Depa’s design allows for some adjustment with the straps, but a proper length is crucial for overall comfort.

Referencing the official Suicoke size chart is essential, but factoring in these user-reported tendencies will help ensure a better fit. Prioritize comfort and allow for slight adjustments with the straps;

Factors Affecting Suicoke Fit

Several elements beyond standard sizing influence the fit of Suicoke sandals. Foot width is a primary consideration; those with wider feet may find standard sizes restrictive, potentially needing to size up for adequate comfort. Conversely, narrower feet might benefit from sticking to the true-to-size measurement or even sizing down.

Sock usage significantly alters the fit. Wearing socks, even thin ones, will reduce the available space within the sandal, necessitating a larger size. Consider your typical wearing style – with or without socks – when selecting your size.

Individual foot shape and volume also play a role. A higher instep or prominent bone structure may require adjustments. Always prioritize a comfortable, secure fit that doesn’t cause rubbing or pressure points.

Foot Width Considerations

Suicoke sandals, while generally accommodating, require careful consideration of foot width. Individuals with wider feet often report that standard sizes can feel constricting, particularly across the forefoot and instep. This can lead to discomfort during extended wear or even blisters.

If you typically wear wide-width shoes in other brands, sizing up a full size with Suicoke is often recommended. This provides extra room without sacrificing length. Conversely, those with narrower feet may find the standard width sufficient, or even slightly loose.

Pay attention to the sandal’s strap configuration; adjustable straps can offer some flexibility, but the overall footbed width remains a crucial factor. Prioritize comfort and avoid squeezing your feet into a size that’s too small;

Sock Usage and Fit

Considering sock usage is vital when determining your Suicoke size, as it significantly impacts the overall fit. Suicoke sandals are frequently worn with socks, altering the required size compared to barefoot wear.

If you plan to regularly wear socks with your Suicoke sandals, it’s generally advisable to size up by half to a full size. This accommodates the added volume of the sock, preventing a cramped or uncomfortable fit. Thicker socks necessitate a larger size increase than thinner sock options.

Experimenting with different sock thicknesses is recommended to find the optimal size. Remember that the foot expands slightly when wearing socks, so prioritize a comfortable, non-restrictive feel. Barefoot wear may require a size down.

Sizing Down vs. Sizing Up

The decision between sizing down or sizing up with Suicoke sandals often depends on individual foot shape and preferred fit. Many users report that Suicoke tends to run larger, making sizing down a common recommendation, particularly for those between sizes.

However, if you have wider feet or plan to wear thicker socks frequently, sizing up might be the better option. Sizing up provides more room and prevents discomfort. Consider your typical sock thickness and foot width when making this decision.

Reviewing user feedback, like those on Reddit, reveals experiences with both approaches. A true-to-size fit isn’t guaranteed, so prioritizing comfort and allowing for slight adjustments is crucial. When in doubt, erring on the side of slightly larger is often preferable.

Where to Find the Official Suicoke Size Chart

Locating the official Suicoke size chart is essential for accurate measurements and a proper fit. While various retailers may offer sizing guides, the most reliable information comes directly from Suicoke themselves.

Currently, the Suicoke EU store is closed, but the official website remains the primary source for sizing details. Look for a dedicated “Size Chart” section, often found at the bottom of the page or within product descriptions. The chart typically includes conversions for US, UK, EU, and Japanese (mm) sizing.

Remember that the chart serves as a reference, and scaling is based on US & UK sizing. For other sizing systems, carefully consult the chart provided on the official Suicoke website to ensure the best possible fit.

Suicoke Unisex Sizing Explained

Suicoke frequently employs unisex sizing, which means many models are listed in US Men’s sizes. However, this doesn’t mean the styles are exclusively for men; women can also find their fit within this system, often by referencing the corresponding women’s size.

Generally, a 1-1.5 size difference exists between US Men’s and Women’s Suicoke sizing. For example, a US Men’s size 7 might equate to a US Women’s size 8 or 9, depending on individual preference and foot shape. It’s crucial to consult the official size chart and consider user reviews.

Our standard sizing runs in US sizing, and unisex styles are typically listed in US Men’s. Always double-check the specific product description for any variations or recommendations regarding unisex fits.

Dealing with Size Uncertainty: Returns & Exchanges

Given the potential for sizing discrepancies with Suicoke sandals, understanding the return and exchange policies is vital. If you’re unsure about your size, ordering from retailers with flexible return policies is highly recommended. This allows you to try on different sizes and return the ones that don’t fit comfortably.

Always check the specific retailer’s policy, as terms can vary. Some retailers may offer free returns, while others may require you to cover shipping costs. Keep original packaging and tags intact to ensure a smooth return process.

The Suicoke EU store has closed, directing inquiries to their contact form, so understanding the policies of where you purchase is key.

Resources for Further Sizing Assistance

Navigating Suicoke sizing can benefit from utilizing various online resources and communities. Reddit’s r/Aritzia frequently features discussions about Suicoke Moto Cab sizing, offering real-world feedback from users comparing sizes across brands like Nike and Adidas. These threads provide valuable insights into how the sandals generally fit.

Coveti’s fashion feed offers a sizing and fit guide, emphasizing the importance of referencing the official size chart and acknowledging that Suicoke tends to run slightly larger. Checking retailer websites for detailed size charts is also crucial.

For direct inquiries, utilize the contact form on the official Suicoke website, though note the EU store is currently closed.

free carb cycling meal plan pdf

What is Carb Cycling?

Carb cycling strategically alternates carbohydrate intake with workout intensity, potentially aiding weight loss and athletic performance; downloadable PDF plans offer guidance.

The Core Principles of Carb Cycling

Carb cycling revolves around manipulating carbohydrate intake to optimize glycogen stores and metabolic function. The fundamental idea is to strategically alternate between higher-carb days, typically coinciding with intense workout sessions, and lower-carb days to encourage fat utilization. A free carb cycling meal plan PDF often illustrates this principle, showcasing how to rotate between these phases.

These plans usually incorporate training days with elevated carb consumption, rest days with reduced carbs, and sometimes even no-carb days. This isn’t about eliminating carbs entirely, but rather timing their intake to fuel activity and support recovery. The goal is to prevent metabolic adaptation and maintain insulin sensitivity, potentially leading to improved body composition. Finding a well-structured PDF is key to understanding these nuances.

Benefits of a Carb Cycling Diet

A carb cycling approach, often detailed in a free carb cycling meal plan PDF, may offer several advantages beyond traditional dieting. Potential benefits include improved insulin sensitivity, allowing the body to utilize carbohydrates more effectively. This can lead to enhanced energy levels, particularly during workouts, and potentially support muscle growth and recovery.

Furthermore, carb cycling may help prevent metabolic slowdown, a common issue with prolonged calorie restriction. By strategically varying carb intake, the body is less likely to adapt and reduce its metabolic rate. Many downloadable plans emphasize this aspect. While research is limited, athletes may find it beneficial for performance. A well-designed PDF will outline these potential benefits and guide implementation.

Understanding Macronutrient Ratios

Free carb cycling meal plan PDFs detail varying protein, fat, and carbohydrate percentages, adjusted based on daily carb levels and activity.

Carb Intake Levels: High, Moderate, and Low

Free carb cycling meal plan PDFs typically categorize intake into three primary levels. High-carb days, often around 200g or more, fuel intense workouts, utilizing sources like rice and quinoa. Moderate-carb days, approximately 100-150g, support recovery and maintain energy, incorporating sweet potatoes and vegetables.

Low-carb days, generally below 50g, encourage fat burning and insulin sensitivity, focusing on non-starchy vegetables. Some plans even include no-carb days for advanced cycling. These PDF resources often provide specific gram ranges for each level, tailored to individual needs and goals. Understanding these distinctions is crucial for effectively implementing a carb cycling strategy, as detailed within the downloadable plans.

Protein and Fat Consumption During Carb Cycling

Free carb cycling meal plan PDFs emphasize consistent protein intake throughout all phases, typically around 0.8-1 gram per pound of body weight, supporting muscle maintenance and recovery. Fat consumption adjusts based on carb levels; high-carb days generally see lower fat intake to manage overall calories.

Conversely, low-carb days often increase healthy fat sources – avocados, nuts, and olive oil – to promote satiety and provide energy. These PDF guides frequently detail macronutrient ratios for each carb level, ensuring balanced nutrition. Maintaining adequate protein is paramount, while strategically adjusting fat intake complements the carb cycling approach, as outlined in downloadable resources.

Sample 4-Week Carb Cycling Meal Plan

Free PDF plans typically structure a four-week progression, starting with higher carb intake and gradually reducing it, including a refeed day each week.

Week 1: Initial Carb Load (200g Carbs/Day)

Free carb cycling meal plan PDFs often begin with a high-carb phase, around 200 grams daily, to replenish glycogen stores. This week focuses on fueling intense workouts. Expect meals featuring rice, quinoa, and sweet potatoes. Sample options include rice and veggies, or quinoa paired with lean protein.

The goal isn’t unrestricted eating, but strategic carbohydrate consumption timed with exercise. Many plans suggest distributing carbs throughout the day, rather than concentrating them in one meal. This initial load prepares the body for subsequent carb restriction. Careful tracking of intake is crucial, even with a pre-made PDF. Prioritize complex carbohydrates over simple sugars during this phase to sustain energy levels and support optimal performance.

Week 2: Reducing Carb Intake

Free carb cycling meal plan PDFs typically transition to lower carbohydrate levels during week two, often around 100-150 grams per day. This phase aims to encourage fat utilization for fuel. Expect a shift towards more vegetables and moderate portions of complex carbs. Baby carrots can be included as a snack, but portion control is key.

Workouts remain intense, but the body begins adapting to rely less on glucose. Protein intake should be maintained to preserve muscle mass. Many plans suggest alternating between moderate-carb and low-carb days. Monitoring energy levels is vital; adjustments may be needed based on individual response. A well-structured PDF will provide guidance on these modifications.

Week 3: Further Carb Restriction

Free carb cycling meal plan PDFs often demonstrate a significant reduction in carbohydrate intake during week three, typically falling between 50-100 grams daily. This phase intensifies fat burning and metabolic adaptation. Focus shifts to non-starchy vegetables and lean protein sources. Handfuls of baby vegetables can still be incorporated, but starchy carbohydrates like rice are minimized.

Workout intensity should be maintained, though some individuals may experience slight energy fluctuations. Careful monitoring of performance is crucial. A quality PDF plan will emphasize adequate hydration and electrolyte intake. This week tests adherence and prepares the body for the final low-carb focus, requiring discipline and mindful eating.

Week 4: Low-Carb Focus & Refeed

Free carb cycling meal plan PDFs typically conclude with a week prioritizing very low carbohydrate intake (under 50g) for most days, coupled with a strategic refeed day. The refeed, often around 200g carbs, replenishes glycogen stores and boosts leptin levels, aiding metabolic function. This phase maximizes fat loss and enhances insulin sensitivity.

A well-structured PDF will detail appropriate refeed food choices – think quinoa and sweet potatoes. Monitoring energy levels is vital; the low-carb days may require adjustments. This final week solidifies adaptations and prepares the body for maintenance. It’s a crucial step for long-term success, preventing metabolic slowdown.

Food Choices for Each Carb Level

Free carb cycling meal plan PDFs detail food selections: high-carb days feature rice, quinoa; moderate days include sweet veggies; low/no-carb days prioritize proteins.

High-Carb Day Food Options

Free carb cycling meal plan PDFs typically emphasize complex carbohydrates on high-carb days, strategically timed around intense workouts to replenish glycogen stores and fuel performance. Excellent choices include brown rice, quinoa, sweet potatoes, and various vegetables like carrots. These provide sustained energy release.

Many plans suggest incorporating fruits, though portion control is key due to their natural sugar content. Consider berries, bananas, or apples. Lean protein sources, such as chicken breast or fish, should still be included to support muscle recovery. A sample meal might be grilled chicken with a side of brown rice and steamed broccoli. Remember to prioritize whole, unprocessed foods for optimal results, as detailed in downloadable plans.

Moderate-Carb Day Food Options

Free carb cycling meal plan PDFs often designate moderate-carb days as a bridge between high and low-carb phases, supporting continued energy levels without excessive calorie intake. Good choices include smaller portions of sweet potatoes, quinoa, or brown rice compared to high-carb days.

Vegetables remain a staple, with a slightly broader selection allowed than on low-carb days. Think squash, peas, or larger servings of leafy greens. Lean proteins like turkey or white fish are ideal. A sample meal could be a turkey breast salad with a small serving of quinoa and mixed vegetables. These plans emphasize balance, ensuring adequate nutrients while managing carbohydrate consumption for continued progress.

Low-Carb & No-Carb Day Food Options

Free carb cycling meal plan PDFs typically focus low-carb/no-carb days on maximizing fat burning and recovery. Protein intake remains high, utilizing sources like chicken breast, fish, or lean beef. Non-starchy vegetables are crucial – broccoli, spinach, kale, and asparagus are excellent choices, providing essential nutrients with minimal carbohydrates.

Healthy fats, such as avocado, olive oil, and nuts (in moderation), become primary energy sources. A no-carb day might consist of a large salad with grilled chicken, avocado, and an olive oil dressing. These plans often suggest strategic timing with rest days or lighter activity to optimize results and minimize fatigue.

Workout Integration with Carb Cycling

Free carb cycling meal plan PDFs emphasize timing high-carb days with intense workouts to fuel performance and recovery effectively, maximizing glycogen stores.

Timing Workouts with High-Carb Days

Free carb cycling meal plan PDFs consistently recommend aligning your most strenuous workouts with your designated high-carbohydrate days. This strategic timing is crucial because carbohydrates are the body’s primary fuel source, especially during high-intensity exercise. Consuming a sufficient amount of carbs before, during, and after intense training sessions replenishes glycogen stores depleted during activity.

These PDF resources often detail specific pre-workout carb intake suggestions, like easily digestible sources such as rice or sweet potatoes, to provide immediate energy. Post-workout, they advocate for continued carb consumption to aid muscle recovery and optimize glycogen resynthesis; Properly timed carbohydrate intake, as outlined in these plans, can significantly enhance workout performance, reduce fatigue, and accelerate recovery, ultimately maximizing the benefits of your training regimen.

Rest Days and Low-Carb Intake

Free carb cycling meal plan PDFs universally emphasize pairing rest days with periods of lower carbohydrate consumption. The rationale behind this approach is to encourage the body to tap into fat stores for energy when glycogen reserves aren’t being actively replenished through carbohydrate intake. This can be particularly effective for weight management goals.

These downloadable plans typically suggest focusing on protein and healthy fats on rest days, while significantly reducing carbohydrate portions. Some PDF guides even incorporate “no-carb” days for advanced practitioners. It’s important to note that these plans often advise against complete carb elimination for extended periods, advocating for cyclical reintroduction to prevent metabolic slowdown and maintain hormonal balance.

Finding a Free Carb Cycling Meal Plan PDF

Numerous websites offer free carb cycling meal plan PDFs, but evaluating their source and content quality is crucial for safe and effective implementation.

Reliable Sources for Downloadable Plans

Locating trustworthy free carb cycling meal plan PDFs requires careful consideration. V Shred LLC, as of 2026, provides resources, though terms and privacy policies should be reviewed. Websites specializing in nutrition and fitness, like those offering keto diet plans (Keto Vale is mentioned), sometimes include carb cycling options as extensions of their low-carb content.

However, exercise caution. General health and fitness websites may offer plans, but verifying the author’s credentials – registered dietitians or certified trainers are ideal – is essential. YouTube, while a source of information, requires discerning viewers to assess the credibility of content creators. Always prioritize plans from established sources with a reputation for accuracy and safety, avoiding those with overly restrictive or unsubstantiated claims.

Evaluating the Quality of a PDF Plan

When assessing a free carb cycling meal plan PDF, several factors are crucial. A high-quality plan should detail macronutrient ratios – carbohydrates, protein, and fats – for each day, aligning with the carb cycling principles. Look for clarity regarding carb intake levels (high, moderate, low, or no-carb) and corresponding food choices.

The plan should integrate with workout schedules, specifying timing for high-carb days relative to exercise intensity. Beware of plans lacking personalization; individual needs vary. A good plan won’t promote extreme restriction but rather a strategic rotation. Finally, scrutinize the source – is it authored by a qualified professional, and does it cite credible scientific references, like those referencing wheat and rice studies?

coloplast titan instructions for use

Coloplast Titan Inflatable Penile Prosthesis: A Comprehensive Guide

This guide details the Coloplast Titan, emphasizing adherence to physician instructions and the device manual for optimal safety and functionality.

The Coloplast Titan Inflatable Penile Prosthesis represents a significant advancement in treating erectile dysfunction (ED). Designed for men who haven’t found success with other treatments, the Titan offers a discreet and reliable solution for restoring sexual function. Understanding its operation and adhering to provided instructions are paramount for achieving optimal results and long-term satisfaction.

Coloplast, a globally recognized healthcare company, has engineered the Titan with a focus on both functionality and patient well-being. The system’s innovative design aims to mimic the natural erectile process, providing firmness for intercourse and allowing for a return to flaccidity when desired. It’s crucial to remember that individual experiences may vary, and careful consideration of the product’s Instructions for Use is essential.

This guide serves as an introductory overview, but it is not a substitute for the detailed information contained within the official Coloplast Titan device manual and your physician’s specific guidance.

What is the Coloplast Titan Inflatable Penile Prosthesis?

The Coloplast Titan is a three-part, inflatable penile prosthesis designed to restore erectile function. It consists of inflatable cylinders implanted within the corpora cavernosa of the penis, a pump implanted in the scrotum, and a reservoir placed in the abdomen. This system allows the user to control when and for how long an erection is maintained.

Unlike semi-rigid implants, the Titan provides a more natural feel and appearance, being flaccid when not in use. Activation involves manually pumping fluid from the reservoir into the cylinders, creating an erection. Detailed instructions for proper operation are provided by your physician and are critical for successful use.

The Titan’s One-Touch release pump is a key feature, enabling quick deflation. Always refer to the device manual for comprehensive information regarding the implant and its intended use, as risks and results can vary.

Components of the Titan System

The Coloplast Titan Inflatable Penile Prosthesis comprises three essential components working in harmony. First, paired inflatable cylinders, crafted from silicone, are surgically placed within the corpora cavernosa, responsible for achieving rigidity. Secondly, the One-Touch release pump, situated within the scrotum, facilitates inflation and deflation via fluid transfer.

Finally, a reservoir, typically implanted in the lower abdomen, stores the sterile fluid necessary for inflation. These components are interconnected by tubing, creating a closed hydraulic system. Understanding each part’s function is crucial for proper operation.

The Coloplast logo is a registered trademark. Detailed information regarding each component, including materials and specifications, can be found within the device manual. Always consult your physician and the Instructions for Use for complete guidance.

Understanding the Titan System Operation

The Titan system utilizes a simple, reliable mechanism for achieving and maintaining an erection, relying on fluid transfer and user-controlled activation.

How the One-Touch Release Pump Works

The Coloplast Titan’s One-Touch release pump is designed for intuitive operation, enabling discreet control over inflation and deflation. This innovative pump, typically located in the scrotum, facilitates a natural-feeling erection with minimal effort. Activation involves a simple, single-touch action to initiate fluid transfer from the reservoir to the cylinders within the penis.

Understanding the pump’s mechanics is crucial for successful use. The pump contains a valve system that directs fluid flow. Repeated squeezes of the pump progressively inflate the cylinders, achieving the desired level of rigidity. It’s important to note that consistent, firm pressure is required for optimal function. The pump’s design prioritizes user comfort and ease of use, contributing to a positive experience. Refer to the device manual for detailed illustrations and operational guidance.

Inflation and Deflation Mechanism

The Coloplast Titan utilizes a sophisticated, two-part mechanism for achieving and releasing an erection. Inflation is initiated by activating the One-Touch release pump, transferring fluid from a reservoir—typically implanted in the abdomen—into the paired inflatable cylinders within the penile shafts. This fluid displacement creates rigidity, mimicking a natural erection.

Deflation is equally straightforward, employing a dedicated release valve. By applying firm and steady pressure to the squeeze release bars located near the pump, the fluid is returned to the reservoir, restoring a flaccid state. Continuous pressure on these bars is essential for complete deflation. This dual-action system allows for controlled erections and discreet return to flaccidity, enhancing both functionality and confidence. Always consult the product’s Instructions for Use for detailed diagrams and operational specifics.

Achieving Flaccidity – Squeeze Release Technique

Returning to a flaccid state with the Coloplast Titan relies on the effective use of the squeeze release technique; This involves firmly and steadily squeezing the penis at the base, near the pump, utilizing the integrated release bars. It’s crucial to maintain continuous pressure during this process; intermittent squeezing may not fully deflate the cylinders.

Gentle squeezing can also expedite deflation. This technique encourages fluid to return to the abdominal reservoir, restoring a natural, relaxed state. Mastering this technique is vital for discreet control and comfort. Remember, consistent practice and adherence to the Instructions for Use are key to achieving optimal results. If difficulties persist, consult your physician for personalized guidance and troubleshooting.

Pre- and Post-Operative Instructions

Following your physician’s detailed instructions before and after surgery is paramount for a successful outcome and optimal device function, as outlined in the manual.

Physician’s Instructions – Importance of Adherence

Your surgeon’s specific instructions are absolutely critical for achieving the best possible results with the Coloplast Titan inflatable penile prosthesis. These guidelines cover pre-operative preparation, including medication adjustments and hygiene protocols, designed to minimize infection risk. Post-operatively, diligent wound care, activity restrictions, and follow-up appointments are essential for proper healing and device integration.

Understanding and strictly adhering to these instructions significantly impacts the long-term functionality and reduces the potential for complications. The physician will provide detailed guidance on operating the prosthesis, including the one-touch release pump mechanism and the squeeze-release technique for achieving flaccidity.

Furthermore, the doctor will explain potential risks and troubleshooting steps for pseudo-malfunctions, emphasizing the importance of referencing the complete device manual for comprehensive information. Ignoring these instructions can compromise the implant’s performance and your overall satisfaction.

Post-Implant Care and Recovery

Following implantation, diligent post-operative care is paramount for successful recovery and optimal device function. Initial recovery involves managing discomfort with prescribed medication and adhering to wound care instructions to prevent infection. Activity restrictions, typically avoiding strenuous exercise and sexual intercourse for a specified period, are crucial for proper tissue healing and implant stabilization.

Regular follow-up appointments with your physician are essential to monitor healing progress and address any concerns. You’ll receive detailed instructions on operating the Titan prosthesis, including the one-touch release pump and the squeeze-release technique.

Understanding potential issues like pseudo-malfunctions and knowing when to consult your doctor is vital. Always refer to the device manual for comprehensive guidance and remember that individual recovery timelines vary. Patience and consistent adherence to your physician’s advice are key to a positive outcome.

Potential Risks and Complications

While generally safe, the Titan implant carries risks; review the Instructions for Use carefully, as experiences and results may vary based on clinical judgment.

Common Risks Associated with Penile Implants

Penile implants, including the Coloplast Titan, while effective, are associated with potential risks that patients should understand before proceeding. These can range from mechanical issues to infection and device-related complications. The Instructions for Use thoroughly detail these possibilities, emphasizing the importance of careful consideration and open communication with your physician.

Infection is a primary concern, requiring diligent post-operative care. Mechanical failures, though infrequent, can occur, potentially necessitating revision surgery. Other risks include erosion, where the device wears through the skin, and component malfunction. Pain, changes in sensation, and dissatisfaction with cosmetic results are also possible.

It’s crucial to remember that individual experiences vary, and the likelihood of these risks depends on factors like overall health and surgical technique. Thoroughly reviewing the product’s Instructions for Use and discussing concerns with your doctor is paramount for informed decision-making and managing expectations.

Pseudo-Malfunction and Troubleshooting

A “pseudo-malfunction” with the Coloplast Titan inflatable penile prosthesis refers to a perceived device failure that isn’t a true mechanical issue. Often, this involves difficulty inflating or deflating the implant, causing anxiety for the user. The product’s Instructions for Use dedicate specific guidance to identifying and resolving these situations.

Common causes include inadequate pump activation, insufficient squeeze release technique, or temporary fluid shifts within the system. Before assuming a mechanical problem, patients should meticulously follow the operating steps outlined in the manual. Ensure firm, steady pressure on the release pump and consistent squeezing for deflation.

If issues persist, consulting the Instructions for Use for troubleshooting tips is vital. Avoid forceful manipulation, which could potentially damage the device. If the problem continues, immediate contact with your physician is recommended to rule out genuine mechanical failure or infection.

Detailed Usage Guidelines

Proper operation involves following the step-by-step instructions provided by your doctor and referencing the device manual for optimal functionality and long-term care.

Operating the Release Pump – Step-by-Step

To initiate inflation, firmly locate the One-Touch release pump, typically situated within the scrotum. A distinct click signifies activation, allowing fluid transfer from the reservoir to the cylinders. Repeated clicks incrementally increase rigidity, enabling personalized firmness control. For deflation, gently squeeze the release bars with consistent, firm pressure.

Maintain continuous pressure on these bars to achieve complete flaccidity; intermittent squeezing may prolong the process. Remember, the pump’s responsiveness can vary, so practice is key to mastering controlled inflation and deflation. Always consult the device manual for detailed illustrations and troubleshooting guidance. Understanding this process ensures comfortable and discreet operation of your Coloplast Titan prosthesis, maximizing its benefits and your confidence.

Maintaining Optimal Functionality

Regular, gentle cycling of the prosthesis – inflating and deflating – is crucial for maintaining fluid movement and preventing potential adhesion within the system. This proactive approach helps ensure consistent performance and responsiveness over time. Avoid forceful or abrupt movements during operation, as these could potentially strain the components.

Routine follow-up appointments with your physician are essential for monitoring the implant’s function and addressing any concerns promptly. Familiarize yourself with the signs of a pseudo-malfunction and consult the device manual for troubleshooting steps. Proper care and consistent use, guided by your doctor’s instructions, will contribute significantly to the longevity and reliable operation of your Coloplast Titan inflatable penile prosthesis.

Long-Term Care and Monitoring

Consistent adherence to your physician’s recommended follow-up schedule is paramount for long-term success with the Coloplast Titan. These appointments allow for proactive assessment of the implant’s mechanical function and identification of any potential issues. Be prepared to discuss any changes in performance or discomfort experienced.

Maintain open communication with your healthcare provider regarding any concerns, even seemingly minor ones. Familiarity with the product’s Instructions for Use is vital, enabling you to recognize normal operation versus potential complications. Remember that risks and results can vary, so personalized monitoring is key. Lifelong commitment to proper care ensures optimal functionality and quality of life with your prosthesis.

Important Safety Information

Always reference the Coloplast Titan device manual and Instructions for Use to fully understand intended use, safety precautions, and potential adverse events.

Referencing the Device Manual

The Coloplast Titan inflatable penile prosthesis device manual is a crucial resource for both patients and physicians. It contains detailed information regarding the implant’s components, proper operation, and troubleshooting guidance. Thoroughly reviewing the manual before and after implantation is essential for understanding the system’s functionality and maximizing its benefits.

Specifically, the manual outlines the correct technique for operating the one-touch release pump, achieving inflation and deflation, and utilizing the squeeze release technique for flaccidity. It also details potential risks, complications, and how to identify and address pseudo-malfunctions.

Furthermore, the manual provides comprehensive instructions for post-implant care, including hygiene recommendations and monitoring for any adverse events. Always consult the manual for the most up-to-date information and adhere to the recommended guidelines to ensure optimal long-term performance and patient satisfaction. Risks and results may vary.

Understanding the Instructions for Use

The Coloplast Titan’s Instructions for Use (IFU) are paramount for safe and effective operation. These instructions, provided by your physician, detail the precise steps for utilizing the inflatable penile prosthesis. Understanding the IFU minimizes risks and maximizes the device’s functionality, ensuring a satisfactory outcome.

The IFU emphasizes the importance of the one-touch release pump, explaining how to achieve controlled inflation and deflation. It specifically details the squeeze release technique, requiring firm, steady pressure for achieving a flaccid state. Continuous pressure is necessary for optimal results.

Furthermore, the IFU outlines potential adverse events and troubleshooting steps for pseudo-malfunctions. It’s vital to familiarize yourself with these scenarios and report any concerns to your doctor promptly; Adherence to the IFU, alongside your physician’s guidance, is key to long-term success and device longevity.

talk to strangers pdf

Article Plan: Talk to Strangers ‒ Safety and Guidelines

Navigating interactions with unfamiliar individuals requires diligent adherence to safety protocols‚ both in physical spaces and the digital realm‚ as detailed in available resources.

The seemingly harmless act of conversing with unknown individuals presents a spectrum of potential dangers‚ demanding cautious awareness. Historically‚ “stranger danger” warnings focused on physical encounters‚ but the digital age has dramatically expanded these risks. Online platforms‚ while offering connection‚ also harbor predators seeking to exploit vulnerability.

Children are particularly susceptible‚ as they may lack the discernment to identify malicious intent. Even adults can be deceived by carefully crafted online personas. The core issue is a lack of information; you simply don’t know the true identity or motivations of someone you’ve encountered only as a stranger. This uncertainty creates opportunities for manipulation‚ harassment‚ and even physical harm. Resources emphasize that parents are right to instill caution‚ teaching children not to engage with random individuals online or offline.

Understanding the “Talk to Strangers” Phenomenon

The inclination to engage with strangers stems from diverse motivations‚ ranging from simple curiosity to a desire for connection and social interaction. In the digital sphere‚ anonymity can lower inhibitions‚ encouraging individuals to share more freely than they might in face-to-face encounters. Chat rooms and social media platforms facilitate these interactions‚ offering a space to explore different perspectives and build relationships – or‚ deceptively‚ to create false ones.

However‚ this openness can be exploited. The phenomenon is fueled by the perceived safety of distance and the allure of novelty. Individuals may seek validation‚ companionship‚ or even excitement through interactions with unknown people. It’s crucial to recognize that while not all encounters are harmful‚ the inherent risk necessitates a cautious approach and a strong understanding of potential dangers‚ as highlighted in safety guidelines.

Historical Context of Stranger Danger

The concept of “stranger danger” isn’t new; warnings about interacting with unknown individuals have existed for generations‚ evolving alongside societal changes. Historically‚ concerns centered around physical threats – kidnapping or assault. Early cautionary tales emphasized the importance of avoiding contact with unfamiliar adults‚ particularly when children were unsupervised.

As society modernized and communication methods expanded‚ the nature of stranger danger shifted. The rise of the internet and online communication introduced new avenues for potential harm‚ extending the risk beyond physical proximity. While the core message – caution around strangers – remained consistent‚ the context broadened to encompass online predators and deceptive practices like catfishing. Today’s guidelines build upon this historical foundation‚ adapting to the complexities of the digital age and emphasizing both physical and online safety.

Modern Forms: Online Chat Rooms & Social Media

Contemporary “stranger” interactions increasingly occur within digital spaces – online chat rooms‚ social media platforms‚ and gaming environments. These platforms offer anonymity and accessibility‚ creating opportunities for connection but also presenting unique risks. Chat rooms‚ once popular‚ still exist‚ alongside newer platforms where individuals can interact with strangers through text‚ audio‚ or video.

Social media‚ while designed for connecting with known contacts‚ often facilitates interactions with unfamiliar users through public profiles and shared interests. The ease of creating fake profiles and concealing identities exacerbates the potential for deceptive behavior. These digital environments require a heightened awareness of safety precautions‚ as traditional “stranger danger” rules must be adapted to address the nuances of online communication and potential predatory tactics.

The Dangers of Online Interactions with Strangers

Engaging with strangers online carries significant risks‚ extending beyond simple discomfort to potential exploitation and harm. The anonymity afforded by the internet emboldens individuals to misrepresent themselves‚ creating a breeding ground for deceptive practices. A seemingly friendly online acquaintance could harbor malicious intent‚ seeking to manipulate or exploit vulnerable individuals.

These dangers include exposure to inappropriate content‚ cyberbullying‚ and the risk of grooming – a predatory tactic where an adult builds a relationship with a minor for abusive purposes. Even seemingly harmless conversations can be used to gather personal information‚ leading to identity theft or real-world stalking. It’s crucial to remember that online interactions lack the non-verbal cues present in face-to-face communication‚ making it harder to assess trustworthiness.

Potential for Predatory Behavior

The internet unfortunately provides avenues for predators to target and exploit vulnerable individuals‚ particularly children and teenagers. These individuals often employ manipulative tactics‚ feigning friendship or shared interests to gain trust. They may start with seemingly innocent conversations‚ gradually probing for personal information and attempting to move the interaction to more private channels.

Predators often use false identities‚ creating fabricated online personas to conceal their true intentions; They may pressure victims into keeping the relationship secret‚ isolating them from support networks. Recognizing the warning signs – excessive flattery‚ requests for personal information‚ or attempts to arrange in-person meetings – is crucial. It’s vital to remember that a predator’s goal is to establish control and exploit the victim‚ and their online behavior is often carefully calculated.

Identity Deception and Catfishing

A significant risk when interacting with strangers online is the potential for identity deception‚ commonly known as “catfishing.” This involves individuals creating fake online profiles‚ often using stolen photos and fabricated personal details‚ to lure others into relationships built on lies. The motivations behind catfishing vary‚ ranging from loneliness and insecurity to malicious intent‚ including financial scams or emotional manipulation.

It’s crucial to be skeptical of online personas‚ especially if they seem too good to be true. Reverse image searches can help verify the authenticity of profile pictures‚ and inconsistencies in their story or reluctance to video chat should raise red flags. Victims of catfishing often experience emotional distress and financial loss‚ highlighting the importance of verifying someone’s identity before investing emotionally or financially in the relationship.

Parental Guidance: Early Education on Stranger Danger

Proactive parental guidance is paramount in safeguarding children from potential harm stemming from interactions with strangers‚ both offline and online. Begin educating children from a young age about the concept of “stranger danger‚” emphasizing that strangers are individuals they don’t know and trust. Explain that while most strangers are harmless‚ some may have bad intentions‚ and it’s essential to exercise caution.

This education should extend to the digital world‚ teaching children not to engage in conversations with unfamiliar individuals in chat rooms or on social media. Reinforce the importance of never sharing personal information‚ such as their name‚ address‚ school‚ or photos‚ with anyone they’ve met online. Open communication is key; encourage children to come to you if they feel uncomfortable or threatened by someone online.

Age-Appropriate Explanations

Tailoring explanations about stranger danger to a child’s developmental stage is crucial for effective understanding. For younger children‚ keep the message simple: “A stranger is someone you don’t know‚ and you should never go with them or talk to them without asking me first.” Avoid frightening language‚ focusing instead on safety rules.

As children grow older‚ explanations can become more nuanced. Discuss the concept of online strangers‚ emphasizing that people online may not be who they claim to be – a concept known as “catfishing.” Explain that even seemingly friendly individuals can pose a risk. Encourage open dialogue‚ allowing children to ask questions and express their concerns. Remind them that it’s okay to say “no” and to tell a trusted adult if someone makes them feel uncomfortable.

Reinforcing the “Don’t Talk to Strangers” Rule

Consistent reinforcement of the “don’t talk to strangers” rule is paramount for a child’s safety‚ extending beyond physical interactions to encompass the digital world. Regularly revisit the topic‚ using real-life scenarios and role-playing to illustrate potential dangers. Emphasize that this rule applies to both approaching strangers and responding to their advances.

Create a safe space for children to discuss uncomfortable encounters without fear of judgment. Validate their feelings and reassure them that they did the right thing by telling you. Highlight the importance of trusting their instincts; if a situation feels wrong‚ it probably is. Remind them that adults should never ask children for help‚ and that they should always seek assistance from another trusted adult if approached by a stranger.

Online Safety Rules for Children

Establishing clear online safety rules is crucial for protecting children in the digital landscape. A fundamental rule is never sharing personal information – including name‚ address‚ school‚ or photos – with anyone online they haven’t met in person. Teach them to recognize suspicious activity‚ such as requests for personal details or overly friendly interactions from strangers.

Emphasize the importance of reporting any uncomfortable or concerning online encounters to a trusted adult immediately. Children should understand that it’s not their fault if someone online makes them feel unsafe. Regularly discuss appropriate online behavior and monitor their online activity‚ utilizing parental control tools where appropriate. Remind them that people online aren’t always who they claim to be.

Never Sharing Personal Information

Protecting personal information online is paramount‚ especially for children. This includes refraining from disclosing their full name‚ age‚ location‚ school details‚ or any identifying photographs. Even seemingly harmless information can be exploited by malicious individuals. Children must understand that online strangers are‚ in reality‚ unknown entities and should not be trusted with sensitive data.

Emphasize that sharing future vacation plans is also risky‚ as it can signal an empty home. Teach them to be cautious about accepting friend requests from people they don’t know in real life. Reinforce the message that they should always consult with a trusted adult before sharing any personal information online‚ regardless of how friendly the requester appears. This is a core principle of online safety.

Recognizing and Reporting Suspicious Activity

Equipping individuals with the ability to identify and report concerning online behavior is crucial. Suspicious activity includes requests for personal information‚ overly friendly or flattering communication‚ attempts to meet in person‚ and any content that makes them feel uncomfortable or scared. Children should be taught to trust their instincts; if something feels wrong‚ it probably is.

Encourage open communication and assure them they won’t be punished for reporting concerns. They should immediately inform a trusted adult about any unsettling interactions. Platforms typically offer blocking and reporting features – demonstrate how to use these tools. Knowing how to block a user and report inappropriate behavior empowers individuals to take control of their online safety and contribute to a safer online environment for everyone.

Adult Chat Rooms: Risks and Precautions

Entering adult chat rooms presents unique risks requiring heightened awareness and caution. These environments‚ while offering potential for connection‚ can harbor individuals with malicious intent. Understanding the environment is paramount; many rooms lack stringent moderation‚ increasing exposure to inappropriate content and predatory behavior. Always adhere to the community guidelines and terms of service of each platform‚ as these outline acceptable conduct.

Prioritize safety by utilizing blocking and reporting features to address unwanted interactions. Avoid sharing personal details‚ including future vacation plans‚ which could be exploited. Building trust takes time; assess risk carefully before considering meeting anyone offline. Frequent communication and questioning are vital to gauge authenticity.

Understanding the Environment

Navigating online spaces requires recognizing their inherent complexities and potential dangers. Adult chat rooms‚ in particular‚ often lack the robust moderation found on mainstream social media platforms. This absence of oversight can create an environment where anonymity shields malicious actors‚ increasing the risk of encountering individuals with harmful intentions. It’s crucial to remember that profiles are easily fabricated‚ and appearances can be deceiving – “Girlie45” could be anyone.

These platforms are designed for connection‚ but also facilitate deception. Users should be aware that a browser alone won’t protect against hackers or predatory behavior. Understanding these risks is the first step towards safe interaction‚ emphasizing the importance of caution and informed decision-making.

Adhering to Community Guidelines & Terms of Service

Each online platform operates under a specific set of rules designed to maintain order and protect its users. Familiarizing yourself with these guidelines – often found in a “Terms of Service” or “Community Guidelines” section – is paramount for safe participation. These documents outline acceptable behavior‚ prohibited content‚ and reporting mechanisms for violations. Platforms like Omegle‚ while offering video chat‚ acknowledge the need for moderation‚ though it’s not foolproof.

By agreeing to these terms‚ users commit to upholding a certain standard of conduct. Ignoring these rules not only risks account suspension but also exposes individuals to potentially harmful interactions. Understanding and respecting these boundaries is a fundamental aspect of responsible online engagement.

Safety Measures When Using Online Chat Platforms

Proactive safety measures are crucial when engaging in online chats with strangers. Utilizing the blocking and reporting features offered by most platforms allows you to immediately disconnect from and flag suspicious users. Avoid divulging personal information‚ including future vacation plans‚ as this could be exploited. Frequent communication and consistent questioning are vital to assess the authenticity of the individual you’re interacting with.

Before considering a face-to-face meeting‚ establish a level of trust through ongoing dialogue. Always notify others about your plans‚ including the location and time of the meeting‚ and share details of the person you’re meeting. Remember‚ a cautious approach is always best when interacting with unknown individuals online.

Blocking and Reporting Users

A fundamental safety precaution on online chat platforms is utilizing the blocking feature. If a user makes you uncomfortable‚ exhibits suspicious behavior‚ or violates community guidelines‚ immediately block them to prevent further contact. Equally important is reporting such users to the platform administrators. This helps maintain a safer environment for everyone and allows moderators to take appropriate action.

Platforms like Omegle‚ while moderated‚ still require user vigilance. Reporting abusive or predatory behavior is essential. Remember‚ blocking removes the user from your immediate interactions‚ while reporting alerts the platform to potentially harmful activity. Don’t hesitate to use these tools; your safety and the safety of others depend on it.

Avoiding Sharing Future Vacation Plans

Disclosing upcoming travel arrangements to individuals you’ve met online‚ even those you believe you’ve established trust with‚ presents a significant security risk. This information can be exploited by malicious actors for various harmful purposes‚ including burglary or physical harm upon your return. It’s crucial to maintain a strict boundary regarding personal details‚ especially those related to your whereabouts and schedule.

Remember‚ online identities can be easily fabricated. A seemingly friendly stranger could be gathering information for nefarious intent. Never post details about future vacations publicly or share them in private chats with unfamiliar individuals. Protecting your travel plans is a vital component of online safety and personal security‚ safeguarding both your property and well-being.

Building Trust and Assessing Risk Before Meeting

If‚ despite precautions‚ you contemplate meeting someone you’ve connected with online‚ prioritize a gradual approach to building trust and a thorough risk assessment. Frequent communication and consistent questioning are paramount; delve beyond superficial exchanges to understand their motivations and verify their claims. Look for inconsistencies or evasiveness in their responses;

Engage in regular conversations to gain a deeper understanding of the individual before considering a face-to-face encounter. This allows for a more informed evaluation of potential risks. Remember‚ even prolonged online interaction doesn’t guarantee safety. Always trust your instincts and proceed with extreme caution‚ recognizing that deception is a real possibility.

Frequent Communication and Questioning

Consistent and detailed communication is crucial when interacting with someone new online‚ serving as a cornerstone for assessing their authenticity and intentions. Ask questions often‚ probing beyond surface-level responses to uncover potential discrepancies or red flags. Regular dialogue allows you to observe patterns in their communication and gauge their willingness to be open and honest.

This ongoing exchange isn’t merely about gathering information; it’s about establishing a baseline understanding of their personality and behavior. By maintaining frequent contact‚ you create opportunities to identify inconsistencies that might indicate deceptive practices. Remember‚ a genuine individual will readily engage in open and transparent conversation‚ while someone with ulterior motives may avoid direct answers or offer vague explanations.

Notifying Others About Planned Meetings

Transparency is paramount when considering meeting someone you’ve connected with online; informing trusted individuals about your plans is a vital safety precaution. Share details such as the date‚ time‚ and precise location of the meeting with family or friends. Providing them with a photograph of the person you intend to meet can also be beneficial for identification purposes.

Furthermore‚ establish a check-in system where you regularly update your trusted contact throughout the meeting. This could involve sending periodic text messages or sharing your location via a smartphone app. Knowing someone is aware of your whereabouts and expecting regular communication can deter potential harm and provide a crucial lifeline if needed. Prioritize your safety by ensuring others are informed and prepared to assist.

Legal Considerations and Reporting Abuse

Understanding the legal ramifications of online interactions and knowing how to report abusive behavior are crucial aspects of online safety. Predatory behavior‚ harassment‚ and exploitation are criminal offenses with serious consequences; Familiarize yourself with the relevant laws in your jurisdiction regarding online communication and child protection.

If you encounter suspicious activity‚ threats‚ or experience any form of abuse‚ it’s imperative to report it to the appropriate authorities. This includes law enforcement agencies‚ the platform where the abuse occurred (e.g.‚ social media site‚ chat room)‚ and organizations dedicated to online safety. Document all evidence‚ such as screenshots of conversations or profiles‚ to support your report. Seeking legal counsel can also provide guidance and ensure your rights are protected.

bosch dishwasher user manual pdf

Accessing your Bosch Serie 6 Dishwasher Manual is crucial; find comprehensive guides and PDF versions online to unlock your appliance’s full potential.

These manuals, like the Bosch EXXCEL manual, offer vital instructions for safe operation, installation, and effective maintenance of your dishwasher.

Availability of PDF Manuals

Bosch dishwasher manuals, including PDF formats, are readily available online through the official Bosch website and various appliance support platforms;

You can easily download a Bosch EXXCEL dishwasher manual as a PDF file, offering convenient access to operating instructions and troubleshooting guides.

These digital versions ensure you always have the information you need, whether you’re setting up a new appliance or addressing a specific issue, like a dishwasher not drinking water.

Finding your specific model’s manual is simplified by entering your model number on dedicated support websites, providing instant access to the correct PDF document.

Importance of Reading the Manual

Reading the Bosch dishwasher user manual, especially the PDF version, is paramount for safe and efficient operation. It details crucial safety instructions for installation and use, preventing potential hazards.

Understanding the manual ensures proper appliance setup, including water hardness settings and connection procedures, maximizing cleaning performance and longevity.

The manual guides you through selecting appropriate wash programs and utilizing special functions, like half load or extra dry, optimizing every wash cycle.

Furthermore, it provides essential troubleshooting steps for common issues, potentially saving costly service calls and ensuring your dishwasher operates flawlessly.

Safety Instructions

Bosch dishwasher manuals emphasize crucial safety guidelines for installation, operation, and maintenance, ensuring user well-being and preventing potential appliance damage.

General Safety Warnings

Bosch dishwasher manuals consistently prioritize user safety, detailing critical warnings against improper use. PDF versions highlight the importance of reading all instructions before operation.

These manuals caution against using the dishwasher for anything other than household dishware, preventing potential malfunctions or hazards. They also stress the need to supervise children around the appliance.

Furthermore, the manuals warn against modifying or attempting repairs without qualified service personnel, ensuring continued safe and efficient operation of your Bosch dishwasher.

Grounding Instructions

Bosch dishwasher manuals, available as PDF downloads, emphasize the critical importance of proper grounding for electrical safety. These instructions detail how to connect the appliance to a grounded electrical outlet.

The manuals explicitly state that improper grounding can lead to electric shock hazards. They advise against altering the plug or using adapter plugs that bypass the grounding feature.

Always consult a qualified electrician if you are unsure about grounding procedures, ensuring your Bosch dishwasher is safely connected and operates within specified electrical parameters.

Proper Installation Safety

Bosch dishwasher manuals, often found as PDF files, prioritize safety during installation. They stress reading all instructions before beginning, emphasizing adherence to local plumbing and electrical codes.

The manuals warn against self-installation if you lack experience, recommending professional help. They detail proper hose connections to prevent leaks and secure mounting to avoid tipping.

Furthermore, they caution against extending or modifying factory-supplied connections, ensuring the dishwasher operates safely and efficiently within its designed parameters, as outlined in the documentation.

Getting Started: Installation & Setup

Bosch dishwasher manuals (available as PDFs) guide unpacking, inspection, and connecting to water/electricity; referencing them ensures correct initial setup.

Unpacking and Inspection

Upon delivery, carefully unpack your Bosch dishwasher, consulting the PDF manual for specific guidance. Thoroughly inspect for any shipping damage – dents, scratches, or missing components.

The manual details what should be included: the dishwasher itself, spray arms, racks, drain hose, and installation hardware. Document any damage immediately with photos and contact your retailer or Bosch support.

Retain all packaging materials until you’ve confirmed the dishwasher is functioning correctly. The manual emphasizes verifying all parts are present before proceeding with installation, preventing delays later.

Water Hardness Settings

Your Bosch dishwasher’s PDF manual stresses the importance of setting the correct water hardness level for optimal cleaning performance. Hard water contains minerals that reduce detergent effectiveness and can leave spots on dishes.

The manual provides instructions on how to test your water hardness using a test strip or by contacting your local water utility. Based on the results, adjust the dishwasher’s settings – typically ranging from 1 (softest) to 7 (hardest).

Incorrect settings can lead to residue or etching. Refer to the manual’s chart to determine the appropriate salt dosage if your model requires it, ensuring sparkling clean results.

Connecting to Water and Electricity

The Bosch dishwasher PDF manual provides detailed instructions for safely connecting your appliance to both water and electrical supplies. It emphasizes following local plumbing and electrical codes during installation.

For water connection, the manual specifies using a new supply hose and ensuring a secure, leak-proof fit. Electrical connection requires a grounded outlet with the correct voltage, as detailed in the specifications section of the manual.

Important: Never attempt to modify the power cord or bypass the grounding system. Improper connections can create hazards; always consult a qualified technician if unsure.

Understanding Your Dishwasher

The Bosch dishwasher user manual PDF details interior components, control panel functions, and the detergent compartment for optimal performance and usage.

Interior Components Overview

Bosch dishwasher interiors, as detailed in the user manual PDF, feature adjustable racks, spray arms, and a filter system. The upper rack accommodates glasses and smaller items, often with adjustable height settings.

Lower racks are designed for plates, pots, and pans. Spray arms, crucial for cleaning, rotate to deliver water to all areas. The filter system captures food particles, preventing clogging and ensuring efficient operation.

Understanding these components, as outlined in the manual, allows for proper loading and maximizes cleaning performance. Regular inspection and cleaning of these parts are essential for longevity.

Control Panel Explanation

The Bosch dishwasher control panel, thoroughly explained in the user manual PDF, features buttons or touch controls for selecting wash programs, adjusting settings, and initiating cycles. Common options include Auto, Normal, Delicate, and Quick Wash.

Special functions like Half Load, Extra Dry, and Sanitize are also accessible. Indicator lights display cycle progress, remaining time, and any error messages. The manual details each button’s function, ensuring users can customize washes.

Understanding the control panel is key to optimizing cleaning results and utilizing the dishwasher’s full capabilities, as described in the provided documentation.

Detergent Compartment Details

The Bosch dishwasher’s detergent compartment, detailed in the user manual PDF, is typically located inside the door. It’s divided into sections for detergent, rinse aid, and sometimes, pre-wash detergent.

The manual specifies the correct amount of detergent based on water hardness and load size. Proper filling ensures optimal cleaning performance. Rinse aid dispenses automatically, aiding drying and preventing water spots.

Understanding compartment markings and capacity is crucial, as outlined in the documentation, to avoid over or under-dosing, maximizing wash effectiveness and protecting your dishwasher.

Operating Instructions

Bosch dishwasher operation, detailed in the user manual PDF, involves proper loading, selecting wash programs, and utilizing special functions for optimal results.

Loading the Dishwasher Correctly

Proper loading, as outlined in your Bosch dishwasher user manual PDF, is essential for optimal cleaning performance. Ensure items don’t block spray arms.

Position dishes facing the center, and avoid overcrowding. Place larger items on the lower rack, and delicate glassware on the upper rack.

Utensils should be placed in the cutlery basket with handles down for safety and thorough cleaning. Refer to the manual for specific rack configurations and loading recommendations to maximize space and efficiency.

Selecting Wash Programs

Your Bosch dishwasher user manual PDF details various wash programs tailored to different needs. Options include Auto, Eco, Normal, and Intensive, each with specific temperature and duration settings.

The Auto program adjusts based on soil level, while Eco prioritizes energy efficiency. Normal is suitable for everyday loads, and Intensive tackles heavily soiled items.

Consult the manual to understand each program’s characteristics and choose the most appropriate one for your dishes, ensuring optimal cleaning and resource conservation.

Using Special Functions (e.g., Half Load, Extra Dry)

The Bosch dishwasher user manual PDF outlines helpful special functions for customized cleaning. The Half Load option conserves water and energy when washing smaller loads, enhancing efficiency.

Extra Dry increases drying performance, ideal for plastics or items needing thorough dryness. Other functions, like Delicate or Machine Care, cater to specific dish types or appliance maintenance.

Refer to your manual for detailed instructions on activating and utilizing these features, optimizing your dishwasher’s performance and achieving desired results with every wash cycle.

Maintenance and Cleaning

Bosch dishwasher user manual PDFs detail essential upkeep, including spray arm and filter cleaning, ensuring optimal performance and longevity of your appliance.

Cleaning the Spray Arms

Bosch dishwasher user manual PDFs emphasize regular spray arm cleaning for peak performance. Remove the spray arms – typically by unscrewing or unclipping – as detailed in your specific model’s manual.

Inspect the small holes for food particles or mineral deposits; use a toothpick or fine wire to carefully clear any blockages. Rinse thoroughly under running water to remove dislodged debris.

Ensure the spray arms rotate freely after cleaning. Reinstall securely, verifying proper attachment to maintain effective water distribution during wash cycles, as outlined in the manual.

Filter Cleaning Procedures

Bosch dishwasher user manual PDFs detail crucial filter cleaning steps. Locate the filter assembly – usually at the bottom of the dishwasher’s interior – and remove it following the manual’s instructions.

Rinse the filter components under running water, using a soft brush to remove stubborn food particles. Check for any damage and replace if necessary.

Reassemble the filter correctly and securely, ensuring proper placement to prevent debris from recirculating during wash cycles, as illustrated in your Bosch model’s manual.

Dishwasher Cleaning Recommendations

Bosch dishwasher user manual PDFs recommend regular cleaning to maintain peak performance. Run an empty cycle with a dishwasher cleaner monthly, following the manual’s dosage guidelines.

Wipe down the door seals and interior surfaces with a damp cloth and mild detergent. Avoid abrasive cleaners that could damage the stainless steel.

Periodically clean the spray arms (refer to the manual) and ensure the filter is clear of debris, as detailed in your Bosch model’s specific PDF instructions.

Troubleshooting Common Issues

Bosch dishwasher user manual PDFs detail solutions for problems like starting failures, poor cleaning, and leaks; consult your manual first!

Dishwasher Not Starting

If your Bosch dishwasher fails to start, the user manual PDF is your first resource. Check the power supply and ensure the door is securely latched, as detailed in the manual.

Verify the control panel isn’t locked; the manual explains how to disable child locks. A tripped circuit breaker or a faulty power cord are also potential causes, outlined within the PDF.

Consult the troubleshooting section of your specific model’s manual for error codes displayed, offering precise diagnostic steps. Resetting the dishwasher, as described in the manual, can sometimes resolve the issue.

Poor Cleaning Performance

Experiencing unsatisfactory cleaning results? Your Bosch dishwasher user manual PDF provides solutions. First, confirm proper loading techniques, as illustrated within the manual, avoiding overcrowding and ensuring spray arm clearance.

Verify the correct detergent is used and the detergent compartment is functioning correctly, details found in the manual. Check water temperature; it must reach the recommended level for optimal cleaning, as specified in the PDF.

A clogged filter significantly impacts performance; the manual details cleaning procedures. Finally, select the appropriate wash program for the load type, guided by the manual’s program descriptions.

Water Leaks and Drainage Problems

Discovering leaks or drainage issues? Your Bosch dishwasher user manual PDF is the first resource. Inspect the door seal for damage or debris, referencing the manual’s diagrams for proper seating.

Check the water inlet and drain hoses for kinks or obstructions; the manual illustrates their correct positioning. A clogged drain filter can cause backups – consult the PDF for cleaning instructions.

Ensure the drain hose is properly elevated, as detailed in the manual, to prevent backflow. If issues persist, the manual guides you through troubleshooting steps before contacting service.

Technical Specifications

Refer to your Bosch dishwasher user manual PDF for precise dimensions, weight, water consumption, and energy efficiency details specific to your model.

Dimensions and Weight

Consult your Bosch dishwasher’s user manual PDF for exact measurements, as specifications vary significantly between models. These documents detail the appliance’s height, width, and depth, crucial for installation planning.

Weight is also specified, impacting flooring considerations and ease of movement during installation or servicing. The manual provides these critical figures, ensuring a proper fit within your kitchen cabinetry and structural support.

Always prioritize referencing the PDF for your specific model number to avoid inaccuracies.

Water Consumption Details

Your Bosch dishwasher’s user manual PDF outlines water usage per cycle, a key factor for both cost savings and environmental responsibility. Different wash programs consume varying amounts of water; the manual details these specifics.

Understanding these details allows you to select the most efficient cycle for your load, minimizing water waste. The PDF will also indicate water pressure requirements for optimal performance.

Referencing the manual ensures accurate information for your specific model, promoting responsible water usage.

Energy Efficiency Information

The Bosch dishwasher user manual PDF provides crucial details regarding energy consumption, helping you understand your appliance’s efficiency. It specifies the energy rating and kilowatt-hours (kWh) used per wash cycle.

Different programs have varying energy demands; the manual clearly outlines these differences, enabling informed choices for eco-friendly operation.

Consulting the PDF allows you to maximize energy savings and minimize your environmental impact, aligning with sustainable practices.

Service and Support

Bosch provides extensive support; locate your model number within the manual PDF to access tailored assistance and warranty details efficiently.

Finding Your Model Number

Locating your Bosch dishwasher’s model number is essential for accessing specific support and downloading the correct PDF user manual. This unique identifier ensures you receive accurate information tailored to your appliance.

Typically, the model number is found on a sticker or plate inside the dishwasher door, often along the edge. Consult your Bosch appliance manual – available as a PDF online – for a visual guide if needed. Having this number readily available streamlines the process of contacting Bosch customer support or finding replacement parts.

Without the correct model number, accessing the appropriate manual and receiving specialized assistance becomes significantly more challenging.

Contacting Bosch Customer Support

For personalized assistance with your Bosch dishwasher, and to discuss issues not covered in the PDF user manual, Bosch provides multiple support channels. You can often find helpful FAQs and troubleshooting guides online, alongside downloadable manuals.

To speak directly with a representative, visit the official Bosch website and navigate to the support section. There, you’ll find contact numbers for phone support, as well as options for live chat or submitting an inquiry via email. Be prepared to provide your dishwasher’s model number for efficient service.

Bosch aims to provide prompt and effective solutions to ensure your appliance operates optimally.

Warranty Information

Bosch dishwashers are backed by a limited warranty, details of which are thoroughly outlined in your product’s PDF user manual. The warranty typically covers defects in materials and workmanship for a specified period, often varying based on the dishwasher series.

Carefully review the manual to understand the scope of coverage, including what components are protected and the duration of the warranty. Registration of your appliance may be required to activate the full warranty benefits. Keep your proof of purchase readily available, as it’s essential for any warranty claims.

Bosch strives to ensure customer satisfaction through reliable products and comprehensive warranty support.

chamberlain 050actwf manual

Chamberlain 050ACTWF Manual: A Comprehensive Guide

This guide provides detailed instructions for the Chamberlain 050ACTWF garage door opener, covering installation, programming, maintenance, and troubleshooting, alongside PDF resources․

The Chamberlain 050ACTWF is a chain drive garage door opener designed for residential use, offering reliable performance and security․ While now discontinued, it remains a popular model with many homeowners․ This manual serves as a comprehensive resource for those who own or are installing this specific opener․

Understanding its features and proper operation is crucial for maximizing its lifespan and ensuring safe usage․ This opener typically includes a robust chain drive system, safety sensors, and compatibility with various remote controls․ Accessing the installation manual, available as a PDF, is highly recommended for complete instructions․

Despite being a discontinued part, replacement options and support resources are still available through Chamberlain’s website and authorized dealers․

Understanding the Discontinued Status of 050ACTWF

The Chamberlain 050ACTWF has been officially discontinued as a current model․ This doesn’t mean it’s unsupported, but rather that Chamberlain no longer manufactures this specific unit․ Discontinuation often occurs as manufacturers release newer models with updated features, improved safety standards, or enhanced technology․

Despite its discontinued status, many 050ACTWF openers remain in service․ Finding replacement parts might require a bit more effort, but they are still generally available through various online retailers and Chamberlain’s support channels․

Owners should retain their installation manual for future reference, as it contains vital information for maintenance and repair․ Exploring replacement options for a complete upgrade is also advisable when parts become scarce․

Safety Precautions & Warnings

Always prioritize safety! Disconnect power before maintenance, avoid short-neck bulbs, and be aware of potential LED interference with remote controls․

General Safety Information

Prior to installing or servicing your Chamberlain 050ACTWF garage door opener, carefully review all provided safety information within the installation manual․ Garage door systems operate with significant force and can pose serious injury risks if not handled correctly․ Always disconnect the power supply to the opener before performing any maintenance or repairs․

Never allow children to operate the garage door or play near the opener․ Keep the remote controls out of reach of children․ Regularly inspect the garage door balance to ensure smooth operation and prevent unexpected closures․ Be mindful of pinch points and avoid placing hands or objects in the door’s path while it’s moving․ Follow all local safety codes and regulations during installation and operation․

Ensure proper adjustments and testing are completed after installation or any repairs․ A malfunctioning opener can create a hazardous situation․

Disconnecting Power Before Maintenance

Before undertaking any maintenance, repair, or even simple inspection of your Chamberlain 050ACTWF garage door opener, completely disconnect the power supply․ This is a crucial safety step to prevent accidental operation and potential injury․ Locate the circuit breaker that controls the garage door opener and switch it to the ‘off’ position․

Alternatively, you can unplug the opener directly from the electrical outlet, if accessible․ Confirm the power is off by attempting to operate the opener with the wall button or remote control – it should not respond․ Always double-check to ensure the power is truly disconnected before proceeding with any work․

Re-establish power only after all maintenance is completed and all components are securely reassembled․

Light Bulb Compatibility & LED Interference

The Chamberlain 050ACTWF opener has specific light bulb requirements to ensure optimal performance and prevent interference with remote control operation․ Avoid using short-neck or specialty light bulbs, as these can cause issues․ Crucially, LED bulbs can sometimes generate radio frequency interference, disrupting the signal between the remote and the opener․

To mitigate this, Chamberlain recommends using only LED bulbs listed as compatible on their website: chamberlain․com/bulb․ Using an incompatible LED bulb may result in reduced remote control range or intermittent operation․ If you experience issues after installing an LED, try a different bulb or revert to an incandescent bulb․

Always check the wattage rating and ensure it doesn’t exceed the opener’s maximum limit․

Installation Guide

Proper installation involves removing the light lens, disconnecting power, and carefully assembling the Chamberlain chain drive opener, following the detailed manual instructions․

Removing the Light Lens

Before beginning any installation or maintenance procedures on your Chamberlain 050ACTWF garage door opener, safely removing the light lens is a crucial first step․ The process is generally straightforward, designed for ease of access․ According to available resources, you should gently pull down on the light lens to detach it from the opener housing․

It’s important to avoid excessive force during this step, as the lens is typically held in place by clips or a friction fit․ Inspect the lens and surrounding area for any damage before proceeding․ Once removed, set the light lens aside in a safe location to prevent breakage or loss during the subsequent installation phases․ Refer to your complete installation manual for visual aids and specific instructions tailored to your model․

Disconnecting Power to the Garage Door Opener

Prioritizing safety is paramount when working with electrical devices like your Chamberlain 050ACTWF garage door opener․ Before undertaking any maintenance, installation, or troubleshooting, completely disconnect the power supply․ Locate the garage door opener’s power source – typically a standard electrical outlet․

Simply switching off the wall switch is insufficient; physically unplug the opener from the outlet․ This ensures a complete power disconnection, preventing accidental activation during your work․ Double-check that the opener is fully de-energized before proceeding․ Refer to your owner’s manual for specific safety guidelines and warnings related to electrical disconnection․ This critical step minimizes the risk of electric shock and ensures a safe working environment․

Assembling the Chamberlain Chain Drive Opener

Carefully unpack all components of your Chamberlain 050ACTWF chain drive opener, verifying that all listed parts are present․ Begin by attaching the rail sections together, ensuring secure connections as per the installation manual’s diagrams․ Next, mount the assembled rail to the ceiling supports, utilizing appropriate hardware for your ceiling type․

Then, carefully position the opener unit onto the rail assembly, aligning it correctly․ Securely fasten the opener to the rail, ensuring a stable and vibration-free connection․ Finally, connect the chain to the garage door, adjusting the chain tension for smooth operation․ Refer to the detailed instructions within your owner’s manual for precise assembly guidance․

Programming & Remote Control Setup

Successfully program your Chamberlain 050ACTWF with easy initial steps, ensuring remote compatibility and resolving potential interference issues for seamless control․

Initial Programming Steps

To begin programming your Chamberlain 050ACTWF, first ensure the garage door opener has power and is in learning mode․ Typically, this involves pressing and releasing the ‘Learn’ button on the motor unit – its location is detailed in the full installation manual․

Next, within 30 seconds of activating learning mode, press and hold the button on your remote control until the garage door opener light flashes, indicating successful programming․ Repeat this process for each additional remote you wish to pair with the system․

If programming fails, verify the battery in the remote and repeat the steps․ Consult the comprehensive PDF manual for detailed diagrams and troubleshooting tips to ensure a smooth setup process․

Remote Control Compatibility

The Chamberlain 050ACTWF is generally compatible with a wide range of Chamberlain and LiftMaster remote controls utilizing rolling code technology․ However, compatibility isn’t universal; older, non-rolling code remotes may require a compatibility bridge or may not function at all․

Specifically, remotes with frequencies around 390 MHz are typically supported․ Checking the PDF manual or Chamberlain’s website for a current compatibility list is highly recommended before purchasing new remotes․

LED bulb interference can sometimes affect remote signal strength, so using Chamberlain-approved bulbs is crucial for reliable operation․ Always refer to the official documentation for the most accurate information․

Troubleshooting Remote Control Issues

If your Chamberlain 050ACTWF remote isn’t working, first ensure the batteries are fresh and correctly installed․ Next, try reprogramming the remote following the instructions in the installation manual․ Interference from LED bulbs is a common culprit; switch to Chamberlain-approved bulbs to test․

Check for obstructions between the remote and the garage door opener․ If multiple remotes are affected, the receiver in the opener might be the issue․ A factory reset, detailed in the PDF manual, can sometimes resolve this․

Finally, verify compatibility – older remotes may not work with rolling code systems․

Maintenance & Troubleshooting

Regular upkeep and addressing operational problems promptly ensures longevity and safety of your Chamberlain 050ACTWF opener; check the door balance frequently․

Regular Maintenance Schedule

To ensure optimal performance and extend the lifespan of your Chamberlain 050ACTWF garage door opener, a consistent maintenance schedule is crucial․ Inspect the chain or belt drive monthly for proper tension and lubrication, applying a suitable lubricant as needed․

Check all hardware – bolts, nuts, and brackets – quarterly, tightening any that are loose․ Examine the door tracks for obstructions and ensure smooth roller movement․ Test the safety reversal system monthly by placing an object in the door’s path;

Clean the opener’s lens and housing annually to remove dust and debris․ Finally, visually inspect wiring for any signs of damage or wear, addressing issues promptly to prevent potential hazards․

Addressing Common Operational Problems

If your Chamberlain 050ACTWF opener isn’t responding, first verify the power supply and check the circuit breaker․ For doors that reverse unexpectedly, examine the safety sensors, ensuring they are aligned and free from obstructions․ Remote control issues often stem from battery depletion or programming conflicts – re-program the remote following the manual’s instructions․

Grinding noises may indicate a need for chain or belt lubrication․ Slow operation could be due to a binding door; inspect the tracks and rollers․ If the door only opens or closes partially, adjust the travel limits․ Always disconnect power before attempting any repairs․

Checking the Garage Door Balance

A properly balanced garage door is crucial for safe and reliable operation with your Chamberlain 050ACTWF opener․ To test, manually disconnect the opener using the emergency release cord․ Then, gently lift the door halfway; it should remain stationary, not drift up or down․

If the door feels heavy or moves on its own, the springs are likely unbalanced and require professional adjustment․ Do not attempt to adjust the springs yourself, as this can be dangerous․ Inspect the door’s tracks and rollers for any obstructions or damage that might affect balance․ Regularly checking balance prevents strain on the opener․

Warranty Information

Maintaining warranty validity requires proper installation and adherence to guidelines; review coverage details within the Chamberlain 050ACTWF manual for specific terms․

Maintaining Warranty Validity

To ensure your Chamberlain 050ACTWF warranty remains valid, meticulous adherence to the installation and operational guidelines outlined in the owner’s manual is crucial․ Retain proof of purchase, as this serves as primary documentation for any warranty claims․ Regular maintenance, performed according to the recommended schedule, demonstrates responsible ownership and supports your claim․

Modifications or repairs performed by unauthorized personnel will immediately void the warranty․ Utilizing non-approved replacement parts also compromises coverage․ Carefully review the warranty documentation for specific exclusions and limitations․ Proper use of the opener, avoiding overloading or misuse, is essential․ Following these steps safeguards your investment and ensures access to warranty benefits should the need arise․

Warranty Coverage Details

The Chamberlain 050ACTWF warranty typically covers defects in materials and workmanship for a specified period, often one year from the date of purchase․ This coverage encompasses the motor, gear case, and electronic components․ However, wear-and-tear items like belts, chains, and light bulbs are generally excluded․

Warranty service involves repair or replacement of defective parts, at Chamberlain’s discretion․ Labor costs for warranty repairs may or may not be covered, depending on the specific terms․ The warranty does not extend to damage caused by improper installation, misuse, accidents, or unauthorized modifications․ Refer to the full warranty statement for complete details and limitations․

Resources & Documentation

Access the 050ACTWF installation manual in PDF format, explore the Chamberlain support website, and locate replacement parts for your opener easily․

Downloading the 050ACTWF Installation Manual (PDF)

Obtaining the official Chamberlain 050ACTWF installation manual in PDF format is crucial for a safe and successful setup․ This comprehensive document, spanning 12 pages, details every step of the process, from unpacking and assembly to programming and safety precautions․

Users can readily download this essential resource from various online platforms dedicated to garage door opener support․ The PDF version allows for convenient offline access, enabling you to refer to the instructions at any time, even without an internet connection․

Ensure you download the manual from a trusted source to guarantee its authenticity and completeness․ Having this manual readily available will significantly simplify the installation and maintenance of your Chamberlain 050ACTWF opener․

Chamberlain Support Website

Chamberlain’s official support website serves as a central hub for all 050ACTWF related resources, despite the model being discontinued․ It provides access to frequently asked questions, troubleshooting guides, and helpful articles addressing common operational issues․

The website also features a dedicated section for finding replacement parts, crucial for maintaining your opener’s functionality over time․ Furthermore, users can explore detailed information regarding LED bulb compatibility to avoid potential remote control interference․

Directly accessing chamberlain․com allows you to stay updated on the latest support information and connect with Chamberlain’s customer service team for personalized assistance․ This online platform is an invaluable asset for 050ACTWF owners․

Finding Replacement Parts

Locating replacement parts for the discontinued Chamberlain 050ACTWF requires a strategic approach․ While direct availability may be limited, Chamberlain’s website offers guidance on compatible alternatives for various components․

Third-party retailers specializing in garage door opener parts often stock components suitable for this model, including chains, gears, and remote controls․ Providing the 050ACTWF model number when searching is crucial for accurate results․

Consider exploring LiftMaster’s website as well, as many parts are interchangeable between the two brands․ Carefully review part specifications to ensure compatibility before purchasing, guaranteeing a proper fit and optimal performance․

Technical Specifications

The 050ACTWF features a chain drive, horsepower ratings vary, and requires standard 120V power; detailed specifications are available in the installation manual․

Detailed Specifications of the 050ACTWF

The Chamberlain 050ACTWF is a ½ horsepower chain drive garage door opener designed for standard sectional doors․ It operates on a 120V AC power supply, with a 60Hz frequency․ The unit features a lifting capacity suitable for single-car garages, typically accommodating doors weighing up to 350 pounds․

Its chain drive system provides reliable performance, though it may be louder than belt-drive models․ The opener includes a rolling code technology for enhanced security, preventing unauthorized access․ The motor voltage is 120V, and the maximum vertical travel is often around 7 feet․ Refer to the official installation manual for precise dimensions and weight limits, as variations may exist based on specific configurations․

Detailed electrical specifications, including amperage draw, are also outlined within the documentation․

Power Requirements

The Chamberlain 050ACTWF garage door opener requires a standard 120-volt AC (alternating current) power supply, operating at a frequency of 60 Hertz․ A dedicated 15-amp circuit is generally recommended to prevent overloading and ensure reliable operation․

It’s crucial to verify that the electrical outlet used is properly grounded for safety․ Avoid using extension cords, as they can reduce power delivery and pose a fire hazard․ The opener’s power consumption varies during operation, with higher draw during door movement and lower draw in standby mode․

Always disconnect power at the breaker before performing any maintenance or wiring adjustments․ Consult a qualified electrician if you are unsure about your electrical setup․

Frequently Asked Questions (FAQ)

Q: My remote isn’t working․ What should I do? A: First, check the battery․ Then, reprogram the remote following the instructions in the manual․ Interference from LED bulbs can also be a cause․

Q: The garage door opens partway and stops․ A: This could indicate a balance issue or obstruction․ Check the door’s balance and clear any obstacles․

Q: Is the 050ACTWF still in production? A: No, it’s discontinued․ Replacement options are available through Chamberlain’s website․

Q: Where can I find a PDF of the manual? A: Links to the PDF installation manual are provided in the Resources section of this guide․

manufacturing and associated industries award pay guide

Manufacturing and Associated Industries Award Pay Guide ー 2026

This comprehensive guide details 2026 pay rates for the Manufacturing and Associated Industries Award (MA000010)‚ covering Australian employees in relevant sectors.
It ensures compliance with Fair Work Commission rulings and annual wage reviews‚ including the 3.75% increase effective July 1‚ 2025.

The Manufacturing and Associated Industries and Occupations Award 2020 (MA000010) is a legally binding document established under Australia’s Fair Work Act 2009. It outlines the minimum employment terms and conditions for a broad spectrum of employees engaged in manufacturing‚ engineering‚ and related technical roles across the nation. This award serves as a cornerstone for fair labor practices within these vital industries.

Its primary function is to define minimum pay rates‚ applicable allowances‚ and essential work conditions‚ ensuring a baseline standard for employee welfare. The award’s scope extends to employers operating throughout Australia who employ personnel within the specified occupations. A detailed listing of covered occupations‚ alongside any exclusions‚ can be found within Clause 4 of the award itself.

Understanding this award is crucial for both employers and employees to guarantee adherence to legal requirements and foster a productive‚ equitable work environment. Regular reviews by the Fair Work Commission ensure the award remains relevant and responsive to evolving economic conditions and industry standards.

Coverage of the Award

The Manufacturing and Associated Industries and Occupations Award 2020 (MA000010) broadly encompasses employees involved in manufacturing‚ production‚ processing‚ and a diverse range of associated industries throughout Australia. This includes roles within engineering‚ technical trades‚ and various operational functions supporting these core activities.

Specifically‚ the award covers employers operating within these sectors nationwide. However‚ it’s vital to consult Clause 4 of the award for a comprehensive and definitive list of covered occupations. This clause details the specific job titles and classifications that fall under the award’s jurisdiction‚ as well as outlining any potential exclusions.

Determining coverage requires careful consideration of the employee’s primary duties and the nature of the employer’s business. The award’s application isn’t solely based on industry classification; the specific work performed is paramount. Employers are responsible for accurately classifying their workforce to ensure compliance with the award’s provisions and avoid potential underpayment issues.

Key Dates and Pay Review Cycles

The Manufacturing and Associated Industries and Occupations Award operates on established key dates and review cycles‚ crucial for employer compliance. A significant date is July 1st‚ marking the typical effective date for annual wage adjustments determined by the Fair Work Commission. In 2025‚ a 3.75% wage increase took effect from this date.

The Fair Work Commission undertakes annual reviews of modern awards‚ including this one‚ to ensure minimum pay rates remain aligned with economic conditions and cost of living adjustments. These reviews typically conclude in the late June/early July timeframe‚ with decisions published shortly thereafter.

Employers must proactively monitor Fair Work Commission announcements and updates to implement any changes promptly. Pay rates are subject to change‚ and adherence to the correct rates is legally mandated. Regular internal audits of payroll systems are recommended to verify accurate application of award provisions throughout each pay cycle. Staying informed is key to avoiding penalties.

General Minimum Wage Adjustments (July 1‚ 2025)

Effective July 1‚ 2025‚ the Manufacturing and Associated Industries and Occupations Award experienced a general minimum wage adjustment of 3.75%. This increase‚ determined by the Fair Work Commission‚ applies to all employees covered under the award‚ impacting base rates of pay across all classification levels.

This adjustment reflects the Commission’s assessment of economic factors and the need to maintain fair compensation for workers. Employers were required to update their payroll systems to reflect these new rates‚ ensuring all employees receive the correct entitlements from the specified date.

It’s crucial to note that this percentage increase is applied to the existing base rate for each classification level‚ as defined in Schedule A of the award. Employers should consult the official pay guide and relevant documentation to accurately calculate the revised pay rates for their workforce. Failure to comply with these adjustments can result in significant penalties.

Understanding Classification Structures (Schedule A)

Schedule A of the Manufacturing and Associated Industries and Occupations Award 2020 details the classification structure used to determine appropriate pay rates for employees. This schedule outlines various levels – currently ranging from Level 1 to Level 5 – each defined by specific skill sets‚ responsibilities‚ and levels of autonomy.

Correct classification is paramount; employers must accurately assess each employee’s duties against the criteria outlined in Schedule A. Misclassification can lead to underpayment or overpayment of wages‚ resulting in legal repercussions. The platform does not automatically update employee levels after three months at a lower level; manual updates are required.

Understanding these definitions is vital for both employers and employees. The schedule provides a clear framework for determining fair compensation based on the complexity and demands of the role. Employers should regularly review classifications to ensure they remain accurate as job duties evolve.

Level 1 Classification ― Pay Rates

Employees classified as Level 1 under the Manufacturing and Associated Industries and Occupations Award generally perform routine tasks under close supervision. These roles typically involve limited skill and experience‚ focusing on basic operational duties. As of July 1‚ 2025‚ following the 3.75% increase‚ the minimum weekly pay rate for Level 1 is subject to specific conditions.

The base rate for Level 1 employees is dependent on whether they are covered by Vehicle Manufacturing provisions. It’s crucial to note potential rounding discrepancies when calculating casual loading and the all-purpose industry allowance‚ which may affect the final pay rate displayed on pay guides. Employers must verify calculations carefully.

Important Note: Always consult the official Fair Work Commission pay rates and schedules for the most accurate and up-to-date information. These rates are minimums‚ and employers may choose to pay above the award rate. Regular review of pay rates is essential for compliance.

Level 2 Classification ― Pay Rates

Level 2 classifications within the Manufacturing and Associated Industries Award encompass roles requiring a degree of experience and skill‚ often involving work under general supervision. Employees at this level typically handle more complex tasks than those in Level 1‚ demonstrating increasing competence and responsibility. The minimum weekly pay rate for Level 2‚ adjusted by the 3.75% increase from July 1‚ 2025‚ requires careful consideration.

Unlike automatic progression from Level 1‚ advancement to Level 2 necessitates a manual update to each employee’s profile. The base rate may vary‚ particularly for those in Vehicle Manufacturing‚ due to potential rounding issues affecting casual loading and the all-purpose industry allowance calculations. Accurate record-keeping is vital.

Crucially‚ employers should always cross-reference pay rates with official Fair Work Commission resources to ensure full compliance. Award rates represent minimum standards‚ and employers retain the option to offer higher remuneration.

Level 3 Classification ー Pay Rates

Level 3 classifications within the Manufacturing and Associated Industries Award signify a substantial increase in skill and responsibility. Employees at this level generally operate with limited supervision‚ exercising independent judgment and contributing to problem-solving within their teams. They often possess specialized knowledge relevant to their specific role. The updated pay rates‚ reflecting the 3.75% increase from July 1‚ 2025‚ are critical for compliant payroll management.

As with Level 2‚ progression to Level 3 isn’t automatic; manual updates to employee profiles are essential. Discrepancies may arise in Vehicle Manufacturing due to rounding impacts on casual loading and allowances. Employers must prioritize accuracy in calculations.

Remember‚ these rates are minimums established by the Fair Work Commission. Employers are encouraged to consult official sources and may choose to exceed these minimums based on performance and experience. Consistent monitoring of Fair Work updates is paramount.

Level 4 Classification ー Pay Rates

Level 4 employees within the Manufacturing and Associated Industries Award demonstrate considerable expertise and often take on mentoring or training responsibilities for lower-level staff. They typically handle complex tasks requiring in-depth technical knowledge and contribute significantly to process improvements. Accurate classification is vital for ensuring fair compensation and legal compliance‚ especially considering the 3.75% wage increase effective July 1‚ 2025.

It’s crucial to remember that the platform doesn’t automatically advance employees; manual profile updates are necessary. Potential rounding discrepancies affecting casual loading and all-purpose allowances may occur within Vehicle Manufacturing‚ demanding careful calculation.

Employers should consistently verify rates against official Fair Work Commission publications. While these represent minimum standards‚ exceeding them based on individual performance is encouraged. Staying informed about evolving regulations is essential for maintaining a compliant and motivated workforce.

Level 5 Classification ー Pay Rates

Level 5 classifications represent the highest skill level within many roles covered by the Manufacturing and Associated Industries Award. These employees possess advanced technical expertise‚ often leading projects‚ resolving complex issues‚ and driving innovation within their teams. They demonstrate independent judgment and require minimal supervision‚ contributing directly to organizational success. Remember the 3.75% wage increase from July 1‚ 2025‚ must be applied correctly.

Employers must ensure accurate classification‚ as underpayment can lead to significant penalties. Be aware of potential rounding issues‚ particularly in Vehicle Manufacturing‚ impacting casual loading and allowances. Manual updates to employee profiles are necessary for progression; the system doesn’t automate this process.

Always prioritize referencing official Fair Work Commission resources for the most up-to-date and accurate pay rate information. Maintaining compliance is paramount for a positive and productive work environment.

Vehicle Manufacturing Rate Considerations

Employees specifically engaged in Vehicle Manufacturing under the Manufacturing and Associated Industries Award require careful attention to pay rate calculations. Due to system limitations‚ the base rate displayed on standard pay guides may not precisely align with the actual amount payable. This discrepancy arises from the complex interaction between casual loading application and the All-Purpose Industry Allowance.

Employers must meticulously verify calculations‚ accounting for these factors to ensure accurate wage disbursement. The system’s rounding processes can introduce minor variations‚ necessitating manual adjustments in some cases. It’s crucial to understand that the award sets minimum standards‚ and employers can offer higher rates if desired.

Regularly consult official Fair Work Commission publications and resources to stay informed about any updates or clarifications regarding Vehicle Manufacturing rates. Accurate pay is vital for maintaining a compliant and motivated workforce.

Casual Loading Application

The Manufacturing and Associated Industries Award mandates a specific casual loading for all eligible casual employees. This loading compensates for the lack of benefits typically afforded to permanent staff‚ such as paid leave entitlements. Accurate application of this loading is paramount for compliance with Fair Work regulations and avoiding underpayment claims.

The standard casual loading percentage is determined by the Award and must be consistently applied to the base rate of pay for each casual employee. Employers should carefully review the Award’s provisions to confirm the current loading percentage. It’s important to note that casual loading is in addition to any applicable allowances or overtime payments.

System calculations‚ as noted‚ can sometimes introduce rounding discrepancies‚ particularly when combined with the All-Purpose Industry Allowance. Therefore‚ employers should routinely audit payroll data to ensure the casual loading is correctly calculated and applied to each casual employee’s wages.

All-Purpose Industry Allowance

The All-Purpose Industry Allowance‚ as defined within the Manufacturing and Associated Industries Award‚ provides an additional payment to employees recognizing the demands and conditions inherent in the manufacturing sector. This allowance is intended to compensate workers for tasks requiring versatility and adaptability across various roles and responsibilities.

The specific amount of the allowance is outlined in the Award’s schedules and may vary based on classification level. Employers must ensure they are applying the correct allowance amount corresponding to each employee’s designated classification. It’s crucial to understand that this allowance is separate from‚ and in addition to‚ base rates of pay and casual loading.

However‚ be aware that the system’s calculation of this allowance‚ when combined with casual loading‚ can sometimes result in rounding issues affecting the final pay rate. Regular verification of payroll calculations is recommended to guarantee accurate allowance application and prevent discrepancies.

Allowances Included in the Award

The Manufacturing and Associated Industries Award 2020 incorporates several allowances beyond the All-Purpose Industry Allowance‚ designed to address specific working conditions and employee responsibilities. These allowances aim to provide fair compensation for tasks or situations that deviate from standard duties.

While a comprehensive list is available within the full Award documentation‚ common allowances include provisions for shift work‚ overtime‚ and potentially hazardous work environments. Employers are legally obligated to correctly identify when these allowances apply and accurately incorporate them into employee pay.

It’s vital to consult the official Fair Work Commission resources and the Award itself for detailed information on eligibility criteria and payment rates for each allowance. Misinterpretation or incorrect application of allowances can lead to underpayment of wages and potential legal ramifications. Thorough understanding and diligent application are paramount for compliance.

Overtime and Penalty Rates

The Manufacturing and Associated Industries Award 2020 meticulously outlines provisions for overtime and penalty rates‚ ensuring employees are appropriately compensated for work performed outside standard hours. Overtime typically applies to hours worked beyond the ordinary span of hours‚ as defined by the Award and any relevant enterprise agreements.

Penalty rates are applicable for work performed on weekends‚ public holidays‚ and potentially during specific shift times. These rates are calculated as a percentage above the ordinary hourly rate‚ varying depending on the day and time worked. Accurate record-keeping of hours worked is crucial for correct overtime and penalty rate calculations.

Employers must adhere strictly to the Award’s stipulations regarding overtime authorization and limitations. Failure to do so can result in significant penalties. Consulting the official Fair Work Commission resources and the Award document itself is essential for understanding the complexities of overtime and penalty rate application.

Fair Work Commission Resources

The Fair Work Commission (FWC) serves as the primary authority for information regarding the Manufacturing and Associated Industries Award 2020 (MA000010). Their website (www.fwc.gov.au) provides direct access to the full Award document‚ ensuring employers and employees have the most up-to-date and legally sound information.

The FWC offers a range of resources‚ including detailed explanations of Award provisions‚ pay rate calculators‚ and guidance on interpreting complex clauses. They also provide access to decisions and rulings related to the Award‚ offering valuable insights into its application in specific scenarios.

Furthermore‚ the FWC’s Infoline (1300 799 722) offers direct assistance from experienced advisors who can answer questions and provide clarification on Award-related matters. Utilizing these resources is vital for maintaining compliance and fostering a fair and productive work environment. Always prioritize official FWC sources for accurate guidance.

Where to Find Official Pay Guides and Updates

Accessing official and current pay guides is crucial for compliance with the Manufacturing and Associated Industries Award 2020. The primary source is the Fair Work Ombudsman (FWO) website (www.fairwork.gov.au)‚ which hosts regularly updated pay rate tables and guides specifically for this Award.

The FWO also provides a Pay Calculator tool‚ simplifying the process of determining correct wages based on classification‚ experience‚ and any applicable allowances. Subscribing to the FWO’s email updates ensures you receive notifications regarding any changes to the Award or minimum wage adjustments.

Additionally‚ the Fair Work Commission (FWC) website (www.fwc.gov.au) publishes official Award documents and decisions. Regularly checking these sources‚ alongside the FWO‚ guarantees you’re utilizing the most accurate and legally compliant information available. Relying on unofficial sources can lead to costly errors.

Impact of Economic Factors on Wages (Q2 2025 Trends)

Economic conditions significantly influence wage trends within the Manufacturing and Associated Industries. Data from Q2 2025 reveals a decrease in average weekly wages‚ falling from AUD 1740.70 in Q4 2024 to AUD 1715.50. This decline reflects broader economic pressures impacting the sector‚ including fluctuating material costs and shifts in demand.

Despite the overall decrease‚ the Fair Work Commission’s mandated 3.75% wage increase from July 1‚ 2025‚ aims to mitigate the effects of inflation and maintain employee purchasing power. However‚ employers must carefully balance these increases with their own financial constraints.

Ongoing monitoring of key economic indicators – inflation rates‚ GDP growth‚ and industry-specific performance – is vital for informed wage planning; These factors will continue to shape wage expectations and negotiations throughout 2025 and beyond‚ impacting businesses and employees alike within the manufacturing landscape.