Month: September 2025

dog clipper guide combs size chart

Dog Clipper Guide Combs: A Comprehensive Size Chart & Guide (Updated 02/08/2026)

Navigating the world of dog grooming requires the right tools, and guide combs are essential for achieving consistent, professional results at home, saving on groomer fees.

Dog clipper guide combs are attachments that slide onto the clipper blade, dictating the length of the fur left behind after clipping. They are indispensable tools for pet owners embracing home grooming, offering a cost-effective alternative to frequent professional visits. These combs come in a variety of sizes, each corresponding to a specific hair length, allowing for precise control over your dog’s appearance.

Understanding these combs is crucial, as selecting the appropriate size directly impacts the final groom. The right comb ensures a comfortable and aesthetically pleasing result for your canine companion. Without guide combs, achieving an even length and avoiding accidental nicks or uneven patches becomes significantly more challenging. They transform a potentially daunting task into a manageable and rewarding experience, fostering a stronger bond with your pet through attentive care.

Why Use Guide Combs?

Employing guide combs during dog grooming offers numerous advantages, primarily ensuring a consistent and uniform haircut. They eliminate the guesswork involved in freehand clipping, minimizing the risk of uneven patches or accidentally cutting the coat too short. This is particularly beneficial for beginners or those lacking extensive grooming experience.

Furthermore, guide combs protect your dog’s skin from the clipper blade, reducing the chance of irritation or injury. They allow for a safer and more comfortable grooming session for your pet. By utilizing different comb sizes, you can achieve a variety of styles, from a close shave to a longer, fluffier coat, all while maintaining control and precision. Ultimately, guide combs empower owners to confidently maintain their dog’s hygiene and appearance at home.

Benefits of Consistent Grooming

Regular grooming, facilitated by tools like guide combs, extends far beyond aesthetics, profoundly impacting a dog’s overall health and well-being. Consistent brushing and clipping prevent matting, which can cause painful skin irritation and harbor parasites. Grooming also stimulates blood circulation, promoting a healthy coat and skin.

Early and frequent handling during grooming sessions helps desensitize your dog, reducing anxiety during future veterinary visits or other potentially stressful situations. Moreover, grooming provides an excellent opportunity to check for lumps, bumps, or skin abnormalities that might require veterinary attention. A well-groomed dog is a happier, healthier dog, and consistent care strengthens the bond between pet and owner, fostering a loving and trusting relationship.

Understanding Guide Comb Sizes

Guide comb sizes dictate the final hair length, ranging from very short to longer lengths, and are crucial for achieving the desired aesthetic and breed standard.

Standard Guide Comb Sizes (A1 to A10)

The most common system utilizes numbered guide combs, typically ranging from A1 to A10, each corresponding to a specific hair length after clipping. An A1 comb generally leaves approximately 1/16 inch of hair, creating a very close shave often used for sanitary trims or detailed work. As the number increases, so does the hair length. An A2 comb typically cuts to 1/8 inch, while an A3 leaves 3/16 inch.

Progressing through the sizes, an A4 comb is around 1/4 inch, an A5 around 5/16 inch, and an A6 around 3/8 inch. The A7 comb generally leaves 1/2 inch, offering a slightly longer trim. Combs A8, A9, and A10 typically cut to 5/8 inch, 3/4 inch, and 7/8 inch respectively, providing progressively fuller coats. These standard sizes offer versatility for various breeds and grooming styles, allowing for precise control over the final appearance. Understanding these increments is key to achieving the desired look for your canine companion.

Metric Guide Comb Sizes

Alongside the standard numbered system, many manufacturers also offer guide combs measured in millimeters (mm), providing an alternative for groomers accustomed to metric measurements. These sizes directly correlate to the approximate hair length left after clipping. A #10 comb, for example, is roughly equivalent to a 3mm comb, leaving about 3 millimeters of hair.

Common metric sizes include 3mm, 6mm, 9mm, 12mm, 15mm, 19mm, and 25mm, each offering a distinct length. A 3mm comb is ideal for very short trims, while a 6mm comb provides a slightly longer, more natural look. Larger sizes, like 19mm and 25mm, are suitable for fluffier coats or breeds requiring a fuller appearance. Converting between imperial (numbered) and metric sizes is helpful for groomers using a variety of comb sets, ensuring consistent results regardless of the measurement system.

Relationship Between Comb Size and Hair Length

Understanding the direct correlation between guide comb size and the resulting hair length is crucial for achieving your desired grooming outcome. Lower numbered (or smaller millimeter) combs leave shorter hair, creating a closer cut, often used for sanitary trims or achieving a sleek, show-ready appearance. Conversely, higher numbered (or larger millimeter) combs leave longer hair, ideal for maintaining a fuller coat or achieving a softer, more natural look.

Generally, each increment in comb size adds approximately 1/8 to 1/4 inch of hair length. A #10 comb typically leaves around 1/8 inch, while a #7 might leave 1/2 inch. However, coat texture and density can influence the final length, so it’s always wise to start with a longer comb and gradually decrease the size if needed.

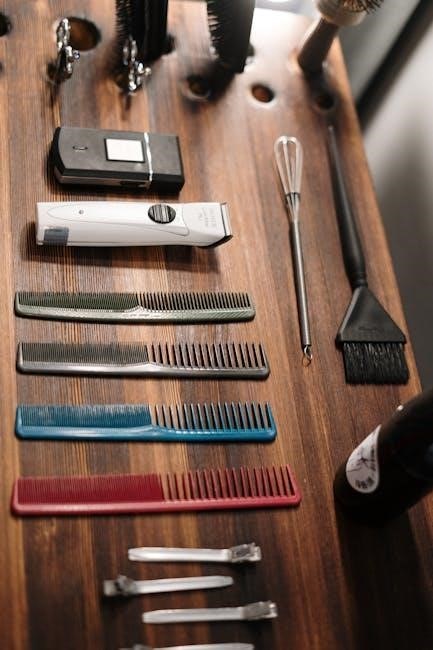
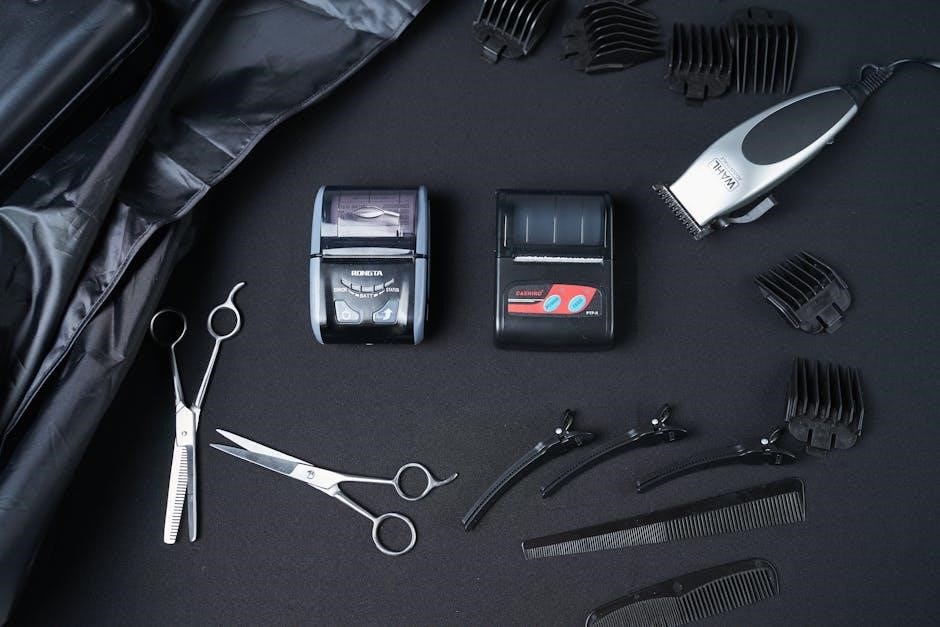
Types of Guide Combs

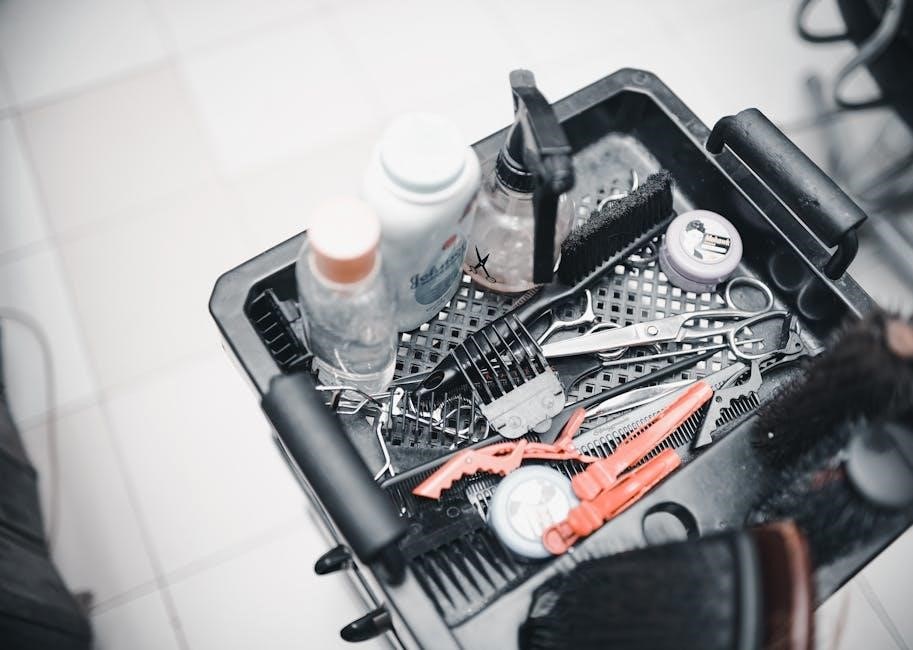
Guide combs come in diverse materials and attachment styles, impacting performance and usability; plastic, metal, snap-on, and detachable options exist for varied grooming needs.

Plastic Guide Combs

Plastic guide combs are a popular choice for many dog owners due to their affordability and lightweight nature. They are generally less expensive than metal combs, making them a great option for beginners or those on a budget. The plastic material also helps to prevent overheating during use, which can be a concern with metal combs.

However, plastic combs may not be as durable as metal ones and can be prone to cracking or breaking with frequent use. They are best suited for dogs with softer coats and lighter grooming needs.

Furthermore, plastic combs often feature a snap-on design, offering easy attachment and removal from the clipper blade. This convenience is a significant advantage for quick coat adjustments during grooming sessions. Despite their limitations, plastic guide combs remain a practical and accessible option for many pet parents.

Metal Guide Combs

Metal guide combs represent a premium option for dog grooming, prized for their durability and precision. Constructed from stainless steel, these combs withstand rigorous use and maintain their shape, resisting bending or breaking that can occur with plastic alternatives. This robustness makes them ideal for tackling thick, dense, or matted coats, particularly on larger breeds.

Metal combs often feature a detachable design, securely clipping onto the clipper blade for a stable and consistent cut. While typically more expensive upfront, their longevity and performance justify the investment for professional groomers or owners committed to regular, high-quality grooming.

However, metal can heat up during extended use, requiring careful monitoring to prevent discomfort for the dog. Proper cleaning and maintenance are crucial to prevent rust and ensure optimal performance.

Snap-On vs. Detachable Combs

The choice between snap-on and detachable guide combs significantly impacts the grooming process and final result. Snap-on combs, as the name suggests, simply push onto the clipper blade, offering quick and easy changes between sizes. They are generally more affordable and convenient for occasional grooming or quick touch-ups.

However, snap-on combs can sometimes feel less secure, potentially shifting during use and leading to uneven cuts. Detachable combs, on the other hand, attach with a more robust locking mechanism, ensuring a stable and consistent cutting experience.

While requiring a slightly more involved attachment process, detachable combs are favored by professional groomers for their reliability and precision, especially when working with challenging coats or performing intricate styles.

Dog Clipper Combs Size Chart

Selecting the appropriate guide comb size is crucial for a successful groom; this chart categorizes combs by breed size, ensuring optimal coat length and comfort.

Small Breed Dog Comb Sizes (Under 20 lbs)

For petite pups weighing under 20 pounds, precision is key when selecting guide comb sizes. Breeds like Chihuahuas, Yorkshire Terriers, and Pomeranians generally benefit from shorter lengths to maintain a neat and manageable appearance. A #10 blade (1/16 inch) is often used for a very close shave, ideal for sanitary trims or creating a smooth, clean look.

More commonly, sizes A1 (1/8 inch) through A5 (1/2 inch) are preferred for body clipping, allowing for a softer, fluffier finish. A1 is excellent for a very short, even trim, while A5 provides a slightly longer, more forgiving length. Consider the dog’s coat type; smoother coats may look best with shorter lengths, while fluffier coats can handle slightly longer settings. Always start with a longer guard and work your way shorter if needed, prioritizing your dog’s comfort and avoiding skin irritation.

Medium Breed Dog Comb Sizes (20-50 lbs)

Medium-sized breeds, ranging from 20 to 50 pounds – think Beagles, Cocker Spaniels, and Bulldogs – offer more versatility in styling, requiring a broader range of guide comb sizes. Generally, these dogs do well with lengths between 1/2 inch and 1 inch. A5 (1/2 inch) remains a popular choice for an all-over trim, providing a neat and tidy appearance without being overly short.

For a slightly longer coat, A7 (7/8 inch) and A8 (1 inch) are excellent options, particularly for breeds with double coats that benefit from some length for insulation. Experimenting with different lengths can help you achieve the desired look, but remember to always clip with the grain of the fur to prevent irritation. Consider blending lengths using multiple comb sizes for a more natural, professional finish.

Large Breed Dog Comb Sizes (50+ lbs)

For larger breeds exceeding 50 pounds – such as German Shepherds, Labrador Retrievers, and Golden Retrievers – managing their substantial coats requires careful consideration of guide comb sizes. These dogs often benefit from longer lengths to maintain insulation and protect their skin. A8 (1 inch) and A10 (1.5 inches) are frequently used for a full-body trim, offering a balanced look that’s both practical and aesthetically pleasing.

If you prefer a shorter, more manageable coat, A7 (7/8 inch) can be a good starting point. Remember that larger breeds often have thicker coats, so a powerful clipper is essential. Blending different lengths with multiple comb sizes can create a more natural appearance, especially around the face and legs. Prioritize comfort and avoid clipping too close to the skin.

Choosing the Right Comb for Your Dog’s Coat

Selecting the appropriate guide comb hinges on your dog’s coat type – short, medium, or long – to ensure a comfortable and visually appealing grooming experience.

Short, Smooth Coats

For dogs with short, smooth coats like Boxers, Bulldogs, or Greyhounds, the goal is typically a very close, neat trim. Guide combs in the A1 (⅛ inch) to A4 (¼ inch) range are generally ideal. These smaller sizes allow you to achieve a clean, uniform look without removing too much length, maintaining the coat’s natural sleekness.

Begin with a higher number, like A4, and gradually work your way down if a shorter length is desired. Remember to always clip with the grain of the hair for a smoother finish and to avoid irritation. Avoid using larger combs, as they can leave the coat looking uneven and disproportionate. Regular grooming with these smaller combs helps maintain hygiene and prevents shedding, keeping your dog comfortable and looking their best.

Consider the dog’s skin sensitivity; a gentle touch and careful technique are crucial when working with short coats.

Medium-Length, Double Coats

Dogs with medium-length, double coats – such as Siberian Huskies, German Shepherds, or Pomeranians – require a different approach. These coats need to be thinned and managed to prevent matting and overheating. Guide combs ranging from A5 (⅜ inch) to A7 (⅝ inch) are often the most effective. These sizes allow you to remove some of the undercoat while maintaining sufficient length for insulation and protection.

Start with a longer comb (A7) and gradually decrease the size as needed, paying close attention to how the coat responds. Clipping against the grain can help lift the undercoat for more effective removal, but be cautious to avoid skin irritation. Regular grooming is vital to prevent matting, especially during shedding season.

Focus on thinning the coat rather than creating a drastically shorter style, preserving its natural functionality.

Long, Thick Coats

Breeds boasting long, thick coats – like Old English Sheepdogs, Bearded Collies, or Afghan Hounds – demand careful consideration when selecting guide comb sizes. These coats are prone to matting and require regular maintenance to stay healthy and manageable. Generally, combs ranging from A7 (⅝ inch) to A10 (1 inch) are suitable for maintaining length while removing excess bulk.

However, the specific size will depend on the desired style and the coat’s current condition. For a natural look, prioritize longer lengths and focus on blending. If matting is present, a slightly shorter comb (A7 or A8) may be necessary to remove it safely. Always clip in the direction of hair growth to minimize stress and prevent skin irritation.

Professional guidance is recommended for complex coat styles.

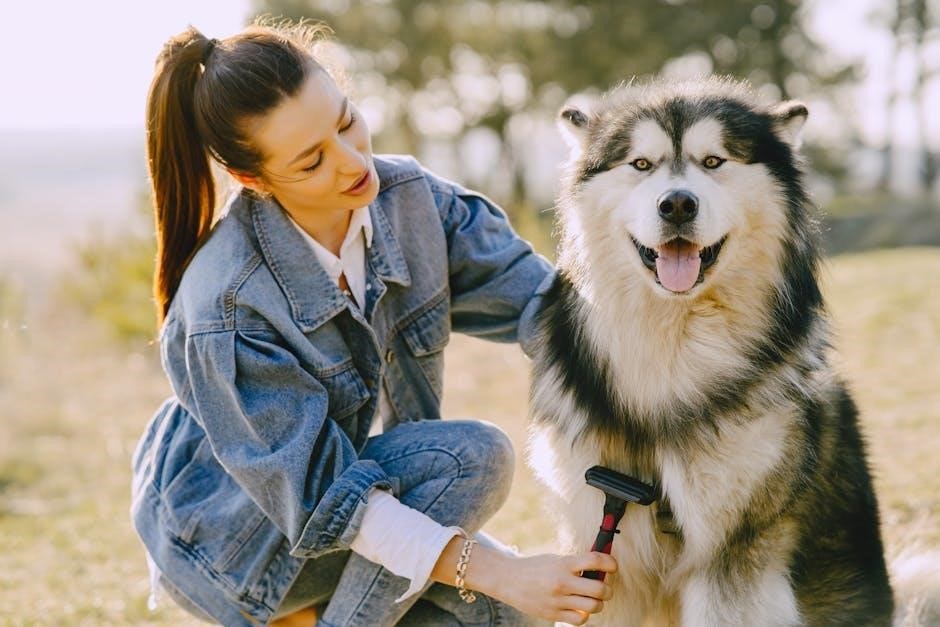
Using Guide Combs Effectively

Mastering guide comb use involves proper preparation, technique, and awareness of your dog’s comfort, ensuring a stress-free grooming experience with excellent results.

Preparing Your Dog for Grooming

Before initiating the grooming process, prioritize creating a calm and positive environment for your canine companion. Begin with a thorough brushing to eliminate mats and tangles, which can obstruct the clipper’s path and cause discomfort. A gentle massage can help relax your dog, easing any anxiety associated with the clippers.

Introduce the clippers gradually, allowing your dog to sniff and acclimate to the sound and vibration without turning them on initially. Once comfortable, briefly turn on the clippers at a distance, rewarding calm behavior with treats and praise. Ensure the chosen grooming space is well-lit and provides a secure, non-slip surface.

Finally, a pre-grooming bathroom break is advisable to prevent any unexpected interruptions during the clipping session. A relaxed and comfortable dog is far more receptive to grooming, resulting in a smoother and more enjoyable experience for both of you.

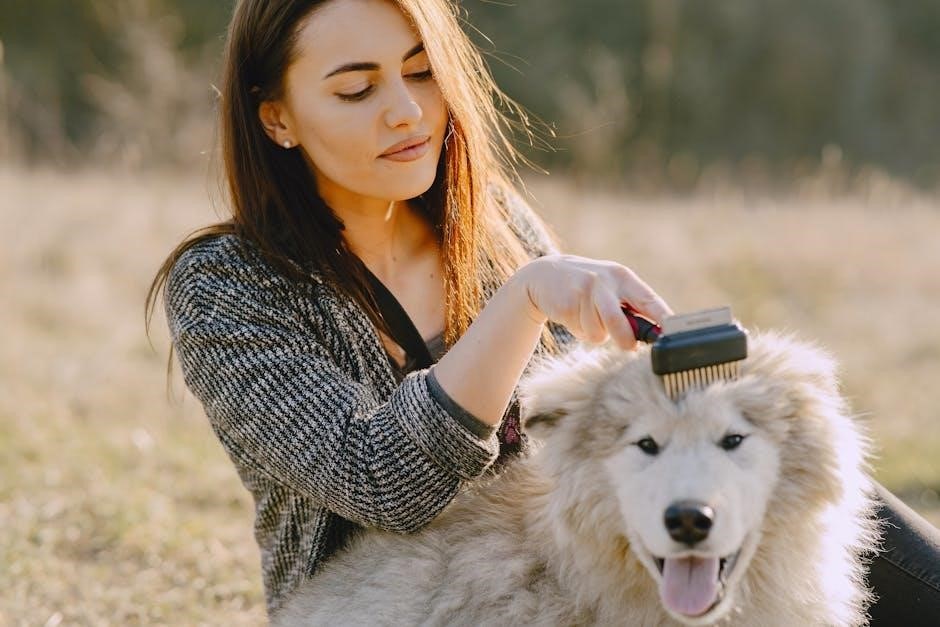
Proper Clipping Technique with Guide Combs

Achieving a professional finish with guide combs hinges on employing the correct clipping technique. Always clip with the grain of the fur, moving the clippers in the natural direction of hair growth to prevent irritation and ensure an even cut. Maintain a consistent speed and pressure throughout the process, avoiding abrupt starts and stops.

Begin with broad, sweeping motions, overlapping each pass slightly to eliminate lines and ensure complete coverage. For sensitive areas like the face and paws, use a lower speed setting and exercise extreme caution. Regularly check the comb attachment to confirm it remains securely fastened during operation.

Periodically brush away clipped hair to maintain visibility and prevent the clippers from overheating. Remember to take breaks if your dog becomes stressed, and always prioritize their comfort throughout the grooming session.

Avoiding Skin Irritation and Injury

Prioritizing your dog’s safety is paramount when using clipper guide combs. Always inspect the skin for any pre-existing conditions like cuts, rashes, or hot spots before beginning. Ensure the guide comb is securely attached and the blades are cool to the touch, preventing burns.

Avoid applying excessive pressure, which can cause skin irritation or even injury. If you encounter resistance, reassess the angle and technique rather than forcing the clippers. Pay close attention to bony areas and sensitive spots, like the ears and groin.

Regularly check the skin during clipping for any signs of redness or discomfort. Stop immediately if irritation occurs and consult a veterinarian if necessary. A calm, patient approach minimizes stress and reduces the risk of accidents.

Maintaining Your Guide Combs

Proper care extends the life of your guide combs, ensuring optimal performance and hygiene for your dog’s grooming needs consistently.

Cleaning Guide Combs

Regular cleaning is paramount for maintaining the effectiveness and hygiene of your dog clipper guide combs. After each use, meticulously remove all accumulated hair using a comb, brush, or even a specialized cleaning tool designed for this purpose. Don’t overlook the spaces between the metal and plastic components, as hair tends to build up in these areas.

For a deeper clean, wash the combs with warm, soapy water. Mild dish soap works well, but avoid harsh chemicals or abrasive cleaners that could damage the plastic or metal. Thoroughly rinse the combs under running water to remove all traces of soap;

Before storing, ensure the combs are completely dry to prevent rust or mildew growth. A soft cloth can be used to wipe them down. Disinfecting with a pet-safe spray is also a good practice, especially if you groom multiple dogs.

Storing Guide Combs

Proper storage significantly extends the lifespan of your dog clipper guide combs and keeps them organized for easy access. Ideally, store your combs in a dry, cool place away from direct sunlight and extreme temperatures, which can warp or damage the plastic components.

A dedicated storage case or pouch is highly recommended. Many clipper kits include a case specifically designed to hold the combs securely. If you don’t have one, a small plastic container or even a labeled zip-lock bag will suffice.

Avoid tossing the combs loosely into a drawer, as this can lead to scratches, bending, or loss of individual pieces. Keeping them organized by size also streamlines the grooming process. Regularly check the storage area for any signs of moisture or pests.

Replacing Worn-Out Combs

Over time, even with diligent care, dog clipper guide combs will inevitably show wear and tear, impacting their performance and potentially harming your pet’s skin. Regularly inspect your combs for chipped edges, cracks, or bending – these are clear indicators it’s time for a replacement.

Dull or damaged combs can pull at the fur, causing discomfort and uneven cuts. Replacing worn combs ensures a smooth, comfortable grooming experience for your dog. Don’t attempt to repair damaged plastic combs with glue, as this is often a temporary fix and can create sharp edges.

Consider replacing combs in pairs or sets to maintain consistency in your grooming results. Investing in quality replacement combs is a small price to pay for your dog’s comfort and a professional-looking finish.

Popular Guide Comb Brands

Andis, Wahl, and Oster are highly-regarded brands offering durable, reliable guide combs for various coat types and grooming needs, ensuring quality results.

Andis Guide Combs

Andis is a prominent name in professional grooming, consistently delivering high-quality clipper blades and guide combs favored by groomers and pet owners alike. Their guide combs are known for their robust construction and precise sizing, ensuring a smooth and even cut every time.

Andis offers a comprehensive range of guide combs, covering sizes A1 through A10, as well as specialized combs for specific breeds and coat textures. Many Andis combs feature color-coded rings for quick identification, streamlining the grooming process. They are compatible with most standard Andis clippers, providing versatility for various grooming tasks.

Beyond standard plastic combs, Andis also manufactures metal guide combs, offering increased durability and precision for demanding grooming applications. These metal combs are particularly useful for tackling thick or matted coats, providing a clean and consistent finish. Investing in Andis guide combs means investing in professional-grade tools designed for lasting performance.

Wahl Guide Combs

Wahl, a household name in grooming, provides a wide selection of guide combs designed for both professional and at-home use. Their combs are celebrated for their affordability and reliability, making them a popular choice for pet owners starting their grooming journey. Wahl guide combs are readily available in standard plastic sets, typically including sizes A1 to A10, catering to diverse coat lengths and breed requirements.

Wahl’s commitment to quality extends to the durability of their combs, ensuring they withstand regular use without cracking or warping. Many Wahl sets include snap-on combs, offering easy attachment and removal during grooming sessions. They are specifically engineered for compatibility with Wahl clippers, guaranteeing a secure fit and optimal performance.

For groomers seeking enhanced precision, Wahl also offers metal guide combs, providing a more robust and consistent cutting experience, especially on dense or challenging coats.

Oster Guide Combs

Oster is renowned within the professional grooming community for producing high-performance clippers and accessories, and their guide combs are no exception. Oster guide combs are built to withstand the demands of frequent, professional use, boasting exceptional durability and consistent cutting performance. They are available in both plastic and metal options, catering to different grooming preferences and coat types.

Oster offers a comprehensive range of sizes, mirroring the standard A1-A10 scale, alongside specialized combs for achieving unique lengths and finishes. Their snap-on combs are designed for secure attachment to Oster clippers, minimizing slippage during operation. Many professionals favor Oster metal guide combs for their superior rigidity and ability to maintain a consistent height, even through thick, matted fur.

Investing in Oster guide combs means investing in quality and precision, ensuring a polished and professional groom every time.

antes de ser libres pdf

Antes de Ser Libres PDF: A Comprehensive Article Plan

Julia Alvarez’s poignant novel‚ available in PDF format‚ explores themes of freedom‚ family‚ and political oppression․
It details Anita’s experiences during the Trujillo dictatorship․

Julia Alvarez’s Antes de Ser Libres (Before We Were Free) offers a compelling glimpse into the Dominican Republic under the oppressive regime of Rafael Trujillo․ Published in 2004‚ the novel‚ frequently sought in PDF format for educational purposes‚ isn’t simply a historical account; it’s a deeply personal narrative experienced through the eyes of twelve-year-old Anita de la Torre․

The story unfolds in 1960‚ a period of escalating political tension and fear․ Anita’s comfortable life is disrupted as family members flee to the United States‚ her beloved Tío Toni mysteriously vanishes‚ and her father faces increasing scrutiny from the secret police due to suspected dissent․ The looming threat of “Mr․ Smith‚” a symbol of Trujillo’s surveillance‚ casts a long shadow over the family․

Understanding the historical context – the brutal Trujillo dictatorship – is crucial to appreciating the novel’s power․ Alvarez masterfully weaves this historical backdrop into a coming-of-age story‚ exploring themes of loss‚ resilience‚ and the yearning for freedom․ The accessibility of the PDF version allows wider engagement with this important work․

The Novel’s Core Themes

Antes de Ser Libres‚ readily available as a PDF‚ delves into several profound themes․ Central is the exploration of freedom – not merely political liberation‚ but also the personal freedom of adolescence and self-discovery․ Anita’s journey mirrors the nation’s struggle against tyranny‚ questioning what it truly means to be free․

Family is another dominant theme․ The novel portrays the strength and fragility of familial bonds amidst political turmoil․ The separation of family members through immigration and the disappearance of Tío Toni highlight the devastating consequences of oppression․

Fear and surveillance permeate the narrative‚ reflecting the climate of the Trujillo dictatorship․ The constant threat of the secret police and the symbolic presence of “Mr․ Smith” create a palpable sense of anxiety․ Finally‚ the loss of innocence is powerfully depicted as Anita confronts the harsh realities of her world‚ a theme often analyzed when studying the PDF edition․

Historical Background: The Trujillo Dictatorship

Understanding the historical context is crucial when exploring Antes de Ser Libres‚ often accessed as a convenient PDF․ The novel is set against the backdrop of the brutal Trujillo dictatorship in the Dominican Republic (1930-1961)․ Rafael Trujillo ruled with an iron fist‚ employing widespread repression‚ censorship‚ and violence to maintain control․

The period was marked by intense political persecution‚ where suspected opponents faced imprisonment‚ torture‚ and even death․ The “secret police” played a significant role in suppressing dissent‚ creating an atmosphere of fear and paranoia – elements vividly portrayed in the novel and readily apparent in the PDF version․

Many Dominicans sought refuge abroad‚ particularly in the United States‚ fleeing the oppressive regime․ This mass emigration is a key element of Anita’s story․ The novel’s references to “butterflies” and “Mr․ Smith” allude to the clandestine resistance movements and the dictator’s network of informants‚ enriching the reading experience of the PDF․

Julia Alvarez: Author Biography and Style

Julia Alvarez‚ born in New York City but deeply connected to her Dominican heritage‚ is the author of the acclaimed novel Antes de Ser Libres‚ frequently available as a PDF download; Her own family fled the Dominican Republic during the Trujillo dictatorship‚ an experience that profoundly influenced her writing․

Alvarez’s style is characterized by lyrical prose‚ vivid imagery‚ and a focus on the emotional lives of her characters․ She often explores themes of identity‚ displacement‚ and the search for freedom․ Her narrative voice‚ particularly in young adult works like this one‚ is accessible yet sophisticated‚ making the PDF version engaging for a wide audience․

She masterfully blends personal and historical narratives‚ offering a nuanced portrayal of a turbulent period․ Readers accessing the PDF will notice her skillful use of foreshadowing and sensory details to create a compelling and immersive reading experience‚ reflecting her literary talent․

Plot Summary: Anita’s Journey

Antes de Ser Libres‚ often sought in PDF format‚ centers on Anita de la Torre‚ a young girl living in the Dominican Republic in 1960․ Her comfortable life is disrupted by the escalating political repression under the Trujillo dictatorship․ As family members flee to the United States‚ Anita witnesses a growing atmosphere of fear and surveillance․

The disappearance of her beloved Tío Toni and the mysterious phone calls her Papi receives‚ referencing “butterflies” and “Mr․ Smith‚” create a sense of mounting dread․ Anita grapples with understanding the danger surrounding her family‚ while simultaneously navigating the challenges of adolescence․ The PDF version allows readers to follow her journey closely․

The narrative follows Anita’s loss of innocence as she confronts the harsh realities of political persecution and the struggle for freedom․ Her story‚ readily available as a PDF‚ is a poignant coming-of-age tale set against a backdrop of historical turmoil․

Key Characters in Antes de Ser Libres

Exploring Antes de Ser Libres‚ often accessed as a PDF‚ reveals a cast of characters deeply affected by the Trujillo regime․ Anita de la Torre‚ the young protagonist‚ provides a child’s perspective on the unfolding events․ Her journey‚ detailed in the PDF‚ is central to the narrative․

Tío Toni‚ Anita’s uncle‚ represents resistance and ultimately‚ disappearance‚ fueling the family’s anxieties․ Papi embodies the fear and courage of a man facing political persecution‚ his coded conversations adding suspense․ Mami‚ a pillar of strength‚ strives to maintain a semblance of normalcy for her children amidst the chaos․

These characters‚ vividly portrayed in the PDF version of the novel‚ grapple with difficult choices and demonstrate resilience in the face of oppression․ Their interconnected stories highlight the devastating impact of dictatorship on individual lives and family bonds․

Anita de la Torre: A Young Girl’s Perspective

Through the eyes of Anita de la Torre‚ readers – often engaging with the novel via a PDF download – experience the escalating tension in the Dominican Republic․ Initially sheltered‚ Anita’s world shifts dramatically as she witnesses her family’s growing fear and the disappearance of her beloved Tío Toni․ The PDF format allows for close reading of her evolving understanding․

Anita’s adolescence intertwines with the political turmoil‚ creating a poignant coming-of-age story․ She struggles to comprehend the adult anxieties surrounding “butterflies” and mysterious phone calls‚ detailed within the PDF text․ Her innocence is gradually eroded as she confronts the reality of the Trujillo dictatorship․

The PDF version emphasizes Anita’s internal conflict – her desire for freedom and normalcy clashing with the oppressive atmosphere․ Her narrative provides a uniquely vulnerable and compelling lens through which to view the historical events․

Tío Toni: The Missing Uncle

Tío Toni’s disappearance is a central mystery in Antes de ser libres‚ readily apparent even in a PDF version of the novel․ He represents a beacon of intellectual and political dissent‚ a figure who openly opposed the Trujillo regime․ His vanishing casts a long shadow over Anita’s family‚ fueling their anxieties and prompting their eventual decision to flee․

The PDF allows readers to trace the subtle clues surrounding Toni’s fate‚ noticing the coded conversations and the family’s growing apprehension․ He embodies the risks taken by those who dared to challenge the dictatorship‚ a theme powerfully conveyed through Anita’s perspective․

Analyzing the PDF text reveals Toni as more than just a missing person; he symbolizes the lost freedoms and silenced voices of the Dominican Republic․ His absence is a constant reminder of the regime’s brutality and the pervasive fear that gripped the nation․

Papi: Facing Political Persecution

Anita’s father‚ Papi‚ embodies the quiet dignity of a man facing escalating political persecution‚ a narrative vividly accessible within the PDF of Antes de ser libres․ Initially a respected lawyer‚ he becomes a target of the Trujillo regime due to his perceived opposition‚ evidenced by mysterious phone calls and increased surveillance․

The PDF format allows close examination of Papi’s internal struggles as he attempts to protect his family while navigating a treacherous political landscape․ His growing fear and the subtle changes in his behavior are powerfully portrayed‚ highlighting the psychological toll of living under a dictatorship․

Through the PDF’s text‚ readers witness Papi’s gradual realization that remaining in the Dominican Republic poses an existential threat to his family․ His eventual decision to seek refuge in the United States underscores the desperation and courage required to confront tyranny․

Mami: Maintaining Family Strength

Within the pages of the Antes de ser libres PDF‚ Mami emerges as the unwavering pillar of strength for the de la Torre family amidst growing political turmoil․ While Papi grapples with direct persecution‚ Mami focuses on shielding her children‚ Anita and Carlitos‚ from the escalating fear and uncertainty․

The PDF allows readers to observe Mami’s subtle yet powerful acts of resilience – maintaining a semblance of normalcy‚ offering emotional support‚ and quietly preparing for the possibility of exile․ She embodies a quiet determination to preserve her family’s spirit despite the oppressive atmosphere․

Accessing the novel through a PDF format highlights Mami’s strategic thinking and her ability to adapt to rapidly changing circumstances․ She represents the unsung heroism of those who endure hardship with grace and fortitude‚ ensuring her family’s survival․

The Symbolism of Butterflies

The PDF version of Antes de ser libres reveals the potent symbolism of butterflies‚ intricately woven throughout the narrative․ These delicate creatures represent both beauty and fragility‚ mirroring the precarious existence of the de la Torre family under the Trujillo regime․ The repeated mention of butterflies‚ particularly in connection with Papi’s mysterious phone calls‚ serves as a coded reference to the clandestine resistance movement․

Downloading the PDF allows a closer examination of how Alvarez uses butterflies to foreshadow danger and symbolize the suppressed desire for freedom․ They become a haunting motif‚ representing those who have “flown away” – disappeared or fled the country – and the hope for liberation․

The PDF format emphasizes the butterflies’ dual nature: a symbol of transformation and a reminder of the ever-present threat looming over Anita’s world․

Fear and Surveillance: The Secret Police

The PDF of Antes de ser libres vividly portrays the suffocating atmosphere of fear created by the Trujillo regime’s secret police․ Alvarez masterfully depicts how constant surveillance permeates every aspect of life for Anita and her family․ The digital format allows readers to meticulously trace the escalating tension as the family experiences increasing intimidation and harassment․

Accessing the PDF reveals how the author illustrates the psychological toll of living under constant scrutiny․ Mysterious phone calls‚ unexplained visits‚ and the disappearance of Tío Toni all contribute to a climate of paranoia․ The secret police aren’t merely antagonists; they embody a system designed to crush dissent and control the population․

The PDF’s text highlights how this pervasive fear shapes Anita’s coming-of-age‚ forcing her to confront the harsh realities of political oppression․

Family Separation and Immigration

The PDF version of Antes de ser libres powerfully illustrates the devastating impact of political turmoil on family bonds․ A central theme explored within the digital text is the widespread emigration of relatives seeking refuge from the Trujillo dictatorship․ Readers accessing the PDF witness how Anita’s world is fractured as family members flee to the United States‚ leaving her feeling increasingly isolated․

The novel‚ readily available as a PDF‚ details the emotional weight of these separations․ Alvarez portrays the difficult choices families faced – the agonizing decision to leave behind their homeland in pursuit of safety and freedom․ This theme is crucial to understanding Anita’s internal struggles․

Through the PDF‚ one can observe how immigration isn’t presented as a simple escape‚ but as a complex process fraught with loss and uncertainty․

Loss of Innocence and Coming-of-Age

The PDF of Antes de ser libres masterfully depicts Anita de la Torre’s abrupt transition from childhood innocence to a painful awareness of political realities․ As readers navigate the digital pages‚ they witness her forced confrontation with fear‚ surveillance‚ and the disappearance of loved ones․ This coming-of-age story is deeply intertwined with the oppressive atmosphere of the Trujillo regime․

The PDF format allows for a focused examination of how Anita’s youthful perspective is shattered by the escalating dangers surrounding her family․ Her initial naiveté gives way to a growing understanding of the risks associated with dissent and the fragility of freedom․

Accessing the novel as a PDF highlights Alvarez’s skill in portraying the emotional toll of political persecution on a young girl’s development‚ marking a poignant loss of innocence․

Literary Devices Employed by Alvarez

The PDF version of Antes de ser libres reveals Julia Alvarez’s skillful employment of literary devices to enhance the narrative’s emotional impact․ Foreshadowing‚ particularly concerning the “butterflies” and “Mr․ Smith‚” builds suspense‚ creating a sense of impending doom throughout the story․ Readers accessing the PDF can easily trace these recurring motifs․

Alvarez’s choice of point of view – Anita’s first-person narrative – is crucial․ The PDF allows close reading of how this perspective shapes our understanding of events‚ filtering the adult complexities of the political situation through a child’s eyes․

Furthermore‚ the novel is rich in imagery and sensory details‚ vividly portraying the Dominican Republic and the characters’ internal states․ Studying the text in PDF format facilitates detailed analysis of these elements‚ showcasing Alvarez’s literary artistry․

Foreshadowing and Suspense

The PDF of Antes de ser libres demonstrates Alvarez’s masterful use of foreshadowing to build suspense․ The repeated references to “butterflies‚” initially seemingly innocuous‚ gradually become ominous‚ hinting at the fate of Tío Toni and the dangers facing the family․ Accessing the novel in PDF format allows readers to meticulously track these subtle clues․

Similarly‚ the mysterious “Mr․ Smith” serves as a recurring symbol of threat and government surveillance․ The PDF enables easy cross-referencing of mentions‚ revealing a pattern of escalating tension․ Alvarez skillfully employs these elements to create a pervasive atmosphere of fear and uncertainty․

The PDF version highlights how these techniques aren’t merely plot devices‚ but integral to conveying the psychological impact of living under a dictatorship‚ heightening the reader’s emotional engagement with Anita’s journey;

Point of View: Anita’s Narrative

The power of Antes de ser libres‚ readily apparent in the PDF version‚ lies in its first-person narration through the eyes of Anita de la Torre․ This perspective offers a uniquely intimate and poignant portrayal of a family grappling with political turmoil․ The PDF format allows for focused analysis of Anita’s evolving understanding of the events unfolding around her․

Readers experience the escalating fear and uncertainty directly through Anita’s innocent‚ yet increasingly perceptive‚ observations․ The PDF facilitates close reading of her internal monologue‚ revealing her struggle to reconcile her childhood world with the harsh realities of the Trujillo dictatorship․

Alvarez’s choice of a young narrator is crucial; it amplifies the sense of loss and vulnerability․ The PDF version underscores how Anita’s narrative voice shapes the novel’s emotional resonance and thematic depth․

Imagery and Sensory Details

Julia Alvarez masterfully employs vivid imagery and sensory details throughout Antes de ser libres‚ powerfully conveyed even within the PDF format․ The novel isn’t simply about fear; it feels frightening through descriptions of darkened rooms‚ hushed whispers‚ and the ever-present sense of being watched․ Accessing the story via PDF allows for focused annotation of these impactful passages․

The recurring motif of butterflies‚ central to the plot‚ is rendered with striking visual detail․ The PDF version highlights how Alvarez uses this symbol to represent both beauty and impending danger․ Sensory details – the scent of jasmine‚ the taste of mangoes‚ the oppressive heat – ground the narrative in a tangible reality․

These elements‚ readily accessible when reading the PDF‚ immerse the reader in Anita’s world‚ amplifying the emotional weight of her experiences and the family’s struggle for freedom․

Critical Reception and Awards

Antes de ser libres‚ readily available as a PDF for educational and personal use‚ garnered significant critical acclaim upon its release․ Reviewers consistently praised Julia Alvarez’s sensitive portrayal of a young girl navigating a politically turbulent environment․ The novel’s strength lies in its ability to convey complex themes – fear‚ loss‚ and the search for freedom – through the innocent perspective of Anita de la Torre․

While specific award details aren’t prominently featured alongside PDF versions‚ the book’s enduring popularity and inclusion in school curricula speak to its literary merit․ Critics highlighted Alvarez’s skillful use of language and her ability to create a deeply immersive reading experience․

The PDF format facilitates close reading and analysis‚ allowing students and scholars to appreciate the nuances of Alvarez’s writing and the novel’s lasting impact․

The Novel’s Relevance Today

Despite being set in the Dominican Republic during the Trujillo dictatorship‚ Antes de ser libres‚ easily accessible as a PDF‚ resonates powerfully with contemporary issues․ The novel’s exploration of political oppression‚ surveillance‚ and the struggle for freedom remains strikingly relevant in a world facing ongoing challenges to democratic values․

The themes of family separation and immigration‚ central to the narrative and readily apparent in the PDF version‚ mirror the experiences of countless individuals and families globally․ Anita’s story prompts reflection on the human cost of authoritarianism and the importance of safeguarding civil liberties․

Furthermore‚ the PDF’s accessibility allows for wider dissemination and discussion‚ fostering critical thinking about power‚ resistance‚ and the enduring quest for a just and equitable society․ It serves as a potent reminder of the fragility of freedom․

Availability of “Antes de Ser Libres” PDF Versions

Finding a legitimate PDF version of Antes de ser libres requires careful navigation․ While not always officially offered for free by the publisher‚ several avenues exist for access․ OverDrive‚ a digital library platform‚ frequently provides ebook and audiobook versions‚ including potential PDF availability‚ through participating public libraries․

Apple Books also lists the title‚ and while primarily offering ePub formats‚ a PDF might be accessible depending on device compatibility․ Amazon․com sells the Spanish edition‚ but a free PDF isn’t typically available there․

Caution: Downloading from unofficial websites carries significant risks‚ including malware and copyright infringement․ Prioritize legitimate sources to ensure a safe and legal reading experience․ Always verify the source before downloading any PDF file․

Legitimate Sources for PDF Access

Accessing a legal PDF copy of Antes de ser libres centers around established digital library services and authorized retailers․ OverDrive stands out as a primary legitimate source‚ allowing library cardholders to borrow ebooks‚ potentially including PDF versions‚ depending on library holdings․ Explore your local library’s digital collection through OverDrive’s platform․

Apple Books offers the novel in digital format‚ though the availability of a direct PDF download may vary based on device and settings․ Purchasing through Apple Books guarantees a legitimate file․ While Amazon․com sells the Spanish edition‚ it doesn’t typically provide a free PDF․

Always prioritize these official channels to support the author and avoid the risks associated with unauthorized downloads․ Checking directly with the publisher’s website is also a viable‚ though less common‚ option․

Risks of Downloading from Unofficial Sites

Downloading the PDF of Antes de ser libres from unofficial websites carries significant risks․ These sites frequently host malware‚ viruses‚ and spyware‚ potentially compromising your device and personal data․ The allure of a “free” PDF often masks malicious intent‚ leading to identity theft or financial loss․

Furthermore‚ such downloads often violate copyright laws‚ supporting illegal distribution and undermining Julia Alvarez’s work․ The quality of these illegally obtained files is often poor‚ containing formatting errors‚ missing pages‚ or corrupted text‚ hindering the reading experience․

These sites lack the security measures of legitimate platforms‚ exposing you to phishing scams and deceptive advertising․ Prioritizing legal sources—like OverDrive or Apple Books—ensures a safe‚ high-quality reading experience and respects intellectual property rights․ Avoid the temptation of free‚ unauthorized PDFs․

Educational Use and Curriculum Integration

Antes de ser libres‚ readily available as a PDF for educational purposes through licensed platforms‚ offers rich opportunities for curriculum integration․ The novel’s exploration of political oppression‚ family dynamics‚ and loss of innocence aligns with social studies‚ history‚ and language arts curricula․

Teachers can utilize the text to facilitate discussions on the Trujillo dictatorship‚ the impact of authoritarian regimes‚ and the importance of human rights․ Analyzing Julia Alvarez’s narrative style—particularly her use of point of view and symbolism—enhances literary analysis skills․

The PDF format allows for easy annotation and sharing of excerpts‚ promoting collaborative learning․ Assignments could include character analysis‚ historical research‚ or creative writing exercises inspired by Anita’s journey․ Utilizing legally obtained PDF versions ensures ethical and responsible educational practices․

Translations and International Editions

Antes de ser libres‚ while originally written in English as Before We Were Free‚ has seen significant international distribution‚ including a widely available Spanish translation‚ Antes de ser libres․ Access to the novel in various languages‚ often found as PDF downloads through legitimate booksellers‚ broadens its readership and impact․

The Spanish edition‚ translated by Liliana Valenzuela‚ maintains the emotional depth and historical context of the original work․ PDF versions of both the English and Spanish editions are accessible through platforms like Apple Books and OverDrive‚ offering convenient access for students and readers globally․

International editions demonstrate the novel’s universal themes resonating across cultures․ Obtaining PDF copies from authorized sources ensures quality and supports the author’s work‚ fostering continued translation and accessibility․

Similar Works and Recommended Reading

Readers captivated by Antes de ser libres‚ and seeking similar narratives exploring themes of political turmoil‚ family resilience‚ and loss of innocence‚ might appreciate Isabel Allende’s works‚ particularly The House of the Spirits․ Both novels delve into the impact of dictatorships on personal lives and familial bonds․

For those interested in stories centered around young protagonists navigating challenging political landscapes‚ The Absolutely True Diary of a Part-Time Indian by Sherman Alexie offers a compelling parallel․ Exploring the availability of these titles as PDF downloads can enhance accessibility for educational purposes․

Furthermore‚ works focusing on the Dominican Republic’s history‚ such as Edwidge Danticat’s essays‚ provide valuable context․ Finding reliable PDF sources for these complementary readings enriches the understanding of the historical and cultural backdrop of Alvarez’s novel․

Analyzing the Title: “Before We Were Free”

The title‚ Antes de ser libres‚ or “Before We Were Free‚” is profoundly evocative‚ hinting at a past state of unacknowledged constraint․ It speaks to a time when the characters‚ particularly Anita‚ hadn’t fully grasped the value – or fragility – of their freedom․ The phrase encapsulates the novel’s central theme: the gradual erosion of liberties under the Trujillo dictatorship․

The use of the past tense suggests a longing for a future state of liberation‚ a freedom that feels increasingly distant as the narrative progresses․ Accessing the novel in PDF format allows for close textual analysis‚ emphasizing the weight of this title․

The ambiguity invites reflection on what constitutes true freedom – is it merely the absence of physical restraint‚ or something more deeply rooted in security and peace of mind? The PDF version facilitates repeated readings to fully unpack this layered meaning․

logitech keyboard instruction manual

Logitech keyboards blend comfort and productivity, featuring innovations like Incurve keys and long battery life. These devices enhance user experience, offering seamless connectivity.

What is a Logitech Keyboard Instruction Manual For?

A Logitech keyboard instruction manual serves as a comprehensive guide to unlocking the full potential of your device. It details everything from initial setup – unboxing, component verification, and connection methods (USB receiver or Bluetooth pairing) – to understanding specialized features.

The manual clarifies how to utilize Logitech Options software for customization, including button assignments and macro creation. It also explains adjusting keyboard backlighting, if available. Crucially, it provides troubleshooting steps for common issues like connectivity problems, key malfunctions, and battery concerns.

Ultimately, the manual ensures a smooth, optimized user experience, maximizing productivity and enjoyment with your Logitech keyboard.

Types of Logitech Keyboards Covered

This guide encompasses a broad spectrum of Logitech keyboards, from the comfortable and productive MK710 Wireless Desktop – known for its Incurve keys and extended battery life – to the sleek and portable Pebble Keys 2 Slim TKL Wireless Keyboard.

It also addresses instructions relevant to full-size and compact layouts, keyboards with dedicated media controls, and those utilizing Logitech Options software for customization. The manual’s principles apply to both USB receiver-based wireless models and those employing Bluetooth pairing.

Whether you own a basic model or a more advanced gaming keyboard, this resource will help you navigate its features and resolve potential issues.

Setting Up Your Logitech Keyboard

Logitech keyboards offer simple setup: unbox, check components, connect via USB receiver or Bluetooth, and download Logitech Options for full functionality.

Initial Unboxing and Component Check

Carefully unpack your new Logitech keyboard and verify all included components. The box should contain the keyboard itself, a USB receiver (for wireless models), and potentially batteries if not pre-installed. Some models, like the MK710, include a mouse as well.

Inspect each item for any visible damage sustained during shipping. Ensure the keyboard’s cable (if wired) is intact and the receiver is undamaged. Retain the original packaging for potential returns or warranty claims. A quick visual check now can prevent issues later, guaranteeing a smooth setup process and optimal performance from your new Logitech keyboard.

Connecting via USB Receiver (Wireless)

For wireless Logitech keyboards utilizing a USB receiver, the connection process is straightforward. Locate the small USB receiver and plug it into an available USB port on your computer. Your computer should automatically detect the receiver and begin installing the necessary drivers.

If drivers don’t install automatically, visit the Logitech support website and download the appropriate software for your keyboard model. Once the drivers are installed, power on your keyboard. It should automatically pair with the receiver. A successful connection is usually indicated by a light on the keyboard.

Bluetooth Pairing Instructions

To connect your Logitech keyboard via Bluetooth, first, ensure Bluetooth is enabled on your computer or device. Then, put the keyboard into pairing mode – typically by pressing and holding a designated Bluetooth button (check your specific model’s documentation).

On your computer, navigate to the Bluetooth settings and scan for available devices. Your Logitech keyboard should appear in the list. Select it to initiate the pairing process. You may be prompted to enter a pairing code, which will be displayed on your screen; enter it using the keyboard. A successful connection will be confirmed on both devices.

Understanding Keyboard Features

Logitech keyboards offer features like Incurve keys, full or compact layouts, and dedicated media controls, enhancing user comfort and streamlining digital tasks.

Logitech Incurve Keys – Comfort and Ergonomics

Logitech Incurve keys represent a significant advancement in keyboard design, prioritizing user comfort and reducing strain during extended use. These keys are subtly curved, mirroring the natural shape of fingertips. This innovative design promotes a more natural and relaxed hand position, minimizing reach and maximizing typing accuracy.

The result is a typing experience that feels remarkably intuitive and comfortable, almost as if the keyboard was custom-made for your hands. This ergonomic approach helps to reduce fatigue and discomfort, even during long work sessions or gaming marathons. The gentle curvature guides your fingers to the center of each key, further enhancing precision and efficiency.

Full-Size vs. Compact Keyboard Layouts

Logitech offers keyboards in both full-size and compact layouts, catering to diverse user preferences and workspace needs. Full-size keyboards include a numeric keypad, ideal for data entry and financial work, providing a complete set of keys. These are best suited for users who frequently utilize number input.

Compact keyboards, often referred to as tenkeyless (TKL), omit the numeric keypad, resulting in a smaller footprint. This design maximizes desk space and enhances portability, appealing to gamers and users prioritizing minimalism. Choosing between the two depends on your primary usage; prioritize functionality with full-size, or space-saving with compact.

Dedicated Media Controls

Logitech keyboards frequently incorporate dedicated media controls, streamlining your entertainment experience; These buttons allow for quick and easy adjustment of volume, playback (play/pause, skip forward/backward), and sometimes even access to specific applications like music players or video streaming services.

Such controls eliminate the need to navigate through software interfaces, offering instant command over your audio and video content. This feature is particularly beneficial during gaming, video conferencing, or simply enjoying music. Dedicated media keys enhance productivity and convenience, providing a more fluid and enjoyable user experience.

Customizing Your Logitech Keyboard

Logitech Options software empowers users to personalize their keyboard, assigning custom functions to buttons and creating macros for enhanced workflow efficiency.

Using Logitech Options Software

Logitech Options software is a cornerstone of personalizing your keyboard experience. Download and install it from the official Logitech website, ensuring compatibility with your operating system – Windows or macOS. Upon launching, the software automatically detects compatible Logitech keyboards;

The intuitive interface allows for button customization; simply click a button on the virtual keyboard to assign a new function. Options include launching applications, controlling media playback, executing specific keystrokes, or even utilizing pre-defined smart actions. Beyond buttons, you can fine-tune scrolling speed, pointer speed, and other device settings. Regularly check for software updates to benefit from new features and improved performance. This software truly unlocks the full potential of your Logitech keyboard.

Button Customization and Macro Creation

Logitech Options software empowers you to redefine your keyboard’s functionality. Easily assign custom actions to individual buttons, tailoring them to your workflow. Beyond simple key remapping, the software excels in macro creation. Record a sequence of keystrokes and mouse actions, then bind it to a single button for instant execution.

This is incredibly useful for repetitive tasks, streamlining processes and boosting productivity. You can create application-specific macros, ensuring they only function within designated programs. The software allows for editing existing macros, refining them for optimal performance. Explore pre-defined smart actions or build your own, transforming your keyboard into a powerful command center.

Adjusting Keyboard Backlighting (If Applicable)

Certain Logitech keyboard models feature adjustable backlighting, enhancing visibility in low-light conditions. Logitech Options software typically controls these settings. Within the software, locate the “Lights” or “Backlight” section, specific to your keyboard model. Here, you can toggle backlighting on or off, and often adjust the brightness level.

Some keyboards offer dynamic lighting effects, such as breathing or wave patterns. You may also find options to customize the backlight duration before it automatically dims or turns off, conserving battery life. Experiment with different settings to find the optimal balance between visibility and power consumption. Remember to save your changes within the software.

Troubleshooting Common Issues

Logitech keyboards sometimes experience connection problems or key malfunctions. Addressing these issues often involves checking batteries, USB receivers, or software settings for resolution.

Keyboard Not Connecting

If your Logitech keyboard isn’t connecting, begin by ensuring it’s within range of the USB receiver or Bluetooth-enabled device. For wireless models, verify the receiver is securely plugged into a functioning USB port. Check battery levels; low batteries are a frequent cause of connection loss.

Attempt re-pairing via Bluetooth in your device’s settings if applicable. If using the unifying receiver, download and utilize Logitech Options software to confirm the connection status and update firmware. A simple restart of both the keyboard and the host computer can often resolve temporary glitches. Finally, test the keyboard with a different computer to isolate whether the issue lies with the keyboard itself or the original system.

Key Malfunctions and Sticky Keys

Experiencing key malfunctions or sticky keys? First, gently try pressing the affected key several times to dislodge any potential debris. Use compressed air to carefully clean around and under the keycap – avoid liquids! If the issue persists, consider if a recent spill occurred, even a small one, as residue can cause stickiness.

Logitech Options software can sometimes identify malfunctioning keys. For stubborn cases, carefully remove the keycap (consult online guides for your specific model) and inspect for obstructions. Avoid forceful removal. If a key remains unresponsive after cleaning, it may require professional repair or replacement.

Battery Life and Replacement (Wireless Models)

Logitech wireless keyboards boast impressive battery life, with some models lasting up to three years! However, usage patterns significantly impact longevity. Frequent use, backlighting, and Bluetooth connectivity consume more power. To check battery levels, use Logitech Options software – it provides a clear indicator.

When replacement is needed, most models utilize standard AA or AAA batteries. Ensure correct polarity during installation. For optimal performance, use high-quality alkaline batteries. Consider rechargeable options for an eco-friendly and cost-effective solution. Low battery warnings will appear on-screen when power is dwindling.

Maintaining Your Logitech Keyboard

Regular cleaning and careful handling extend your Logitech keyboard’s lifespan. Spill-resistant designs offer protection, but prompt attention to spills is crucial.

Cleaning Instructions

Maintaining a clean keyboard is essential for optimal performance and hygiene. Begin by disconnecting the keyboard from your computer or turning it off if wireless. Gently turn the keyboard upside down and tap it to dislodge any loose debris, such as dust or crumbs. Use a can of compressed air to blow out particles from between the keys, directing the airflow in various directions.

For surface cleaning, dampen a soft, lint-free cloth with a small amount of water or isopropyl alcohol (70% concentration or less). Avoid using harsh chemicals or abrasive cleaners, as these can damage the keycaps. Wipe the keyboard surface and keycaps gently, ensuring no liquid enters the internal components. For stubborn marks, lightly dampen the cloth and apply gentle pressure. Allow the keyboard to dry completely before reconnecting or turning it on.

Spill Resistance Features and Limitations

Certain Logitech keyboards offer spill-resistant designs, engineered to withstand accidental liquid splashes. However, it’s crucial to understand these features have limitations. Spill resistance doesn’t equate to waterproofness; significant liquid exposure can still cause damage. The MK345, for example, boasts a spill-resistant design, protecting internal components from minor spills.

If a spill occurs, immediately disconnect the keyboard and turn it off. Turn it upside down to drain any liquid, and wipe away visible moisture with a clean, dry cloth. Allow the keyboard to dry completely – several days are recommended – before attempting to use it again. Damage caused by liquid spills is typically not covered under warranty, so prevention is key.

Logitech Keyboard Models – A Brief Overview

Logitech offers diverse keyboards like the MK710 for comfort, the slim Pebble Keys 2 TKL, and high-performance options for gaming and productivity needs.

MK710 Wireless Desktop

The Logitech Wireless Desktop MK710 prioritizes a comfortable and productive computing experience. Its low-profile design incorporates Logitech Incurve keys, sculpted to comfortably fit the shape of your fingers, reducing strain during extended use. A cushioned palm rest further enhances ergonomic support.

This desktop set boasts an impressive battery life – up to three years for both the keyboard and mouse – minimizing the inconvenience of frequent battery replacements. It offers reliable 2.4 GHz wireless connectivity, ensuring a stable connection with minimal lag. The included receiver is compact and unobtrusive. It’s a practical choice for everyday tasks and prolonged work sessions, blending comfort with dependable performance.

Pebble Keys 2 Slim TKL Wireless Keyboard

The Logitech Pebble Keys 2 Slim TKL Wireless Keyboard offers a modern and minimalist design, perfect for users seeking portability and style. Its tenkeyless (TKL) layout saves desk space without sacrificing essential keys. This keyboard connects via Bluetooth or a 2.4 GHz USB receiver, providing versatile connectivity options for Windows, macOS, iPadOS, and ChromeOS.

Featuring quiet, scissor-switch keys, the Pebble Keys 2 ensures a comfortable and nearly silent typing experience. Its slim profile makes it easy to transport, ideal for on-the-go productivity. Available in Graphite, it complements various setups. It’s a sleek and efficient solution for streamlined workspaces and mobile professionals.

bc science 9 textbook pdf

Understanding the BC Science 9 Textbook

BC Science 9, published by McGraw-Hill/Ryerson in 2007, is a cornerstone resource for Grade 9 students in British Columbia, offering a detailed exploration of core scientific principles and concepts․

This textbook aligns with the BC curriculum, fostering critical thinking and inquiry skills, and is available as a PDF through various official and educational platforms․

What is BC Science 9?

BC Science 9 is a comprehensive science textbook specifically designed for Grade 9 students within the British Columbia (BC) education system․ Published by McGraw-Hill/Ryerson, with a primary publication date of 2007, it serves as a foundational resource for introducing key scientific concepts, theories, and practical applications․

The textbook meticulously aligns with the BC Ministry of Education’s prescribed learning standards, ensuring students receive a curriculum-relevant education․ It aims to cultivate critical thinking, problem-solving abilities, and scientific inquiry skills․ The content covers a broad spectrum of scientific disciplines, preparing students for more advanced studies in high school․

Increasingly, students access BC Science 9 as a PDF document, offering flexibility in learning․ Resources like Open School BC and various e-textbook platforms provide digital access, catering to diverse learning preferences and accessibility needs․ The PDF version maintains the textbook’s comprehensive content in a convenient, portable format․

Curriculum Alignment

BC Science 9 is meticulously aligned with the British Columbia Ministry of Education’s science curriculum for Grade 9․ This alignment ensures that the content comprehensively covers the prescribed learning outcomes and expectations for students across the province․ The textbook’s structure and topics directly correspond to the key areas outlined in the BC curriculum framework․

Open School BC actively supports this alignment, providing resources and materials that complement the BC Science 9 textbook and reinforce curriculum standards․ The PDF version of the textbook maintains this crucial alignment, allowing students to access curriculum-approved content digitally․

E-textbook platforms also emphasize curriculum adherence, ensuring the digital versions mirror the content and learning objectives of the print edition․ This consistency is vital for teachers and students alike, facilitating effective instruction and assessment․ The PDF format supports seamless integration into various learning environments․

Target Audience: Grade 9 Students

BC Science 9 is specifically designed for Grade 9 students in British Columbia, serving as their primary resource for foundational science education․ The textbook’s content, language, and presentation are tailored to the cognitive abilities and learning styles of this age group, fostering engagement and comprehension․

The PDF version of the textbook extends accessibility to all Grade 9 students, regardless of their learning environment or access to physical copies․ It provides a convenient and portable learning tool, supporting both in-class instruction and independent study․

Ms․ Rogers’ online assignments utilizing the BC Science 9 textbook demonstrate its practical application for contemporary learning․ The textbook aims to build critical thinking and inquiry skills, preparing students for more advanced science courses in subsequent grades․ The PDF format facilitates interactive learning experiences․

Accessing the BC Science 9 Textbook PDF

The BC Science 9 textbook PDF is readily available through official sources like Open School BC, McGraw-Hill/Ryerson, and various e-textbook platforms․

Official Sources for PDF Download

BC Science 9’s PDF version is primarily accessible through officially recognized educational resources within British Columbia․ Open School BC stands as a leading provider, offering the textbook as part of its extensive K-12 content library, aligning directly with the BC Ministry of Education’s curriculum standards․

Students and educators can locate the PDF on the Open School BC website, ensuring access to a curriculum-approved version․ Furthermore, the Internet Archive hosts a digitized copy of the 2007 McGraw-Hill/Ryerson edition, categorized as ‘print disabled’ to enhance accessibility․

It’s crucial to verify the source’s legitimacy to guarantee a safe and accurate download, avoiding potentially compromised files․ These official channels provide reliable access to the complete BC Science 9 content in a convenient, digital format․

McGraw-Hill/Ryerson Availability

While a direct PDF download from the official McGraw-Hill/Ryerson website isn’t readily available as of today, February 8, 2026, information regarding the BC Science 9 textbook can still be found on their platform․ The 2007 publication details are listed, confirming its original publisher and providing key bibliographic information․

However, accessing the complete textbook as a downloadable PDF typically requires utilizing alternative, officially sanctioned educational resources like Open School BC or the Internet Archive, which have digitized copies․ McGraw-Hill/Ryerson may offer access through specific institutional partnerships or e-textbook platforms․

Checking with your school or district may reveal if they have a licensed digital version available through McGraw-Hill/Ryerson’s educational solutions․ Always prioritize legitimate sources to ensure copyright compliance and content accuracy․

Open School BC Resources

Open School BC stands as a primary resource for accessing the BC Science 9 textbook in PDF format․ As British Columbia’s leading provider of K-12 educational materials, they offer digitized versions of curriculum-aligned resources, including this essential science textbook․

Their platform provides both online and print content designed to meet BC Ministry of Education standards․ Students and educators can find the BC Science 9 textbook available for viewing and download, supporting flexible learning environments․

Open School BC’s commitment to accessibility makes the PDF version particularly valuable for students requiring alternative formats, including those with print disabilities․ It’s a reliable and legally compliant source for obtaining the textbook, ensuring students have the materials they need to succeed․

E-Textbook Platforms

Several e-textbook platforms offer access to the BC Science 9 textbook in PDF format, providing convenient digital learning solutions․ These platforms often require an access process, which users must complete before gaining access to the materials․

Notable options include platforms hosting BC Science Connections 9, 10, BC Biology 12, Mathlinks 9, 10, and Foundations of Mathematics 11․ These sites compile various BC curriculum resources into easily navigable digital libraries․

These e-textbook platforms typically offer features like zoom capabilities, searchable text, and potentially annotation tools, enhancing the learning experience․ Students can access the BC Science 9 PDF on various devices, promoting flexibility and accessibility in their studies․

Key Topics Covered in BC Science 9

BC Science 9 comprehensively explores matter, energy, and forces, aligning with the BC curriculum through detailed units and a readily available PDF version․

Unit 1: Matter and Its Properties

Unit 1 of BC Science 9 delves into the fundamental building blocks of our world, meticulously examining matter and its diverse properties․ Students will explore the states of matter – solid, liquid, and gas – and the transitions between them, gaining a foundational understanding of particle theory․

The textbook, accessible as a PDF, guides learners through concepts like pure substances and mixtures, homogeneous and heterogeneous solutions, and the differences between physical and chemical changes․ It details how to classify matter based on its composition and characteristics, utilizing observable properties like density, solubility, and melting/boiling points․

Furthermore, the unit introduces the periodic table and the organization of elements, laying the groundwork for future chemistry studies․ Practical applications and real-world examples, readily available within the BC Science 9 PDF, reinforce these concepts, fostering a deeper comprehension of matter’s role in everyday life;

Unit 2: Energy and Its Conservation

Unit 2 of BC Science 9 focuses on the crucial concept of energy, exploring its various forms – kinetic, potential, thermal, chemical, electrical, and nuclear – and how energy transforms from one type to another․ The BC Science 9 textbook PDF provides detailed explanations and illustrative examples of these energy conversions․

Students will learn about energy transfer through conduction, convection, and radiation, and investigate the principles of energy conservation․ The unit emphasizes that energy cannot be created or destroyed, only transformed, a cornerstone of physics․

Practical applications, such as energy efficiency and renewable energy sources, are explored, connecting scientific principles to real-world issues․ The PDF format allows for easy access to diagrams, experiments, and practice questions, reinforcing understanding of energy’s role in our environment and technological advancements․

Unit 3: Forces and Motion

Unit 3 of the BC Science 9 curriculum, comprehensively covered in the BC Science 9 textbook PDF, delves into the fundamental principles governing forces and motion․ Students explore Newton’s Laws of Motion – inertia, acceleration, and action-reaction – and their application to everyday phenomena․

The unit examines various types of forces, including gravity, friction, applied force, and tension, demonstrating how these forces influence an object’s motion․ Concepts like velocity, acceleration, and displacement are defined and applied through problem-solving exercises․

The PDF version facilitates interactive learning with diagrams illustrating force vectors and motion graphs․ Students will analyze real-world scenarios, such as projectile motion and collisions, solidifying their understanding of how forces dictate the movement of objects․ This unit builds a strong foundation for further study in physics․

Utilizing the PDF Textbook Effectively

The BC Science 9 textbook PDF offers convenient access, enhanced by features like searchable text, annotation tools, and highlighting capabilities for focused study․

Navigation within the PDF

Successfully navigating the BC Science 9 textbook PDF requires understanding its structural elements․ Most PDF readers display a table of contents panel, allowing quick jumps to specific units or chapters․

Utilize the page thumbnails view for a visual overview of the document, enabling direct selection of desired pages․ Hyperlinks within the PDF, if present, provide immediate access to referenced sections or external resources․

Familiarize yourself with the bookmarking feature to save frequently accessed pages for rapid retrieval․ Zoom functionality is crucial for comfortable reading on various screen sizes․ Regularly updating your PDF reader ensures optimal performance and compatibility with the document’s features, maximizing your learning experience with this valuable resource․

Search Functionality

The BC Science 9 textbook PDF boasts a powerful search function, a critical tool for efficient study․ Access this feature – typically represented by a magnifying glass icon – to locate specific keywords, concepts, or definitions within the entire document instantly․

Employ precise search terms for focused results; broader terms may yield numerous irrelevant matches․ Utilize quotation marks around phrases to search for exact wordings․ Explore advanced search options, if available, to refine searches by case sensitivity or whole words․

Remember that the PDF’s search capability extends to all text layers, including captions, diagrams, and appendices․ Mastering this function significantly reduces time spent manually browsing, allowing students to quickly pinpoint relevant information within the BC Science 9 content․

Annotation and Highlighting Tools

Most PDF readers used to access the BC Science 9 textbook PDF offer robust annotation and highlighting tools, enhancing the learning experience․ Highlighting key terms and concepts allows for quick review and identification of important information during study sessions․

Annotation features, such as sticky notes and text boxes, enable students to add personal notes, explanations, or questions directly onto the PDF pages․ These tools facilitate active reading and deeper engagement with the material․

Utilize different colors for highlighting to categorize information – for example, definitions in yellow, examples in green, and key formulas in blue․ Regularly reviewing these annotations reinforces understanding and prepares students for assessments within the BC science curriculum․

Supplementary Resources for BC Science 9

Numerous online platforms and teacher assignments complement the BC Science 9 textbook PDF, offering additional practice questions and support for students learning scientific concepts․

Online Learning Platforms

BC’s Open School provides valuable resources alongside the BC Science 9 textbook PDF, offering comprehensive K-12 content aligned with the provincial curriculum standards․ These platforms deliver both online and print materials, supporting teachers and students alike․

Furthermore, educators are utilizing platforms like Google Forms to facilitate online learning, assigning weekly tasks and checking student access to both the textbook and online resources․ This ensures all students can participate effectively, even with remote learning challenges․

E-textbook platforms also provide access to BC Science 9 and related subjects like BC Science Connections 10 and Mathlinks 9, offering a digital alternative to the physical PDF․ These resources aim to enhance the learning experience and cater to diverse student needs․

Teacher Assignments and Support

Teachers are actively adapting to online learning environments, leveraging the BC Science 9 textbook PDF as a central resource․ Weekly assignments are being distributed, often accompanied by Google Forms to gauge student access to materials – including the textbook itself – and their ability to engage with the online learning system․

This proactive approach ensures that potential barriers to access are identified and addressed promptly․ Support extends beyond simply providing the PDF; teachers are focused on verifying students can successfully utilize the digital resource․

The BC Ministry of Education curriculum standards are met through these assignments, and Open School BC provides supplementary materials to aid educators in delivering effective instruction based on the textbook’s content․

Additional Practice Questions

Supplementing the core content of the BC Science 9 textbook PDF, numerous online resources offer additional practice questions to reinforce learning․ These resources are crucial for students to solidify their understanding of key scientific concepts presented within the textbook․

Online learning platforms frequently provide interactive quizzes and exercises directly aligned with the BC curriculum and the textbook’s units․ These platforms often feature immediate feedback, allowing students to identify areas where they need further review․

Teachers may also assign practice questions sourced from external websites or create their own, utilizing the PDF textbook as a guide to ensure comprehensive coverage of the material․ This multi-faceted approach enhances student mastery․

Historical Context of the Textbook

Published in 2007 by McGraw-Hill/Ryerson, the BC Science 9 textbook PDF has served British Columbia students for nearly two decades, undergoing revisions to remain current․

Accessibility considerations have led to print-disabled versions, ensuring inclusivity for all learners accessing this essential scientific resource․

Publication Date and Editions (2007)

The original BC Science 9 textbook, available as a PDF, was first published in January 2007 by McGraw-Hill/Ryerson․ This initial edition quickly became a standard resource for Grade 9 science education throughout British Columbia, aligning directly with the provincial curriculum standards of that time․

While a definitive list of subsequent editions isn’t readily available, it’s understood that the core content has been periodically updated to reflect advancements in scientific knowledge and changes within the BC Ministry of Education’s learning objectives․ These updates, however, haven’t necessarily resulted in entirely new published editions, but rather revisions incorporated into the digital PDF versions․

The 2007 publication date signifies a foundational moment for science education in the province, providing students with a comprehensive and accessible learning tool․ The continued availability of the PDF format ensures ongoing access to this valuable resource, even as educational materials evolve․

Updates and Revisions

Despite the initial BC Science 9 textbook PDF publication in 2007, the content hasn’t remained static․ McGraw-Hill/Ryerson and Open School BC, key distributors, have implemented revisions to address evolving scientific understanding and curriculum changes within British Columbia․

These updates are primarily found within the digital PDF versions, offering corrections, clarifications, and occasionally, expanded explanations of complex concepts․ While major overhauls resulting in new editions are limited, ongoing refinements ensure the material remains relevant and accurate for students․

Accessibility considerations, particularly for print-disabled learners, have also driven revisions․ The PDF format allows for features like text-to-speech compatibility and adjustable font sizes, enhancing inclusivity․ These continuous improvements demonstrate a commitment to providing a dynamic and accessible learning experience for all BC Grade 9 science students․

Accessibility Considerations (Print Disabled)

The availability of the BC Science 9 textbook PDF significantly enhances accessibility for students with print disabilities․ Digital formats allow for crucial assistive technologies to be employed, leveling the playing field for all learners․

Features like screen readers can convert text to speech, benefiting students with visual impairments or dyslexia․ Adjustable font sizes and customizable color contrasts cater to individual needs, reducing eye strain and improving readability․ The PDF format also supports text magnification without loss of quality․

Internet Archive’s inclusion of the BC Science 9 textbook within its collection, marked as “printdisabled,” highlights this commitment․ This ensures wider access for students requiring alternative formats, promoting inclusive education throughout British Columbia and beyond․

Troubleshooting PDF Access Issues

Common problems accessing the BC Science 9 PDF include error messages and reader compatibility issues; ensure you have an updated PDF reader installed․

Common Error Messages

When attempting to access the BC Science 9 textbook PDF, users may encounter several frustrating error messages․ A frequent issue is a “corrupted file” notification, indicating a problem with the download or the PDF itself․ This often resolves with a fresh download from an official source like Open School BC or McGraw-Hill/Ryerson․

Another common message is related to PDF reader compatibility․ Older versions of Adobe Acrobat Reader, or alternative PDF viewers, might struggle with the file’s formatting․ Updating to the latest version of a reliable PDF reader is highly recommended․ “Access Restricted” errors can occur if the file requires specific permissions or if you’re accessing it through a restricted network․

Finally, a “File Not Found” error simply means the link is broken or the file has been moved․ Double-check the URL or navigate to the official source’s website to locate the correct download link․ If problems persist, contacting support is advised․

PDF Reader Compatibility

Ensuring you have a compatible PDF reader is crucial for smoothly accessing the BC Science 9 textbook PDF․ While most modern computers have a default PDF viewer, older versions may lack the functionality to properly display the textbook’s formatting, interactive elements, or embedded features․

Adobe Acrobat Reader DC is a widely recommended and free option, consistently updated to support the latest PDF standards․ Alternative readers like Foxit Reader or Chrome’s built-in PDF viewer can also work effectively․ However, compatibility issues are more likely with less common or outdated software․

If you encounter display problems – such as distorted text, missing images, or inability to navigate – try updating your current PDF reader or switching to Adobe Acrobat Reader DC․ Regularly updating your software ensures optimal performance and prevents potential compatibility conflicts․

Contacting Support for Assistance

If you persistently experience issues accessing the BC Science 9 textbook PDF, several support avenues are available․ Begin by checking the FAQ sections on the official source websites – McGraw-Hill/Ryerson or Open School BC – for solutions to common problems․

For technical difficulties with PDF viewing, Adobe Acrobat Reader DC offers extensive online support and troubleshooting guides․ If the issue stems from a specific platform (like an e-textbook provider), contact their customer support directly․

Teachers can also provide assistance, potentially offering alternative access methods or clarifying platform-specific instructions․ Don’t hesitate to reach out to your school’s IT department for further technical support․ Clearly describe the error message and steps taken to resolve the issue when seeking help․

eagle scout service project workbook pdf

Eagle Scout Service Project Workbook PDF: A Comprehensive Plan

Navigating the Eagle Scout journey requires meticulous planning, and the project workbook PDF is central to success.
It’s a vital document for outlining, executing, and documenting your impactful community service endeavor, ensuring a smooth path.

Understanding the Eagle Scout Service Project

The Eagle Scout Service Project isn’t merely a requirement; it’s the culminating demonstration of a Scout’s leadership skills and commitment to service. It’s a significant undertaking, demanding careful planning, execution, and reflection. This project allows a Life Scout to design, organize, and lead others in a valuable service benefiting a religious institution, school, or the community.

Crucially, the project must be Scout-led – meaning the Scout conceives the idea, creates the plan, and directs the work. Adult guidance is permitted, but the Scout retains primary responsibility. The project’s scope should be substantial, demonstrating initiative and a genuine impact. It’s not about the monetary value, but the positive change brought about through dedicated effort. Successful completion showcases a Scout’s ability to translate ideals into action, embodying the core principles of Scouting.

The Importance of the Project Workbook

The Eagle Scout Service Project Workbook isn’t just a form; it’s the roadmap and official record of your project. It ensures a structured approach, prompting thorough planning and consideration of all critical aspects – from initial concept to final report. This document facilitates clear communication between the Scout, unit leaders, and the district/council review committee.

Accurate and complete documentation within the workbook is paramount. It demonstrates responsible project management, adherence to safety guidelines, and a clear understanding of the project’s scope and impact. The workbook serves as proof of leadership, organization, and dedication. It’s essential for the review process, allowing the committee to assess the project’s merit and ensure it meets Eagle Scout requirements. A well-maintained workbook significantly streamlines the approval process and minimizes potential delays.

Where to Find the Official PDF Workbook

The official Eagle Scout Service Project Workbook PDF is readily accessible through the Boy Scouts of America (BSA) website. Navigate to Scouting.org, and utilize the search function, typing “Eagle Scout Service Project Workbook.” You’ll find a direct link to download the current version. Alternatively, your local Scout Shop should have physical copies available for purchase, though the PDF is often preferred for ease of completion and digital submission.

Furthermore, many local councils and districts also provide links to the workbook on their respective websites. Check with your unit leader or committee members; they often have a readily available copy or a direct link to share. Ensure you are downloading the official BSA document to avoid outdated or inaccurate versions. Always verify the document’s source to guarantee its authenticity and compliance with current requirements.

Workbook Version and Updates (as of 02/08/2026)

As of today, February 8th, 2026, the current official version of the Eagle Scout Service Project Workbook is designated as Revision Date: 2024. While minor clarifications and formatting adjustments may occur, the core requirements and sections remain consistent. The BSA periodically reviews and updates the workbook to reflect changes in policies or best practices, but significant overhauls are infrequent.

It’s crucial to use this latest version to ensure your project proposal and report align with current BSA standards. Older versions may be missing required elements or contain outdated information, potentially causing delays in the review process. Regularly check the Scouting.org website for any announced updates or revisions. Your unit leader and council advancement team are also excellent resources for confirming you’re utilizing the most current workbook.

Project Planning & Proposal

Careful planning is paramount; brainstorm ideas, select a feasible project, and develop a detailed proposal for review by unit leaders and the committee.

Initial Project Ideas and Brainstorming

Embarking on your Eagle Scout service project begins with a period of thoughtful brainstorming. Consider your interests, skills, and the needs of your community. Explore potential projects that align with these factors, aiming for something impactful and sustainable. Don’t limit yourself initially – generate a wide range of ideas, no matter how ambitious or seemingly simple.

Think about organizations you’re familiar with, or areas where you see a clear need for improvement. Could you build something, restore a space, or organize a beneficial event? Research existing projects to gain inspiration, but strive for originality.

Document all your ideas, even those you initially dismiss. This list will serve as a foundation for further evaluation. Remember, the goal is to identify a project that is both meaningful to you and beneficial to others, setting the stage for a successful Eagle Scout experience.

Selecting a Suitable Project

After brainstorming, carefully evaluate each project idea against specific criteria. Feasibility is paramount – can you realistically complete the project with available resources, time, and support? Consider the scope; it should be substantial enough to demonstrate leadership but manageable within the timeframe. Ensure the project benefits a religious institution, school, or your community – it cannot benefit the Boy Scouts of America directly.

Assess potential risks and safety concerns. A well-planned project minimizes hazards for yourself and volunteers. Think about required permissions and approvals from beneficiaries and local authorities.

Finally, choose a project that genuinely excites you. Your enthusiasm will be crucial for motivating volunteers and overcoming challenges. A suitable project balances ambition with practicality, aligning with your skills and contributing positively to your community.

Developing a Detailed Project Proposal

Your project proposal is the blueprint for success, meticulously outlining every aspect of your service project. Begin with a clear description of the project’s purpose and the beneficiary it will serve. Detail the scope, including specific tasks, materials needed, and a realistic timeline with milestones.

A comprehensive budget is crucial, listing all anticipated expenses and potential funding sources. Include a detailed plan for recruiting and managing volunteers, outlining their roles and responsibilities.

Most importantly, address safety considerations and risk management strategies. This demonstrates responsible planning. The proposal, completed within the workbook, must be thorough and demonstrate your leadership capabilities to your unit leaders and committee for review and approval.

Unit Leader and Committee Review & Approval

Securing approval from your Unit Leader and Committee is a pivotal step. They assess the feasibility of your project, ensuring it aligns with Scouting principles and available resources. The committee attests that you are a registered Life Scout and reviews the proposal’s practicality.

They confirm their willingness to support the project to the agreed-upon level. A single authorized committee member can sign, reflecting the unit’s self-governance. Concerns raised by the committee should be addressed collaboratively; their decision isn’t always binding, but is important.

Ultimately, the Council/District Advancement Team typically defers resolution of disputes back to the unit. This emphasizes unit-level responsibility. Their approval, documented in the workbook, signifies your project is ready for execution.

Committee Attestation Details (Current Guidelines)

The Committee’s attestation on the project proposal confirms the candidate’s Life Scout status and unit registration. They verify a review of the proposal and express comfort with its feasibility, pledging support as agreed. Authorization for approval rests with the unit committee, allowing a designated member to sign.

Unit self-governance is key; how the committee organizes internally is at their discretion, guided by the Chartering Organization. A Chair’s approval, even without a formal vote, generally suffices. However, raised concerns should be addressed through unit discussion and decision-making.

The Council/District Advancement Team typically directs any disputes back to the unit for resolution, reinforcing local responsibility. This attestation is a critical component of workbook completion.

Project Execution

Successfully bringing your plan to life involves securing resources, coordinating volunteers, adhering to a timeline, and prioritizing safety throughout every stage of the project.

Gathering Materials and Resources

Efficient resource acquisition is paramount for project success; Begin by creating a comprehensive list of all necessary materials – lumber, paint, tools, and any specialized equipment. Explore donation opportunities from local businesses; many are eager to support Scout initiatives.

Detailed budgeting is crucial; track expenses meticulously within the project workbook. Consider bulk purchasing to reduce costs, but always prioritize quality and safety. Don’t forget permits or permissions required for your project location or activities.

Volunteer contributions can extend beyond labor to include material donations. Clearly communicate material needs to volunteers and donors. Maintain a detailed inventory log to prevent shortages and ensure responsible use of resources. Remember to document all donations for potential tax benefits for donors.

Recruiting and Managing Volunteers

Successful project completion often hinges on a dedicated volunteer team. Begin by identifying the skills needed and the number of volunteers required. Reach out to your troop, school, community organizations, and even local businesses for assistance. Clearly define roles and responsibilities for each volunteer.

Effective communication is key; establish a regular communication channel – email, group chat – to keep everyone informed. Schedule volunteer shifts strategically, considering availability and skill sets. Prioritize safety training for all volunteers, especially when using tools or equipment.

Acknowledge and appreciate volunteer contributions; a simple thank-you goes a long way. Document volunteer hours accurately in your project log, as this contributes to overall service hour tracking. Remember, a well-managed team fosters a positive and productive work environment.

Project Timeline and Milestones

A detailed timeline is crucial for keeping your Eagle Scout service project on track. Break down the project into smaller, manageable milestones – planning, material acquisition, construction/implementation, and final cleanup. Assign realistic deadlines to each milestone, allowing for potential delays.

Utilize a visual timeline, such as a Gantt chart, to illustrate the project’s progression. Regularly monitor progress against the timeline and adjust as needed. Identify potential roadblocks and develop contingency plans. Communicate the timeline to your volunteers and unit leaders to ensure everyone is aligned.

Celebrating milestone achievements boosts morale and reinforces commitment. Remember, the workbook requires detailed documentation of your project’s progress, so maintain accurate records of completed milestones and any timeline adjustments.

Safety Considerations and Risk Management

Prioritizing safety is paramount throughout your Eagle Scout service project. Thoroughly assess potential hazards associated with each project phase – material handling, tool usage, environmental factors, and volunteer activities. Develop a comprehensive safety plan addressing these risks.

Ensure all volunteers receive appropriate safety training before commencing work. Provide necessary personal protective equipment (PPE) and enforce its use. Establish clear safety protocols and emergency procedures. Obtain necessary permits and approvals, adhering to all local regulations.

The project workbook requires a detailed safety plan outlining identified hazards and mitigation strategies. Document all safety briefings and incident reports. Remember, a safe project is a successful project, protecting both volunteers and the community.

Documentation & Reporting

Meticulous record-keeping is crucial; maintain a detailed project log, track service hours (aiming for 100+), and accurately complete each workbook section for review.

Maintaining a Detailed Project Log

A comprehensive project log is absolutely essential throughout your Eagle Scout service project. This isn’t merely a formality; it’s a crucial record of everything you do, from initial planning stages to the final completion. Document dates, times, specific tasks completed, materials used, and any challenges encountered.

Be incredibly specific. Instead of writing “Worked on the fence,” detail “Installed 15 fence posts, secured with concrete, and leveled each post using a spirit level – 3 hours.” This level of detail provides clear evidence of your effort and demonstrates responsible project management.

The log should also include who was present during work sessions, volunteer hours contributed by others, and any significant decisions made. Consider using a digital spreadsheet or a dedicated notebook for easy organization and accessibility. This log will be invaluable when completing the workbook and during the final review process, proving your dedication and thoroughness.

Tracking Service Hours (Recommended 100+ Hours)

While there isn’t a strict minimum hour requirement mandated by the BSA, consistently aiming for 100+ service hours is generally advised and demonstrates significant commitment. Leaders often suggest this benchmark as a reasonable indicator of a substantial project. Meticulously track all time dedicated to the project, not just the physical labor.

This includes time spent planning, gathering materials, communicating with volunteers, and attending meetings. Don’t underestimate the time invested in these preparatory phases – they are integral to the project’s success. Accurate tracking is vital for completing the workbook and showcasing your dedication.

Remember to differentiate between direct service hours (hands-on work) and indirect hours (planning, coordination). Both are valuable and should be documented. Your detailed log, as previously mentioned, will be your primary source for calculating total hours.

Personal Service Hour Logging (Phone Calls, Meetings, Travel)

The Eagle Scout workbook specifically requests a record of your personal service hours, extending beyond the direct project work. This encompasses all time you personally invest, even seemingly minor activities. Every phone call made to coordinate volunteers, every meeting attended to plan logistics, and even travel time to and from the project site should be logged.

Don’t dismiss short durations – even five-minute increments add up significantly over the project’s lifespan. Maintaining this detailed log is crucial, as your planning and preparatory efforts often exceed the actual hands-on project time. This detailed accounting can provide a valuable boost to your overall service hour total, potentially bridging any gaps.

Remember, the workbook’s intention is to recognize your comprehensive involvement, not just the physical labor. Accurate logging demonstrates dedication and thoroughness.

Completing the Workbook Sections Accurately

Meticulous attention to detail is paramount when completing the Eagle Scout Project Workbook. Each section builds upon the last, so accuracy from the outset is crucial. Ensure all information aligns with your project proposal and any subsequent approvals received from your unit leaders and committee.

Don’t rush the process; thoroughly review each question and provide comprehensive answers. Vague or incomplete responses can lead to delays or require revisions; The workbook serves as the official record of your project, so clarity and precision are essential. Double-check all dates, names, and figures for errors.

Remember, the workbook isn’t just a formality; it demonstrates your organizational skills and commitment to the scouting method. A well-completed workbook reflects a well-executed project.

Final Submission & Review

Submitting your completed workbook initiates the final review stage; the Council/District evaluates your project’s adherence to BSA guidelines and approves completion.

Final Project Report

The final project report is a crucial component of the Eagle Scout Service Project, serving as a comprehensive narrative of your entire undertaking. This report, meticulously detailed within the workbook, should clearly articulate the initial project goals, the planning process, and any adjustments made along the way.

It’s essential to document the challenges encountered and how they were overcome, demonstrating problem-solving skills and leadership. Include specifics about volunteer recruitment, material acquisition, and the project timeline.

Furthermore, the report must accurately reflect the total service hours contributed – both those of volunteers and your own personal hours dedicated to planning, meetings, and logistical tasks. Remember to include even seemingly minor time commitments, as these accumulate significantly. A well-crafted report showcases not only the project’s impact but also your dedication and organizational abilities, ultimately supporting a successful review by the Council/District.

Workbook Submission to Council/District

Submitting your completed workbook to the Council or District is a pivotal step towards Eagle Scout recognition. The specific submission process varies, so it’s crucial to consult your local Council’s guidelines for detailed instructions. Typically, this involves delivering a physical copy or submitting a digital version through a designated online portal.

Ensure the workbook is entirely complete, accurately signed by all required parties – including your Unit Leader and Committee. Any missing information or signatures will likely cause delays. Be prepared for potential follow-up questions or requests for clarification from the Council/District review team.

Understand that the Council/District’s role is primarily to ensure adherence to national standards and that the project aligns with BSA guidelines. They generally defer to the Unit Committee’s initial approval, so addressing concerns at the unit level is often more effective.

Council/District Review Process

The Council/District review focuses on verifying that the submitted project adheres to national Eagle Scout requirements and BSA standards. Reviewers will examine the workbook for completeness, proper signatures, and a clear demonstration of project planning, execution, and leadership. They assess if the project’s scope is substantial enough and if the candidate genuinely led the effort.

Expect a thorough, but generally supportive, review. The Council/District typically won’t overturn a Unit Committee’s approval unless significant concerns arise regarding safety, feasibility, or adherence to BSA policies. Any identified issues will be communicated back to the candidate, often through the Unit Leader.

Remember, the Council/District aims to facilitate the process, not to create obstacles. They’ll likely push any debates about Unit Committee decisions back to the unit itself, emphasizing self-governance and local resolution.

Potential Concerns and Resolution (Unit Level)

Common concerns at the unit level often revolve around project scope, safety planning, and adequate volunteer recruitment. If the committee questions feasibility, the candidate should be prepared to revisit the proposal, potentially scaling it down or bolstering the plan with more detailed logistics.

Disagreements about leadership demonstrated within the project are also possible. The candidate must clearly articulate their role – initiating, organizing, leading, and managing the project – providing specific examples within the workbook.

Ultimately, the Unit Committee has significant authority. If concerns persist, open communication and a willingness to compromise are crucial. Remember, the Council generally defers to the unit’s judgment, encouraging internal resolution before escalating issues. Document all discussions and revisions thoroughly.

Understanding Committee Authority & Decision-Making

The Unit Committee’s authority regarding the Eagle Scout service project is substantial, yet flexible. While a formal vote isn’t always required – a Chair’s approval can suffice if the committee self-governs effectively – the committee must genuinely support the project’s feasibility and the candidate’s leadership.

Decision-making processes vary widely between units, guided by the Chartering Organization. The committee can address concerns and request revisions, but their decisions aren’t necessarily binding or enforceable by the Council.

It’s vital to remember that the Council Advancement Team typically encourages units to resolve internal disputes independently. The committee attests to the candidate’s Life Scout status and their commitment to the project, not necessarily its flawless execution, but a reasonable attempt.

rudrashtakam pdf

Rudrashtakam PDF: A Comprehensive Guide

Rudrashtakam resources are widely available online in PDF format, offering convenient access to this sacred hymn dedicated to Lord Shiva.

Numerous websites provide downloads, including options with accompanying text for ease of recitation and understanding.

What is Rudrashtakam?

Rudrashtakam is a revered hymn, a stotra, dedicated to Lord Shiva, composed in Sanskrit. It consists of eight verses (Ashtakam), each glorifying different aspects and attributes of the deity. The name itself, “Rudrashtakam,” directly translates to “eight verses on Rudra,” with Rudra being a fierce form of Lord Shiva.

This powerful hymn is not merely a poetic composition; it’s considered a potent spiritual practice. Recitation of the Rudrashtakam is believed to invoke the blessings of Lord Shiva, offering protection, peace, and liberation. The verses vividly describe Shiva’s majestic form, his power, and his compassionate nature.

Digitized versions, readily available as PDF files, have made this ancient hymn accessible to a wider audience. These PDFs often include the Sanskrit text alongside transliterations and translations, facilitating understanding and accurate pronunciation for devotees. The availability of Rudrashtakam in PDF format ensures its preservation and continued practice for generations to come.

The Significance of Rudrashtakam in Hinduism

Within Hinduism, the Rudrashtakam holds immense spiritual significance, revered as a powerful hymn for invoking Lord Shiva’s blessings. It’s believed to be particularly effective in removing obstacles, alleviating suffering, and bestowing spiritual growth upon devotees.

The hymn’s verses encapsulate the essence of Shaivism, highlighting Shiva’s role as the destroyer of evil and the bestower of grace. Recitation is often undertaken for protection from negative energies and for attaining overall well-being. The Rudrashtakam is frequently chanted during auspicious occasions, festivals dedicated to Shiva, and as a daily spiritual practice.

The widespread availability of the Rudrashtakam in PDF format has amplified its accessibility, allowing devotees worldwide to easily incorporate this sacred hymn into their devotional routines. These digital versions preserve the integrity of the text, ensuring its continued relevance and practice within the Hindu tradition. The PDF format facilitates learning and recitation for all.

Historical Origins and Authorship

The precise historical origins of the Rudrashtakam remain somewhat shrouded in tradition, though its authorship is widely attributed to the 8th-century Shaiva saint, Tulsidas. However, some scholars suggest earlier roots, potentially tracing elements back to ancient Vedic hymns dedicated to Rudra, a fierce form of Shiva.

Regardless of the exact timeline, the hymn’s composition reflects a deep understanding of Shaiva theology and a profound devotion to Lord Shiva. The Rudrashtakam quickly gained prominence within the Bhakti movement, becoming a staple in devotional practices across India.

The proliferation of Rudrashtakam PDF versions today speaks to its enduring popularity and accessibility. These digital copies ensure the preservation and dissemination of Tulsidas’s work, allowing devotees to connect with this ancient hymn regardless of location. The PDF format aids in study and recitation, maintaining the hymn’s legacy.

Understanding the Structure of Rudrashtakam

Rudrashtakam consists of eight verses (Ashtakam), each a powerful invocation of Lord Shiva. PDF versions clearly display this structure, aiding comprehension and recitation.

The Eight Verses (Ashtakam) Explained

Each verse within the Rudrashtakam, readily available in PDF format, is a distinct offering of praise and devotion to Lord Shiva, detailing His various attributes and glories. These verses, often found with transliteration and translations in PDF documents, build upon each other to create a comprehensive hymn.

The first verse typically invokes Shiva’s benevolent nature, while subsequent verses elaborate on His fierce and powerful aspects. PDF versions often include explanations of the symbolism within each verse, clarifying references to Shiva’s form – like the snake around His neck and the crescent moon adorning His head.

Many PDFs highlight how each verse describes Shiva as the ultimate reality, the destroyer of ignorance, and the source of all creation. The verses collectively paint a vivid picture of Shiva’s cosmic dance and His role in maintaining the balance of the universe. Studying these verses through accessible PDF resources deepens understanding and enhances the devotional experience.

Meter and Poetic Style

The Rudrashtakam, frequently accessed in PDF form, is composed in the Anushtubh meter, a classical Sanskrit poetic form known for its rhythmic flow and elegant structure. This meter contributes significantly to the hymn’s memorability and ease of recitation, making PDF versions with transliteration particularly useful.

The poetic style is characterized by rich imagery, evocative descriptions, and the skillful use of alliteration and other figures of speech. PDF documents often preserve the original Sanskrit verses alongside translations, allowing readers to appreciate the artistry of the composition.

The verses are crafted to create a harmonious blend of sound and meaning, enhancing the devotional experience. Many PDF resources analyze the poetic devices employed, revealing the depth and sophistication of the hymn’s construction. The consistent meter and refined style elevate the Rudrashtakam to a masterpiece of Sanskrit devotional poetry.

Deity Addressed: Lord Shiva and His Attributes

The Rudrashtakam, readily available as a PDF download, is a hymn entirely dedicated to Lord Shiva, the supreme deity in Shaivism. The verses vividly portray Shiva’s multifaceted attributes, emphasizing his power, compassion, and transcendental nature. PDF versions often include explanations of these attributes, enriching understanding.

Shiva is depicted with iconic symbols like the serpent around his neck, the crescent moon adorning his head, and the Ganges flowing from his matted locks. The hymn highlights his role as the destroyer and transformer, essential for cosmic balance. Accessing the Rudrashtakam in PDF format allows focused contemplation on these divine qualities.

The verses celebrate Shiva as the ultimate source of creation and liberation, embodying both fierce energy and serene grace. Many PDF resources provide interpretations of these attributes within the broader context of Hindu philosophy.

Accessing Rudrashtakam in PDF Format

Rudrashtakam PDF files are easily found online through various websites and digital libraries, offering convenient access to this devotional hymn for study and recitation.

Where to Download Rudrashtakam PDF with Text

Several online platforms offer Rudrashtakam PDF downloads that include the original Sanskrit verses alongside English or Hindi transliterations and translations. This is particularly helpful for those unfamiliar with the Sanskrit script or seeking a deeper understanding of the hymn’s meaning.

Websites dedicated to Hindu scriptures and stotras frequently host these files. Look for resources from reputable sources to ensure authenticity and accuracy. Some sites provide downloadable files in various formats, including PDF, Word documents (.doc/.docx), and even plain text (.txt). The PDF format is generally preferred for its consistent formatting across different devices.

Additionally, digital libraries and online bookstores specializing in religious texts often carry Rudrashtakam resources. Checking these sources can yield high-quality PDF versions with detailed explanations and commentaries. Remember to verify the source’s credibility before downloading any file to avoid potentially corrupted or inaccurate content. Many options also offer single-page processed JP2 ZIP files.

Different Versions of Rudrashtakam PDF Available

The Rudrashtakam PDF isn’t monolithic; several versions circulate online, catering to diverse preferences and needs. Some PDFs focus solely on the Sanskrit verses, ideal for those proficient in the language. Others include transliterations in Roman script, aiding pronunciation for non-Sanskrit speakers.

You’ll find versions with varying translation styles – literal, interpretive, and those emphasizing devotional aspects. Some PDFs incorporate detailed commentaries explaining the symbolism and philosophical underpinnings of each verse. Formats also differ; some are designed for easy printing, while others are optimized for digital reading on tablets or e-readers.

Furthermore, variations exist in the presentation of the text, including font sizes, layouts, and the inclusion of supplementary materials like images or related mantras. Documents like “Sri Rudrashtakam.docx” and simple text files (.txt) are also available, though PDF remains the most common and user-friendly format for accessing this powerful hymn.

Reliable Sources for Authentic PDF Downloads

Securing an authentic Rudrashtakam PDF requires discerning sources. While numerous websites offer downloads, verifying their reliability is crucial. Reputable Hindu organizations and spiritual websites often provide accurate versions, ensuring the verses haven’t been altered or corrupted.

Websites archiving religious texts and stotras can be trustworthy, but always cross-reference with known, respected sources. Be cautious of sites with excessive advertising or unclear origins. Digital libraries specializing in Sanskrit literature may also host verified PDFs.

Checking for consistent transliteration and translation across multiple sources can help validate authenticity. Avoid downloading from file-sharing platforms known for distributing unverified content. Prioritize sources that clearly state the lineage or authority behind the PDF, guaranteeing its fidelity to the original hymn.

Recitation and Benefits of Rudrashtakam

Rudrashtakam recitation, often accessed via PDF, is believed to bestow blessings of Lord Shiva, promoting peace, prosperity, and spiritual growth for devotees.

Proper Pronunciation and Chanting Techniques

Achieving accurate pronunciation is crucial when reciting Rudrashtakam, often learned from PDF versions containing the Sanskrit text. Pay close attention to the sounds, as subtle variations can alter the meaning and impact of the verses. Utilizing audio resources alongside the PDF is highly recommended; many online sources offer recordings of skilled chanters.

Chanting should be done with clarity and devotion, focusing on each syllable. Begin slowly, gradually increasing the pace as you become more comfortable. Maintaining a consistent rhythm enhances the meditative quality of the recitation. It’s beneficial to understand the meaning of the verses, which can deepen your connection to the hymn.

Some practitioners prefer chanting in a specific rāga (melodic framework) to further elevate the experience. However, even a simple, heartfelt recitation, guided by a PDF text, can be profoundly effective. Remember, the intention and devotion behind the chanting are paramount.

Benefits of Regular Recitation

Consistent recitation of Rudrashtakam, often facilitated by readily available PDF versions, is believed to yield significant spiritual and worldly benefits. Devotees report increased mental clarity, reduced stress, and a heightened sense of inner peace. The hymn’s powerful verses are thought to invoke Lord Shiva’s blessings, fostering protection and removing obstacles.

Regular chanting is said to purify negative energies, both within the individual and their surrounding environment. It can also strengthen devotion and deepen one’s connection to the divine. Many believe it aids in overcoming fears and anxieties, promoting courage and self-confidence.

Furthermore, reciting Rudrashtakam is considered auspicious for overall well-being and can contribute to improved health and prosperity. Utilizing a PDF for accurate pronunciation ensures the full benefits are realized through dedicated practice.

Occasions for Reciting Rudrashtakam

The Rudrashtakam, conveniently accessible in PDF format for easy reference, is recited on various auspicious occasions within Hinduism. It’s particularly favored during the holy month of Shravan, dedicated to Lord Shiva, and on Mondays – considered Shiva’s day. Many devotees incorporate it into their daily puja (worship) routines.

Recitation is also common during special ceremonies like Maha Shivaratri, a significant festival celebrating the marriage of Shiva and Parvati. It’s believed to be highly effective in seeking blessings for health, prosperity, and spiritual growth.

Furthermore, the Rudrashtakam is often chanted during times of difficulty or crisis, offering solace and invoking divine intervention. Having a PDF copy allows for convenient recitation whenever and wherever needed, providing comfort and strength.

Rudrashtakam Translations and Interpretations

Rudrashtakam PDFs often include translations in English, Hindi, and other languages, aiding comprehension. Nuances vary between interpretations, enriching the devotional experience.

English Translations and Their Nuances

Several English translations of the Rudrashtakam are accessible alongside PDF versions of the stotra. However, capturing the poetic essence and spiritual depth of the original Sanskrit poses a significant challenge. Different translators employ varying approaches, resulting in subtle yet impactful nuances.

Some translations prioritize literal accuracy, aiming to convey the direct meaning of each verse. While valuable for scholarly study, these may sometimes lack the lyrical flow and emotive power of the original. Others adopt a more interpretive approach, focusing on conveying the underlying devotional sentiment and philosophical concepts.

These translations might use more poetic language and imagery, potentially sacrificing some literal precision for enhanced aesthetic appeal. Examining multiple English translations alongside the original Sanskrit (if possible) allows for a richer understanding of the Rudrashtakam’s multifaceted beauty. The choice of translation often depends on the reader’s preference and purpose – whether seeking precise linguistic analysis or a deeply moving devotional experience.

Hindi Translations and Cultural Context

Hindi translations of the Rudrashtakam are immensely popular, reflecting the widespread devotion to Lord Shiva across North India. These translations often resonate deeply with a broader audience due to the linguistic accessibility and strong cultural connection. The PDF versions frequently include Hindi transliteration alongside the Sanskrit verses, aiding in correct pronunciation and comprehension.

The cultural context significantly influences the interpretation and reception of the Rudrashtakam in Hindi-speaking regions. Shiva is deeply ingrained in the local folklore, traditions, and religious practices. Consequently, the imagery and symbolism within the stotra are readily understood and appreciated.

Hindi translations often incorporate regional devotional nuances and poetic styles, enhancing the emotional impact. Understanding this cultural backdrop is crucial for fully grasping the significance of the Rudrashtakam within the Hindi-speaking world. The availability of PDF resources with Hindi translations fosters wider accessibility and continued devotional practice.

Comparative Analysis of Different Translations

Analyzing various Rudrashtakam translations, readily available in PDF format, reveals subtle yet significant differences in interpretation. English translations often prioritize literal accuracy, while others emphasize poetic flow and emotional resonance. Comparing these approaches highlights the challenges of conveying the nuances of Sanskrit into another language.

Different translators may interpret specific verses differently, influenced by their philosophical leanings or understanding of Shaivism. Some PDF versions include multiple translations side-by-side, facilitating direct comparison. Examining these variations enriches one’s understanding of the stotra’s depth and complexity.

Furthermore, the quality of PDF scans and digital text can impact readability and accuracy. Critical evaluation of the source and translator is essential. A comparative study reveals that no single translation fully captures the essence of the Rudrashtakam; each offers a unique perspective on this powerful hymn.

affidavit of death form pdf

What is an Affidavit of Death?

Definition and Purpose

An Affidavit of Death is a sworn legal document confirming an individual’s passing‚ often used alongside a death certificate for official notifications to various entities.

Legal Significance of the Document

This document holds substantial legal weight‚ serving as formal proof of death for courts‚ financial institutions‚ and other organizations requiring verification.

An Affidavit of Death is a legally binding‚ sworn statement used to verify an individual’s demise. It’s essentially a formal declaration‚ made under oath‚ attesting to the fact that someone has passed away. This document isn’t a replacement for a death certificate‚ but rather a supplementary tool used when official notification is required.

Its primary purpose is to provide concrete evidence of death to institutions like courts‚ banks‚ insurance companies‚ and government agencies. Often‚ it’s needed when a death certificate isn’t immediately available or when additional assurance is necessary for legal or administrative processes. The affidavit streamlines procedures related to estates and asset distribution.

The Affidavit of Death carries significant legal weight as a sworn statement‚ meaning the person signing it (the affiant) is legally responsible for its accuracy. Providing false information can lead to penalties‚ including perjury charges. Courts rely on this document during probate proceedings to establish the validity of claims and transfer assets.

Financial institutions require it to access accounts‚ settle debts‚ and distribute funds according to a will or state law. It’s crucial for property transfers‚ insurance claims‚ and benefit payouts. Essentially‚ it provides a legally recognized confirmation of death‚ enabling various legal and financial processes to proceed smoothly and lawfully.

When is an Affidavit of Death Required?

Probate Court Proceedings

An Affidavit of Death is frequently needed when initiating probate‚ allowing the court to legally validate a will and begin asset distribution.

Transfer of Property Ownership

It’s essential for transferring property titles‚ ensuring legal ownership changes are correctly documented after the deceased’s passing.

Probate courts require an Affidavit of Death as a foundational document when a will is submitted for validation; This sworn statement officially confirms the testator’s passing‚ initiating the legal process of estate administration. The affidavit provides the court with essential information‚ including the deceased’s name‚ date of death‚ and last known address.

It’s a crucial step in establishing the court’s jurisdiction over the estate and authorizing the executor or administrator to manage assets. Without a properly executed affidavit‚ the probate process can face significant delays. Often‚ it’s submitted alongside the death certificate to provide comprehensive proof of death‚ streamlining the court’s review and approval process.

An Affidavit of Death is frequently necessary when transferring property ownership after someone’s passing‚ particularly with “transfer on death” deeds. Beneficiaries utilize this document to legally establish their right to inherit the property‚ presenting it to county recording offices. It confirms the previous owner’s death‚ enabling the transfer to proceed smoothly.

This is especially vital when dealing with real estate‚ bank accounts‚ or other assets held in the deceased’s name. The affidavit serves as proof for title companies and financial institutions‚ facilitating the change of ownership. It simplifies the process‚ avoiding potential legal complications and ensuring a clear transfer of assets to the rightful heirs.

Insurance Claims and Benefits

An Affidavit of Death is a crucial document when filing insurance claims or accessing benefits after a person’s death. Insurance companies and benefit providers require official proof of passing to process claims and distribute funds to beneficiaries. This affidavit‚ alongside the death certificate‚ provides that necessary legal verification.

It streamlines the claims process for life insurance policies‚ retirement accounts‚ and other benefits. The affidavit confirms the insured’s death‚ allowing for the prompt and accurate disbursement of funds to the designated recipients. It’s a key component in ensuring beneficiaries receive the financial support they are entitled to.

Key Components of an Affidavit of Death Form

Deceased’s Information

Forms require the deceased’s full legal name‚ date and place of birth‚ date and location of death‚ and potentially their last known address.

Affiant’s Information

The affiant must provide their name‚ address‚ contact details‚ and a statement confirming their knowledge of the deceased’s passing.

Statement of Death and Circumstances

A clear declaration of death‚ including the date and place‚ along with any known circumstances surrounding the death‚ is essential for the affidavit.

The affidavit of death form necessitates comprehensive details about the deceased individual. This typically includes their complete legal name‚ as it appears on official identification documents‚ ensuring accuracy for legal purposes. Crucially‚ the form requires the deceased’s date of birth‚ and their precise place of birth – city‚ state‚ and country.

Furthermore‚ the date of death and the location where the death occurred are mandatory fields. Some forms may also request the deceased’s last known address‚ social security number (though caution is advised when providing this)‚ and marital status. Providing accurate and complete information regarding the deceased is paramount for the affidavit’s validity and acceptance.

The affidavit of death form requires detailed information about the affiant – the person swearing to the truthfulness of the document. This section demands the affiant’s full legal name and contact details‚ including a complete mailing address and a reliable phone number. Accurate identification is vital‚ so the form will typically request the affiant’s date of birth and place of birth.

Additionally‚ the affiant must clearly state their relationship to the deceased‚ establishing their standing to provide the affidavit. A signature is‚ of course‚ essential‚ and often requires notarization to validate the sworn statement. Providing truthful and verifiable information is crucial for the affidavit’s legal standing.

The affidavit of death form’s core lies in the detailed statement regarding the deceased’s passing. This section necessitates the full legal name of the deceased‚ their date and place of death‚ and the county and state where the death occurred. It also requires a clear declaration that the affiant believes the individual is‚ in fact‚ deceased.

While extensive detail isn’t always needed‚ briefly outlining the circumstances of the death – whether from natural causes‚ accident‚ or other means – is often required. This section solidifies the affidavit’s purpose as formal confirmation of the death event.

Finding and Downloading Affidavit of Death Forms (PDF)

Official Government Websites

Affidavit of death forms (PDF) are often available on official government websites‚ particularly those of county clerk or probate court offices.

Legal Form Providers

Numerous legal form providers offer downloadable templates‚ but ensure they align with your specific state’s requirements.

Finding an Affidavit of Death form (PDF) often begins with exploring official government websites. County clerk offices and probate courts frequently provide downloadable forms directly on their sites. These sources are generally the most reliable‚ ensuring the document adheres to local and state-specific legal requirements.

Look for sections dedicated to “Probate Forms” or “Estate Administration.” Some states may have a centralized website for court forms‚ simplifying the search process. Always verify the form’s date to ensure it’s current‚ as regulations can change. Downloading from official sources minimizes the risk of using an outdated or invalid template‚ safeguarding against potential legal complications.

Numerous legal form providers offer Affidavit of Death forms (PDF) as part of their document libraries. These services‚ like LegalZoom or US Legal Forms‚ can be convenient‚ providing pre-drafted templates. However‚ it’s crucial to exercise caution when using these sources.

Always review the form carefully to ensure it aligns with the specific requirements of the state and county where it will be filed. Some providers may charge a fee for access‚ while others offer basic forms for free. Prioritize providers with strong reputations and clear disclaimers regarding legal advice; these forms are templates‚ not substitutes for professional counsel.

Ensuring Form Validity and Currency

Maintaining form validity is paramount when utilizing an Affidavit of Death (PDF). Laws and requirements frequently change‚ so an outdated form may be rejected. Always verify the document’s date and confirm it reflects the current regulations of the relevant jurisdiction.

Cross-reference the form’s content with official state guidelines or consult with a legal professional. Downloading from trusted sources‚ like official government websites‚ increases the likelihood of obtaining a current and legally sound document. Regularly check for updates‚ as forms are often revised to reflect legislative changes.

Completing the Affidavit of Death Form

Required Information and Documentation

Accurate completion demands providing the deceased’s details‚ affiant information‚ and a clear statement of death‚ alongside supporting documentation like a death certificate.

Notarization Requirements

Proper notarization is crucial; a notary public must witness the signing to validate the affidavit’s authenticity and legal standing.

Successfully completing an Affidavit of Death necessitates meticulous attention to detail and the provision of specific‚ crucial information. Typically‚ you’ll need the deceased’s full legal name‚ date and place of death‚ and last known address. The affiant – the person swearing to the truth of the statement – must also provide their complete contact information and a clear statement establishing their knowledge of the death.

Supporting documentation is paramount. A certified copy of the death certificate is almost always required‚ alongside potentially other documents like identification for both the deceased and the affiant. Some forms may also request details regarding the circumstances of the death‚ though this is less common. Ensuring all requested information is accurate and complete is vital for acceptance.

Proper notarization is a non-negotiable element for a valid Affidavit of Death. The affiant must personally appear before a qualified notary public‚ presenting valid photo identification. The notary will then administer an oath or affirmation‚ verifying the affiant’s identity and their truthful attestation to the contents of the affidavit.

The notary’s role is to deter fraud and ensure the document’s authenticity. They will affix their official seal or stamp‚ along with their signature and commission expiration date‚ to the affidavit. Without proper notarization‚ the document is generally considered legally invalid and will likely be rejected by the receiving institution.

Accuracy and Truthfulness

Absolute accuracy and truthfulness are paramount when completing an Affidavit of Death. Any false statements or inaccuracies can lead to severe legal consequences‚ including perjury charges. Double-check all information‚ including the deceased’s full legal name‚ date and place of death‚ and your own contact details.

Verify all dates and names against official documentation like the death certificate. The affiant must personally attest to the veracity of the information provided‚ understanding that they are legally responsible for its correctness. A meticulously prepared and truthful affidavit ensures a smooth and legally sound process.

State-Specific Requirements for Affidavits of Death

Variations in Form and Content

State laws dictate specific affidavit formats and required content; forms vary significantly‚ necessitating the use of the correct state-specific document.

Specific State Laws and Regulations

Each state has unique regulations governing affidavits of death‚ impacting notarization‚ witness requirements‚ and acceptable supporting documentation.

Affidavit of Death forms aren’t standardized nationally; substantial variations exist between states regarding their structure and the information they demand. Some states utilize pre-printed forms available from the probate court or county clerk‚ while others require the affiant to draft the document independently‚ adhering to specific guidelines.

These differences extend to the level of detail required about the deceased‚ the affiant‚ and the circumstances surrounding the death. Certain states may necessitate detailed biographical information‚ while others focus primarily on confirming the date and location of death. The inclusion of specific clauses or statements can also differ‚ impacting the document’s legal validity depending on the jurisdiction. Always ensure you’re using the correct form for the relevant state.

Affidavit of Death requirements are deeply rooted in individual state laws and regulations‚ creating a complex landscape for users. States dictate specific language‚ notarization protocols‚ and acceptable supporting documentation. For instance‚ some states mandate the inclusion of the deceased’s social security number‚ while others prohibit it.

Furthermore‚ laws govern who can serve as an affiant – often a close relative or someone with direct knowledge of the death. Failing to comply with these state-specific rules can render the affidavit invalid‚ causing delays in probate‚ property transfer‚ or insurance claim settlements. Thorough research of the relevant state’s statutes is crucial.

Common Mistakes to Avoid When Filing

Incomplete Information

Avoid submitting affidavits with missing details; ensure all sections are fully completed with accurate information to prevent processing delays or rejections.

Incorrect Dates or Names

Double-check all dates and names for accuracy‚ as even minor discrepancies can invalidate the document and cause significant legal complications.

Lack of Notarization

Always obtain proper notarization‚ as an unnotarized affidavit lacks legal validity and will not be accepted by courts or institutions.

Submitting an affidavit of death with missing details is a frequent error that can lead to significant complications. Ensure every section of the form is thoroughly completed‚ leaving no blanks unfilled. This includes the deceased’s full legal name‚ date and place of death‚ and relevant identifying information.

Similarly‚ the affiant’s details – name‚ address‚ and contact information – must be accurately provided. Omissions can cause processing delays‚ requests for resubmission‚ or even outright rejection of the affidavit. A complete affidavit demonstrates diligence and respect for the legal process‚ streamlining the verification of death for all involved parties.

Accuracy is paramount when completing an affidavit of death form; even minor discrepancies in dates or names can cause substantial issues. Verify the deceased’s full legal name and date of death against the official death certificate to avoid errors. Double-check all entries‚ ensuring consistency throughout the document.

Incorrect information may lead to rejection by the receiving institution‚ necessitating corrections and resubmission. This can significantly delay crucial processes like probate or insurance claim settlements. Meticulous attention to detail is vital to ensure the affidavit accurately reflects the facts and is legally sound.

A properly notarized affidavit of death is often a mandatory requirement for acceptance. Notarization confirms the affiant’s identity and verifies that they signed the document willingly and under oath. Submitting an affidavit without notarization will almost certainly result in its rejection by courts‚ banks‚ or insurance companies.

Find a qualified notary public and present valid photo identification. The notary will witness the signing and affix their seal and signature‚ validating the document’s authenticity. Failing to obtain proper notarization renders the affidavit legally insufficient and defeats its purpose.

Affidavit of Death vs. Death Certificate

Distinguishing the Two Documents

A death certificate proves death; an affidavit states it under oath‚ often supplementing the certificate for legal processes and official notifications.

Using Both Documents in Conjunction

Both documents are frequently required together to facilitate property transfers‚ insurance claims‚ and other post-death administrative tasks.

A death certificate is an official record issued by a government authority‚ verifying the fact of a person’s death. It details vital statistics like date‚ place‚ and cause of death. Conversely‚ an affidavit of death is a sworn statement‚ made under oath‚ attesting to the individual’s passing.

While a death certificate proves the death occurred‚ an affidavit states the death as a factual matter‚ often used when the certificate alone isn’t sufficient for specific legal or administrative purposes. The affidavit provides a personal attestation‚ bolstering the official record with sworn testimony. It’s a crucial distinction for various legal proceedings.

Often‚ a death certificate and an affidavit of death are used together to ensure a comprehensive and legally sound notification of passing. The death certificate provides the official verification‚ while the affidavit reinforces this with a sworn statement from someone with knowledge of the death.

This combination is particularly useful when dealing with financial institutions‚ property transfers‚ or insurance claims. It provides a stronger level of assurance and can expedite the processing of necessary paperwork. Utilizing both documents minimizes potential delays and ensures compliance with legal requirements‚ streamlining administrative tasks post-loss.

Using Gemini AI with Gmail for Related Tasks

Drafting Emails Regarding Death Notifications

Gemini AI within Gmail can assist in composing sensitive death notification emails‚ offering appropriate phrasing and ensuring respectful communication.

Organizing Important Documents

Gmail‚ powered by Gemini‚ helps organize related documents like the affidavit and death certificate‚ streamlining post-loss administrative tasks.

Utilizing Gemini AI within Gmail significantly simplifies the challenging task of composing death notification emails. The AI can generate drafts with appropriate and sensitive language‚ ensuring respectful communication to family‚ friends‚ and relevant institutions.

Specifically‚ Gemini can help articulate the necessary details regarding the deceased‚ referencing the Affidavit of Death form as official documentation. It can also assist in outlining required actions‚ such as informing banks or insurance companies.

Furthermore‚ Gemini can tailor the email’s tone to suit the recipient‚ offering options for formal or more personal notifications‚ easing the burden during a difficult time.

Gmail‚ enhanced by Gemini AI‚ proves invaluable for organizing crucial documents related to an estate‚ including the Affidavit of Death form (PDF). Gemini can automatically categorize emails containing these documents‚ creating dedicated folders for probate‚ insurance‚ and property transfer.

The AI’s search capabilities swiftly locate specific files when needed‚ streamlining the process of gathering information for legal proceedings or claim submissions.

Moreover‚ Gemini can assist in creating reminders for deadlines related to document filing‚ ensuring timely completion of necessary tasks during a period of grief and administrative complexity.

Gmail Security and Account Access

Protecting Sensitive Information

Gmail employs robust security measures to safeguard sensitive data within the Affidavit of Death form (PDF) and related estate documents‚ ensuring confidentiality.

Accessing Gmail on Multiple Devices

Access your Gmail account‚ and thus important documents‚ seamlessly across various devices—computer‚ phone‚ or tablet—for convenient management.

When dealing with an Affidavit of Death form (PDF)‚ Gmail prioritizes the security of highly sensitive personal and legal information. Robust encryption protocols protect your data both in transit and at rest‚ minimizing the risk of unauthorized access.

Gmail’s security features‚ including two-factor authentication‚ add an extra layer of protection against account breaches. Be cautious of phishing attempts seeking to obtain your login credentials or access to downloaded PDF forms. Regularly review account activity and security settings to ensure ongoing protection of your estate-related documents.

Remember to download and store the Affidavit of Death PDF securely on your devices‚ utilizing strong passwords and encryption where possible.

Gmail offers seamless accessibility across various devices – computers‚ smartphones (iOS and Android)‚ and tablets – allowing you to manage your Affidavit of Death form (PDF) and related communications conveniently.

The official Gmail app‚ available on Google Play and the Apple App Store‚ synchronizes your inbox‚ ensuring consistent access to important emails and attachments regardless of the device you’re using. Download the app to receive real-time notifications about new messages concerning the affidavit.

This multi-device compatibility facilitates efficient organization and sharing of the PDF document with legal professionals or family members.

unit 8 test polygons and quadrilaterals answer key pdf

Unit 8 Test: Polygons and Quadrilaterals ‒ Article Plan

This section outlines a study guide focusing on mastering key geometry concepts. It includes polygons‚ quadrilaterals‚ and their properties‚ preparing students for a comprehensive Unit 8 assessment‚ potentially in PDF format.

Polygons form the foundational building blocks of geometry‚ representing closed two-dimensional shapes constructed from straight line segments. Understanding their characteristics is crucial for success on the Unit 8 test covering polygons and quadrilaterals. This unit delves into identifying polygons based on their number of sides – from triangles to decagons and beyond – and recognizing their inherent properties.

A key aspect involves differentiating between various polygon types. The upcoming assessment‚ potentially available as a PDF answer key for self-assessment‚ will likely test your ability to classify shapes and apply fundamental geometric principles. Mastery of these concepts is essential‚ as they underpin more complex geometric problems. Resources like Disha Publication materials and online quizzes can aid in preparation. Remember‚ a solid grasp of basic polygon definitions is the first step towards conquering the Unit 8 exam!

Defining Polygons

A polygon is rigorously defined as a closed figure formed by three or more straight line segments connected end-to-end. These segments are called sides‚ and the points where they meet are vertices. Crucially‚ the sides must not intersect except at their endpoints‚ creating a completely enclosed space. This definition is fundamental to the Unit 8 test on polygons and quadrilaterals‚ and understanding it is vital for correctly identifying and classifying shapes.

The upcoming assessment‚ potentially accessible as a PDF with an answer key‚ will likely emphasize this precise definition. Expect questions requiring you to distinguish true polygons from shapes that violate these rules – for example‚ open figures or those with curved sides. Resources like geometry chapter reviews and practice quizzes (G8-Answer Key-04) will reinforce this understanding. Knowing what doesn’t constitute a polygon is just as important as knowing what does‚ ensuring success on the test!

Types of Polygons (Based on Sides)

Polygons are systematically categorized by the number of sides they possess. A triangle has three sides‚ a quadrilateral has four‚ a pentagon five‚ a hexagon six‚ and so on. The Unit 8 test on polygons and quadrilaterals will require you to recognize these common types and understand their specific names. Expect questions testing your ability to identify a polygon simply by counting its sides.

The answer key for the test‚ potentially available as a PDF‚ will likely rely on this precise nomenclature. Beyond the basics‚ you might encounter heptagons (7 sides)‚ octagons (8 sides)‚ and nonagons (9 sides). Familiarity with these terms is crucial. Review materials‚ like Disha Publication resources and homework assignments focusing on angles of polygons‚ will reinforce this classification system. Mastering these names will significantly improve your performance on the assessment and demonstrate a solid grasp of geometric fundamentals.

Regular vs. Irregular Polygons

A core distinction within polygons lies between regular and irregular forms. Regular polygons boast equal side lengths and equal interior angles – think of a perfect square or an equilateral triangle. Conversely‚ irregular polygons lack this uniformity; their sides and angles can vary. The Unit 8 test on polygons and quadrilaterals will assess your ability to differentiate between these two types.

The answer key‚ often found as a PDF resource‚ will likely emphasize this distinction in its solutions. Understanding this difference is vital for calculating interior angles and understanding a polygon’s properties. Expect questions requiring you to analyze diagrams and determine if a given shape is regular or irregular. Reviewing geometry chapter materials‚ particularly those covering angle measures‚ will be beneficial. Successfully identifying regular versus irregular polygons demonstrates a fundamental understanding of geometric symmetry and shape characteristics.

Quadrilaterals: A Specific Polygon Type

Quadrilaterals‚ four-sided polygons‚ are a key focus of Unit 8. The answer key PDF will detail their unique properties and classifications for test success.

Defining Quadrilaterals

Quadrilaterals represent a specific category within the broader family of polygons‚ distinguished by possessing precisely four sides and four vertices. Understanding this fundamental definition is crucial for success on the Unit 8 test‚ and the answer key PDF will reinforce this concept. These shapes are foundational in geometry‚ serving as building blocks for more complex figures.

Key properties include having four angles that sum to 360 degrees. The answer key will likely emphasize identifying these characteristics. A quadrilateral is formed by the intersection of four straight lines‚ creating a closed two-dimensional shape. The test will assess your ability to differentiate quadrilaterals from other polygons based on these defining features. Mastering this definition is the first step towards understanding the various types of quadrilaterals and their unique attributes‚ all of which will be covered in the Unit 8 material and clarified in the answer key PDF.

Properties of Quadrilaterals

Quadrilaterals‚ while diverse in form‚ share core properties essential for the Unit 8 test. A fundamental characteristic is that the sum of their interior angles always equals 360 degrees – a point the answer key PDF will undoubtedly highlight. They have four sides‚ four angles‚ and four vertices‚ forming a closed figure on a plane.

Beyond this‚ understanding side relationships and angle congruency is vital. The answer key will likely feature questions testing these concepts. Opposite sides may or may not be parallel‚ and opposite angles may or may not be congruent‚ depending on the specific type of quadrilateral. The Unit 8 material‚ and its corresponding answer key PDF‚ will delve into how these properties differentiate squares‚ rectangles‚ parallelograms‚ and trapezoids. Successfully identifying and applying these properties is key to solving problems on the test and demonstrating a solid grasp of quadrilateral geometry.

Types of Quadrilaterals: Parallelograms

Parallelograms are foundational quadrilaterals for the Unit 8 test‚ and the answer key PDF will certainly assess your understanding of their unique properties. Defined by two pairs of parallel sides‚ they exhibit key characteristics: opposite sides are congruent‚ opposite angles are congruent‚ and consecutive angles are supplementary.

The answer key will likely include problems requiring you to apply these properties to solve for unknown angles or side lengths. Understanding how diagonals bisect each other is also crucial. Furthermore‚ recognizing that rectangles‚ rhombuses‚ and squares are all special types of parallelograms is essential. The Unit 8 study materials‚ and the corresponding answer key PDF‚ will emphasize these relationships. Mastery of parallelogram properties provides a strong base for tackling more complex quadrilateral problems on the exam‚ ensuring a higher score.

Types of Quadrilaterals: Rectangles

Rectangles‚ a specific type of parallelogram‚ will be heavily featured on the Unit 8 test‚ and the answer key PDF will reflect this. Beyond possessing all parallelogram properties (opposite sides parallel and equal‚ opposite angles congruent)‚ rectangles are defined by having four right angles. This characteristic is key to solving problems involving the Pythagorean theorem and area calculations.

Expect the answer key to include questions testing your ability to apply these properties. Problems might involve finding missing side lengths given diagonal measurements‚ or calculating areas and perimeters. Remember‚ diagonals of a rectangle are congruent and bisect each other. Understanding the relationship between rectangles and other quadrilaterals – specifically how they differ from squares – is vital. Thorough preparation using the study materials and reviewing the answer key PDF will ensure success on this portion of the Unit 8 exam.

Types of Quadrilaterals: Squares

Squares represent a highly specific quadrilateral‚ and mastery of their properties is crucial for the Unit 8 test – the answer key PDF will demonstrate this emphasis. A square combines the characteristics of both a rectangle and a rhombus: four right angles and four equal sides. This unique combination leads to specific properties regarding diagonals – they are congruent‚ bisect each other at right angles‚ and bisect the angles of the square.

The answer key PDF will likely contain questions requiring you to apply these properties to solve for unknown side lengths‚ angle measures‚ or areas. Expect problems involving the Pythagorean theorem‚ as squares are perfect for demonstrating this concept. Be prepared to differentiate squares from rectangles and rhombuses‚ understanding how a square fulfills the criteria of both. Reviewing example problems and carefully studying the solutions within the answer key PDF will solidify your understanding for the Unit 8 assessment.

Types of Quadrilaterals: Rhombuses

Rhombuses‚ a key focus of the Unit 8 geometry test‚ are quadrilaterals defined by four equal sides. Unlike squares‚ their angles aren’t necessarily right angles. The answer key PDF for the test will likely assess your understanding of how a rhombus’s diagonals behave – they bisect each other perpendicularly‚ though they aren’t congruent like in a square. This perpendicular bisection creates four congruent right triangles within the rhombus.

Expect test questions requiring you to utilize these diagonal properties to calculate areas or side lengths. The answer key PDF will demonstrate how to apply trigonometric functions when angles are given. Distinguishing a rhombus from a square is vital; remember‚ equal sides are the defining characteristic of a rhombus‚ while equal sides and right angles define a square. Thoroughly reviewing examples in the answer key PDF will prepare you to confidently tackle rhombus-related problems on the Unit 8 exam.

Types of Quadrilaterals: Trapezoids

Trapezoids‚ frequently tested in Unit 8 on polygons and quadrilaterals‚ are defined as quadrilaterals with at least one pair of parallel sides. The answer key PDF for the test will likely emphasize the distinction between general trapezoids and isosceles trapezoids – the latter possessing congruent non-parallel sides and base angles. Understanding this difference is crucial for solving related problems.

Expect questions involving the median of a trapezoid (the segment connecting the midpoints of the non-parallel sides)‚ which is parallel to the bases and equal in length to their average. The answer key PDF will demonstrate how to apply this concept. Be prepared to calculate areas‚ potentially requiring decomposition into simpler shapes. The test may also assess your ability to identify trapezoids within diagrams and apply properties of angles formed by transversals intersecting parallel lines. Reviewing solved examples within the answer key PDF will solidify your understanding for the Unit 8 assessment.

Angles in Polygons

This section focuses on interior and exterior angle calculations. The Unit 8 test‚ and its answer key PDF‚ will assess formulas for angle sums and individual angle measures.

Sum of Interior Angles of a Polygon

Understanding the sum of interior angles is key for the Unit 8 test on polygons and quadrilaterals. The fundamental formula‚ (n-2) * 180°‚ where ‘n’ represents the number of sides‚ is crucial. Mastery of this formula allows students to quickly determine the total degrees within any polygon‚ a frequent question type on assessments‚ including those available as an answer key PDF.

This concept extends beyond simple application; students must be able to apply it to irregular polygons and solve for missing angles. The test will likely present scenarios requiring this skill. Furthermore‚ recognizing how this formula relates to specific quadrilaterals – triangles‚ quadrilaterals‚ pentagons‚ and beyond – is essential. Practice problems focusing on various polygon types will be vital for success. Reviewing examples and working through practice questions‚ potentially using a provided answer key PDF for self-assessment‚ is highly recommended.

Calculating Individual Interior Angles

Once the sum of interior angles is determined using the (n-2) * 180° formula‚ calculating individual angles within a regular polygon becomes straightforward. In a regular polygon‚ all interior angles are congruent‚ so dividing the total sum by the number of sides (n) yields the measure of each angle. This is a frequently tested skill on the Unit 8 assessment covering polygons and quadrilaterals‚ often found within a comprehensive answer key PDF.

However‚ the test will also include irregular polygons where angles differ. Students must then utilize deductive reasoning and potentially algebraic equations to solve for unknown angles‚ leveraging the knowledge that all interior angles still sum to (n-2) * 180°. Practice with diverse polygon shapes and angle measurements is crucial. Utilizing practice tests and checking solutions against an answer key PDF will solidify understanding and build confidence for the exam.

Exterior Angles of Polygons

A fundamental concept for the Unit 8 test on polygons and quadrilaterals revolves around exterior angles. Unlike interior angles‚ the sum of the exterior angles of any polygon – regular or irregular – always equals 360°. This consistent property provides a valuable problem-solving tool‚ often featured in the answer key PDF for practice quizzes.

Test questions frequently involve finding a missing exterior angle when others are known‚ or relating exterior and interior angles (they are supplementary‚ adding up to 180°). Understanding this relationship is key. Students should practice calculating exterior angles from given interior angles and vice versa. The answer key PDF will likely demonstrate various problem types‚ including those involving extending sides to accurately measure exterior angles. Mastery of this concept is essential for success on the exam and is often a focus of review materials.

Polygon and Quadrilateral Relationships

This section explores connections between polygons and quadrilaterals‚ including diagonals and bicentric polygons‚ often detailed in the answer key PDF.

Diagonals of Polygons and Quadrilaterals

Diagonals are line segments connecting non-adjacent vertices within a polygon or quadrilateral. Understanding their properties is crucial for the Unit 8 test. A quadrilateral’s diagonals can bisect each other (parallelograms‚ rectangles‚ squares) or be perpendicular (rhombuses‚ squares). The number of diagonals in a polygon is calculated using the formula n(n-3)/2‚ where ‘n’ represents the number of sides.

The answer key PDF for the Unit 8 test will likely include problems requiring students to identify diagonals‚ determine if they bisect or are perpendicular‚ and calculate the total number of diagonals in various polygons. Problems may also involve using diagonals to classify quadrilaterals based on their properties. Mastery of this concept is essential for success‚ and the key provides solutions for practice.

Furthermore‚ understanding how diagonals divide shapes into triangles is important for area calculations‚ potentially featured in the test and detailed within the answer key.

Bicentric Polygons (Inscribed and Circumscribed)

Bicentric polygons are special shapes possessing both an inscribed circle (incircle) and a circumscribed circle (circumcircle). Notably‚ all triangles fall into this category‚ a point likely emphasized in the Unit 8 test material. However‚ not all polygons share this property. The answer key PDF may contain questions identifying which polygons are bicentric and understanding the relationship between their sides and radii of the circles.

The test could assess your ability to determine if a given quadrilateral or polygon can be both inscribed within and circumscribed around circles. Understanding the conditions required for bicentricity – relating to side lengths and angles – is key. The key will provide step-by-step solutions demonstrating how to verify these conditions.

Casey’s theorem‚ mentioned in resources‚ might be relevant for more advanced problems within the test‚ and its application will be detailed in the answer key.

Applying the Concepts: Test Preparation

Prepare for success! This section focuses on utilizing formulas and problem-solving skills‚ mirroring the Unit 8 test’s multiple-choice format‚ with a detailed answer key PDF.

Distance Formula and Coordinate Geometry

Coordinate geometry plays a crucial role in verifying polygon and quadrilateral properties. The distance formula‚ d = √((x₂ ⎯ x₁)² + (y₂ ‒ y₁)²)‚ allows students to calculate side lengths directly from coordinate points. This is particularly useful when determining if a shape is a specific quadrilateral – like a rhombus or square – where all sides must be congruent.

Test questions frequently involve applying this formula to demonstrate that opposite sides of a parallelogram are equal‚ or to confirm that a quadrilateral’s diagonals bisect each other. Understanding how to use the distance formula to justify answers is essential. Reviewing examples where the answer key PDF demonstrates these calculations will solidify comprehension. Furthermore‚ recognizing how coordinate geometry connects to polygon classifications is vital for success on the Unit 8 test.

Practice problems should include finding perimeters‚ identifying specific quadrilateral types‚ and verifying properties using coordinate proofs.

Solving for Unknown Angles

A significant portion of the Unit 8 test focuses on angle calculations within polygons and quadrilaterals. Students must know the formula for the sum of interior angles: (n-2) * 180°‚ where ‘n’ represents the number of sides. Applying this formula is crucial for finding missing angles in any polygon.

Quadrilaterals present specific angle relationships. For example‚ in parallelograms‚ opposite angles are congruent‚ and consecutive angles are supplementary (add up to 180°). Rectangles and squares have all angles equal to 90°. The answer key PDF for practice tests will demonstrate how these properties are used to solve for unknown angles.

Test questions often require students to set up and solve algebraic equations to determine angle measures. Mastering these skills‚ alongside understanding exterior angle theorems‚ is key to achieving a high score. Reviewing worked examples within the Unit 8 study materials is highly recommended.

Key Formulas for Unit 8 Test

Success on the Unit 8 test hinges on memorizing and applying essential formulas. The sum of interior angles of a polygon is (n-2) * 180°‚ where ‘n’ is the number of sides. For individual interior angles in a regular polygon‚ use (n-2) * 180° / n. Understanding these is vital‚ and the answer key PDF often showcases their application in problem-solving.

Quadrilateral-specific formulas include those for parallelograms (opposite angles congruent‚ consecutive angles supplementary) and the Pythagorean theorem (a² + b² = c²) when dealing with right angles in rectangles and squares. The distance formula‚ √((x₂ ‒ x₁)² + (y₂ ‒ y₁)²)‚ is also frequently used.

Reviewing a comprehensive formula sheet alongside the Unit 8 materials and practice tests (available as a PDF) will significantly boost confidence. Familiarity with these formulas‚ and knowing when to apply them‚ is crucial for efficient and accurate test completion.

pdf free printable free cross stitch bookmark patterns

Discover a delightful world of free PDF cross stitch bookmark patterns! Explore charming designs, from floral motifs to beloved characters, readily available for instant download.

Numerous websites and online marketplaces offer these free patterns, providing endless creative possibilities for stitchers of all skill levels.

Begin your stitching journey today with these accessible and rewarding projects – perfect for personalizing your reading experience!

What is Cross Stitch and Why Bookmarks?

Cross stitch is a counted thread embroidery, creating pixelated designs with X-shaped stitches on evenweave fabric. Free printable patterns simplify this craft, offering accessible designs.

Bookmarks are ideal projects for beginners; they’re small, quick to complete, and require minimal materials. Utilizing PDF patterns allows for easy printing and pattern access.

These stitched bookmarks add a personal, handmade touch to any book, making them thoughtful gifts or delightful self-made treasures!

The Appeal of Free Patterns

Free cross stitch bookmark patterns democratize the craft, removing financial barriers to entry for beginners and seasoned stitchers alike. PDF downloads offer instant access to a vast library of designs.

Experimentation is encouraged – try new techniques and themes without investment. These patterns foster creativity and allow stitchers to build skills.

The abundance of free resources online makes this a wonderfully accessible and rewarding hobby for everyone!

Popular Themes in Cross Stitch Bookmarks

Explore diverse themes in free PDF patterns! Floral designs, charming animals, seasonal motifs, and beloved characters like Disney favorites are readily available.

These themes offer something for every taste and skill level, inspiring beautiful, personalized bookmarks.

Floral Designs: A Classic Choice

Embrace the timeless elegance of floral cross stitch bookmark patterns! Free PDF downloads showcase beautiful thistle flowers, delicate tea cups adorned with blooms, and vibrant springtime arrangements.

These classic designs bring a touch of nature to your reading, offering a serene and sophisticated aesthetic. Many patterns cater to beginners, featuring simple floral motifs and easy-to-follow charts.

Floral bookmarks are a delightful way to personalize your books and gifts, adding a handmade touch of beauty.

Animal Motifs: Cute and Charming

Delight in the adorable world of animal-themed cross stitch bookmark patterns! Free PDF options include charming dogs, whimsical unicorns, and potentially even playful dragons, offering a touch of personality.

These cute motifs are perfect for adding a fun and lighthearted element to your reading experience, or as a thoughtful gift for animal lovers of all ages.

Simple designs make them ideal for beginners!

Seasonal & Holiday Bookmarks

Celebrate every season with festive cross stitch bookmark patterns! Free PDF downloads offer designs for Christmas, featuring classic symbols, or springtime florals, bringing a touch of holiday cheer to your reading.

These bookmarks are a wonderful way to personalize your books throughout the year, or create heartfelt handmade gifts for friends and family during special occasions.

Enjoy stitching seasonal joy!

Character-Based Bookmarks (Disney, etc.)

Immerse yourself in nostalgia with character-based cross stitch bookmark patterns! Free PDF options showcase beloved Disney characters like Mickey and Minnie, Donald and Daisy, and even Winnie the Pooh, adding a magical touch to your books.

These patterns are perfect for Disney fans of all ages, offering a fun and creative stitching project.

Stitch your favorite characters today!

Where to Find Free PDF Patterns

Explore dedicated cross stitch websites, Etsy’s free sections, and Pinterest for a treasure trove of free PDF bookmark patterns.

Download and start stitching instantly!

Dedicated Cross Stitch Websites

Numerous websites specialize in offering free cross stitch patterns, including a delightful selection of bookmark designs in PDF format. These platforms frequently update their libraries with new charts, catering to various skill levels and aesthetic preferences.

Look for sites that specifically categorize patterns by type, making it easy to locate bookmark options. Many provide detailed charts, symbol keys, and even suggested floss colors for a seamless stitching experience.

Enjoy exploring these resources for endless inspiration and readily available, printable patterns!

Etsy & Online Marketplaces (Free Sections)

Etsy, while known for paid patterns, also hosts a selection of free cross stitch bookmark patterns offered by generous designers in PDF format. Explore the platform using keywords like “free cross stitch bookmark pattern” to uncover hidden gems.

Other online marketplaces may feature similar free sections or promotional offerings. Always verify the licensing terms before downloading and stitching to ensure compliance with the designer’s guidelines.

Discover unique and charming designs alongside a vibrant community of stitchers!

Pinterest as a Pattern Source

Pinterest serves as a vast visual discovery engine brimming with links to free cross stitch bookmark patterns in PDF format. Search using relevant keywords like “free cross stitch bookmark” or “PDF pattern” to uncover a wealth of inspiration.

Pinners frequently share direct links to downloadable patterns hosted on blogs, websites, and online marketplaces. Be mindful of verifying the source and licensing before use.

Explore curated boards and collections for a diverse range of designs!

Understanding Cross Stitch Pattern PDFs

PDF patterns utilize symbols representing stitches; a legend decodes these. Pay attention to fabric count, impacting stitch size and final bookmark dimensions.

Carefully review the pattern before starting to ensure a smooth and enjoyable stitching experience!

Decoding the Symbols and Legend

Cross stitch patterns rely on a legend, a key that translates symbols into specific stitch colors. Each symbol represents a particular floss shade, meticulously chosen by the pattern designer.

PDF patterns often feature a grid where symbols indicate stitch placement; understanding this grid is crucial. Carefully match each symbol on the chart to its corresponding floss color in the legend before beginning your project.

Accurate decoding prevents errors and ensures your finished bookmark faithfully reflects the intended design.

Fabric Count and Stitch Size

Fabric count, like 14-count Aida, dictates stitch size; lower counts mean larger stitches. PDF patterns specify the recommended fabric count for optimal results. Using a different count alters the final bookmark dimensions.

Adjusting floss strands can compensate for fabric changes, maintaining design proportions. Generally, one strand per hole suits 14-count Aida, while two strands work well with 18-count.

Consistent stitch size ensures a neat, professional finish.

Materials Needed: Floss, Fabric, Needle

Essential supplies include embroidery floss (DMC is popular), Aida cloth or linen fabric, and a tapestry needle with a blunt tip. PDF patterns list floss colors and amounts needed for each design.

Scissors, a hoop (optional but helpful), and a pattern transfer pen are also beneficial. Consider a needle threader for ease, especially with multiple strands.

Quality materials enhance the stitching experience and final bookmark appearance.

Beginner-Friendly Patterns

Start with simple geometric designs or small, easy-to-complete patterns found in free PDFs. These offer quick gratification and build essential cross stitch skills.

Focus on patterns with limited colors and straightforward stitch counts for a successful first project!

Simple Geometric Designs

Embrace the ease of geometric patterns – ideal for beginners! Free PDFs showcase designs like stripes, chevrons, or basic shapes, requiring minimal color changes and stitch complexity.

These patterns are fantastic for practicing even stitch tension and mastering the fundamental cross stitch technique. Look for designs utilizing full cross stitches only, avoiding fractional stitches initially.

Quick completion provides a confidence boost, encouraging further exploration of this relaxing and rewarding craft!

Small, Easy-to-Complete Patterns

Beginners will adore miniature free PDF bookmark patterns! These designs, often featuring simple motifs like hearts or stars, are quick to stitch and require minimal floss colors.

Their compact size makes them perfect for portable projects – stitch on your commute or during short breaks. Look for patterns with a low stitch count for a fast finish.

Enjoy the satisfaction of completing a project quickly, building confidence and sparking creativity!

Advanced Patterns & Techniques

Elevate your stitching with intricate free PDF patterns! Explore backstitching for detail, color blending for depth, and shading for realistic effects.

Challenge yourself with complex designs and refine your skills for stunning, professional-looking bookmarks.

Backstitching for Definition

Backstitching dramatically enhances free cross stitch bookmark patterns, adding crisp lines and refined details. This technique involves stitching over completed cross stitches, creating a subtle outline.

Utilize a contrasting floss color for a bolder effect, or a similar shade for a more understated look. PDF patterns often indicate backstitch lines with a different symbol.

Mastering backstitching elevates your work, transforming simple designs into polished, professional-quality bookmarks!

Blending Colors and Shading

Elevate your free cross stitch bookmark patterns with subtle color blending and shading techniques! Utilize variegated floss or carefully select similar hues to create depth and dimension.

PDF patterns may suggest color variations; experiment to achieve desired effects. Gradual transitions add realism to floral or animal motifs, enhancing visual appeal.

Mastering these skills transforms flat designs into captivating, textured bookmarks!

Printing and Preparing Your Pattern

Ensure accurate scale when printing free PDF cross stitch bookmark patterns! Verify 100% size settings and use quality paper for clear grids and symbols.

Carefully transfer the design to your chosen fabric using your preferred method.

Ensuring Correct Pattern Scale

Critical for accurate stitching, verifying pattern scale is paramount when using free PDF bookmarks. Before printing, access your printer settings and absolutely confirm the scaling is set to 100%, preventing unwanted distortion.

Always print a test square – often included in the PDF – and measure it to guarantee it matches the fabric count specified in the pattern instructions. This simple step avoids frustrating errors later!

Incorrect scaling leads to mismatched stitch counts and a finished bookmark that doesn’t resemble the intended design.

Transferring the Pattern to Fabric

Several methods exist for transferring free PDF cross stitch bookmark patterns onto fabric. You can utilize water-soluble pens to trace the design directly, ensuring a faint, washable guideline.

Alternatively, consider iron-on transfer pencils or paper, though test a small area first! For lighter fabrics, a tracing wheel with carbon paper provides a clear outline.

Carefully center the pattern on your chosen fabric, accounting for margins for finishing, before transferring for optimal results.

Resources for Cross Stitchers

Explore vibrant online forums and communities for support and inspiration! Discover helpful tutorials and videos demonstrating techniques for free PDF patterns.

Connect with fellow stitchers, share projects, and gain valuable insights to enhance your cross stitch bookmark creations.

Online Forums and Communities

Engage with passionate cross stitchers in dedicated online forums! These platforms offer a wealth of knowledge, pattern sharing, and troubleshooting assistance for free PDF bookmarks.

Find inspiration, ask questions, and receive constructive feedback on your projects. Explore groups on platforms like Reddit and Facebook, specifically focused on cross stitch and bookmark designs.

Benefit from experienced stitchers’ advice on fabric choices, floss colors, and pattern interpretation, elevating your crafting experience with free patterns.

Helpful Tutorials and Videos

Unlock your cross stitch potential with a plethora of online tutorials and videos! Learn essential techniques, from starting a new project to finishing your free PDF bookmark.

Discover step-by-step guides on decoding patterns, mastering different stitches, and achieving a neat, professional finish; YouTube channels and crafting websites offer visual demonstrations.

Enhance your skills and confidently tackle intricate designs, making the most of readily available free printable bookmark patterns for stunning results!

Customizing Your Bookmarks

Elevate your free cross stitch bookmarks with personalized touches! Add beads, embellishments, or monograms for a unique, handcrafted keepsake.

Transform a simple pattern into a treasured item reflecting your individual style and creativity.

Adding Beads and Embellishments

Transform your completed cross stitch bookmarks into miniature works of art by incorporating beads and embellishments! Seed beads can outline floral designs, adding sparkle and texture.

Consider using tiny charms – hearts, stars, or themed elements – attached with embroidery floss. Experiment with different bead sizes and colors to complement your chosen pattern.

Securely attach embellishments to prevent loss during use, ensuring a lasting, beautiful finish to your personalized bookmark.

Personalizing with Monograms

Elevate your cross stitch bookmarks with a personal touch by adding monograms! Incorporate initials or names using simple cross stitch fonts readily available online or designed yourself.

Choose floss colors that contrast or complement the bookmark’s main design for visual appeal. Consider the placement carefully – centered, corner, or subtly woven into the pattern.

Monogrammed bookmarks make thoughtful, unique gifts, showcasing a handmade touch and personalized sentiment for the recipient.

Finishing Your Cross Stitch Bookmark

Complete your project by trimming the fabric and adding backing for durability. Enhance it further with charming tassels or decorative charms for a polished look!

Trimming and Backing the Fabric

Once stitching is complete, carefully trim excess fabric, leaving approximately ¼ inch around the design. Backing provides stability and a clean finish; felt is a popular choice. Apply adhesive or stitch the backing securely to the cross stitch.

Ensure edges are neat for a professional appearance; Consider using pinking shears to prevent fraying before attaching the backing material, enhancing longevity.

Adding Tassels or Charms

Elevate your finished bookmark with decorative tassels or charming embellishments! Attach tassels to the bottom corners using embroidery floss or jump rings. Consider small beads, buttons, or themed charms to personalize your creation further.

These additions add a touch of whimsy and sophistication, transforming a simple bookmark into a unique and treasured keepsake. Experiment with different styles!

Copyright and Usage of Free Patterns

Understand that even free patterns often have usage restrictions! Respect designer terms, typically allowing personal use but prohibiting commercial resale.

Always check the license details before stitching and sharing your creations.

Understanding Royalty-Free Licenses

Royalty-free doesn’t mean entirely free; it signifies a one-time payment grants usage rights without ongoing royalties! For cross stitch patterns, this often allows crafting finished items for personal enjoyment or gifting.

However, commercial use – selling completed bookmarks – usually requires a separate license or permission from the pattern designer. Carefully review the specific terms accompanying each free PDF pattern to ensure compliance.

Respecting Designer’s Terms

Even with free patterns, honoring the designer’s stipulations is crucial! Many request credit if shared online, or prohibit altering the design for resale. Always check the license details accompanying the PDF download.

Some designers may allow limited commercial use, while others strictly forbid it. Respecting these terms fosters a positive community and encourages continued creation of free resources.

Troubleshooting Common Issues

Address mistakes with careful unstitching! Maintain even tension for neat stitches, and utilize online resources for guidance when encountering pattern complexities.

Dealing with Mistakes

Don’t despair! Mistakes are a natural part of cross stitch; Carefully unstitch the incorrect stitches using a seam ripper or needle, preserving the fabric’s integrity. Gently remove the floss, avoiding pulling or snagging. Re-stitch the area, focusing on accuracy. Remember, patience is key, and even experienced stitchers make errors!

Utilize online tutorials for visual guidance on correcting common mistakes, ensuring a flawless finished bookmark.

Keeping Your Stitches Even

Consistency is crucial for a polished look. Maintain consistent tension throughout your stitching; too tight or too loose will distort the design. Ensure each stitch covers the same amount of fabric, creating uniform crosses. Regularly check your work against the pattern, and don’t pull the floss too tightly.

Practice makes perfect – even stitches elevate your finished bookmark!

Bookmark Size and Shape Variations

Standard bookmark dimensions are approximately 1.5-2 inches wide and 6-8 inches long. Explore unique shapes like rounded ends or creatively shaped designs for a personalized touch!

Standard Bookmark Dimensions

Typically, a standard cross stitch bookmark, designed from readily available free PDF patterns, measures between 1.5 to 2 inches in width. The length generally falls within the 6 to 8-inch range, providing ample space for detailed designs.

These dimensions accommodate most books comfortably, ensuring the bookmark remains securely in place. However, many designers offer patterns with slight variations, allowing for customization based on personal preference and book size.

Unique Bookmark Shapes (Rounded, Shaped)

Beyond the traditional rectangular shape, free PDF cross stitch bookmark patterns increasingly feature creative designs! Explore rounded tops, pointed ends, or even whimsical shapes like hearts or leaves.

These unique forms add a personalized touch to your reading experience. Designers offer patterns catering to various skill levels, allowing both beginners and experienced stitchers to craft eye-catching bookmarks.

Latest Trends in Cross Stitch Bookmarks (as of 02/08/2026)

Miniature bookmarks and designs featuring inspirational quotes are trending! Free PDF patterns showcase these styles, offering quick, delightful projects for stitchers.

Miniature Bookmarks

Tiny cross stitch bookmarks are gaining immense popularity! These petite projects utilize fewer materials and require less time, making them ideal for quick gifts or starter projects.

Free PDF patterns specifically designed for miniature bookmarks are readily available online, often featuring simple, charming designs like hearts, stars, or tiny floral elements.

Their compact size makes them perfect for thinner books or as a delicate accent, reflecting a trend towards subtle, handcrafted details.

Bookmarks with Quotes

Inspirational and literary quotes beautifully integrated into cross stitch bookmark designs are currently trending! Free PDF patterns showcase motivational phrases or excerpts from classic literature.

These bookmarks add a personal touch to reading, offering a daily dose of encouragement or a reminder of a beloved story, enhancing the overall reading experience.

Designs range from elegant script fonts to bolder, modern typography, catering to diverse aesthetic preferences.