Club Car Service Manual: A Comprehensive Plan
This manual provides detailed repair, maintenance, and troubleshooting for Club Car golf carts, covering DS, Precedent, and Villager models․
This service manual is a crucial resource for anyone maintaining or repairing Club Car golf carts․ It encompasses a wide range of models, including the classic DS, the popular Precedent, and the versatile Villager․ Whether you’re a seasoned mechanic or a dedicated owner, this guide offers detailed instructions, diagrams, and specifications to ensure accurate and efficient repairs․
Understanding the intricacies of these vehicles requires a dedicated resource, and this manual aims to be precisely that․ It covers everything from routine maintenance like battery care and tire checks to complex procedures like engine tune-ups and electrical system diagnostics․ Proper service extends the lifespan and performance of your Club Car․
II․ Safety Precautions & General Information
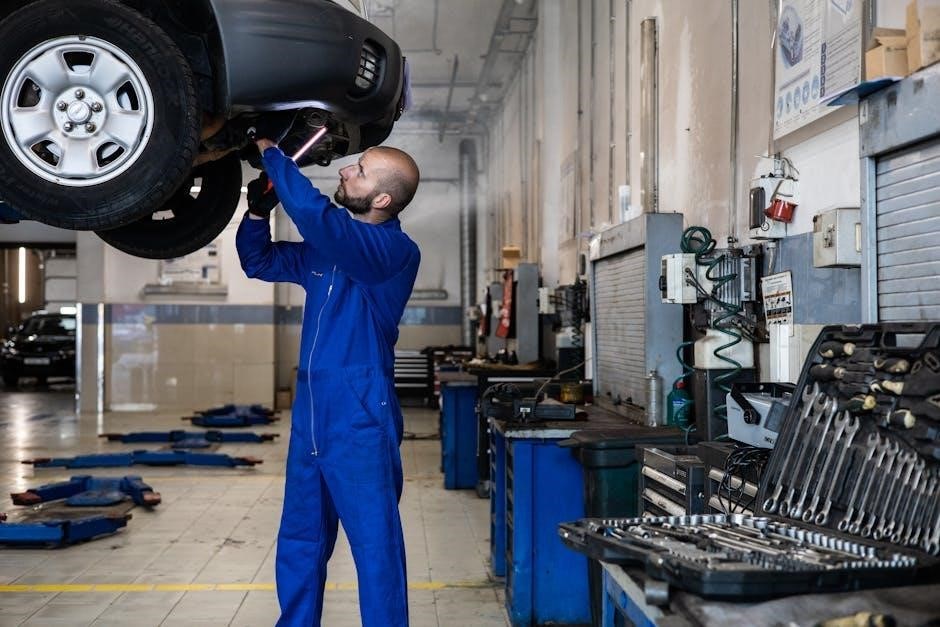
Prioritizing safety is paramount when servicing any vehicle, including Club Cars․ Always disconnect the battery before commencing electrical work to prevent accidental shorts and potential injury․ Wear appropriate personal protective equipment (PPE), such as safety glasses and gloves, during all repair procedures․
This manual assumes a basic understanding of mechanical principles․ If you are unfamiliar with any procedure, consult a qualified technician․ Proper tool usage is essential; utilize the correct tools for each task to avoid damage to components or personal harm․ Keep the work area clean and organized, and dispose of waste materials responsibly․
III․ Understanding Club Car Models
Club Car has produced a variety of golf cart models over the years, each with unique features and service requirements․ This section provides an overview of the most common series: DS (1981-2000), Precedent (2004-2012), and Villager․ Understanding the specific model year and configuration is crucial for accurate diagnosis and repair․
DS models often utilize simpler mechanical systems, while Precedent carts introduced more advanced features and electronic controls․ Villager models, designed for residential use, may have different component layouts․ Refer to the vehicle’s serial number to determine the exact model and year of manufacture for precise service information․
III․A․ Club Car DS Models (1981-2000)
Club Car DS models, manufactured between 1981 and 2000, represent a robust and relatively simple golf cart design․ These carts commonly feature mechanical steering, hydraulic or mechanical brakes, and either gasoline or electric powertrains․ Service typically involves carburetor adjustments for gas engines, or battery and solenoid testing for electric versions․
Common issues include worn steering components, brake adjustments, and electrical connection problems․ DS carts often require routine maintenance like lubrication and filter replacements․ Identifying the specific year within this range is vital, as minor component changes occurred throughout the production run․
III․B․ Club Car Precedent Models (2004-2012)
Club Car Precedent models (2004-2012) introduced significant design updates, including a redesigned chassis and body․ These carts generally utilize rack and pinion steering and hydraulic brakes, offering improved handling and stopping power․ Service procedures often involve diagnosing and repairing the electronic control systems governing the electric motor․
Common maintenance tasks include inspecting the suspension components, checking brake lines for leaks, and ensuring proper battery charging․ Precedent carts are known for their modular design, simplifying component replacement․ Identifying specific sub-models within this range is crucial for accurate parts ordering and repair procedures․
III․C․ Club Car Villager Models
Club Car Villager models were designed for low-speed transportation in residential and resort communities․ These carts often feature automotive-style components, like turn signals and headlights, requiring knowledge of both golf cart and automotive electrical systems for effective repair․ Villager service frequently involves addressing issues with the vehicle’s body panels and interior features․
Maintenance procedures include checking the vehicle’s lighting system, ensuring proper operation of safety features, and inspecting the chassis for corrosion․ Due to their intended use, Villager models may require more frequent attention to cosmetic repairs and comfort-related components․
IV․ Essential Tools & Equipment
Successful Club Car service demands a well-equipped workspace․ Core tools include a comprehensive socket set, wrenches (both standard and metric), screwdrivers (Phillips and flathead), and pliers․ A multimeter is crucial for electrical diagnostics, alongside a battery load tester․ Specialized tools, like a solenoid puller and a valve compression tester (for gas models), are highly recommended․
Safety equipment – gloves, eye protection, and a well-ventilated workspace – is paramount․ A service manual, torque wrench, and lifting jacks complete the essential toolkit, ensuring efficient and safe repairs․
V․ Electrical System Diagnostics
Diagnosing Club Car electrical issues requires a systematic approach․ Begin with a visual inspection of wiring, connectors, and the battery pack for corrosion or damage․ Utilize a multimeter to test voltage levels at the battery, solenoid, and motor․ Check for continuity in wiring harnesses to identify breaks or shorts․
Understanding wiring diagrams is essential for component location and troubleshooting․ Pay close attention to the starter generator and solenoid, common failure points․ Proper battery maintenance and testing are fundamental to a functioning electrical system․
V․A․ Battery Maintenance & Testing
Proper battery care is crucial for Club Car performance․ Regularly inspect batteries for corrosion, cracks, and electrolyte levels․ Add distilled water only when needed, avoiding overfilling․ Perform load tests to assess battery capacity and identify weak cells․ Equalization charging can help restore battery health, but follow manufacturer guidelines․
Voltage checks should be conducted with a multimeter, noting individual battery voltages and the overall pack voltage․ Clean terminals with a baking soda solution to ensure good connections․ Replace batteries as a set for optimal performance and longevity․
V․B․ Solenoid & Starter Generator Troubleshooting
Solenoid issues often manifest as a “click” without engagement․ Check solenoid voltage during activation and inspect for burnt contacts․ A faulty starter generator can prevent the vehicle from starting or cause intermittent operation․ Test the starter generator by directly applying power, ensuring proper grounding․ Inspect the commutator for wear and clean or replace as needed․
Wiring connections to both components are critical; ensure they are secure and free from corrosion․ Use a multimeter to verify continuity and voltage levels․ A failing solenoid or starter generator can drain the battery, so address these issues promptly․
V․C․ Wiring Diagrams & Component Location
Detailed wiring diagrams are essential for accurate diagnostics and repairs․ Locate the starter generator, solenoid, batteries, and control module using the provided illustrations․ Understanding the wiring harness routing prevents accidental damage during service․ Diagrams illustrate color-coded wires and connector pinouts for easy identification․
Component locations vary slightly between Club Car models (DS, Precedent, Villager)․ Refer to the specific diagram for your vehicle․ Proper wire identification is crucial; always double-check before disconnecting or reconnecting any electrical components․ A clear understanding of the electrical system is paramount․
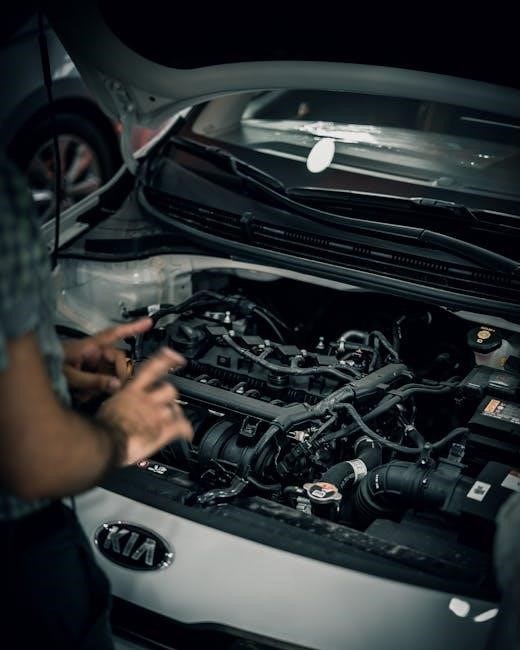
VI․ Engine/Motor Maintenance (Gas & Electric)
Gas engine maintenance includes regular oil changes, spark plug replacement, air filter cleaning, and fuel system inspection․ Electric motor care focuses on brush inspection (if applicable), bearing lubrication, and armature checks․ Proper maintenance extends component lifespan and ensures optimal performance․
Troubleshooting involves identifying issues like weak acceleration, overheating, or unusual noises․ Follow the outlined procedures for both gas and electric powertrains․ Always disconnect the power source before performing any maintenance․ Regular inspections prevent costly repairs and maintain vehicle reliability․
VI․A․ Gas Engine Tune-Up Procedures
Tune-up procedures begin with inspecting and replacing the spark plug, ensuring proper gap settings for optimal combustion․ Clean or replace the air filter to maintain efficient airflow․ Check and adjust valve clearances according to manufacturer specifications․ Inspect the fuel lines and carburetor for leaks or obstructions, cleaning as needed․
Adjust the engine’s idle speed and mixture settings for smooth operation․ Verify ignition timing for peak performance․ Change the engine oil and filter, using the recommended grade․ Regular tune-ups enhance fuel efficiency and reduce emissions, prolonging engine life․
VI․B․ Electric Motor Inspection & Repair
Electric motor inspection involves checking brushes for wear and replacing them if necessary․ Inspect the armature for shorts or open circuits, utilizing a multimeter for accurate readings․ Clean the commutator to ensure good electrical contact․ Examine field coils for damage or insulation breakdown․
Repair procedures may include rewinding field coils or replacing the entire motor․ Verify proper motor operation after repairs, checking for unusual noises or overheating․ Ensure all connections are secure and properly insulated․ Regular inspection and maintenance extend motor lifespan and prevent failures․
VII․ Steering & Suspension System
Steering and suspension are crucial for a smooth ride and safe operation․ Inspect tie rod ends, ball joints, and steering linkages for wear or damage․ Check for loose connections and replace worn components․ Adjust the steering box to minimize play and ensure responsive steering․
Suspension component inspection includes checking springs, shocks, and leaf springs for cracks or fatigue․ Replace damaged components to maintain ride quality and handling․ Ensure proper alignment after any suspension work․ Regular maintenance prevents excessive wear and tear, enhancing vehicle stability․
VII․A․ Steering Box Adjustment & Repair
Steering box adjustment is vital for precise handling․ Loosen the adjusting nut and carefully turn the adjustment screw to eliminate excessive play in the steering wheel․ Tighten the nut to secure the adjustment․ Inspect the steering box for leaks or damage; replace seals if necessary․
Repair often involves replacing worn gears or bearings within the box․ Disassemble carefully, noting component orientation․ Clean and inspect all parts before reassembly․ Ensure proper lubrication during reassembly․ If significant damage exists, consider complete steering box replacement․
VII․B․ Suspension Component Inspection & Replacement
Regularly inspect leaf springs for cracks or sagging; replace if compromised․ Check shock absorbers for leaks or reduced damping; replace in pairs for balanced performance․ Examine bushings for wear and tear, causing play in the suspension․ Inspect all mounting hardware for corrosion or damage, ensuring secure attachment․
Replacement involves disconnecting the worn component, carefully noting its position․ Use appropriate tools to avoid damaging surrounding parts․ Torque all fasteners to the manufacturer’s specifications․ After replacement, verify proper alignment and suspension travel for optimal handling and ride quality․
VIII․ Brake System Service
Maintaining a functional brake system is crucial for safety․ Regularly inspect brake pads or shoes for wear, replacing them when they reach minimum thickness․ Check brake lines and hoses for leaks or damage, addressing any issues immediately․ Inspect the master cylinder and wheel cylinders for proper operation and fluid leaks․
Service includes bleeding the brake lines to remove air, ensuring firm pedal feel․ Adjust brakes to provide even stopping power․ Lubricate moving parts to prevent corrosion and ensure smooth operation․ Always use the correct brake fluid type as specified in the owner’s manual․
VIII․A․ Hydraulic Brake System Maintenance
Hydraulic systems require diligent maintenance․ Regularly check the brake fluid level and condition, replenishing or flushing as needed․ Inspect brake lines, hoses, and fittings for leaks, cracks, or corrosion, replacing damaged components promptly․ Bleed the system to remove air bubbles, ensuring optimal pedal feel and stopping power․
Carefully examine the master cylinder and wheel cylinders for internal leaks or external damage․ Lubricate piston seals with compatible brake fluid․ Always follow manufacturer’s specifications for fluid type and bleeding procedures to maintain system integrity and safety․
VIII․B․ Mechanical Brake System Adjustment
Mechanical brake systems demand precise adjustment for optimal performance․ Inspect brake shoes for wear, replacing them if they’re below the minimum thickness․ Adjust the brake cable tension to ensure proper engagement without binding․ Verify that the parking brake operates effectively, holding the vehicle securely on an incline․
Clean and lubricate all moving parts, including pivot points and linkages․ Check for damaged or worn springs, replacing them as needed․ Proper adjustment is crucial for even braking and preventing premature wear, ensuring safe operation and extending component lifespan․
IX․ Tire & Wheel Maintenance
Regular tire maintenance is vital for safety and performance․ Inspect tires for wear, damage, and proper inflation – maintaining the recommended PSI extends tire life and optimizes handling․ Check wheels for damage like bends or cracks, addressing any issues immediately․ Rotate tires periodically to ensure even wear, maximizing their usability․
Torque wheel lug nuts to the manufacturer’s specifications using a calibrated torque wrench; Inspect valve stems for leaks and replace if necessary․ Properly maintained tires and wheels contribute to a smoother ride, improved stability, and enhanced overall vehicle safety․
X․ Body & Chassis Repair
Body panel replacement requires careful removal of existing components and precise fitting of new panels, ensuring proper alignment and secure fastening․ Chassis straightening, if needed, demands specialized tools and expertise to restore structural integrity․ Welding should only be performed by qualified technicians, adhering to safety protocols and using appropriate welding techniques․
Inspect the chassis for rust or corrosion, addressing these issues with appropriate treatments before repair․ Ensure all repairs meet safety standards and maintain the vehicle’s original structural strength․ Properly executed body and chassis repairs guarantee longevity and safety․
X․A․ Body Panel Replacement
Begin by carefully removing all associated hardware – screws, bolts, and clips – documenting their locations for reassembly․ Detach wiring harnesses and connectors linked to the panel, labeling them to avoid confusion․ Gently pry the damaged panel away, avoiding further damage to surrounding components․
Clean the mounting surfaces thoroughly before installing the new panel․ Align the replacement panel precisely, ensuring a flush fit․ Secure it with the original hardware, tightening to the specified torque․ Verify proper functionality of any relocated components and test all systems․
X․B․ Chassis Straightening & Welding
Inspect the chassis meticulously for bends, cracks, or distortions using appropriate measuring tools․ Employ a chassis straightening bench, if available, to restore the original geometry․ For minor bends, hydraulic jacks and pullers can be utilized cautiously․ Welding should only be performed by certified technicians using the correct welding process and filler material․
Ensure proper grounding and shielding during welding to prevent electrical damage․ Grind down welds smoothly and apply corrosion protection to prevent rust․ Re-inspect the chassis after repairs to confirm structural integrity and alignment before reassembly․
XI․ Hydraulic System (If Applicable)
Inspect hydraulic lines, hoses, and fittings for leaks, damage, or wear․ Check the hydraulic fluid level and condition, replenishing or flushing as needed․ Examine the hydraulic pump for proper operation and pressure output, testing with a gauge․ Verify the functionality of the hydraulic cylinder(s) responsible for lifting or steering․
Bleed the hydraulic system to remove air bubbles, ensuring smooth operation․ Replace any damaged components, using only manufacturer-approved parts․ Follow proper safety precautions when working with hydraulic systems, including wearing protective eyewear․
XII․ Lift Kit Installation & Maintenance
Install lift kits according to the manufacturer’s instructions, ensuring proper alignment and torque specifications․ Inspect all components – springs, shocks, and brackets – for wear or damage regularly․ Check for loose bolts and fasteners, tightening as needed to maintain stability․ Verify proper steering geometry after installation, adjusting as required․
Lubricate moving parts to prevent corrosion and ensure smooth operation․ Monitor for unusual noises or vibrations, indicating potential issues․ Replace worn components promptly to maintain ride quality and safety․ Consider professional installation for complex lift kits․
XIII․ Troubleshooting Common Issues
No-start conditions often stem from a discharged battery, faulty solenoid, or a defective starter generator; check connections and voltage levels․ Poor performance and speed issues can indicate worn brushes, a malfunctioning speed controller, or low tire pressure․ Inspect wiring for corrosion or damage, and test the accelerator pedal․
Address overheating by checking the cooling fan and ensuring adequate ventilation․ Diagnose brake problems by inspecting brake pads, cables, and hydraulic lines․ Utilize diagnostic flowcharts and error codes for efficient troubleshooting․
XIII․A․ No Start Conditions
Investigate a “no-start” scenario by first verifying the battery’s charge level and connections; a weak or corroded battery is a frequent culprit․ Check the solenoid for proper operation – listen for a click when the pedal is depressed․ Examine the starter generator, testing for continuity and voltage output․ Inspect the ignition switch and safety switches, ensuring they are functioning correctly․
Confirm the fuel supply (for gas models) and check for spark․ Utilize a multimeter to diagnose electrical faults․ Remember to consult wiring diagrams for accurate component location and testing procedures․
XIII․B․ Poor Performance & Speed Issues
Address diminished performance by assessing the battery pack’s overall health and individual cell voltages; low voltage significantly impacts speed․ Inspect the electric motor for worn brushes or internal damage, potentially requiring rebuild or replacement․ Examine the drive belt for wear and proper tension, as slippage reduces power transfer․
For gas models, check the air filter, fuel filter, and spark plug condition․ Verify proper carburetor function and adjust as needed․ Consider solenoid and controller issues, utilizing diagnostic tools for accurate assessment․
XIV․ Parts Identification & Ordering
Accurate parts identification is crucial for successful repairs; utilize the Club Car parts manual, referencing model and serial numbers․ Exploded view diagrams are invaluable for visualizing component relationships and proper assembly․ Online parts catalogs from authorized dealers offer convenient searching and ordering capabilities․
When ordering, double-check part numbers to ensure compatibility․ Consider OEM (Original Equipment Manufacturer) parts for optimal performance and reliability․ Explore aftermarket options, but verify quality and warranty information․ Maintain a parts inventory for common maintenance items, minimizing downtime․
XV․ Club Car DS Specific Repairs
Club Car DS models (1981-2000) often require attention to the steering box, checking for wear and adjusting for proper alignment․ Common issues include worn kingpins and tie rod ends, impacting steering precision․ Electrical problems frequently stem from corroded wiring connections and faulty solenoids․
Gas engine repairs may involve carburetor cleaning and valve adjustments․ Inspect the drive belt for wear and replace as needed․ Pay close attention to the battery compartment for corrosion and damage․ Regular maintenance prevents costly repairs on these classic models․
XVI․ Club Car Precedent Specific Repairs
Club Car Precedent models (2004-2012) frequently exhibit issues with the accelerator linkage, requiring adjustment or replacement for smooth operation․ Inspect the starter generator for worn brushes and a faulty armature․ Common concerns include the battery management system and charging circuit, demanding thorough testing․
Focus on the steering system, checking for loose components and worn bushings․ Address any body panel damage promptly to prevent further corrosion․ Regular inspection of the electrical connections is crucial, as corrosion is prevalent․ Prioritize preventative maintenance for optimal performance․
XVII․ Club Car Villager Specific Repairs
Club Car Villager models, often used for neighborhood transportation, require attention to their unique features․ Inspect the vinyl roof and seating for wear and tear, addressing damage promptly․ Pay close attention to the suspension system, as these carts often carry heavier loads․ Check the brake system thoroughly, ensuring proper functionality for safety․
Address any issues with the windshield and doors, ensuring secure operation․ Regularly inspect the lighting system, including headlights and taillights․ Focus on maintaining the overall aesthetic condition of the vehicle․
XVIII․ Winterization & Storage Procedures
Preparing your Club Car for winter storage is crucial for longevity․ Begin by thoroughly cleaning the vehicle, removing all debris․ For gas models, stabilize the fuel and change the oil․ Electric carts require battery maintenance – fully charge, then disconnect the negative terminal; Inspect tires for wear and inflate to the recommended pressure․
Store the cart in a dry, covered location, protecting it from the elements․ Consider a battery tender for electric models․ Cover the vehicle to prevent dust accumulation․ Regularly check on the cart during storage․
XIX․ Regular Maintenance Schedules
Establish a routine maintenance schedule to maximize your Club Car’s lifespan․ Every 25 hours of operation, inspect fluid levels (oil, coolant, brake fluid) and tire pressure․ Monthly, check for loose fasteners and lubricate moving parts․ Annually, perform a comprehensive inspection including battery testing (electric models), spark plug replacement (gas models), and brake system evaluation․
Adhere to these intervals, adjusting based on usage․ Keep a maintenance log for tracking․ Prioritize safety checks before each use․ Regular upkeep prevents costly repairs and ensures optimal performance․
XX; Diagnostic Flowcharts
Utilize detailed diagnostic flowcharts to pinpoint issues efficiently․ These charts guide you through a series of questions and tests, narrowing down potential causes for common problems like no-start conditions, poor performance, or electrical faults․ Follow the steps sequentially, checking components as indicated․
Flowcharts cover both gas and electric models, simplifying complex troubleshooting․ Refer to wiring diagrams alongside the charts for accurate component identification․ Proper use minimizes guesswork and reduces diagnostic time, leading to faster repairs and reduced downtime․
XXI․ Torque Specifications
Accurate torque is crucial for safe and reliable Club Car operation․ This section provides a comprehensive list of torque specifications for all fasteners, including engine/motor mounts, suspension components, steering linkages, and brake system parts․ Using a calibrated torque wrench is essential to avoid over- or under-tightening․
Incorrect torque can lead to component failure, premature wear, or even safety hazards․ Refer to these specifications during assembly and repair procedures․ Specifications are categorized by model and component for easy reference, ensuring proper tightening for every application․
XXII․ Wiring Diagrams (Detailed)
This section contains detailed wiring diagrams for all Club Car models, including DS, Precedent, and Villager series․ Diagrams illustrate the complete electrical system, showing component locations, wire colors, and connections․ These diagrams are essential for diagnosing electrical issues and performing repairs accurately․
Each diagram is clearly labeled and easy to follow, aiding in troubleshooting and modification․ Understanding the wiring harness is vital for safe and effective electrical work․ Refer to these diagrams alongside the troubleshooting guides for optimal results, ensuring correct component identification․
XXIII․ Exploded View Diagrams
This section presents comprehensive exploded view diagrams for all Club Car models – DS, Precedent, and Villager․ These diagrams visually break down assemblies into individual components, illustrating their precise placement and relationships․ They are invaluable for understanding the construction of the vehicle and facilitating repairs․
Each diagram includes part numbers, aiding in accurate parts identification and ordering․ Using these diagrams simplifies reassembly after maintenance or component replacement․ Detailed views showcase fasteners, washers, and other small parts often overlooked, ensuring a complete and correct repair process․
XXIV․ Appendix: Common Error Codes
This appendix lists common error codes encountered in modern Club Car models, particularly those with electronic control systems․ Each code is accompanied by a detailed description of the fault it indicates, potential causes, and recommended troubleshooting steps․ This allows for quicker diagnosis and repair, minimizing downtime․
Codes are categorized by system – electrical, motor, or controller – for easy navigation․ The appendix also includes information on accessing and clearing error codes using the vehicle’s diagnostic tools․ Understanding these codes empowers technicians to efficiently resolve issues and restore optimal performance․