Guide

shoretel phones user guide

ShoreTel phones, part of a unified communications system, enhance productivity with effortless communication and stylish designs. These ergonomically designed IP phones streamline workflows across organizations.

What is ShoreTel Unified Communications?

ShoreTel Unified Communications (UC) is a comprehensive system designed to unify the flow of information throughout your business. It goes beyond traditional phone systems, integrating voice, video conferencing, instant messaging, and collaboration tools into a single, seamless platform.

At the heart of this system are ShoreTel ShorePhone IP Telephones, engineered for effortless communication with a focus on style and elegance. This integration boosts productivity across the entire organization, ensuring employees can connect and collaborate effectively, regardless of location. The UC system is a single solution, bringing intercom capabilities even within large, multi-site enterprises.

By consolidating communication channels, ShoreTel UC simplifies workflows and enhances responsiveness, ultimately improving overall business efficiency. It’s about more than just making calls; it’s about connecting people and information.

Benefits of Using ShoreTel Phones

Utilizing ShoreTel phones as part of the broader Unified Communications system delivers significant benefits. Primarily, they boost productivity by ensuring effortless communication across your organization. The ergonomically designed, high-performance phones enhance user experience and streamline daily tasks.

Beyond simple phone calls, ShoreTel offers style and intercom capabilities, even in multi-site enterprises. The intuitive interface, including features like a large color touchscreen on models like the 655, improves user efficiency. Real-time presence information and advanced voicemail (Visual Voicemail) further contribute to a more productive workflow.

Ultimately, ShoreTel phones contribute to a more connected and collaborative work environment, simplifying communication and improving overall business responsiveness. They represent a move towards a more unified and efficient communication strategy.

Understanding Your ShoreTel Phone Model

ShoreTel offers a family of IP phones designed for effortless communication. Models, like the 655, feature touch screen displays and intuitive interfaces for enhanced usability.

ShoreTel IP Phone 655 Overview

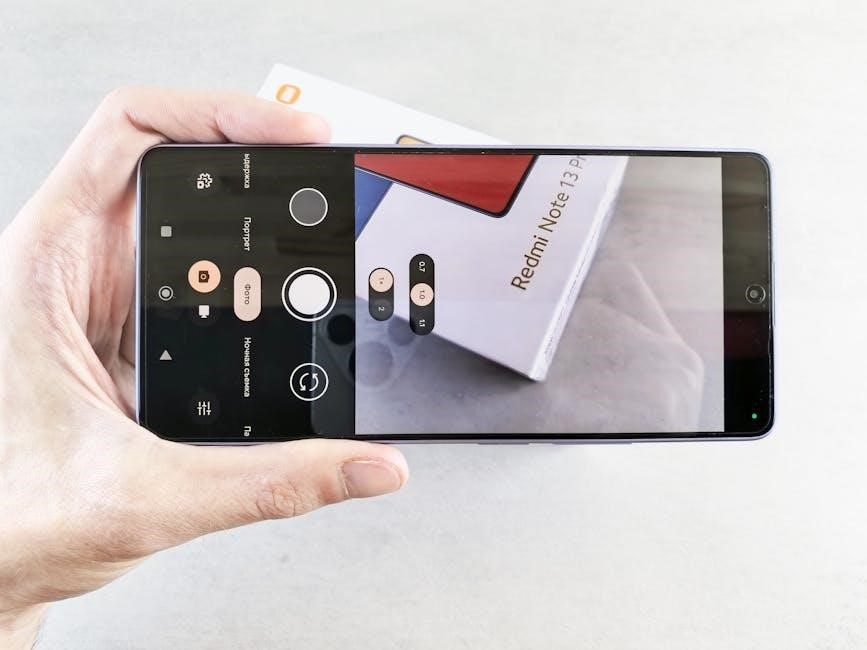
The ShoreTel IP Phone 655 is a cornerstone of modern business communication, offering a rich and intuitive user experience. This model distinguishes itself with a large, color touch screen display, providing a crisp and responsive interface that significantly enhances user productivity. Interaction with the phone is seamless, utilizing touchable buttons alongside structured menus for easy navigation.

Beyond basic call handling, the 655 incorporates a virtual keyboard for efficient text entry, streamlining tasks like voicemail access and directory searches. A key feature is its real-time telephony presence information, allowing users to quickly see the availability of colleagues. Furthermore, the integrated Visual Voicemail application provides an advanced voicemail viewer, simplifying message management and retrieval. The 655 is designed to be more than just a phone; it’s a communication hub.

ShoreTel Phone Keypad and Buttons

The ShoreTel phone keypad and buttons are designed for intuitive operation. The numeric keypad facilitates dialing phone numbers and, crucially, searching the Company Directory. Entering the initial letters of a first or last name allows quick access to contact information within your network. Navigation buttons enable scrolling through directory listings to select the desired contact.

Alongside the keypad, soft keys dynamically change function based on the current screen display, providing context-sensitive options. The touch screen interface, particularly on the 655 model, offers virtual buttons and menus for advanced features. These include access to voicemail, call history, and settings. Understanding the interplay between physical buttons and the touch screen is key to maximizing the phone’s capabilities. The Dial soft key completes the call after a contact is selected.

Basic Phone Operations

ShoreTel phones offer simple call management. Easily initiate calls, answer incoming connections, and utilize the hold function for seamless communication within the unified system.

Making a Call

With your ShoreTel IP phone, initiating a call is straightforward. You can directly dial a number using the keypad, leveraging the virtual keyboard available on models like the 655. To reach someone within your organization, utilize the convenient Company Directory.

Simply press the “Directory” button, then enter the initial letters of the desired first or last name using the numeric keypad. Navigate through the results using the Navigation button to pinpoint the correct contact. Once selected, press the “Dial” soft key to immediately connect.

For external numbers, dial the full number including any necessary area codes. The phone’s interface provides clear visual feedback throughout the dialing process, ensuring a smooth and efficient calling experience. Remember to utilize any configured call prefixes for outbound calls as defined by your system administrator.

Answering a Call

When receiving a call on your ShoreTel phone, a visual notification will appear on the large color touch screen display (on models like the 655) indicating an incoming call. You can easily answer the call by pressing the dedicated “Answer” soft key, typically located near the bottom of the phone’s interface.

Alternatively, if a headset is connected, you can answer the call using the corresponding button on the headset itself. The phone’s interface will dynamically update to display call information, including the caller’s name or number (if available from the Company Directory or caller ID).

During an incoming call, you may also have options to decline the call, send it directly to voicemail, or forward it to another extension, depending on your system configuration and personal preferences. The intuitive interface ensures a seamless and efficient call handling experience.

Placing a Call on Hold

During an active call on your ShoreTel phone, you can easily place the caller on hold by pressing the “Hold” soft key. This key is typically located on the phone’s interface, often near the bottom of the screen or alongside other call control options. The caller will then hear hold music or a customizable message, depending on your company’s system settings.

To retrieve a call from hold, simply press the “Resume” or “Recall” soft key – the label may vary slightly depending on your specific phone model. The phone will reconnect you to the caller, resuming the conversation where it left off.

You can also transfer a call to hold while simultaneously accessing the Company Directory or other phone features, allowing for efficient multitasking. The ShoreTel system ensures a smooth and professional hold experience for both parties involved in the call.

Advanced Features

ShoreTel phones offer powerful tools like the Company Directory, Visual Voicemail, and flexible Call Forwarding, enhancing communication and productivity within your organization.

Using the Company Directory

The Company Directory feature on your ShoreTel phone provides a convenient way to locate contact information for colleagues within your organization. To access the directory, simply press the designated “Directory” button on your phone. Once open, you can search for individuals by entering the first few letters of their first or last name using the numeric keypad.

Utilize the Navigation button – typically an arrow or scroll wheel – to scroll through the search results and pinpoint the desired name. The directory displays relevant information, including phone numbers and potentially other contact details. Once you’ve selected the correct entry, press the “Dial” soft key to immediately initiate a call to that individual.

For larger organizations, the directory can be a significant time-saver, eliminating the need to remember or manually enter phone numbers. Remember to keep the directory updated for accurate results!

Visual Voicemail Access

ShoreTel IP Phone 655 offers a sophisticated Visual Voicemail application, accessible directly through the phone’s large color touchscreen display. This feature allows you to manage your voicemail messages in a more efficient and user-friendly manner than traditional voicemail systems.

Instead of listening to messages sequentially, Visual Voicemail presents a list of your voicemails, displaying caller information, date, and time received. You can then selectively listen to messages in any order you choose. The interface provides playback controls – play, pause, rewind, fast forward – for convenient message management.

The advanced voicemail viewer enhances user productivity by providing real-time telephony presence information alongside your messages. You can easily delete, save, or forward voicemails directly from the phone. This intuitive system streamlines communication and ensures you never miss an important message.

Call Forwarding Configuration

ShoreTel offers flexible call forwarding options, allowing you to redirect incoming calls to different destinations based on your needs. You can configure these settings directly from your ShoreTel IP phone or through the ShoreTel Personal Communicator application.

Call forwarding can be set up to forward calls to another extension, an external phone number, or even to a voicemail box. Different modes allow for customized forwarding rules – for example, forwarding all calls, forwarding when busy, or forwarding when unanswered.

Using the Personal Communicator provides granular control, enabling you to define specific forwarding schedules and destinations. This is particularly useful for managing calls during business hours, after hours, or while on vacation. Properly configured call forwarding ensures you remain reachable, even when you’re away from your desk, maintaining seamless communication.

Customizing Your ShoreTel Phone

Personalize your ShoreTel experience by adjusting volume settings and configuring greetings. These features, accessible through the phone’s interface, enhance usability and reflect your preferences.

Personalizing Greetings

ShoreTel allows for customized greetings, enhancing your professional image and providing callers with a personalized experience. You can configure different greetings for various scenarios, such as when you are available, busy, or away. The ShoreTel Personal Communicator is a key tool for managing these settings, enabling you to set unique greetings for different call forwarding destinations.

To personalize your greeting, access the settings through the Communicator application. You’ll typically have options to record a custom audio greeting or utilize a text-to-speech function. Consider crafting a greeting that is professional, concise, and informative, clearly stating your name and offering assistance. Regularly updating your greeting ensures callers receive accurate information regarding your availability. Remember to save your changes after configuring your desired greeting.

Effective greetings improve caller experience and demonstrate a commitment to professional communication within your organization.

Adjusting Volume Settings

ShoreTel IP phones offer comprehensive volume control options to ensure clear audio during calls and for various phone functions. You can independently adjust the handset volume, speakerphone volume, and ringer volume to suit your preferences and environment. The ShoreTel IP Phone 655, with its touch screen interface, provides intuitive controls for these adjustments.

Typically, volume controls are accessible directly on the phone’s touch screen, often represented by up and down arrow icons; You can also find volume settings within the phone’s menu system. Experiment with different levels to find the optimal balance for comfortable listening. Consider your surroundings – a louder volume may be necessary in a noisy environment, while a lower volume is preferable in a quiet space.

Proper volume adjustment enhances call clarity and minimizes distractions, contributing to a more productive communication experience. Regularly check and adjust these settings as needed.

Troubleshooting Common Issues

If your ShoreTel phone isn’t registering, check network connectivity and power. Ensure the phone is properly connected and configured within the system settings.

Phone Not Registering

A common issue users encounter is a ShoreTel phone failing to register with the system. This prevents making or receiving calls. First, verify the physical network connection – ensure the Ethernet cable is securely connected to both the phone and the network jack. Confirm the network is functioning correctly by testing another device on the same port.

Next, check the phone’s power supply. A faulty power adapter can prevent proper startup and registration. If the connection and power are confirmed, access the phone’s configuration menu (if possible) and verify the correct IP address, subnet mask, and gateway settings are entered. Incorrect settings will prevent the phone from communicating with the ShoreTel server.

If you’re still experiencing issues, contact your IT administrator. They can check the ShoreTel server logs for registration errors and ensure the phone is properly provisioned within the system. A server-side issue or incorrect user configuration may be the root cause.

one piece card game 1st anniversary complete guide

One Piece Card Game 1st Anniversary Complete Guide: An Overview

The 1st Anniversary Complete Guide encapsulates over 1000 cards from the game’s initial year‚ offering a comprehensive resource for players and collectors alike!

This guide‚ alongside the 2nd Anniversary edition‚ provides detailed insights into strategies‚ card values‚ and the evolving meta of ONE PIECE CARD GAME․

The ONE PIECE CARD GAME launched globally‚ celebrating the iconic manga’s 25th anniversary‚ quickly becoming a sensation within the trading card game community․ This innovative game allows players to build decks centered around beloved characters from the One Piece universe․

The core gameplay revolves around “Donning” and “Recruiting” characters‚ strategically utilizing energy‚ and deploying event cards to outmaneuver opponents․ The 1st Anniversary sets‚ like OP01 and OP02‚ laid the foundation for a dynamic and evolving meta‚ attracting both seasoned TCG players and newcomers alike․

The game’s accessibility and engaging mechanics have fueled its rapid growth and collector interest․

The Significance of the 1st Anniversary

The 1st Anniversary marked a pivotal moment for ONE PIECE CARD GAME‚ solidifying its position as a major player in the TCG world․ It represented a year of growth‚ community building‚ and exciting card releases‚ including the foundational OP01 and expanding OP02 sets․

The Complete Guide released alongside this milestone served as an essential resource‚ compiling over 1000 cards․ This guide offered players a comprehensive overview of the game’s initial landscape‚ aiding in deck building and strategic understanding․ It also fueled investment interest as card values began to fluctuate․

Understanding the Core Mechanics

ONE PIECE CARD GAME revolves around Donning and Recruiting characters‚ utilizing Energy to play cards‚ and strategically countering opponents to achieve victory on the battlefield․

Card Types and Their Roles

Character Cards are central‚ featuring Leaders who define your deck’s color and Allies who bolster your forces․ Event Cards introduce impactful‚ one-time effects‚ shifting the battlefield dynamics and disrupting opponent strategies․

Energy Cards are crucial‚ providing the necessary resources to play other cards and activate powerful abilities․ Mastering the interplay between these card types is fundamental to success․ Understanding each role allows for strategic deck construction and effective gameplay‚ maximizing your potential for victory in ONE PIECE CARD GAME․

Character Cards: Leaders and Allies

Character Cards form the core of your strategy․ Leaders dictate your deck’s color and possess unique abilities‚ influencing your overall game plan․ Allies support your Leader‚ providing additional attack power‚ defensive capabilities‚ and special effects․

Strategic selection of both Leaders and Allies is vital․ Synergies between characters can create powerful combos‚ overwhelming opponents․ Building a cohesive team‚ considering cost and abilities‚ is key to constructing a competitive deck in ONE PIECE CARD GAME․

Event Cards: Impacting the Battlefield

Event Cards introduce dynamic shifts to the game‚ offering immediate effects that can disrupt your opponent’s plans or bolster your own position․ These cards range from powerful attacks and defensive maneuvers to resource manipulation and card draw․

Timing is crucial when playing Event Cards․ A well-timed event can swing the momentum of a duel‚ turning the tide in your favor․ Mastering their use requires understanding the current board state and anticipating your opponent’s actions within ONE PIECE CARD GAME․

Energy Cards: Fueling Your Strategies

Energy Cards are the lifeblood of any ONE PIECE CARD GAME strategy‚ providing the necessary resources to play Character and Event cards․ Each card requires a specific energy cost‚ demanding careful resource management․

Efficient energy generation is paramount to success․ Players must balance playing characters with building up their energy pool‚ creating a sustainable engine for powerful combos․ Strategic discarding and utilizing energy-generating effects are key to maximizing your potential and overwhelming opponents․

The 1st Anniversary Sets & Key Cards

OP01 established the foundation‚ while OP02 expanded options․ The 1st Anniversary releases feature rare and valuable cards‚ driving collector interest and gameplay diversity!

OP01: Starter Deck – The Foundation

OP01 served as the initial entry point for players into the ONE PIECE CARD GAME universe․ These starter decks provided pre-constructed decks‚ offering a balanced introduction to core mechanics and character synergies․

They were crucial for new players learning to don and recruit‚ understand energy systems‚ and engage in basic combat․ While not competitively viable long-term‚ OP01 decks laid the groundwork for deck-building knowledge․

The value of sealed OP01 product has increased due to its historical significance and the nostalgia it evokes within the growing player base‚ making it a collector’s item․

OP02: Booster Pack – Expanding Your Options

OP02 booster packs dramatically expanded the card pool beyond the initial OP01 sets‚ introducing new characters‚ events‚ and strategies․ This expansion allowed players to customize their decks and explore diverse archetypes․

The set featured a wider range of rarities‚ including sought-after Secret and Special Rares‚ driving collector interest and market value․ OP02 significantly impacted the competitive meta‚ shifting deck compositions and viable strategies․

Pull rates and card demand within OP02 continue to influence the secondary market‚ making it a key focus for investors and players alike․

Rare and Valuable Cards from the 1st Anniversary

Several cards from the initial sets quickly gained significant value due to rarity‚ playability‚ and collector demand․ Secret Rares and cards featuring popular characters like Luffy and Zoro commanded high prices on the secondary market․

Cards essential to dominant meta decks also experienced price surges․ Tracking these market trends became crucial for both players and investors seeking to maximize returns․

The 1st Anniversary Complete Guide aids in identifying these key cards‚ providing valuable insights into their historical pricing and current market value․

Building a Competitive Deck

Deck construction follows specific rules‚ emphasizing synergy and archetype selection to define your playstyle․ Mastering color strategies unlocks maximum potential!

Deck Construction Rules and Regulations

Constructing a competitive deck in the One Piece Card Game requires adherence to specific regulations․ A standard deck must contain exactly 60 cards‚ including Leader cards․ Players are limited to a maximum of four copies of any single card‚ excluding Leader cards‚ of which only one can be used․

Energy cards are crucial‚ and a minimum of 10 must be included․ Understanding these rules is fundamental for legal and effective deck building‚ ensuring a balanced and strategic gameplay experience․ Careful consideration of card limits and energy requirements is paramount for success․

Synergy and Archetypes: Finding Your Style

Discovering your playstyle within the One Piece Card Game hinges on understanding card synergy and prevalent archetypes․ Popular strategies include aggressive rush-down decks‚ control decks focused on disruption‚ and combo decks aiming for powerful finishing moves․

Effective deck building involves identifying cards that complement each other‚ creating synergistic effects․ Experimenting with different archetypes – like Red Luffy or Blue Sabo – allows players to tailor their decks to their preferred approach and maximize their competitive edge․

Color Strategies: Maximizing Your Potential

Color identity profoundly impacts strategy in the One Piece Card Game․ Each color – Red‚ Blue‚ Yellow‚ and Green – embodies distinct strengths․ Red excels in aggressive offense‚ Blue focuses on control and cunning‚ Yellow prioritizes treasure and events‚ while Green emphasizes character recruitment and endurance․

Mastering color combinations unlocks powerful synergies․ Mono-color decks offer consistency‚ while multi-color decks provide versatility․ Understanding these nuances is crucial for maximizing deck potential and adapting to the evolving meta․

The Meta Landscape: Current Trends

The 1st Anniversary meta showcases popular archetypes like Treasure Cruise and Rush decks․ Adapting to these trends‚ and understanding deck strengths‚ is vital for success!

Popular Deck Archetypes in the 1st Anniversary Meta

Within the 1st Anniversary meta‚ several deck archetypes have risen to prominence․ Treasure Cruise decks‚ leveraging powerful leader abilities and card draw‚ consistently perform well․ Rush decks‚ focused on quickly reducing opponent life‚ offer aggressive strategies․

Furthermore‚ Control decks‚ aiming to disrupt opponent plays and establish board dominance‚ are also viable options․ The recent release of OP14 Azure Seas Seven has introduced new cards influencing archetype viability‚ shifting the competitive landscape and demanding adaptation from players․

Strengths and Weaknesses of Top Decks

Treasure Cruise decks excel in card advantage and consistent power‚ but can struggle against early aggression․ Rush decks boast explosive damage potential‚ yet are vulnerable to control strategies and resource denial․ Control decks offer strong disruption‚ but require careful resource management and can be slow to develop․

OP14’s introduction has altered these dynamics; some decks now counter others more effectively․ Understanding these strengths and weaknesses is crucial for deck building and adapting to opponents’ strategies․

Adapting to the Evolving Meta

The One Piece Card Game meta is dynamic‚ shifting with each new set release like OP14 Azure Seas Seven․ Successful players must continuously analyze tournament results and community discussions to identify emerging trends․

Tech cards and sideboarding become vital for countering popular archetypes․ Flexibility in deck construction and a willingness to experiment are key to staying competitive․ Anticipating shifts and proactively adjusting your strategy are essential for long-term success․

Investment Potential & Card Values

One Piece TCG investment gains traction as collectors assess potential returns‚ tracking market trends and identifying high-value cards for long-term financial gains․

Tracking Card Prices and Market Trends

Monitoring card prices is crucial for investors in the One Piece Card Game․ Several online platforms and communities diligently track sales data‚ providing valuable insights into market fluctuations․ Observing trends reveals which cards are appreciating in value‚ driven by rarity‚ playability‚ and collector demand․

Analyzing historical sales data‚ particularly from the 1st Anniversary sets‚ helps predict future price movements․ Factors like set rotation‚ tournament results‚ and popular streamer influence significantly impact card values․ Staying informed about these dynamics is essential for maximizing investment returns․

Identifying High-Value Cards for Investment

Pinpointing high-value cards requires understanding key factors beyond simple rarity․ Cards featuring popular characters‚ particularly those with strong competitive play‚ often command higher prices․ Limited edition cards‚ promotional releases‚ and those with unique artwork are also prime investment targets․

Focusing on cards from early sets‚ like OP01 and OP02‚ can yield substantial returns as the game evolves․ Analyzing tournament data to identify consistently used cards is vital․ Scarcity‚ demand‚ and potential for future playability are crucial indicators of investment potential․

Long-Term Investment Strategies

Successful long-term investment in the One Piece TCG necessitates a diversified portfolio․ Prioritize sealed product – booster boxes and bundles – as they generally appreciate with time․ Grading valuable cards through professional services enhances their collectibility and resale value․

Stay informed about upcoming set releases and potential rule changes‚ as these impact card demand․ Patience is key; avoid impulsive selling during market fluctuations․ Consistent monitoring of market trends and strategic buying are essential for maximizing returns․

Resources for Players

Players can access the official One Piece Card Game website‚ thriving online communities‚ and regularly updated tournament schedules for comprehensive support and engagement․

Official One Piece Card Game Website

The official website serves as the central hub for all things ONE PIECE CARD GAME․ Here‚ players can find the latest news regarding upcoming sets‚ like OP14 Azure Seas Seven‚ and detailed card databases․

It provides access to rulebooks‚ tournament information‚ and official announcements․ The site also showcases how to enjoy the game‚ offering a gateway for newcomers and seasoned veterans․ Regularly checking the website ensures players stay informed about the evolving landscape and competitive scene‚ crucial for mastering the game․

Online Communities and Forums

Engaging with online communities is vital for ONE PIECE CARD GAME players․ Platforms like Reddit and dedicated forums offer spaces to discuss strategies‚ trade cards‚ and stay updated on the meta․

These communities are invaluable for newcomers seeking guidance and experienced players refining their decks․ Sharing insights‚ analyzing card values‚ and participating in discussions fosters a collaborative learning environment․ Active participation enhances understanding and keeps players informed about the latest trends․

Tournament Information and Schedules

Competitive play is a core aspect of the ONE PIECE CARD GAME experience․ Information regarding official tournaments and schedules can be found on the official website and through partnered local game stores․

These events provide opportunities to test deck-building skills‚ compete for prizes‚ and connect with fellow players․ Regularly checking for updates on tournament formats‚ locations‚ and registration deadlines is crucial for participation․ Staying informed ensures readiness for the challenge!

Advanced Gameplay Techniques

Mastering donning and recruiting‚ alongside strategic counterplay and efficient resource management‚ elevates gameplay beyond basic mechanics for competitive success!

Donning and Recruiting: Mastering the Basics

Donning involves playing characters to your leader zone‚ enhancing their abilities and providing crucial support․ Strategic donning is vital for building a powerful board presence and activating synergistic effects․ Recruiting‚ conversely‚ places characters into your battle area‚ forming your offensive and defensive lines․

Understanding the timing and sequencing of these actions is paramount․ Prioritize characters that complement your deck’s archetype and counter your opponent’s strategy․ Efficiently managing your resources to consistently don and recruit key cards is a cornerstone of advanced gameplay‚ directly impacting card advantage and overall control of the match․

Countering Opponent Strategies

Successfully countering opponents requires diligent observation and adaptation․ Identify their core archetype and key cards early in the duel․ Utilize event cards to disrupt their combos or remove threatening characters from the board․ Anticipate their plays and conserve resources for crucial defensive maneuvers․

Effective side-decking‚ if permitted by tournament rules‚ allows for tailored responses to prevalent meta strategies․ Mastering the art of reading your opponent and proactively neutralizing their threats is essential for consistent victories․

Resource Management and Card Advantage

Efficient resource management is paramount in ONE PIECE CARD GAME․ Carefully consider when to Don or Recruit characters‚ balancing immediate board presence with long-term energy generation․ Prioritize cards that provide card draw or recycling effects to maintain a consistent flow of options․

Conserving energy and strategically discarding cards are vital skills․ Aim to consistently have more playable cards than your opponent‚ creating opportunities to overwhelm them with superior options and tactical flexibility․

The Future of the One Piece Card Game

Upcoming sets‚ like OP14 Azure Seas Seven‚ promise fresh strategies and cards․ Expect rule tweaks and expansions‚ building towards exciting 2nd and 3rd anniversary milestones!

Upcoming Sets and Expansions

The One Piece Card Game’s trajectory points towards consistent expansion‚ with OP14 Azure Seas Seven already generating significant hype․ Future sets will likely introduce new characters‚ mechanics‚ and archetypes‚ continually refreshing the meta․

Bandai consistently releases guides alongside these expansions‚ such as the 3rd Anniversary Complete Guide‚ featuring exclusive cards like Nami and Franky․ These guides are essential for understanding evolving strategies and maximizing deck potential․ Expect continued support and innovation‚ solidifying the game’s long-term appeal․

Potential Rule Changes and Updates

While The One Piece Card Game has established core mechanics‚ the developers may introduce rule tweaks to balance gameplay and address community feedback․ These updates could refine existing systems like Donning and Recruiting‚ or introduce entirely new mechanics to deepen strategic complexity․

Monitoring official announcements is crucial‚ as changes impact deck construction and competitive viability․ Bandai’s commitment to the game suggests ongoing refinement‚ ensuring a dynamic and engaging experience for players as the game evolves beyond its initial anniversary․

The 2nd and 3rd Anniversary Expectations

Building on the success of the 1st Anniversary‚ players anticipate even more substantial content with the 2nd and 3rd anniversaries․ The 2nd Anniversary Complete Guide Book already hints at expanded card pools and deeper strategic options․

The 3rd Anniversary‚ previewed in September 2025‚ promises further expansion‚ potentially including significant rule adjustments and a wealth of new cards‚ solidifying ONE PIECE CARD GAME’s position in the trading card game landscape․

Guide Book & Artbook Information

The 1st Anniversary Complete Guide‚ available in Japanese‚ is a vital resource‚ while the 2nd Anniversary edition is already anticipated by fans!

Artbooks enhance the collecting experience‚ showcasing stunning card artwork and providing additional value․

The 1st Anniversary Complete Guide Book Contents

The 1st Anniversary Complete Guide Book meticulously catalogs all cards released during the game’s inaugural year‚ exceeding 1000 unique cards․ It serves as an invaluable compendium for both seasoned players and newcomers eager to understand the foundational elements of the ONE PIECE CARD GAME․

Beyond a simple card list‚ the guide delves into detailed strategy analysis‚ offering insights into deck building‚ card synergies‚ and competitive gameplay․ It’s a comprehensive resource designed to elevate your understanding and performance within the game‚ providing a deep dive into the mechanics and nuances that define the initial sets․

The 2nd Anniversary Complete Guide Book Preview

The 2nd Anniversary Complete Guide Book builds upon the foundation laid by its predecessor‚ promising an even more extensive collection of information and analysis․ While details are still emerging‚ previews suggest a continued focus on comprehensive card listings‚ strategic breakdowns‚ and meta-game analysis․

Expect expanded sections dedicated to advanced gameplay techniques‚ deck archetypes‚ and investment strategies․ This guide will likely incorporate lessons learned from the first year‚ offering players a refined understanding of the ONE PIECE CARD GAME’s evolving landscape․

Artbook Features and Collectibility

The 1st Anniversary Complete Guide often includes an accompanying artbook‚ highly sought after by collectors․ These artbooks showcase stunning card illustrations‚ character designs‚ and concept art from the ONE PIECE universe‚ offering a visual feast for fans․

Limited edition versions and exclusive variants further enhance collectibility‚ driving up market value․ The artbooks serve as both a beautiful display piece and a valuable addition to any One Piece or TCG collection‚ appealing to both players and art enthusiasts․

Understanding Card Rarity

One Piece Card Game features varying rarities – Common‚ Uncommon‚ Rare‚ Super Rare‚ Secret Rare‚ and Special Rare – impacting card value and collectibility․

Common‚ Uncommon‚ Rare‚ and Super Rare

Common cards form the base of decks‚ readily available in booster packs‚ and generally have the lowest market value․ Uncommon cards are slightly more difficult to find‚ offering a step up in power and collectibility․ Rare cards introduce stronger effects and unique artwork‚ becoming more desirable among players․

Super Rare cards‚ often featuring foil treatments and enhanced illustrations‚ represent significant additions to any collection and often see higher trading prices․ These rarities dictate a card’s accessibility and influence deck-building strategies within the One Piece Card Game․

Secret Rare and Special Rare Cards

Secret Rare cards are the most elusive finds‚ often featuring unique textures or alternate artwork‚ commanding premium prices due to their scarcity․ Special Rare cards‚ like Leaders with alternate art‚ offer a distinct aesthetic appeal and increased collectibility․ These cards frequently become focal points for investors and dedicated collectors․

Their limited availability and striking designs contribute significantly to the overall market value within the One Piece Card Game‚ driving demand and shaping investment strategies․

The Impact of Rarity on Value

Card rarity directly correlates with market value in the One Piece Card Game; Common cards have minimal worth‚ while Uncommon and Rare cards see moderate demand․ Super Rare and Secret Rare cards command significantly higher prices due to their limited print runs and desirability among collectors․

This scarcity drives investment potential‚ as these cards often appreciate in value over time‚ making them attractive assets for those tracking market trends and seeking long-term returns․

One Piece TCG Investment in 2026

One Piece TCG investment gains traction‚ with projected growth and returns attracting collectors; however‚ careful consideration of market risks is crucial for investors․

Current Market Analysis

The market for the One Piece Card Game‚ particularly concerning the 1st Anniversary sets‚ demonstrates significant dynamism․ Currently‚ demand for key cards from OP01 and OP02 remains robust‚ driving up prices for sought-after rarities․

The release of subsequent sets‚ like OP14 Azure Seas Seven‚ influences valuations‚ creating a fluctuating landscape․ Complete Guide Books‚ especially the 1st and 2nd Anniversary editions‚ are also experiencing increased collector interest․

Analyzing sales data reveals a growing secondary market‚ fueled by both investment and gameplay needs․ Tracking these trends is vital for informed decisions․

Projected Growth and Returns

Projections for the One Piece TCG market indicate continued growth through 2026‚ driven by the franchise’s popularity and expanding card pool․ Early investment in 1st Anniversary cards‚ particularly Secret and Special Rares‚ could yield substantial returns․

However‚ returns are contingent on card condition‚ rarity‚ and overall market trends․ The release of future sets will impact valuations‚ necessitating ongoing market analysis․

Conservative estimates suggest a potential for 15-25% annual appreciation for key cards‚ but higher returns are possible with strategic investment․

Risks and Considerations for Investors

Investing in One Piece TCG cards carries inherent risks․ Market volatility‚ influenced by new set releases and shifting meta trends‚ can impact card values․ Counterfeit cards pose a threat‚ requiring careful authentication․

Storage conditions are crucial; improper handling can diminish card quality and value․ Liquidity can be a concern‚ as selling high-value cards may take time․ Diversification is recommended to mitigate risk‚ avoiding over-concentration in a single card or set․

Thorough research and due diligence are essential before investing․

5e guide to sex

Navigating romantic and intimate scenarios within a Dungeons & Dragons 5th Edition (5e) game requires careful consideration‚
emphasizing player comfort and collaborative storytelling. This guide explores responsible approaches‚
acknowledging the diverse preferences within gaming groups and the importance of establishing clear boundaries.

The integration of intimacy into 5e is not about explicit content‚ but rather about portraying
complex character relationships and emotional connections through roleplaying‚
utilizing descriptive language and respecting individual limits.

Remember‚ consent and communication are paramount‚ ensuring a safe and enjoyable experience
for all participants‚ fostering a collaborative environment where everyone feels respected and empowered.

Understanding the Scope

The scope of intimacy in a 5e campaign is entirely defined by the group’s comfort levels and pre-established boundaries. It’s crucial to recognize that “intimacy” doesn’t necessitate explicit depictions; it encompasses a broad spectrum of interactions – from affectionate gestures and emotional vulnerability to romantic relationships and implied physical intimacy.

This guide focuses on roleplaying these aspects responsibly‚ emphasizing narrative development and character connection rather than graphic detail. The intention is to provide tools for portraying believable relationships and exploring emotional depth within the game world‚ always prioritizing player agency and consent.

Discussions about what is and isn’t acceptable should occur before any potentially sensitive scenes arise. This includes defining “lines and veils” (topics to avoid entirely versus those that can be alluded to but not detailed) and establishing a clear understanding of each player’s boundaries. Remember‚ the goal is to enhance the storytelling experience‚ not to create discomfort or violate anyone’s personal limits.

Ultimately‚ the level of intimacy portrayed is a collaborative decision‚ reflecting the group’s shared vision for the campaign and their commitment to a safe and respectful gaming environment.

This guide is intended to offer tools for navigating potentially sensitive topics within a Dungeons & Dragons 5e context‚ specifically concerning intimacy and relationships. It is imperative to understand that responsible play is paramount‚ and this material should only be used by adults who are comfortable discussing such themes.

We strongly advocate for open communication‚ enthusiastic consent‚ and the utilization of safety tools (like the X-Card or Lines and Veils – detailed later) to ensure a comfortable and respectful gaming experience for all participants. This guide does not endorse or encourage the depiction of non-consensual acts or exploitative content.

Players should always prioritize their own well-being and boundaries. If a scene or topic makes you uncomfortable‚ you have the right to opt out or modify it. Remember‚ the goal is collaborative storytelling‚ and everyone’s comfort is essential. This guide is a starting point for discussion‚ not a rigid set of rules.

By using this information‚ you acknowledge your responsibility to create a safe and inclusive gaming environment.

Character Creation & Considerations

Developing characters with nuanced backgrounds‚ motivations‚ and flaws is crucial for portraying realistic relationships and intimate interactions within the 5e world.

Consider how stats and attributes might influence a character’s personality and approach to romance‚ adding depth and believability to their roleplay.

Stats & Attributes Impacting Roleplay

Character statistics in 5e aren’t solely for combat; they profoundly shape roleplaying‚ especially intimate interactions. Charisma (CHA) is often the most directly relevant‚ influencing a character’s persuasiveness‚ attractiveness‚ and ability to connect emotionally.

High CHA characters might be naturally flirtatious or skilled at reading social cues‚ while low CHA characters could struggle with expressing affection or understanding romantic advances. Dexterity (DEX) can inform a character’s grace‚ physicality‚ and responsiveness‚ impacting how they move and interact physically.

Wisdom (WIS) influences perception and insight‚ allowing characters to better understand their own and others’ feelings. Strength (STR) and Constitution (CON)‚ though less direct‚ can contribute to a character’s confidence and stamina. Intelligence (INT) might shape how a character approaches romance – analytically or with intellectual curiosity.

These attributes aren’t deterministic‚ but provide a framework for consistent and believable character behavior‚ enriching the roleplaying experience and adding layers to intimate scenes.

Backgrounds & Flaws for Realistic Characters

A character’s background and flaws are crucial for grounding intimate roleplay in realism. Backgrounds provide context – a noble might approach romance with formality‚ while a criminal could be more pragmatic or possessive.

Flaws‚ in particular‚ add depth and complexity. A character with a fear of intimacy might struggle to open up‚ while one with a history of betrayal could be distrustful. These imperfections create opportunities for compelling storylines and emotional vulnerability.

Consider how past experiences shape a character’s desires‚ boundaries‚ and expectations. A sheltered character might be naive‚ while a seasoned adventurer could be more worldly. Integrating these elements ensures that intimate interactions feel organic and character-driven‚ rather than contrived.

Well-defined backgrounds and flaws foster empathy and understanding‚ allowing players to explore the nuances of their characters’ emotional lives authentically.

Alignment & Consent in-Game

Alignment should never dictate a character’s actions regarding intimacy; consent is paramount. A chaotic character isn’t entitled to non-consensual acts‚ and a lawful character doesn’t automatically receive consent. Alignment reflects moral and ethical leanings‚ not a license to disregard boundaries.

Explicitly establish consent before any intimate interaction. This can be done through in-character dialogue (“May I…?”) or out-of-character discussion. Assume nothing; enthusiastic agreement is essential.

Respect “no” immediately and without argument. A character’s refusal should be honored‚ and the scene should shift accordingly. Utilize safety tools (X-Card‚ Lines & Veils – discussed later) to provide players with a comfortable way to express discomfort.

Remember‚ in-game actions have consequences. Violating consent should have significant repercussions‚ reflecting the severity of the transgression.

In-Game Mechanics & Roleplaying

Skill checks‚ like Persuasion or Insight‚ can subtly influence interactions‚ but intimacy isn’t resolved by dice rolls. Focus on descriptive storytelling‚
setting the emotional tone and respecting player agency within the narrative.

Using Skill Checks for Interactions

While 5e doesn’t offer mechanics specifically for intimate encounters‚ skill checks can enhance roleplaying surrounding attraction‚ courtship‚ and building emotional connections. Persuasion might determine initial receptiveness‚ while Insight could gauge another character’s true feelings or hidden reservations. Deception could be used – cautiously – to mask intentions‚ though honesty is generally preferable.

However‚ avoid resolving intimacy with a skill check; it’s crucial to remember that consent cannot be mechanically determined. Instead‚ use checks to establish the context for a scene‚ not the outcome. A successful Persuasion check doesn’t guarantee a romantic encounter‚ but it might indicate a character is open to further interaction.

Focus on collaborative storytelling‚ where players narrate their characters’ actions and reactions‚ guided by established boundaries and mutual respect. Skill checks should inform the narrative‚ not dictate it‚ ensuring agency and a comfortable experience for everyone involved.

Descriptive Language & Setting the Scene

Evocative language is key to portraying intimacy in 5e without resorting to explicit detail. Focus on sensory descriptions – the warmth of a hand‚ the scent of perfume‚ the soft glow of candlelight – to create a romantic atmosphere. Describe emotional states: nervousness‚ longing‚ affection‚ or vulnerability. Show‚ don’t tell‚ allowing players to interpret the scene through their characters’ perspectives.

Setting plays a vital role. A secluded garden‚ a cozy tavern corner‚ or a moonlit balcony can enhance the mood. Describe the environment in detail‚ focusing on elements that contribute to the emotional tone. Consider the characters’ surroundings and how they influence their interactions.

Remember‚ subtlety is often more powerful than explicitness. Suggestive language and implied actions can be far more impactful than graphic descriptions‚ fostering a sense of intimacy while respecting boundaries and maintaining a comfortable atmosphere for all players.

Handling Non-Consensual Situations (Safeguards)

Addressing potential non-consensual scenarios requires proactive safeguards. Establish a zero-tolerance policy for unwanted advances or depictions of harm. The X-Card system is crucial: players can anonymously signal discomfort‚ immediately halting the scene without explanation. Lines and Veils define explicit boundaries – “lines” are off-limits‚ while “veils” are alluded to but not detailed.

Prioritize open communication. Regularly check in with players to ensure comfort levels. Encourage honest feedback and create a safe space for expressing concerns. Never assume consent; actively seek affirmation before portraying any intimate interaction.

If a non-consensual situation arises despite safeguards‚ immediately pause the game. Address the issue privately and respectfully‚ prioritizing the affected player’s well-being. Remember‚ player safety and comfort are paramount.

Specific Scenarios & Roleplay Ideas

Explore nuanced interactions: a shared vulnerability after battle‚ a blossoming romance during downtime‚ or a complicated past resurfacing.
Focus on emotional depth and character development‚ fostering compelling narratives.

Consider scenarios like a clandestine meeting‚ a festival courtship‚ or a healing ritual involving intimate trust‚ always prioritizing consent.

The Romantic Encounter

Roleplaying a romantic encounter in 5e demands sensitivity and a focus on emotional connection rather than explicit detail. Begin by establishing clear boundaries and utilizing descriptive language that emphasizes feelings‚ atmosphere‚ and shared vulnerability. Instead of detailing physical acts‚ concentrate on the characters’ internal experiences – their nervousness‚ desire‚ and affection.

Skill checks can subtly enhance the scene; a successful Charisma (Persuasion) check might indicate a character’s ability to create a romantic ambiance‚ while a Wisdom (Insight) check could reveal a partner’s hidden desires. Describe the setting vividly – the soft glow of candlelight‚ the scent of flowers‚ the gentle touch of a hand.

Focus on the aftermath‚ exploring the emotional consequences and how the encounter impacts the characters’ relationship. Remember‚ a compelling romantic scene is about storytelling and character development‚ not graphic content. Prioritize player comfort and ensure everyone feels safe and respected throughout the roleplaying process.

The Complicated Relationship

Exploring a complicated relationship in 5e offers rich roleplaying opportunities‚ focusing on internal conflict and emotional nuance; These scenarios often involve conflicting desires‚ past traumas‚ or societal pressures‚ demanding careful handling and sensitivity. Avoid explicit content‚ instead concentrating on the characters’ emotional turmoil and the challenges they face.

Utilize background elements and flaws to create believable obstacles. Perhaps one character harbors a secret‚ or their alignment clashes with their romantic interest. Skill checks‚ like Wisdom (Insight) or Charisma (Deception)‚ can reveal hidden motivations and create dramatic tension.

Focus on the consequences of choices and the impact on the characters’ development. A complicated relationship isn’t about instant gratification; it’s about navigating difficult emotions and making tough decisions. Prioritize player agency and ensure everyone feels comfortable exploring these sensitive themes within established boundaries.

Exploring Different Dynamics

5e allows for diverse relationship dynamics beyond traditional romance‚ offering opportunities for nuanced roleplaying. Consider exploring polyamorous relationships‚ queer pairings‚ or relationships built on unconventional foundations like shared trauma or professional necessity. The key is respectful representation and collaborative storytelling.

Focus on character motivations and how they shape interactions. A relationship built on mutual benefit will differ drastically from one based on deep emotional connection. Utilize backgrounds and personality traits to inform these dynamics‚ creating believable and engaging scenarios.

Remember that consent is crucial in all dynamics. Clearly establish boundaries and utilize safety tools like the X-card to ensure everyone feels comfortable. Avoid perpetuating harmful stereotypes and prioritize authentic representation‚ fostering a safe and inclusive gaming environment.

Safety Tools & Boundaries

Prioritizing player comfort is vital; utilize tools like the X-card‚ Lines and Veils‚ and consistent check-ins to establish and maintain boundaries‚
ensuring a safe and respectful gaming experience for all involved.

The X-Card System

The X-Card is a remarkably simple yet profoundly effective safety tool for tabletop roleplaying games‚ particularly when navigating potentially sensitive themes like intimacy. A physical or virtual “X-Card” is introduced at the start of the session. Any player can tap or mention the “X-Card” at any time‚ with no explanation required‚ to immediately halt a scene or topic that makes them uncomfortable.

This system prioritizes immediate comfort and removes the burden of explanation‚ which can be difficult in the moment. It’s crucial to establish that using the X-Card is not a judgment on the GM or other players; it’s simply a signal that something isn’t working for an individual. The scene is then immediately shifted or skipped‚ and no further discussion about why the X-Card was used is necessary unless the player initiating the X-Card chooses to share.

The X-Card fosters a culture of trust and empowers players to protect their boundaries without disrupting the flow of the game or causing awkwardness. It’s a proactive measure that demonstrates a commitment to creating a safe and enjoyable experience for everyone at the table.

Lines and Veils

Lines and Veils is another powerful safety tool for tabletop RPGs‚ offering a more nuanced approach than the X-Card. It involves collaboratively establishing boundaries before the game begins‚ categorizing topics into three zones: “Lines” (absolutely off-limits)‚ “Veils” (fade-to-black – alluded to but not described)‚ and “Okay” (safe for exploration).

“Lines” represent hard limits – topics that will not be included in the game at all. “Veils” are subjects that can be acknowledged but will be handled with minimal detail‚ avoiding explicit descriptions. This allows for acknowledging a character’s experience without dwelling on potentially triggering content.

The process of defining Lines and Veils is a crucial conversation‚ ensuring everyone feels heard and respected. It’s not about censorship‚ but about creating a shared understanding of comfort levels. Regular check-ins during the game can reinforce these boundaries‚ and players should feel empowered to adjust them as needed. This system promotes proactive boundary setting and collaborative storytelling.

Open Communication & Check-Ins

Establishing a culture of open communication is the cornerstone of responsible intimacy roleplaying in 5e. Before‚ during‚ and after sessions‚ players should feel comfortable discussing their boundaries and concerns. Regular “check-ins” are vital – brief pauses during gameplay to gauge everyone’s comfort level. A simple “How is everyone feeling?” can open a dialogue.

These check-ins aren’t just about preventing discomfort; they’re about fostering trust and ensuring everyone is enjoying the experience. Encourage players to use “I” statements to express their feelings (“I’m feeling a little uncomfortable with…”). Active listening and validation are key – acknowledge and respect each player’s perspective.

Remember‚ consent is ongoing and can be withdrawn at any time. Create a safe space where players feel empowered to say “no” without fear of judgment. Prioritizing emotional safety above all else will lead to more rewarding and fulfilling roleplaying experiences.

Advanced Roleplaying Techniques

Mastering nuanced character motivations and improvisational skills elevates intimate roleplay in 5e‚ allowing for dynamic interactions.
Utilizing sensory details—sights‚ sounds‚ smells—deepens immersion and emotional resonance within the narrative.

Developing Character Motivations

Understanding why a character seeks intimacy is crucial for authentic roleplaying in 5e. Motivations extend far beyond simple physical desire‚ encompassing emotional needs‚ past traumas‚ societal pressures‚ or even strategic alliances. A paladin might seek connection to reaffirm their faith‚ while a rogue could view intimacy as a means of gathering information or manipulating others.

Explore backstories and flaws to uncover hidden desires and vulnerabilities. A character with a lonely past might crave affection‚ while one burdened by guilt might seek redemption through connection. Consider how alignment influences their approach – a chaotic character might embrace impulsive encounters‚ while a lawful one prioritizes commitment and responsibility.

Collaborate with your fellow players to weave these motivations into the narrative. Shared history and established relationships create richer‚ more meaningful interactions. Remember‚ compelling roleplay stems from believable characters driven by complex‚ well-defined motivations‚ enhancing the emotional depth of any intimate scene.

Improvisation & Reacting to the Unexpected

Intimate roleplaying in 5e often deviates from pre-planned scenarios‚ demanding strong improvisational skills. Be prepared for your partner to introduce unexpected elements – a sudden confession‚ a change of heart‚ or an interruption – and embrace these moments as opportunities to deepen the narrative.

Active listening is paramount. Pay close attention to your partner’s cues‚ both verbal and nonverbal‚ and respond authentically to their character’s actions and emotions. Avoid railroading or forcing a specific outcome; instead‚ allow the scene to unfold organically.

Utilize “yes‚ and…” to build upon each other’s contributions. This technique fosters collaboration and prevents the scene from stalling. Remember‚ the most memorable moments often arise from spontaneous choices and unexpected twists‚ enriching the shared storytelling experience.

Utilizing Sensory Details

Elevate intimate roleplaying in 5e by focusing on sensory details‚ moving beyond explicit descriptions to create a vivid and immersive experience. Engage all five senses – sight‚ sound‚ smell‚ taste‚ and touch – to paint a compelling picture for your partner.

Describe the ambiance: the flickering candlelight‚ the scent of incense‚ the soft music playing in the background. Detail the physical sensations – the warmth of a hand‚ the texture of clothing‚ the gentle pressure of a kiss.

Focus on emotional responses: the racing heartbeat‚ the flush of cheeks‚ the catch in the breath. Avoid graphic language‚ instead relying on evocative imagery and suggestive phrasing to convey intimacy with respect and sensitivity.

Remember‚ subtlety can be incredibly powerful.

Resources & Further Exploration

Explore online forums dedicated to inclusive tabletop roleplaying‚ seeking guidance on sensitive topics and best practices for respectful interactions. Consider literature
focused on healthy relationships and communication.

Online Communities & Forums

Numerous online communities cater to tabletop roleplayers seeking guidance on mature themes‚ offering spaces for discussion‚ advice‚ and shared experiences. Reddit’s r/DnD and similar subforums often host threads addressing responsible intimacy roleplaying‚ though moderation varies‚ so discernment is key.

Dedicated Discord servers focused on safety tools and inclusive gaming provide more curated environments. Search for servers explicitly mentioning consent-focused roleplay or utilizing systems like the X-Card. These platforms allow for real-time discussion and support.

Be cautious when exploring less-moderated forums‚ as content quality and safety standards can differ significantly. Prioritize communities that actively promote respectful communication and enforce clear boundaries. Remember to critically evaluate information and prioritize your own comfort levels.

Websites dedicated to RPG safety tools often link to relevant forums and resources‚ providing a starting point for your exploration.

Relevant Books & Literature

While dedicated “5e and intimacy” guides are limited‚ several resources offer valuable insights into portraying relationships and mature themes in roleplaying games. “The Monsters Know What They’re Doing” by Keith Baker‚ though not explicitly focused on intimacy‚ provides excellent advice on character motivations and complex interactions.

Works on improvisational acting and creative writing can enhance descriptive language and emotional depth in roleplaying. Exploring literature that sensitively portrays relationships – focusing on emotional nuance rather than explicit detail – can inspire your game.

Books on consent and healthy relationships are crucial for understanding boundaries and responsible interaction‚ informing your approach to in-game scenarios. Consider resources on trauma-informed care to navigate potentially sensitive topics with empathy.

Remember to prioritize resources that promote ethical roleplaying and respect for all players.

Ethical Considerations & Best Practices

Prioritizing player safety and comfort is paramount when exploring intimate themes in 5e. Always obtain explicit‚ enthusiastic consent before introducing any potentially sensitive content‚ and respect any withdrawal of consent during play.

Avoid perpetuating harmful tropes or stereotypes related to sex‚ relationships‚ or power dynamics. Focus on agency and mutual respect in all interactions‚ ensuring characters have control over their own bodies and choices.

Be mindful of triggers and sensitivities‚ and proactively discuss potential content warnings with your group. Utilize safety tools like the X-Card and Lines and Veils (detailed elsewhere in this guide) to create a safe and inclusive environment.

Remember that roleplaying is a collaborative storytelling experience; prioritize the enjoyment and well-being of all participants.

phoenix wright justice for all guide

Phoenix Wright: Justice For All ー Comprehensive Guide

This guide meticulously details Phoenix Wright: Justice For All, offering walkthroughs for each case. It helps players master investigations and courtroom strategies for success!

Phoenix Wright: Justice For All, released initially for the Game Boy Advance in 2002, marks a significant evolution in the Ace Attorney series. Building upon the foundation laid by its predecessor, this installment introduces a more complex narrative and refined gameplay mechanics. Players once again step into the shoes of the defense attorney, Phoenix Wright, as he tackles a series of challenging cases where the fate of his clients hangs in the balance.

This game isn’t merely about presenting evidence; it’s about unraveling intricate plots, exposing contradictions in witness testimonies, and ultimately, delivering justice. Justice For All expands the scope of investigations, demanding keen observation and logical deduction. The courtroom battles are more intense, requiring strategic cross-examination and precise timing to sway the judge and jury. Prepare to defend the innocent and uncover the truth in a world where appearances can be deceiving!

Game Overview & Key Features

Phoenix Wright: Justice For All is a point-and-click adventure game centered around courtroom drama and investigative work. The core gameplay divides into two primary phases: Investigations and Trials. During investigations, players gather evidence by exploring crime scenes, interviewing witnesses, and collecting crucial clues. The Trial phase involves presenting this evidence in court, cross-examining witnesses, and identifying contradictions in their statements.

Key features include a compelling narrative spanning four unique cases, each with its own cast of memorable characters and intricate plot twists. The game introduces the “Psychology Meter,” a mechanic that gauges a witness’s willingness to reveal the truth. Mastering cross-examination techniques is vital, as is careful evidence management. Expect challenging puzzles, surprising revelations, and a gripping storyline that will keep you hooked until the very end!

Understanding the Core Gameplay Mechanics

Phoenix Wright: Justice For All’s gameplay revolves around meticulous investigation and strategic courtroom battles. Investigations require thorough exploration of environments, careful examination of objects, and insightful questioning of witnesses to uncover vital clues. Players must logically connect these clues to progress.

In court, presenting evidence at the right moment is crucial. The game’s core mechanic is cross-examination: identifying contradictions in witness testimonies. The “Psychology Meter” adds a layer of complexity, indicating a witness’s honesty. Pressing witnesses when their meter is high can unlock crucial information. Successfully exposing lies and presenting irrefutable evidence leads to “Objections!” and ultimately, a “Not Guilty” verdict. Mastering these mechanics is key to achieving justice!

Case Walkthroughs ‒ Episode 1: Phoenix Wright: Ace Attorney

Begin your journey with a detailed walkthrough of the first case! We’ll guide you through investigations, courtroom segments, and evidence presentation for a successful defense.

Episode 1: Investigation Sections

The initial investigation in Episode 1 is crucial for gathering vital clues. Thoroughly examine each location – the victim’s office and the crime scene – interacting with every object. Don’t overlook seemingly insignificant details; they often hold the key to unlocking the truth.

Pay close attention to conversations with witnesses. Select dialogue options carefully, probing for inconsistencies or hidden information. The evidence collection screen is your best friend; meticulously review each item as you acquire it. Remember to present evidence to witnesses during conversations to challenge their statements and reveal new leads.

Effective investigation involves revisiting locations after uncovering new evidence. This allows you to discover previously unnoticed clues or trigger new dialogue options. Prioritize examining items related to the victim’s last known activities and potential motives. A systematic approach ensures you don’t miss anything critical for building a strong defense.

Episode 1: Courtroom ー Day 1

Day 1 of the courtroom battle centers around establishing the basic facts of the case and challenging the prosecution’s initial narrative. The key witness, Kurtz, will present his testimony, and your primary goal is to identify contradictions within his statements. Carefully listen to his responses and look for inconsistencies with the evidence you’ve collected during the investigation.

When presenting evidence, choose wisely. Select pieces that directly contradict Kurtz’s testimony to expose weaknesses in his account. Utilize the “Press” function to challenge specific phrases within his statements, forcing him to elaborate and potentially reveal crucial details.

Remember to maintain composure and build a logical argument. Avoid presenting irrelevant evidence or making unfounded accusations. Focus on dismantling the prosecution’s case piece by piece, laying the groundwork for a successful defense. A strong start on Day 1 is vital for shifting the momentum in your favor.

Episode 1: Key Evidence & Presentation

Several pieces of evidence are crucial in unraveling the truth in Episode 1. The Broken Spectacles are paramount, directly linking to the events at the crime scene and challenging the initial assumptions. The Security Footage provides a visual record, potentially contradicting witness testimonies and revealing hidden details. Don’t underestimate the importance of the Dusty Glove; its origin and connection to the victim are key.

Presenting evidence effectively is vital. Select the appropriate item when challenging witness statements, focusing on contradictions. Use the “Show” command strategically to highlight specific details within the evidence. Remember to carefully analyze each piece before presenting it, ensuring it directly supports your argument.

Proper timing and selection are essential. Presenting evidence prematurely or incorrectly can weaken your case. Build a logical chain of reasoning, connecting the evidence to dismantle the prosecution’s claims and establish reasonable doubt.

Episode 1: Cross-Examination Techniques

Mastering cross-examination is central to success in Phoenix Wright: Justice For All. Begin by carefully listening to witness testimonies, identifying inconsistencies and potential lies. The “Press” command is your primary tool – use it to challenge specific statements and force witnesses to elaborate.

Pay close attention to witness reactions and the Psychology Meter. A wavering or panicked response indicates a potential breakthrough. Don’t hesitate to press repeatedly on suspicious points, but avoid overdoing it, as it can backfire.

Presenting contradictory evidence during cross-examination is crucial. Select the relevant item and choose the statement it refutes. This will expose falsehoods and weaken the prosecution’s case. Remember to remain calm and focused, even under pressure.

Strategic questioning and astute observation are key to uncovering the truth and securing a “Not Guilty” verdict.

Case Walkthroughs ー Episode 2

This section provides a detailed walkthrough for Episode 2, guiding you through the motel investigation and courtroom showdown with Lana Skye, revealing crucial alibis.

Episode 2: Investigation ー The Motel

The motel investigation in Episode 2 is pivotal to unraveling the mystery surrounding the murder. Upon arriving, meticulously examine every detail within Room 302, the scene of the crime. Pay close attention to the broken lamp, the discarded glass, and any potential clues hidden in plain sight. Don’t overlook the significance of the motel owner’s testimony; his observations could hold vital information.

Interact with all available objects, zooming in to uncover hidden details. The key is to find inconsistencies and evidence that contradicts the established narrative. Specifically, focus on locating items that could establish a timeline or link the victim to a suspect. Remember to speak with all witnesses present at the motel, carefully noting their statements and looking for discrepancies.

Thoroughly searching the surrounding areas outside Room 302 is also crucial. Look for any discarded items or footprints that might provide additional clues. This initial investigation sets the stage for a challenging courtroom battle, so ensure you gather as much evidence as possible before proceeding.

Episode 2: Courtroom ー Witness: Lana Skye

Lana Skye’s testimony is a cornerstone of Episode 2, demanding careful scrutiny. She presents herself as a glamorous and somewhat evasive witness, requiring precise cross-examination to expose inconsistencies. Focus initially on her alibi and her relationship with the victim, Zackary Gramarye. Pay close attention to her descriptions of events leading up to the murder, looking for any vagueness or contradictions.

Present evidence strategically to challenge her statements. The key is to pinpoint moments where her recollection doesn’t align with the facts. Don’t hesitate to press her on seemingly minor details, as these often reveal larger discrepancies. Remember to utilize the “Press” command effectively to force her to elaborate on ambiguous responses.

Successfully dismantling Lana Skye’s testimony is crucial for advancing the case. Her carefully constructed facade hides vital information, and it’s Phoenix Wright’s job to uncover the truth behind her carefully worded statements. Prepare for a lengthy and challenging cross-examination!

Episode 2: Uncovering Contradictions

Identifying contradictions is paramount in Episode 2. Lana Skye’s testimony, and those of other witnesses, are riddled with inconsistencies that Phoenix must exploit. Focus on discrepancies between witness statements and the presented evidence – photographs, autopsy reports, and the motel room itself. Look for conflicting timelines and illogical details in their accounts.

The key to success lies in meticulous evidence presentation. When a contradiction arises, present the relevant evidence and “Press” the witness to explain the discrepancy. Don’t be afraid to revisit previously examined evidence; a new perspective can reveal overlooked details. Remember to carefully analyze the Psychology Meter to gauge the witness’s emotional state and determine the best moment to strike.

Successfully exposing these contradictions will unravel the carefully constructed lies and bring you closer to the truth behind Zackary Gramarye’s murder. Patience and attention to detail are essential!

Episode 2: The Importance of Alibis

Alibis play a crucial role in dismantling the prosecution’s case in Episode 2. Thoroughly investigate the alibis provided by each witness, particularly Lana Skye and Butler. Scrutinize their claims for weaknesses and inconsistencies. A seemingly solid alibi can crumble under careful examination and the presentation of contradictory evidence.

Pay close attention to the timeline of events. Can the witness realistically have been where they claim to be at the time of the murder? Look for gaps in their story or evidence that places them elsewhere. The motel’s security footage and witness testimonies are vital for verifying or disproving alibis.

Successfully challenging an alibi can shift the focus of suspicion and reveal the true culprit. Remember to “Press” witnesses on any doubts regarding their whereabouts, forcing them to confront the flaws in their story.

Case Walkthroughs ‒ Episode 3

This section provides a detailed walkthrough for Episode 3, guiding you through the art museum investigation and courtroom battles to identify the forger!

Episode 3: Investigation ー The Art Museum

The Art Museum investigation in Episode 3 is crucial for uncovering the truth behind the forged painting and the subsequent murder. Begin by thoroughly examining the main hall, paying close attention to the display cases and the surrounding area. Speak with all available witnesses, including the museum staff and any visitors present during the incident.

Focus on collecting key evidence such as the forged painting itself, any tools potentially used in the forgery, and any unusual markings or fingerprints found at the scene. Don’t overlook seemingly insignificant details, as they may hold vital clues. Carefully analyze the painting for inconsistencies and compare it to known authentic works by the artist.

Remember to utilize Phoenix’s unique ability to present evidence to witnesses during the investigation, prompting them to reveal further information. The museum’s layout and the timeline of events are essential to understanding the case. Meticulous examination and astute questioning will unlock the secrets hidden within the Art Museum.

Episode 3: Courtroom ー Day 1: The Forger

Day 1 of the courtroom battle in Episode 3 centers around identifying the forger and establishing their motive. The initial witness testimony will likely focus on the authenticity of the painting and the circumstances surrounding its creation. Prepare to challenge inconsistencies in their statements regarding the painting’s details and the forger’s expertise.

Present the evidence gathered during the Art Museum investigation, specifically focusing on the discrepancies found in the forged painting. Utilize cross-examination techniques to expose contradictions in the witness’s account and reveal their potential involvement in the crime. Pay close attention to their reactions when presented with key evidence.

Successfully dismantling the witness’s testimony is crucial for shifting suspicion towards the true culprit. Remember to carefully analyze the timeline of events and establish a clear motive for the forgery. A strong defense relies on meticulous presentation of evidence and skillful cross-examination.

Episode 3: Identifying the True Culprit

After successfully discrediting the initial suspect, focus shifts to uncovering the true mastermind behind the forgery. The key lies in connecting the seemingly disparate pieces of evidence gathered throughout the investigation – the painting, the forged signature, and the witness testimonies.

Consider the motives of each character involved. Who stood to gain the most from the forgery? Examine the relationships between the suspects and identify any hidden connections or conflicts. The culprit likely possesses both the skill to forge the painting and a compelling reason to do so.

Present the conclusive evidence that directly implicates the true culprit, highlighting their opportunity, motive, and means. A carefully constructed argument, supported by irrefutable proof, will sway the judge and secure a “Not Guilty” verdict for your client. Don’t underestimate the power of a well-timed presentation!

Episode 3: Presenting the Final Evidence

With the true culprit identified, the final stage demands a precise and impactful presentation of evidence. Begin by systematically reviewing the key pieces – the forged painting, the altered documents, and any incriminating testimonies. Connect these elements to establish a clear timeline of events, exposing the culprit’s deception.

Focus on highlighting contradictions in the culprit’s statements and demonstrating how their actions align with the evidence; Utilize the “Present” command strategically, emphasizing the significance of each piece. Anticipate potential objections and prepare counter-arguments to maintain momentum.

A compelling narrative, built upon irrefutable proof, is crucial. Deliver a closing statement that leaves no doubt in the judge’s mind, securing a “Not Guilty” verdict and bringing justice to your client. Remember, precision and clarity are paramount!

Case Walkthroughs ー Episode 4

This section provides a detailed walkthrough for the final episode, guiding you through the Kurain Village investigation and the climactic courtroom showdown for victory.

Episode 4: Investigation ‒ The Kurain Village

The investigation in Kurain Village is pivotal, steeped in tradition and mystery. Begin by thoroughly examining the Hazari family residence, focusing on the garden and the surrounding areas. Pay close attention to the peculiar rock formations and any disturbed earth – these could hold vital clues.

Speak with the villagers, particularly the Hazari family members: Keaya, and the elder, Kanai Hazari. Their testimonies are crucial, but be prepared for evasiveness and cultural nuances. Carefully question them about the events leading up to the incident, and any unusual behavior they observed. Don’t overlook the seemingly insignificant details; they often unravel the truth.

Collect all available evidence, including the broken pot shards, the ritualistic items, and any footprints you discover. Remember to present evidence strategically during the investigation to unlock new lines of questioning; The village holds secrets, and diligent exploration is key to uncovering them before heading to court.

Episode 4: Courtroom ‒ The Final Showdown

The final courtroom battle is a culmination of everything you’ve learned. Expect relentless opposition from the prosecutor and carefully prepared testimonies designed to mislead. Focus on exposing contradictions in witness statements, particularly those concerning the ritual and the alleged accident.

Present the evidence gathered from Kurain Village strategically, linking it directly to the inconsistencies in the testimonies. The broken pot, the ritual items, and the footprints are all crucial pieces of the puzzle. Utilize cross-examination to push witnesses to reveal the truth, focusing on their motivations and any hidden agendas.

Remember to stay calm and methodical, even under pressure. This case demands precision and a thorough understanding of the evidence. Mastering the turnabout hinges on your ability to unveil the truth behind the tragedy and secure a ‘Not Guilty’ verdict.

Episode 4: Mastering the Turnabout

Achieving the turnabout in the final case requires impeccable timing and a deep understanding of the interconnected evidence. Successfully presenting the correct evidence at the pivotal moment is paramount. Don’t rush; carefully analyze each testimony and identify the critical contradictions that will dismantle the prosecution’s case.

Remember the significance of the spiritual connection and the true nature of the ritual. The key lies in proving the defendant’s innocence by exposing the real culprit’s deception. Utilize the psychology meter to gauge witness reactions and pinpoint moments of hesitation or falsehood.

This final showdown tests your skills as a defense attorney. A ‘Not Guilty’ verdict isn’t just about winning; it’s about revealing the truth and bringing justice to those wrongly accused. Prepare for a challenging, yet ultimately rewarding, conclusion.

Episode 4: Unveiling the Truth Behind the Tragedy

The final case delves into a complex web of relationships and hidden motives surrounding the tragic events at Kurain Village. Unraveling the truth requires meticulous investigation and careful examination of witness testimonies. Pay close attention to the details surrounding the sacred ritual and the history of the Kurain family.

The seemingly straightforward narrative conceals a deeply rooted conspiracy. Identifying the true perpetrator demands a thorough understanding of their connection to the victim and their carefully constructed alibi. Don’t overlook seemingly insignificant clues; they often hold the key to unlocking the mystery.

Successfully exposing the culprit’s lies will not only secure a ‘Not Guilty’ verdict but also reveal the heartbreaking truth behind the tragedy, bringing closure to all involved. Prepare for emotional revelations and a satisfying resolution.

Advanced Techniques & Tips

Master cross-examination, utilize the psychology meter effectively, and manage evidence wisely. Discover hidden secrets and Easter eggs for a complete Phoenix Wright experience!

Effective Cross-Examination Strategies

Cross-examination is the heart of Phoenix Wright: Justice For All. Successfully dismantling witness testimonies requires careful observation and precise timing. Begin by identifying inconsistencies – contradictions between statements, or discrepancies with presented evidence. Don’t rush; listen intently to each response.

Presenting the correct evidence at the right moment is crucial. Highlight conflicting statements and force witnesses to acknowledge their errors. The psychology meter plays a vital role; press relentlessly when a witness appears shaken, but pause when they become defensive. Observe their reactions closely!

Pay attention to keywords and phrases. Witnesses often use specific language to conceal the truth. Isolate these terms and challenge their meaning. Remember, the goal isn’t simply to find contradictions, but to expose the underlying deception. Mastering these techniques will dramatically increase your success rate in court, leading to “Not Guilty” verdicts.

Utilizing the Psychology Meter

The Psychology Meter in Phoenix Wright: Justice For All is a critical tool for breaking down witness testimonies. It visually represents a witness’s mental state during cross-examination, indicating their susceptibility to pressure. A full meter allows you to present evidence and expose contradictions more effectively.

However, overuse can backfire. Continuously pressing a witness with a low meter will cause them to compose themselves, resetting your progress. Observe their reactions carefully – a hesitant response or fidgeting suggests vulnerability. Focus your questioning when the meter is rising, and pause when it begins to fall.

Strategic pauses are key. Allow the witness to incriminate themselves with rambling explanations. The meter fills faster with thoughtful, pressured responses. Mastering the meter isn’t about relentless attacks, but about understanding when to push and when to yield, maximizing your chances of uncovering the truth.

Managing Evidence & Timeline

Effective case management in Phoenix Wright: Justice For All hinges on meticulous evidence organization and timeline comprehension. The Court Record is your central hub; regularly review collected evidence, noting connections and potential contradictions. Don’t underestimate the importance of revisiting investigation sites – overlooked clues can be pivotal.

Pay close attention to the timeline of events. Understanding the sequence of actions helps identify inconsistencies in witness testimonies. Cross-reference evidence with the timeline to pinpoint discrepancies. A seemingly minor detail out of place can unravel an entire alibi.

Prioritize evidence presentation strategically. Save crucial pieces for impactful moments during cross-examination. A well-timed reveal can shatter a witness’s composure. Remember, a disorganized approach leads to missed opportunities; a structured one unlocks the path to justice.

Hidden Secrets & Easter Eggs

Phoenix Wright: Justice For All, beyond its compelling cases, harbors delightful secrets for observant players. Explore thoroughly – interact with every object in investigation scenes, even those seemingly irrelevant. Dialogue options sometimes unlock unique responses or background information, hinting at deeper lore.

Keep an eye out for references to previous cases and characters from Phoenix Wright: Ace Attorney; Capcom cleverly weaves continuity throughout the series, rewarding dedicated fans. Certain character animations and courtroom mannerisms are subtle nods to the game’s development and inspirations.

Experiment with presenting evidence in unconventional orders. While not always fruitful, it can occasionally trigger unexpected reactions or dialogue. These hidden elements enhance replayability and demonstrate the developers’ attention to detail, adding layers of enjoyment to the experience.

breezeline stream tv user guide

Breezeline Stream TV User Guide: A Comprehensive Overview

Breezeline, formerly Atlantic Broadband, delivers high-speed internet, TV, and phone services across twelve states. This guide provides detailed instructions for setting up and utilizing your Breezeline Stream TV experience, ensuring optimal enjoyment.

Breezeline Stream TV represents a modern approach to home entertainment, offering a seamless blend of live television and on-demand content. Formerly known as Atlantic Broadband, Breezeline has evolved to provide a more expansive and user-friendly television experience. This service is designed to deliver reliable, high-quality viewing, accessible through a compact and easy-to-use set-top box.

Unlike traditional cable, Breezeline Stream TV utilizes a TiVo-based interface, enhancing navigation and program discovery. It allows customers to enjoy a wide range of channels, access streaming apps, and record favorite shows with ease. The service boasts features like a comprehensive live TV guide and convenient on-demand options, catering to diverse viewing preferences. Breezeline’s commitment to customer satisfaction is reflected in its 24/7 support availability, ensuring assistance is always within reach.

What is Breezeline (Formerly Atlantic Broadband)?

Breezeline is a prominent cable operator in the United States, currently serving customers across twelve states. Previously operating as Atlantic Broadband, the company underwent a rebranding in January 2022 following strategic expansions beyond its original East Coast footprint. It is a subsidiary of Cogeco Communications, ranking as the 8th largest cable operator nationwide based on television subscribers.

Breezeline provides a comprehensive suite of services, including high-speed cable internet, television, and home phone options. A key differentiator is its commitment to customer-friendly policies, often featuring unlimited data usage and the absence of long-term contracts. The transition to Breezeline signifies a broader vision – to deliver innovative and reliable connectivity solutions to a wider audience, enhancing the overall customer experience with services like Breezeline Stream TV.

Breezeline Service Availability

Breezeline currently extends its services across twelve states within the United States, though specific availability varies by community. Primary service areas include portions of New Hampshire, Maine, Massachusetts, Connecticut, New York, Pennsylvania, Florida, Ohio, South Carolina, North Carolina, Maryland, and Virginia. To determine if Breezeline, and specifically Breezeline Stream TV, is available at your address, the most reliable method is to utilize the company’s online availability checker.

This tool, accessible on the Breezeline website, requires you to input your service address. It will then instantly confirm whether services, including internet, TV, and phone, are offered in your location. Availability is constantly being updated as Breezeline continues to expand its network. Checking the website ensures you have the most current and accurate information regarding service options in your area.

Setting Up Your Breezeline Stream TV

Breezeline Stream TV setup involves connecting the box to your television via an HDMI cable and powering it on, followed by a simple activation process.

Unboxing and Components

Upon receiving your Breezeline Stream TV box, carefully unpack the contents to ensure all components are present. You should find the Stream TV box itself, a remote control, a power adapter, and an HDMI cable. Verify that the packaging hasn’t been tampered with during shipping.

The Stream TV box is the central hub for accessing your television services. The remote control allows for easy navigation through menus and content. The power adapter provides the necessary electricity to operate the box, and the HDMI cable transmits high-definition video and audio to your television.

Should any components be missing or damaged, immediately contact Breezeline Support for assistance. Retain the original packaging for potential returns or exchanges. A quick inventory check now will save potential headaches later, ensuring a smooth setup process and immediate access to your entertainment.

Connecting to Your TV with HDMI

To connect your Breezeline Stream TV box to your television, you’ll need the provided HDMI cable. Locate an available HDMI port on the back of your TV – note the port number for later input selection. Firmly connect one end of the HDMI cable to the HDMI output port on the back of the Stream TV box.

Next, connect the other end of the HDMI cable to the chosen HDMI input port on your television. Ensure both connections are secure to prevent signal interruptions. Once physically connected, power on your television and use your TV’s remote to select the correct HDMI input corresponding to the port you used.

You should now see the Breezeline startup screen on your TV. If not, double-check the HDMI connections and input selection. A properly connected HDMI cable delivers the best possible picture and sound quality for your Stream TV experience.

Powering On Your Breezeline Stream TV Box

To power on your Breezeline Stream TV box, begin by ensuring the power cord is securely attached to the back of the device. Then, plug the other end of the power cord into a functioning electrical outlet. Avoid using extension cords or power strips if possible, as they can sometimes interfere with the power supply.

Once connected to power, the Stream TV box will automatically begin the startup process. You’ll likely see a blinking light on the front of the box, indicating it’s powering up. This process may take a few moments, so please be patient.

After the startup sequence is complete, the light will typically become solid, and the Breezeline logo will appear on your television screen (assuming it’s correctly connected via HDMI). If the box doesn’t power on, verify the outlet is working and the power cord is firmly connected at both ends.

Initial Setup and Activation

After powering on, your Breezeline Stream TV box will guide you through an initial setup process. Follow the on-screen prompts carefully. This typically involves selecting your preferred language and confirming your time zone. You’ll also be asked to connect to your home Wi-Fi network if you plan to use streaming features.

Activation usually requires linking the box to your Breezeline account. You may be prompted to enter your account number or other identifying information. Ensure you have your account details readily available during this step.

The system will then scan for available channels and complete the activation process. This may take several minutes. For further assistance, visit support.breezeline.com or scan the provided QR code for detailed installation instructions and troubleshooting tips. A successful activation will grant you access to live TV and on-demand content.

Navigating the Breezeline Stream TV Interface

The Breezeline Stream TV interface is designed for simplicity. Utilize the TiVo button for quick access to key features, and the remote control for effortless channel surfing and menu navigation.

Understanding the TiVo Button

The TiVo button on your Breezeline Stream TV remote is your gateway to a streamlined viewing experience. A single press instantly takes you back to the TiVo home screen, providing quick access to your favorite channels, recordings, and on-demand content.

From the TiVo home screen, you can easily browse live TV, explore the guide, and manage your recordings. Holding down the TiVo button often brings up additional options or settings related to the current program or menu. It’s a central hub for navigating the interface efficiently.

Furthermore, the TiVo button allows for swift access to personalized recommendations based on your viewing habits. It’s designed to simplify finding something new to watch, ensuring you never miss out on exciting content available through Breezeline. Mastering the TiVo button unlocks the full potential of your streaming experience.

Using the Remote Control

Your Breezeline Stream TV remote is designed for intuitive control of your entertainment. Beyond the essential power and volume buttons, the directional pad allows for effortless navigation through menus and the on-screen guide. The ‘Select’ or ‘OK’ button confirms your choices, while the ‘Back’ button returns you to the previous screen.

Dedicated number buttons provide direct channel access, and the ‘Guide’ button opens the live TV listings. Utilize the ‘Menu’ button to access settings and customize your viewing preferences. Remember the crucial TiVo button for quick access to the home screen and recordings.

For on-demand content, explore the dedicated buttons or navigate through the main menu. Familiarize yourself with the remote’s layout to maximize your Breezeline experience, unlocking seamless channel surfing and content discovery. A little practice will make you a remote control pro!

Accessing the Main Menu

The Breezeline Stream TV main menu is your central hub for navigating all features and settings. You can access it in two primary ways: by pressing the TiVo button on your remote, or by selecting the ‘Menu’ option using the directional pad and ‘Select’ button.

Within the main menu, you’ll find sections for Live TV, On Demand, Recordings, Channels, and Settings. The ‘Settings’ area allows customization of display options, audio preferences, and parental controls. Explore the ‘Channels’ section to manage your lineup and favorite networks.

The intuitive layout ensures easy access to all functionalities. Take time to browse each section to fully understand the capabilities of your Breezeline service. Returning to live TV is always a simple press of the TiVo button, providing a seamless viewing experience.

Breezeline Stream TV Features & Functionality

Breezeline Stream TV boasts features like On Demand content, a comprehensive Live TV guide, recording capabilities, and easy channel management for personalized viewing.

On-Demand Content

Breezeline Stream TV provides a vast library of On-Demand content, offering a diverse selection of movies and TV shows readily available for your viewing pleasure. This feature allows you to watch what you want, when you want, without being tied to a specific broadcast schedule.

Navigating the On-Demand section is simple; access it through the main menu on your TV screen. You can browse by genre, search for specific titles, or explore new releases and featured collections. The platform regularly updates its offerings, ensuring a fresh and engaging experience.

Many titles are available in stunning high definition (HD), enhancing your visual experience. Some content may require an additional purchase or subscription, clearly indicated before selection. Enjoy hours of entertainment with the extensive On-Demand library provided by Breezeline!

Live TV Guide

The Breezeline Stream TV Live TV Guide is your central hub for discovering and accessing live television programming. This interactive guide displays a comprehensive listing of channels and their current and upcoming shows, allowing you to easily plan your viewing schedule.

You can navigate the guide using your remote control, scrolling through channels and time slots. Program information, including descriptions and ratings, is readily available. The guide also supports keyword searches, enabling you to quickly find specific programs or channels.

Breezeline’s Live TV Guide offers features like channel previews and the ability to set reminders for your favorite shows. It’s designed for intuitive use, ensuring you never miss a moment of live television. Explore the guide to unlock a world of real-time entertainment!

Recording Programs

Breezeline Stream TV empowers you to record your favorite shows and movies, ensuring you never miss out on valuable content. Utilizing the built-in digital video recorder (DVR) functionality, you can schedule recordings in advance directly from the Live TV Guide.

Simply select the program you wish to record and choose the “Record” option. You can also set up series recordings to automatically capture every episode of a particular show. Manage your recordings through the “My Recordings” section, where you can view, delete, and prioritize your saved content.

Breezeline provides ample storage space for your recordings, allowing you to build a personal library of entertainment. Enjoy the flexibility of watching your shows on your own schedule!

Managing Your Channels

Breezeline Stream TV offers a degree of customization regarding your channel lineup, allowing you to tailor your viewing experience. While the core channel package is determined by your subscription plan, you may have options to add premium channels or specialized packages.

Access the channel management section through the main menu to explore available add-ons. You can preview the content offered within each package before making a selection. Breezeline frequently introduces promotional offers on channel packages, so be sure to check for current deals.

Furthermore, you can often rearrange the order of your channels to prioritize your frequently watched networks. This feature enhances navigation and streamlines your channel surfing experience, making finding your favorite shows quicker and easier.

Account Management & Support

Breezeline provides convenient online account access for plan changes, payments, and troubleshooting. 24/7 support is available via chat, phone, and their comprehensive support website.

Accessing Your Breezeline Account Online

Managing your Breezeline account online offers a convenient and efficient way to stay in control of your services. To begin, navigate to the official Breezeline website – support.breezeline.com – using your preferred web browser. From there, locate and click on the “My Account” or “Login” section, typically found in the upper right-hand corner of the homepage.

You will be prompted to enter your username and password. If you haven’t already created an online account, you can easily register by following the on-screen instructions. This usually involves providing your account number and verifying your identity. Once logged in, you’ll have access to a dashboard where you can view your current plan details, billing statements, and usage information.

Furthermore, the online portal allows you to update your contact information, manage payment methods, and explore additional services offered by Breezeline. It’s a central hub for all your account-related needs, accessible anytime, anywhere with an internet connection.

Making Payments

Breezeline offers several convenient methods for managing your bill payments, ensuring uninterrupted service. The easiest way is through the online portal at support.breezeline.com. After logging into your account, navigate to the “Billing” or “Payments” section to view your current balance and make a secure online payment using a credit or debit card.

Alternatively, you can pay by phone by calling Breezeline’s customer support line – available 24/7 – and following the automated prompts or speaking with a representative. Another option is to mail a check or money order to the address specified on your bill. Please allow sufficient time for mail delivery and processing.

Breezeline also may offer Auto Pay, a hassle-free option where your bill is automatically deducted from your bank account or charged to your credit card each month. Setting up Auto Pay ensures timely payments and avoids late fees. Explore these options to find the method that best suits your needs.

Troubleshooting Common Issues

Experiencing issues with your Breezeline Stream TV? First, ensure all cables – particularly the HDMI connection to your TV and the power cord – are securely plugged in. If you have no picture, try cycling the power on both the TV box and the television itself. A frozen screen often resolves with a simple reboot of the Stream TV box.

For remote control problems, replace the batteries and ensure there are no obstructions between the remote and the box. If you’re having trouble with on-demand content, check your internet connection speed. Slow speeds can cause buffering or playback errors. Visit support.breezeline.com for detailed troubleshooting guides and FAQs.

If issues persist, a factory reset (consult the online guide for instructions) can sometimes resolve software glitches. Remember to document any error messages you receive, as this information will be helpful when contacting Breezeline support.

Contacting Breezeline Support (24/7)

Breezeline offers multiple avenues for 24/7 support to address your Stream TV concerns. For immediate assistance, initiate a chat with a representative directly through the Breezeline website. This is a convenient option for quick questions and troubleshooting. Alternatively, you can access their comprehensive online support portal at support.breezeline.com, which features a wealth of self-help articles and FAQs.

If you prefer speaking with a live agent, phone support is available around the clock. While a specific phone number isn’t universally provided, navigating the “Contact Us” section of their website will direct you to the appropriate number for your region. Be prepared to provide your account information for faster service.

Don’t forget to utilize the QR code available on various Breezeline resources to quickly access support materials on your smartphone or tablet;

dog clipper guide combs size chart

Dog Clipper Guide Combs: A Comprehensive Size Chart & Guide (Updated 02/08/2026)

Navigating the world of dog grooming requires the right tools, and guide combs are essential for achieving consistent, professional results at home, saving on groomer fees.

Dog clipper guide combs are attachments that slide onto the clipper blade, dictating the length of the fur left behind after clipping. They are indispensable tools for pet owners embracing home grooming, offering a cost-effective alternative to frequent professional visits. These combs come in a variety of sizes, each corresponding to a specific hair length, allowing for precise control over your dog’s appearance.

Understanding these combs is crucial, as selecting the appropriate size directly impacts the final groom. The right comb ensures a comfortable and aesthetically pleasing result for your canine companion. Without guide combs, achieving an even length and avoiding accidental nicks or uneven patches becomes significantly more challenging. They transform a potentially daunting task into a manageable and rewarding experience, fostering a stronger bond with your pet through attentive care.

Why Use Guide Combs?

Employing guide combs during dog grooming offers numerous advantages, primarily ensuring a consistent and uniform haircut. They eliminate the guesswork involved in freehand clipping, minimizing the risk of uneven patches or accidentally cutting the coat too short. This is particularly beneficial for beginners or those lacking extensive grooming experience.

Furthermore, guide combs protect your dog’s skin from the clipper blade, reducing the chance of irritation or injury. They allow for a safer and more comfortable grooming session for your pet. By utilizing different comb sizes, you can achieve a variety of styles, from a close shave to a longer, fluffier coat, all while maintaining control and precision. Ultimately, guide combs empower owners to confidently maintain their dog’s hygiene and appearance at home.

Benefits of Consistent Grooming

Regular grooming, facilitated by tools like guide combs, extends far beyond aesthetics, profoundly impacting a dog’s overall health and well-being. Consistent brushing and clipping prevent matting, which can cause painful skin irritation and harbor parasites. Grooming also stimulates blood circulation, promoting a healthy coat and skin.

Early and frequent handling during grooming sessions helps desensitize your dog, reducing anxiety during future veterinary visits or other potentially stressful situations. Moreover, grooming provides an excellent opportunity to check for lumps, bumps, or skin abnormalities that might require veterinary attention. A well-groomed dog is a happier, healthier dog, and consistent care strengthens the bond between pet and owner, fostering a loving and trusting relationship.

Understanding Guide Comb Sizes

Guide comb sizes dictate the final hair length, ranging from very short to longer lengths, and are crucial for achieving the desired aesthetic and breed standard.

Standard Guide Comb Sizes (A1 to A10)

The most common system utilizes numbered guide combs, typically ranging from A1 to A10, each corresponding to a specific hair length after clipping. An A1 comb generally leaves approximately 1/16 inch of hair, creating a very close shave often used for sanitary trims or detailed work. As the number increases, so does the hair length. An A2 comb typically cuts to 1/8 inch, while an A3 leaves 3/16 inch.

Progressing through the sizes, an A4 comb is around 1/4 inch, an A5 around 5/16 inch, and an A6 around 3/8 inch. The A7 comb generally leaves 1/2 inch, offering a slightly longer trim. Combs A8, A9, and A10 typically cut to 5/8 inch, 3/4 inch, and 7/8 inch respectively, providing progressively fuller coats. These standard sizes offer versatility for various breeds and grooming styles, allowing for precise control over the final appearance. Understanding these increments is key to achieving the desired look for your canine companion.

Metric Guide Comb Sizes

Alongside the standard numbered system, many manufacturers also offer guide combs measured in millimeters (mm), providing an alternative for groomers accustomed to metric measurements. These sizes directly correlate to the approximate hair length left after clipping. A #10 comb, for example, is roughly equivalent to a 3mm comb, leaving about 3 millimeters of hair.

Common metric sizes include 3mm, 6mm, 9mm, 12mm, 15mm, 19mm, and 25mm, each offering a distinct length. A 3mm comb is ideal for very short trims, while a 6mm comb provides a slightly longer, more natural look. Larger sizes, like 19mm and 25mm, are suitable for fluffier coats or breeds requiring a fuller appearance. Converting between imperial (numbered) and metric sizes is helpful for groomers using a variety of comb sets, ensuring consistent results regardless of the measurement system.

Relationship Between Comb Size and Hair Length

Understanding the direct correlation between guide comb size and the resulting hair length is crucial for achieving your desired grooming outcome. Lower numbered (or smaller millimeter) combs leave shorter hair, creating a closer cut, often used for sanitary trims or achieving a sleek, show-ready appearance. Conversely, higher numbered (or larger millimeter) combs leave longer hair, ideal for maintaining a fuller coat or achieving a softer, more natural look.

Generally, each increment in comb size adds approximately 1/8 to 1/4 inch of hair length. A #10 comb typically leaves around 1/8 inch, while a #7 might leave 1/2 inch. However, coat texture and density can influence the final length, so it’s always wise to start with a longer comb and gradually decrease the size if needed.

Types of Guide Combs

Guide combs come in diverse materials and attachment styles, impacting performance and usability; plastic, metal, snap-on, and detachable options exist for varied grooming needs.

Plastic Guide Combs

Plastic guide combs are a popular choice for many dog owners due to their affordability and lightweight nature. They are generally less expensive than metal combs, making them a great option for beginners or those on a budget. The plastic material also helps to prevent overheating during use, which can be a concern with metal combs.

However, plastic combs may not be as durable as metal ones and can be prone to cracking or breaking with frequent use. They are best suited for dogs with softer coats and lighter grooming needs.

Furthermore, plastic combs often feature a snap-on design, offering easy attachment and removal from the clipper blade. This convenience is a significant advantage for quick coat adjustments during grooming sessions. Despite their limitations, plastic guide combs remain a practical and accessible option for many pet parents.

Metal Guide Combs

Metal guide combs represent a premium option for dog grooming, prized for their durability and precision. Constructed from stainless steel, these combs withstand rigorous use and maintain their shape, resisting bending or breaking that can occur with plastic alternatives. This robustness makes them ideal for tackling thick, dense, or matted coats, particularly on larger breeds.

Metal combs often feature a detachable design, securely clipping onto the clipper blade for a stable and consistent cut. While typically more expensive upfront, their longevity and performance justify the investment for professional groomers or owners committed to regular, high-quality grooming.

However, metal can heat up during extended use, requiring careful monitoring to prevent discomfort for the dog. Proper cleaning and maintenance are crucial to prevent rust and ensure optimal performance.

Snap-On vs. Detachable Combs

The choice between snap-on and detachable guide combs significantly impacts the grooming process and final result. Snap-on combs, as the name suggests, simply push onto the clipper blade, offering quick and easy changes between sizes. They are generally more affordable and convenient for occasional grooming or quick touch-ups.

However, snap-on combs can sometimes feel less secure, potentially shifting during use and leading to uneven cuts. Detachable combs, on the other hand, attach with a more robust locking mechanism, ensuring a stable and consistent cutting experience.

While requiring a slightly more involved attachment process, detachable combs are favored by professional groomers for their reliability and precision, especially when working with challenging coats or performing intricate styles.

Dog Clipper Combs Size Chart

Selecting the appropriate guide comb size is crucial for a successful groom; this chart categorizes combs by breed size, ensuring optimal coat length and comfort.

Small Breed Dog Comb Sizes (Under 20 lbs)

For petite pups weighing under 20 pounds, precision is key when selecting guide comb sizes. Breeds like Chihuahuas, Yorkshire Terriers, and Pomeranians generally benefit from shorter lengths to maintain a neat and manageable appearance. A #10 blade (1/16 inch) is often used for a very close shave, ideal for sanitary trims or creating a smooth, clean look.

More commonly, sizes A1 (1/8 inch) through A5 (1/2 inch) are preferred for body clipping, allowing for a softer, fluffier finish. A1 is excellent for a very short, even trim, while A5 provides a slightly longer, more forgiving length. Consider the dog’s coat type; smoother coats may look best with shorter lengths, while fluffier coats can handle slightly longer settings. Always start with a longer guard and work your way shorter if needed, prioritizing your dog’s comfort and avoiding skin irritation.

Medium Breed Dog Comb Sizes (20-50 lbs)

Medium-sized breeds, ranging from 20 to 50 pounds – think Beagles, Cocker Spaniels, and Bulldogs – offer more versatility in styling, requiring a broader range of guide comb sizes. Generally, these dogs do well with lengths between 1/2 inch and 1 inch. A5 (1/2 inch) remains a popular choice for an all-over trim, providing a neat and tidy appearance without being overly short.

For a slightly longer coat, A7 (7/8 inch) and A8 (1 inch) are excellent options, particularly for breeds with double coats that benefit from some length for insulation. Experimenting with different lengths can help you achieve the desired look, but remember to always clip with the grain of the fur to prevent irritation. Consider blending lengths using multiple comb sizes for a more natural, professional finish.

Large Breed Dog Comb Sizes (50+ lbs)

For larger breeds exceeding 50 pounds – such as German Shepherds, Labrador Retrievers, and Golden Retrievers – managing their substantial coats requires careful consideration of guide comb sizes. These dogs often benefit from longer lengths to maintain insulation and protect their skin. A8 (1 inch) and A10 (1.5 inches) are frequently used for a full-body trim, offering a balanced look that’s both practical and aesthetically pleasing.

If you prefer a shorter, more manageable coat, A7 (7/8 inch) can be a good starting point. Remember that larger breeds often have thicker coats, so a powerful clipper is essential. Blending different lengths with multiple comb sizes can create a more natural appearance, especially around the face and legs. Prioritize comfort and avoid clipping too close to the skin.

Choosing the Right Comb for Your Dog’s Coat

Selecting the appropriate guide comb hinges on your dog’s coat type – short, medium, or long – to ensure a comfortable and visually appealing grooming experience.

Short, Smooth Coats

For dogs with short, smooth coats like Boxers, Bulldogs, or Greyhounds, the goal is typically a very close, neat trim. Guide combs in the A1 (⅛ inch) to A4 (¼ inch) range are generally ideal. These smaller sizes allow you to achieve a clean, uniform look without removing too much length, maintaining the coat’s natural sleekness.

Begin with a higher number, like A4, and gradually work your way down if a shorter length is desired. Remember to always clip with the grain of the hair for a smoother finish and to avoid irritation. Avoid using larger combs, as they can leave the coat looking uneven and disproportionate. Regular grooming with these smaller combs helps maintain hygiene and prevents shedding, keeping your dog comfortable and looking their best.

Consider the dog’s skin sensitivity; a gentle touch and careful technique are crucial when working with short coats.

Medium-Length, Double Coats

Dogs with medium-length, double coats – such as Siberian Huskies, German Shepherds, or Pomeranians – require a different approach. These coats need to be thinned and managed to prevent matting and overheating. Guide combs ranging from A5 (⅜ inch) to A7 (⅝ inch) are often the most effective. These sizes allow you to remove some of the undercoat while maintaining sufficient length for insulation and protection.

Start with a longer comb (A7) and gradually decrease the size as needed, paying close attention to how the coat responds. Clipping against the grain can help lift the undercoat for more effective removal, but be cautious to avoid skin irritation. Regular grooming is vital to prevent matting, especially during shedding season.

Focus on thinning the coat rather than creating a drastically shorter style, preserving its natural functionality.

Long, Thick Coats

Breeds boasting long, thick coats – like Old English Sheepdogs, Bearded Collies, or Afghan Hounds – demand careful consideration when selecting guide comb sizes. These coats are prone to matting and require regular maintenance to stay healthy and manageable. Generally, combs ranging from A7 (⅝ inch) to A10 (1 inch) are suitable for maintaining length while removing excess bulk.

However, the specific size will depend on the desired style and the coat’s current condition. For a natural look, prioritize longer lengths and focus on blending. If matting is present, a slightly shorter comb (A7 or A8) may be necessary to remove it safely. Always clip in the direction of hair growth to minimize stress and prevent skin irritation.

Professional guidance is recommended for complex coat styles.

Using Guide Combs Effectively

Mastering guide comb use involves proper preparation, technique, and awareness of your dog’s comfort, ensuring a stress-free grooming experience with excellent results.

Preparing Your Dog for Grooming

Before initiating the grooming process, prioritize creating a calm and positive environment for your canine companion. Begin with a thorough brushing to eliminate mats and tangles, which can obstruct the clipper’s path and cause discomfort. A gentle massage can help relax your dog, easing any anxiety associated with the clippers.

Introduce the clippers gradually, allowing your dog to sniff and acclimate to the sound and vibration without turning them on initially. Once comfortable, briefly turn on the clippers at a distance, rewarding calm behavior with treats and praise. Ensure the chosen grooming space is well-lit and provides a secure, non-slip surface.

Finally, a pre-grooming bathroom break is advisable to prevent any unexpected interruptions during the clipping session. A relaxed and comfortable dog is far more receptive to grooming, resulting in a smoother and more enjoyable experience for both of you.

Proper Clipping Technique with Guide Combs

Achieving a professional finish with guide combs hinges on employing the correct clipping technique. Always clip with the grain of the fur, moving the clippers in the natural direction of hair growth to prevent irritation and ensure an even cut. Maintain a consistent speed and pressure throughout the process, avoiding abrupt starts and stops.

Begin with broad, sweeping motions, overlapping each pass slightly to eliminate lines and ensure complete coverage. For sensitive areas like the face and paws, use a lower speed setting and exercise extreme caution. Regularly check the comb attachment to confirm it remains securely fastened during operation.

Periodically brush away clipped hair to maintain visibility and prevent the clippers from overheating. Remember to take breaks if your dog becomes stressed, and always prioritize their comfort throughout the grooming session.

Avoiding Skin Irritation and Injury

Prioritizing your dog’s safety is paramount when using clipper guide combs. Always inspect the skin for any pre-existing conditions like cuts, rashes, or hot spots before beginning. Ensure the guide comb is securely attached and the blades are cool to the touch, preventing burns.

Avoid applying excessive pressure, which can cause skin irritation or even injury. If you encounter resistance, reassess the angle and technique rather than forcing the clippers. Pay close attention to bony areas and sensitive spots, like the ears and groin.

Regularly check the skin during clipping for any signs of redness or discomfort. Stop immediately if irritation occurs and consult a veterinarian if necessary. A calm, patient approach minimizes stress and reduces the risk of accidents.

Maintaining Your Guide Combs

Proper care extends the life of your guide combs, ensuring optimal performance and hygiene for your dog’s grooming needs consistently.

Cleaning Guide Combs

Regular cleaning is paramount for maintaining the effectiveness and hygiene of your dog clipper guide combs. After each use, meticulously remove all accumulated hair using a comb, brush, or even a specialized cleaning tool designed for this purpose. Don’t overlook the spaces between the metal and plastic components, as hair tends to build up in these areas.

For a deeper clean, wash the combs with warm, soapy water. Mild dish soap works well, but avoid harsh chemicals or abrasive cleaners that could damage the plastic or metal. Thoroughly rinse the combs under running water to remove all traces of soap;

Before storing, ensure the combs are completely dry to prevent rust or mildew growth. A soft cloth can be used to wipe them down. Disinfecting with a pet-safe spray is also a good practice, especially if you groom multiple dogs.

Storing Guide Combs

Proper storage significantly extends the lifespan of your dog clipper guide combs and keeps them organized for easy access. Ideally, store your combs in a dry, cool place away from direct sunlight and extreme temperatures, which can warp or damage the plastic components.

A dedicated storage case or pouch is highly recommended. Many clipper kits include a case specifically designed to hold the combs securely. If you don’t have one, a small plastic container or even a labeled zip-lock bag will suffice.

Avoid tossing the combs loosely into a drawer, as this can lead to scratches, bending, or loss of individual pieces. Keeping them organized by size also streamlines the grooming process. Regularly check the storage area for any signs of moisture or pests.

Replacing Worn-Out Combs

Over time, even with diligent care, dog clipper guide combs will inevitably show wear and tear, impacting their performance and potentially harming your pet’s skin. Regularly inspect your combs for chipped edges, cracks, or bending – these are clear indicators it’s time for a replacement.

Dull or damaged combs can pull at the fur, causing discomfort and uneven cuts. Replacing worn combs ensures a smooth, comfortable grooming experience for your dog. Don’t attempt to repair damaged plastic combs with glue, as this is often a temporary fix and can create sharp edges.

Consider replacing combs in pairs or sets to maintain consistency in your grooming results. Investing in quality replacement combs is a small price to pay for your dog’s comfort and a professional-looking finish.

Popular Guide Comb Brands

Andis, Wahl, and Oster are highly-regarded brands offering durable, reliable guide combs for various coat types and grooming needs, ensuring quality results.

Andis Guide Combs

Andis is a prominent name in professional grooming, consistently delivering high-quality clipper blades and guide combs favored by groomers and pet owners alike. Their guide combs are known for their robust construction and precise sizing, ensuring a smooth and even cut every time.

Andis offers a comprehensive range of guide combs, covering sizes A1 through A10, as well as specialized combs for specific breeds and coat textures. Many Andis combs feature color-coded rings for quick identification, streamlining the grooming process. They are compatible with most standard Andis clippers, providing versatility for various grooming tasks.

Beyond standard plastic combs, Andis also manufactures metal guide combs, offering increased durability and precision for demanding grooming applications. These metal combs are particularly useful for tackling thick or matted coats, providing a clean and consistent finish. Investing in Andis guide combs means investing in professional-grade tools designed for lasting performance.

Wahl Guide Combs

Wahl, a household name in grooming, provides a wide selection of guide combs designed for both professional and at-home use. Their combs are celebrated for their affordability and reliability, making them a popular choice for pet owners starting their grooming journey. Wahl guide combs are readily available in standard plastic sets, typically including sizes A1 to A10, catering to diverse coat lengths and breed requirements.

Wahl’s commitment to quality extends to the durability of their combs, ensuring they withstand regular use without cracking or warping. Many Wahl sets include snap-on combs, offering easy attachment and removal during grooming sessions. They are specifically engineered for compatibility with Wahl clippers, guaranteeing a secure fit and optimal performance.

For groomers seeking enhanced precision, Wahl also offers metal guide combs, providing a more robust and consistent cutting experience, especially on dense or challenging coats.

Oster Guide Combs

Oster is renowned within the professional grooming community for producing high-performance clippers and accessories, and their guide combs are no exception. Oster guide combs are built to withstand the demands of frequent, professional use, boasting exceptional durability and consistent cutting performance. They are available in both plastic and metal options, catering to different grooming preferences and coat types.

Oster offers a comprehensive range of sizes, mirroring the standard A1-A10 scale, alongside specialized combs for achieving unique lengths and finishes. Their snap-on combs are designed for secure attachment to Oster clippers, minimizing slippage during operation. Many professionals favor Oster metal guide combs for their superior rigidity and ability to maintain a consistent height, even through thick, matted fur.

Investing in Oster guide combs means investing in quality and precision, ensuring a polished and professional groom every time.

drz400 cam chain guide

DRZ400 Cam Chain Guide: A Comprehensive Overview

The DRZ400’s longevity relies on diligent maintenance, and a crucial component often discussed is the cam chain guide. Online forums reveal a wealth of information,
spanning from discussions on aftermarket upgrades to identifying failure symptoms and detailed replacement procedures, ensuring optimal engine performance and preventing catastrophic damage.

The DRZ400 engine utilizes a cam chain to synchronize the crankshaft and camshafts, a critical system for precise valve timing and overall engine function. This chain, however, requires guidance to prevent excessive wear and potential failure. The cam chain’s durability is paramount, as a broken chain can lead to severe internal engine damage, necessitating costly repairs or even a complete engine rebuild.

Online resources highlight the DRZ400’s cam chain as a common area for preventative maintenance, particularly in older or high-mileage bikes. Discussions frequently center around the chain’s susceptibility to stretching and the importance of regular inspection. Understanding the cam chain’s role and potential weaknesses is the first step towards ensuring the DRZ400’s continued reliability and performance. Proper maintenance, including tension adjustments and guide replacement, are key to a long engine life.

What is a Cam Chain Guide?

A cam chain guide is a crucial component within the DRZ400 engine, designed to maintain proper cam chain tension and alignment. It’s typically constructed from a durable, low-friction material – often plastic or a reinforced composite – and physically guides the chain as it travels between the crankshaft and camshaft sprockets. This guidance prevents the chain from slapping against the internal engine components, minimizing wear and reducing noise.

The guide isn’t a tensioner; it supports the chain while the tensioner maintains the correct overall tension. Without a functioning guide, the chain can jump teeth, leading to catastrophic engine failure. Online forums emphasize that the DRZ400’s cam chain guide is a wear item, prone to degradation over time, especially with aggressive riding or inadequate oil maintenance. Regular inspection and timely replacement are vital for preventing serious engine issues.

The Importance of the Cam Chain Guide

The cam chain guide’s role is paramount to the DRZ400’s engine health and longevity. A failing guide allows excessive cam chain movement, leading to several detrimental effects. Primarily, it causes the chain to wear prematurely, stretching it and potentially causing it to jump teeth – a scenario that can result in valve-to-piston contact and complete engine destruction.

Beyond catastrophic failure, a worn guide contributes to increased engine noise, often manifesting as a rattling sound, particularly at lower RPMs. This rattling isn’t merely an annoyance; it’s a symptom of metal-on-metal contact, accelerating wear on the chain, sprockets, and even the cylinder head. Online discussions consistently highlight the preventative nature of guide replacement, emphasizing that addressing the issue early is far more cost-effective than repairing a damaged engine.

DRZ400 Specific Cam Chain Guide Design

The DRZ400’s cam chain guide is a critical component uniquely stressed by the engine’s characteristics. Originally, Suzuki utilized a guide constructed from a relatively soft material, prone to wear, especially under aggressive riding conditions or with inadequate lubrication. This design, while functional initially, became a known weak point, prompting the aftermarket to develop more durable alternatives.

The guide itself is positioned within the cylinder head, maintaining tension on the cam chain as it transfers power from the crankshaft to the camshaft. Its shape is specifically contoured to fit the chain and head, minimizing friction and noise. However, the original material’s susceptibility to wear means that even well-maintained DRZ400s often require guide replacement at regular intervals, typically between 20,000 and 30,000 miles, depending on riding style and maintenance practices.

Types of DRZ400 Cam Chain Guides

When considering cam chain guide options for the DRZ400, riders primarily encounter OEM (Original Equipment Manufacturer) guides and a diverse range of aftermarket alternatives. The OEM guide, as initially fitted by Suzuki, is readily available and represents the most cost-effective solution, though its inherent material limitations are well-documented within the DRZ400 community.

Aftermarket guides typically fall into two main categories: those constructed from improved polymers and those utilizing metal reinforcements. Polymer guides offer enhanced durability over the OEM version, resisting wear and deformation for extended periods. Metal-reinforced guides, often incorporating steel or aluminum inserts, provide the highest level of strength and longevity, ideal for riders engaging in demanding off-road activities or those seeking maximum reliability. Choosing the right type depends on budget, riding style, and desired level of performance and peace of mind.

OEM Cam Chain Guide

The Original Equipment Manufacturer (OEM) cam chain guide for the DRZ400 is a plastic component designed to maintain proper cam chain tension and prevent excessive wear. It’s the standard part installed on the motorcycle from the factory and remains a popular choice due to its affordability and ease of availability through Suzuki dealerships and online parts retailers.

However, the OEM guide is known within the DRZ400 community to have a significant weakness: it’s constructed from a relatively soft plastic that can wear down prematurely, especially under aggressive riding conditions or with inadequate lubrication. This wear leads to increased cam chain slap, potentially causing noise and, over time, contributing to more serious engine damage. While a suitable temporary fix, many riders proactively upgrade to aftermarket options for increased durability and long-term reliability, recognizing the OEM guide’s limitations.

Aftermarket Cam Chain Guide Options

Numerous aftermarket cam chain guide options exist for the DRZ400, addressing the shortcomings of the OEM plastic guide. These alternatives primarily utilize more durable materials like phenolic resin, nylon impregnated with oil, or even billet aluminum for enhanced longevity and reduced wear. Popular brands include Tusk, Warp9, and several smaller manufacturers specializing in DRZ400 performance parts.

Phenolic resin guides offer a good balance of durability and cost-effectiveness, while nylon-impregnated options provide self-lubrication, further minimizing wear. Billet aluminum guides, though the most expensive, offer the highest level of strength and heat resistance. Riders often choose based on their riding style and budget; aggressive off-road riders typically opt for the most robust options. Installation is generally straightforward, mirroring the OEM replacement process, offering a significant upgrade in cam chain reliability.

Common DRZ400 Cam Chain Guide Failure Symptoms

Identifying cam chain guide failure early is crucial to prevent severe engine damage in the DRZ400. The most frequently reported symptom is a distinct rattling noise emanating from the engine, particularly noticeable at idle or low RPMs. This sound originates from the cam chain slapping against the internal engine components due to the worn guide.

Alongside the rattling, riders may experience reduced engine performance, manifesting as a loss of power or difficulty maintaining consistent RPMs. Prolonged neglect can lead to increased engine wear, as the loose cam chain impacts timing and valve operation. Ignoring these signs can ultimately result in catastrophic engine failure. Regular checks and prompt replacement upon noticing these symptoms are vital for maintaining DRZ400 engine health and avoiding costly repairs.

Rattling Noise from the Engine

A rattling noise originating from the engine is the most common and often first indicator of a failing cam chain guide in the DRZ400. This isn’t a subtle sound; it’s typically described as a distinct, metallic rattling or slapping, particularly prominent during idle or low RPM operation. The noise stems from the cam chain’s increased play and subsequent impact against the internal engine casing, a direct result of the guide’s wear.

The intensity of the rattle can fluctuate with engine temperature and load. Some riders report it being more noticeable when the engine is cold. It’s crucial not to dismiss this sound as normal engine operation. A persistent rattling suggests the cam chain is no longer properly guided, and immediate investigation is necessary to prevent further damage and potential engine failure.

Reduced Engine Performance

As the DRZ400’s cam chain guide deteriorates, a gradual decline in engine performance often becomes apparent. This isn’t usually a sudden, dramatic loss of power, but rather a subtle decrease in responsiveness and overall “pep.” The increased cam chain slack affects valve timing precision, leading to inefficient combustion and reduced power output, especially in the mid-range.

Riders may notice the engine feels sluggish, requiring more throttle input to achieve the same level of acceleration. Difficulty maintaining consistent RPMs and a general lack of crispness in the engine’s response are also common symptoms. Ignoring this performance drop can exacerbate the issue, potentially leading to more significant engine problems and costly repairs down the line. Prompt attention is key.

Increased Engine Wear

A failing DRZ400 cam chain guide doesn’t just impact performance; it significantly accelerates engine wear. The excessive cam chain movement caused by a worn guide leads to increased friction and impact forces on critical components like the cam lobes, rocker arms, and valve buckets. This constant pounding gradually erodes these parts, reducing their lifespan and potentially causing catastrophic failure.

Metal particles from the wear process contaminate the engine oil, acting as an abrasive compound that further damages bearings and other internal surfaces. Over time, this cumulative wear can result in valve train issues, reduced compression, and ultimately, a complete engine rebuild. Addressing a worn cam chain guide proactively is crucial for preserving the longevity and reliability of your DRZ400 engine.

Diagnosing Cam Chain Guide Issues

Accurately diagnosing cam chain guide problems on a DRZ400 requires a systematic approach. Begin with a thorough visual inspection of the guide itself, accessible after removing the valve cover. Look for signs of cracking, chipping, or excessive wear on the guide’s surface – these are clear indicators of impending failure. Simultaneously, checking cam chain tension is vital; excessive slack suggests the guide isn’t effectively maintaining proper chain tension.

Listen carefully for unusual noises during engine operation. A distinct rattling, particularly noticeable at lower RPMs, often signals a worn guide. While not definitive, this sound warrants further investigation. Remember, early detection is key to preventing more significant engine damage. A combination of visual assessment and auditory clues will help pinpoint potential issues.

Visual Inspection of the Guide

A detailed visual inspection is the first step in assessing the condition of your DRZ400’s cam chain guide. After carefully removing the valve cover, examine the guide for any physical damage. Pay close attention to the guide’s sliding surface – look for cracks, chips, or areas where the material has begun to wear away. Even seemingly minor imperfections can indicate significant internal weakening.

Inspect the guide’s mounting points as well. Check for any signs of stress or damage to the surrounding metal. A compromised mounting point can lead to improper guide function and accelerated wear. Note any discoloration or unusual residue, which might suggest overheating or contamination. A healthy guide will appear solid and intact, with a smooth, consistent surface.

Checking Cam Chain Tension

Assessing cam chain tension is vital alongside visual inspection of the guide. With the valve cover removed, gently pull down on the cam chain between the camshaft sprockets. There should be a minimal amount of slack – typically between 5-10mm, though specific tolerances can vary. Excessive slack indicates wear in the chain, guide, or tensioner.

Feel for any tight spots or stiffness in the chain as you rotate the engine manually. A smooth, consistent feel is ideal. If you encounter resistance, it suggests potential internal damage or buildup. Also, inspect the cam chain tensioner itself; ensure it’s extending and retracting smoothly and isn’t sticking or leaking oil. Proper tension is crucial for quiet operation and preventing premature wear.

Tools Required for Cam Chain Guide Replacement

Successfully replacing the DRZ400 cam chain guide demands a specific toolkit. Essential items include a socket set with various sizes, particularly for valve cover bolts and potentially the camshaft nut. A torque wrench is absolutely critical for re-installation, ensuring correct tightening and preventing damage. You’ll also need a set of screwdrivers (Phillips and flathead) for removing covers and components.

Pliers are useful for removing hoses or clips. A cam chain tensioner tool (specific to the DRZ400) simplifies tensioner removal and installation. Penetrating oil aids in loosening stubborn bolts. Finally, a clean workspace and a container to hold removed parts are highly recommended. Having a repair manual specific to the DRZ400 is invaluable for torque specifications and diagrams.

Step-by-Step Cam Chain Guide Replacement Procedure

The DRZ400 cam chain guide replacement begins with preparing the motorcycle, disconnecting the battery and ensuring a clean workspace. First, remove the valve cover, carefully disconnecting any hoses or wiring. Next, rotate the engine to Top Dead Center (TDC) on the compression stroke. Access the old guide, often requiring removal of the camshaft.

Carefully extract the worn guide, noting its orientation. Clean the surrounding area thoroughly. Install the new cam chain guide, ensuring correct positioning. Reinstall the camshaft, verifying proper alignment. Reattach the valve cover, using a torque wrench to tighten bolts to specification. Finally, double-check all connections and re-connect the battery before starting the engine.

Removing the Valve Cover

Initiating the DRZ400 cam chain guide replacement requires careful valve cover removal. Begin by disconnecting the negative battery terminal to prevent shorts. Locate and disconnect any hoses attached to the valve cover, noting their positions for reassembly. Unplug any electrical connectors, such as those for the valve cover gasket heater.

Then, systematically remove the bolts securing the valve cover, typically in a crisscross pattern to ensure even pressure release. Gently pry the valve cover loose, being mindful of the gasket. Once free, lift the valve cover, taking care not to damage the gasket surface. Inspect the gasket for wear and plan for replacement during reassembly.

Accessing and Removing the Old Guide

With the valve cover removed, accessing the cam chain guide is the next step. You’ll now have a clear view of the cam chain and its guide. Often, the guide is held in place by a single bolt or two, and sometimes it’s a press-fit component. Locate the securing fastener(s) and carefully remove them.

Depending on the guide’s design, it might require gentle persuasion to remove. Avoid excessive force, as damaging the camshaft or surrounding components is possible; A small pry tool can be helpful, but use it cautiously. Once loosened, carefully extract the old cam chain guide, noting its orientation for correct installation of the new one. Inspect the area for any debris or wear marks.

Installing the New Cam Chain Guide

With the old guide removed, carefully position the new cam chain guide into its designated space. Ensure it’s oriented correctly – referencing the notes you made during removal is crucial. If it’s a press-fit guide, gently apply even pressure until it’s fully seated. Avoid using a hammer directly on the guide; use a soft-faced mallet or a suitable tool to prevent damage.

If the guide is secured with bolts, align the mounting holes and install the fasteners. Do not fully tighten them yet. Double-check that the guide is properly seated and the cam chain runs smoothly within its channel. Once satisfied, proceed to tighten the securing bolts to the manufacturer’s specified torque settings, ensuring a secure and reliable installation.

Torque Specifications for Related Bolts

Precise torque application is paramount during reassembly to prevent damage and ensure long-term reliability. For the valve cover bolts on a DRZ400, a typical torque specification falls within the range of 8.7 lb-ft (12 Nm). However, always verify this specification in your DRZ400’s service manual, as variations can occur based on model year and specific bolt location.

If the cam chain guide is secured with bolts (some aftermarket options), torque them to the manufacturer’s recommendation, usually around 9-11 lb-ft (12-15 Nm). Ignoring these specifications can lead to stripped threads, leaks, or even catastrophic engine failure. Using a calibrated torque wrench is essential for accurate results. Double-check all fasteners after the initial ride to confirm they remain within the specified torque range;

Preventative Maintenance for the Cam Chain Guide

Proactive maintenance significantly extends the lifespan of your DRZ400’s cam chain guide. Regular cam chain tension checks – ideally every 600-1000 miles, or with each oil change – are crucial. Excessive slack indicates wear and potential failure. Always use a quality oil and filter; clean oil lubricates the cam chain and guide, reducing friction and wear.

Consider oil with a higher zinc content, as this additive provides enhanced protection for the cam chain and guide. Avoid prolonged periods of inactivity, as this can lead to corrosion. If storing the bike, pre-lubricate the cylinder and cam chain. Frequent visual inspections during valve adjustments can also reveal early signs of guide wear, allowing for timely replacement and preventing costly engine damage.

Regular Cam Chain Tension Checks

Consistent cam chain tension checks are paramount for DRZ400 reliability. Implement a schedule – every 600-1000 miles is recommended, or concurrently with oil changes. Locate the tensioner adjustment screw, typically near the cylinder head. With the engine off, gently rock the cam chain to assess slack. A small amount of play is normal, but excessive movement signals a problem.

Proper tension prevents premature wear on both the chain and the guide; Consult your DRZ400 service manual for specific tensioning procedures and acceptable slack measurements. Avoid over-tensioning, as this can lead to increased friction and potential chain breakage. Document each check to track changes over time, providing valuable insight into the guide’s condition and predicting potential failures before they occur.

Using Quality Oil and Filters

Employing high-quality oil and filters significantly extends the lifespan of your DRZ400’s cam chain and guide. Opt for motorcycle-specific oils formulated for wet clutches, meeting or exceeding JASO MA standards. These oils contain additives crucial for cam chain lubrication and wear protection. Regular oil changes – every 3,000 miles or six months, whichever comes first – are non-negotiable.

Furthermore, invest in premium oil filters capable of trapping microscopic debris that can accelerate wear. Avoid cheap filters, as they may compromise filtration efficiency. Clean oil ensures adequate lubrication, reducing friction and heat buildup within the cam chain mechanism. This proactive approach minimizes stress on the guide, preventing premature failure and maintaining optimal engine performance for years to come.

Long-Term DRZ400 Cam Chain Health

Maintaining the long-term health of your DRZ400’s cam chain requires a holistic approach beyond just the guide itself. Consistent adherence to recommended maintenance schedules, including regular valve adjustments, is paramount. Incorrect valve clearances can induce excessive cam chain wear and stress. Monitoring for subtle changes in engine noise – even slight increases in rattling – can indicate developing issues.

Riding style also plays a role; aggressive riding with frequent high-RPM operation places greater demands on the cam chain system. Prioritizing quality components throughout the engine, not solely the guide, contributes to overall reliability. Proactive inspection and timely replacement of worn parts, coupled with diligent oil maintenance, will ensure your DRZ400 continues to deliver dependable performance for countless miles.

heelys size guide

Heelys Size Guide: A Comprehensive Overview (Updated 02/08/2026)

Navigating Heelys sizing can be tricky, with variations reported across models and between youth and adult sizes; accurate foot measurement is key for comfort.

Understanding Heelys Sizing Challenges

Heelys present unique sizing difficulties compared to traditional shoes due to their integrated wheel system and the need for a secure, yet comfortable, fit. Many users report inconsistencies, with sizes running smaller than standard shoe sizes, particularly in models like the Rezerve EXS. A common issue is toe compression, as experienced by an adult woman who found a 9W too constricting, necessitating a switch to a 9M.

Variations also exist between youth and women’s sizes, requiring careful conversion – an 8Y often corresponds to a 9W. Furthermore, individual foot shapes, especially width (narrow, medium, wide), significantly impact the ideal size. The lack of frequent wider size availability adds to the challenge, potentially incurring shipping costs for multiple attempts to find the correct fit. Reliable distributors and accurate foot measurements are crucial for a positive Heelys experience.

The Variability of Heelys Sizes

Heelys sizing isn’t standardized; it fluctuates considerably between different models and even within the same model across production runs. One user’s daughter, typically wearing a size 1 or 2 shoe, required a women’s 4/youth 3 in Heelys, highlighting this discrepancy. This inconsistency stems from the shoe’s construction accommodating the wheel, impacting internal volume and fit.

Wheel size itself can vary depending on the shoe size, though this isn’t always the case. Experiences shared online emphasize that relying solely on typical shoe size is unreliable. Foot flattening during measurement is recommended for accuracy. The brand’s size chart, while available, doesn’t always account for individual foot variations or preferred tightness, as some users prefer a snugger fit for better control.

Heelys Size Charts: Where to Find Them

Heelys provides a size chart directly on their official website, serving as a primary resource for initial estimations. However, users caution against relying solely on these charts due to the inherent sizing inconsistencies within the brand. Retailers like Amazon, which also sell Heelys, may offer their own size charts, but these can sometimes differ from the official Heelys guide.

AliExpress, a platform sharing sizing data, can also be a supplemental resource. It’s crucial to compare charts and prioritize accurate foot measurement. Remember, a comfortable fit requires flattening your foot during measurement. Consider checking for model-specific charts, as the Rezerve EXS, for example, has reported sizing issues.

Heelys Sizing for Kids

Children’s Heelys sizing requires careful consideration, as youth sizes differ from women’s, and typical shoe sizes don’t always translate directly.

Youth Sizes vs. Women’s Sizes

Understanding the distinction between youth and women’s Heelys sizes is crucial for a proper fit, especially when navigating online retailers or comparing sizing charts. Heelys frequently utilizes a dual sizing system, displaying both a youth size and its corresponding women’s size – for example, 8Y/9W. This indicates that the shoe is designed to fit a youth size 8 and a women’s size 9.

However, this conversion isn’t always a perfect one-to-one match. Individual foot shapes and preferences play a significant role. Some individuals may find a more comfortable fit by slightly adjusting from the suggested conversion. It’s important to remember that Heelys, like many shoe brands, can have variations in their sizing depending on the specific model.

Therefore, relying solely on the dual sizing can be misleading. Accurate foot measurement, combined with considering width and personal preference, is essential for selecting the correct size.

Converting Youth Sizes to Women’s Sizes (Example: 8Y/9W)

The 8Y/9W designation commonly found on Heelys indicates a size equivalence: Youth size 8 corresponds to a Women’s size 9. However, this conversion serves as a general guideline, and individual experiences can vary significantly. Factors like foot width and desired fit – tighter for control or looser for comfort – influence the optimal size.

A user reported normally wearing an 8.5-9 in women’s shoes but found a 9W Heelys to be too constricting, particularly in the toe area. This highlights the potential for discrepancies and the importance of considering individual foot dimensions.

When converting, it’s often advisable to err on the side of caution and potentially size up, especially if you have wider feet or prefer a more relaxed fit. Always prioritize accurate foot measurement and consider the specific Heelys model, as sizing can differ.

Typical Shoe Size to Heelys Size Conversion for Children

Converting standard shoe sizes to Heelys sizes for children requires careful consideration, as variations exist. A child typically wearing a size 1 or 2 shoe may require a Women’s 4/Youth 3 Heelys. However, this isn’t a rigid rule, and individual foot shapes play a crucial role.

One parent noted their 8-year-old daughter generally wears a size 1 or 2, but recent purchases ranged from a size 1 (Converse) to a 1 1/5 (boots). This illustrates the inconsistency in standard shoe sizing itself.

Therefore, relying solely on a child’s usual shoe size isn’t sufficient. Accurate foot measurement, combined with understanding Heelys’ specific sizing charts, is essential for a comfortable and secure fit. Prioritize a snug, but not overly tight, feel.

Age 6-8: Common Heelys Size Ranges

For children aged 6-8, determining the correct Heelys size often falls within the Youth 1-4 range, or Women’s 4-7, but significant individual variation exists. A child typically wearing a standard shoe size of 1-2 might comfortably fit into a Women’s 4/Youth 3 Heelys, as observed by parents.

However, foot development during these years is rapid, and sizing can change quickly. It’s crucial to measure foot length accurately, rather than relying on past shoe sizes. Consider the width of the foot as well; a wider foot may necessitate going up a half or full size.

Prioritize a snug fit that allows for some growth, but avoids being overly spacious, ensuring stability and control while rolling.

Age 8-10: Common Heelys Size Ranges

Children between 8 and 10 years old generally find their Heelys size within the Youth 4-6 or Women’s 7-10 range, though individual foot size dictates the best fit. Many in this age group wearing a typical shoe size of 2-3 may require a Women’s 7/Youth 5 Heelys, but this is merely a starting point.

As with younger children, accurate foot measurement is paramount. Growth spurts are common, so regular checks are advisable. Pay attention to whether the child prefers a looser or more snug fit, influencing size selection.

Remember that Heelys sizing can be inconsistent, so prioritizing comfort and maneuverability is essential for a positive experience.

Age 10-12: Common Heelys Size Ranges

For children aged 10-12, Heelys sizes typically fall within the Youth 6-8 or Women’s 10-12 range, but individual foot dimensions are crucial for determining the optimal fit. Those wearing a standard shoe size of 4-5 might comfortably fit into a Women’s 10/Youth 7, serving as a useful initial guide.

Given the potential for rapid growth during these years, precise foot measurement is vital before purchasing. Consider the child’s preference for a snug or relaxed fit, as this impacts the overall experience.

Heelys sizing can vary, so prioritizing comfort and ensuring adequate toe room are essential for safe and enjoyable rolling.

Heelys Sizing for Adults

Adult Heelys sizing differs between men and women, with women often finding success converting youth sizes; width considerations are also important.

Men’s vs. Women’s Heelys Sizing

Generally, men’s and women’s Heelys sizing isn’t a direct correlation, requiring careful consideration when purchasing. Many adult women successfully navigate sizing by utilizing the youth size charts, specifically looking at the equivalent women’s size within the youth range – for example, an 8Y/9W. However, this isn’t a universal solution, particularly for individuals with wider feet.

Men typically adhere to standard men’s shoe sizes when selecting Heelys. It’s often noted that some men prefer a slightly tighter fit for enhanced control while rolling, suggesting potentially sizing down a half size. The key is understanding your foot’s dimensions and comparing them to the official Heelys size charts available on their website. Remember, individual experiences vary, and trying on (or having a reliable return policy) is crucial for optimal fit.

Adult Women’s Heelys Sizing Considerations (Wide Feet)

Adult women with wider feet often encounter challenges finding a comfortable Heelys fit, as the standard width can feel constricting. One recent experience involved ordering a 9W, which proved too narrow, causing toe discomfort and tightness. Heelys doesn’t consistently stock wider widths (like 10W), necessitating alternative solutions.

Switching to a medium width (9M) is often recommended, despite potentially sacrificing some width. Accurate foot measurement, while flattened comfortably, is paramount. Consider purchasing from retailers like Amazon, which may offer more flexible return policies to accommodate sizing trials. Be aware that Heelys’ official website doesn’t refund shipping costs, making multiple size attempts potentially expensive. Prioritize a retailer you trust for hassle-free exchanges.

Finding the Right Fit for Adult Men

Determining the correct Heelys size for adult men requires careful consideration, as preferences for fit can vary. Some individuals, even those who typically wear the same size as women, prefer a tighter fit for enhanced control while rolling. However, relying solely on standard shoe size isn’t sufficient due to model-specific variations.

Consulting Heelys’ official size chart is a crucial first step, but remember that these charts are guidelines. Prioritize accurate foot measurement, ensuring your foot is comfortably flattened during the process. Explore online resources and communities for insights into specific model sizing. Be prepared to potentially order multiple sizes to achieve the optimal fit, factoring in retailer return policies and shipping costs.

Specific Heelys Model Sizing (Rezerve EXS)

The Rezerve EXS model often presents sizing challenges, frequently running smaller than expected; consider ordering a half or full size up for optimal comfort.

Rezerve EXS: Known Sizing Issues

The Heelys Rezerve EXS model is frequently reported to have inconsistent sizing, often running notably smaller than standard Heelys or typical shoe sizes. Many adult women, even those who usually wear an 8.5 or 9, have experienced significant discomfort with a 9W, finding it excessively tight and causing toe compression. This issue stems from a narrow toe box design within the EXS model.

Customers with wider feet are particularly susceptible to sizing problems, as the 9W often feels more akin to a standard width. The lack of readily available wider sizes (like a 10W) further complicates finding a comfortable fit. It’s crucial to acknowledge that Heelys’ return policy doesn’t cover shipping costs, making multiple size attempts potentially expensive. Therefore, careful consideration and accurate measurement are paramount when selecting the Rezerve EXS.

Rezerve EXS: Recommendations for Size Selection

Given the reported sizing inconsistencies with the Rezerve EXS, a cautious approach is highly recommended. Prioritize accurate foot measurement while fully flattening your foot, and consult the official Heelys size chart as a starting point. For individuals typically wearing an 8.5-9, especially those with wider feet, consider initially ordering a 9M instead of a 9W.

Be prepared for potential fit issues and factor in the cost of return shipping when ordering directly from Heelys. Exploring alternative retailers like Amazon might offer more flexible return options. Prioritize purchasing from a trusted distributor to ensure a smoother exchange process if necessary. Remember, a slightly looser fit is preferable for comfortable rolling and maneuverability within the Rezerve EXS model.

Measuring Your Feet for Heelys

Precise foot measurement, whether using a ruler or Brannock device, is crucial for selecting the correct Heelys size, accounting for width variations.

Accurate Foot Measurement Techniques

Getting an accurate foot measurement is the cornerstone of finding the perfect Heelys fit. Begin by placing a piece of paper on a hard, flat surface against a wall. Comfortably flatten your foot – don’t point your toes or curl them – and stand with your weight evenly distributed. Trace around your foot carefully, keeping the pen or pencil vertical.

Measure the length from the back of your heel to the tip of your longest toe in millimeters or inches. Repeat with the other foot, as sizes can vary. It’s essential to measure both feet and use the larger measurement as your guide. Remember to measure at the end of the day when your feet are at their largest, as they tend to swell throughout the day. Don’t forget to consider foot width when selecting your size!

Measuring with a Ruler or Brannock Device

Once you’ve traced your foot, use a ruler or, ideally, a Brannock device for precise measurements. A Brannock device, commonly found in shoe stores, measures both length and width. When using a ruler, align the zero mark with the heel and extend the measurement to the longest toe. Record the measurement in inches or millimeters.

If using a Brannock device, follow the instructions carefully to determine your size. Pay attention to both the length and width readings. Accurate width measurement is crucial, especially if you have narrow or wide feet. Compare your measurements to the Heelys size chart available on their official website or from trusted retailers like Amazon to determine your corresponding Heelys size.

Accounting for Foot Width (Narrow, Medium, Wide)

Foot width significantly impacts Heelys fit, as a too-narrow shoe can cause discomfort and blisters, while a too-wide shoe lacks control. Many Heelys models offer width options like Medium (M), Wide (W), and sometimes Narrow. If you naturally have wide feet, opting for a ‘W’ width is highly recommended, even if it means potentially sizing up slightly.

One user experienced a crushing fit in a 9W Rezerve EXS, suggesting considering a Medium width if Wide feels too constricting. Conversely, those with narrow feet should seek out narrower sizes or utilize thicker socks. Accurately assessing your foot width during measurement is vital; a Brannock device is particularly helpful for this. Prioritize comfort and control when selecting the appropriate width for your Heelys.

Heelys Return and Shipping Policies

Heelys official website doesn’t refund shipping costs on returns, so choosing a trusted retailer like Amazon may be financially wiser for size exchanges.

Heelys Official Website Return Policy

The Heelys official website does offer returns, but customers should be aware of specific stipulations regarding shipping fees. According to recent experiences shared by purchasers, Heelys does not refund the original shipping costs incurred when the item was initially delivered. This can become a significant factor, particularly when multiple size exchanges are necessary to achieve the correct fit.

Given the reported inconsistencies in Heelys sizing – with some individuals finding that their typical shoe size doesn’t translate directly – frequent returns may be required. Therefore, carefully measuring your feet and consulting the Heelys size chart is crucial. Considering this policy, exploring alternative retailers like Amazon, which may have different return shipping arrangements, could potentially save money during the sizing process. Always review the specific terms and conditions before finalizing your purchase.

Shipping Costs and Potential Issues

Shipping costs associated with Heelys purchases can add up, especially when factoring in potential size exchanges. As noted by a recent customer, the non-refundable shipping fee from the official Heelys website presents a financial hurdle when multiple attempts to find the correct size are needed. This is particularly relevant given the reported sizing inconsistencies across different models and between youth and adult lines.

Potential issues extend beyond the initial shipping cost. Repeated returns and reshipments can lead to delays and increased expenses. To mitigate these concerns, carefully reviewing the Heelys size chart and considering purchases from retailers like Amazon, which may offer different shipping or return policies, is advisable. Thorough research can help avoid unnecessary costs and ensure a smoother purchasing experience.

Alternative Retailers (Amazon) and Their Policies

When navigating Heelys sizing challenges, exploring alternative retailers like Amazon can offer advantages. A recent customer shared a positive experience ordering a second pair of Rezerve EXS Heelys through Amazon, highlighting a potentially more flexible return process compared to the official Heelys website. This is crucial given the reported difficulties in achieving a proper fit, particularly for individuals with wider feet.

Amazon’s policies often differ, potentially absorbing return shipping costs or offering easier exchange options. However, it’s vital to carefully review the specific seller’s policies on Amazon before making a purchase, as these can vary. Comparing Amazon’s return stipulations with Heelys’ non-refundable shipping policy can save money and hassle when dealing with sizing uncertainties.

Wheel Size and Heelys Size

Wheel size can sometimes correlate with Heelys shoe size, though variations exist by model; larger shoe sizes don’t always guarantee bigger wheels.

Correlation Between Shoe Size and Wheel Size

Generally, as Heelys shoe size increases, so does the wheel size, offering greater speed and stability for larger feet. However, this isn’t a rigid rule, and discrepancies can occur depending on the specific Heelys model. Some models prioritize maneuverability over sheer speed, potentially featuring smaller wheels even in larger shoe sizes. It’s crucial to remember that a larger wheel isn’t always better; it can impact control, especially for beginners.

Information regarding wheel size isn’t always prominently displayed alongside shoe size charts. Users have reported finding charts shared on platforms like AliExpress, but verifying their accuracy is essential. Considering individual skating style and experience level is also vital when choosing a Heelys with an appropriate wheel size. A tighter fit, as some users prefer, can influence control, regardless of wheel dimensions.

Potential Variations in Wheel Size by Model

Heelys models exhibit noticeable wheel size variations, impacting performance characteristics. The Rezerve EXS, for example, might feature a different wheel diameter compared to older or alternative models. These differences aren’t always immediately apparent from standard size charts, creating potential confusion for buyers. Manufacturers adjust wheel sizes to cater to specific skating styles – some prioritize speed, while others emphasize control and maneuverability.

Even within a particular size range, wheel size can differ. One user’s experience suggests that depending on the model and size ordered, a smaller wheel might be received. This highlights the importance of researching the specific model before purchasing. Checking user reviews and forums can provide valuable insights into real-world wheel size experiences, supplementing official product information.

Finding Information on Wheel Size Charts

Locating precise Heelys wheel size charts can be challenging, as they aren’t consistently provided with product listings. The official Heelys website is a primary resource, though information may be limited or require navigating through specific model pages. Online marketplaces like AliExpress sometimes host user-shared charts, offering a broader range of data points, but verifying their accuracy is crucial.

User forums and social media groups dedicated to Heelys are invaluable for gathering real-world insights. Experienced Heelys users frequently share their knowledge and experiences regarding wheel sizes, offering practical advice. Searching for “[Heelys model name] wheel size chart” online can also yield relevant results, though cross-referencing information from multiple sources is recommended to ensure reliability.

Tips for a Comfortable Heelys Fit

Wearing socks, breaking in new Heelys gradually, and considering your foot shape and arch support are vital for optimal comfort and control.

Wearing Socks with Heelys

Determining the right sock thickness is crucial when achieving a comfortable and secure Heelys fit. Many users find that wearing socks helps to prevent blisters and provides an extra layer of cushioning during use. However, adding socks also impacts the overall fit within the shoe.

It’s generally recommended to measure your feet while wearing the type of socks you intend to use with your Heelys. This ensures a more accurate size selection. Thicker socks will naturally take up more space, potentially requiring a half-size or even a full size larger than your typical shoe size. Conversely, thinner socks may allow for a snugger fit.

Experimenting with different sock weights can help you find the perfect balance between comfort and control. Remember that a well-fitted Heelys shoe shouldn’t feel overly tight or loose, even with socks on. Prioritize a secure heel hold and adequate toe room to prevent discomfort during skating.

Breaking in New Heelys

New Heelys, like many shoes, often require a break-in period to achieve optimal comfort and performance. The initial stiffness of the materials can cause discomfort, particularly around the ankles and heel. Gradual wear is key to softening the shoe and molding it to your foot’s unique shape.

Start by wearing your Heelys for short periods indoors, gradually increasing the duration as they become more comfortable. Avoid prolonged skating sessions immediately. Focus on walking and light rolling to gently flex the shoe. Addressing any pressure points early on can prevent blisters.

Consider using a shoe stretcher to gently widen areas that feel tight. Remember to proceed cautiously to avoid damaging the shoe. Consistent, moderate use is more effective than attempting to break them in quickly; Patience will result in a more enjoyable Heelys experience!

Considering Foot Shape and Arch Support

Foot shape significantly impacts Heelys fit; those with wider feet may need to size up or explore models accommodating wider widths, as noted with women’s sizing experiences. Individuals with high arches might benefit from adding aftermarket arch support inserts for enhanced comfort and stability during use.

Heelys, by design, offer limited arch support. Inserts can alleviate pressure points and prevent foot fatigue, especially during extended skating sessions. Conversely, those with flat feet may prefer a more neutral insole to avoid overcorrection.

Pay attention to how your foot feels within the Heelys. A snug, but not constricting, fit is ideal. Addressing individual foot needs ensures a secure and comfortable experience, maximizing enjoyment and minimizing the risk of discomfort or injury.

sonic origins trophy guide

Sonic Origins Trophy Guide: A Comprehensive Overview

Sonic Origins presents a 36-trophy collection, boasting 20 bronze, 10 silver, 5 gold, and a coveted platinum—a relatively easy 3/10 difficulty!

Completion typically takes around 10 hours, though utilizing debug menus can streamline the process for most titles, excluding the surprisingly accessible Sonic CD.

Sonic Origins, released across PC and consoles, bundles together four classic Sonic the Hedgehog titles: Sonic The Hedgehog, Sonic CD, Sonic The Hedgehog 2, and Sonic The Hedgehog 3 & Knuckles. This compilation offers players a nostalgic trip alongside a robust trophy/achievement system, depending on the platform.

For PlayStation owners, the game features a total of 36 trophies, providing a structured path for completionists. The overall consensus, particularly within the r/Trophies community on Reddit, suggests that obtaining the platinum trophy is remarkably straightforward. Many players report a 3/10 difficulty rating, with an estimated completion time of approximately 10 hours.

A significant advantage for those seeking a quicker platinum is the availability of a debug menu in several of the games. This allows players to bypass challenging sections and efficiently acquire necessary trophies. However, Sonic CD stands out as the most accessible game even without utilizing such tools, making it a smooth experience for all skill levels.

Difficulty Assessment: Overall Platinum Difficulty

The platinum trophy for Sonic Origins is widely considered to be one of the easier platinum achievements available on PlayStation consoles. The general sentiment, echoed by the trophy hunting community on Reddit’s r/Trophies, places the difficulty at a comfortable 3 out of 10.

This accessibility stems from several factors. Firstly, the inherent simplicity of the classic Sonic gameplay translates into manageable challenges. Secondly, and perhaps most significantly, the presence of a debug menu in most of the included games allows players to circumvent particularly difficult sections or requirements.

While the debug menu isn’t required for platinum completion, it drastically reduces the time and effort needed. Sonic CD, notably, is considered the easiest game in the collection, even without exploiting any glitches or tools. Players can expect to earn the platinum within 10 hours of gameplay, making it a relatively quick and rewarding experience.

Estimated Platinum Completion Time

Based on community consensus and reported completion times, achieving the platinum trophy in Sonic Origins typically requires approximately 10 hours of dedicated gameplay. However, this estimate can fluctuate depending on the player’s skill level, familiarity with the original games, and willingness to utilize available exploits.

Players opting to leverage the debug menu – present in most titles except Sonic CD – can significantly reduce this timeframe. Efficient use of the debug menu allows for bypassing challenging sections and quickly acquiring necessary trophies. Conversely, a purist playthrough, avoiding any exploits, may extend the completion time slightly.

The relative ease of Sonic CD contributes to the overall swift platinum run. Consistent S-rank acquisition, alongside completing the core game requirements, forms the bulk of the platinum journey. Therefore, a focused approach and strategic use of available tools will lead to a satisfyingly quick platinum unlock.

Trophy Breakdown by Game

Sonic Origins divides trophies across four classic titles: Sonic the Hedgehog, Sonic the Hedgehog 2, Sonic CD, and Sonic the Hedgehog 3 & Knuckles.

Each game features unique challenges!

Sonic the Hedgehog Trophies

Sonic the Hedgehog’s trophy list in Sonic Origins centers around completing acts, obtaining Chaos Emeralds, and achieving S-ranks on missions. Essential trophies involve finishing all zones and beating the final boss, Dr. Robotnik. Players should focus on mastering the Green Hill Zone and navigating the Labyrinth Zone effectively.

Hidden trophies often require specific actions, like finding hidden palaces or completing Special Stages. S-ranking missions demands speed and skillful maneuvering, but remember, repeating the same mission multiple times counts towards the ten required for a trophy! Utilizing the debug menu, where available, can significantly ease the process for struggling players, though legitimate completion is achievable with practice and understanding of the game’s mechanics.

Don’t underestimate the importance of collecting all the Chaos Emeralds!

Essential Trophies in Sonic the Hedgehog

Sonic the Hedgehog’s core trophies revolve around straightforward progression. Completing all seven zones – Green Hill, Marble, Spring Yard, Labyrinth, Star Light, Scrap Brain, and Final Zone – is paramount. Beating Dr. Robotnik in each zone, and ultimately in the final showdown, unlocks several key achievements.

Collecting all seven Chaos Emeralds is crucial; these are found within the Special Stages, accessed through Giant Rings hidden throughout the levels. Mastering these stages is vital. Furthermore, simply finishing the game unlocks a significant number of trophies, making a full playthrough essential. Focus on consistent speed and avoiding unnecessary damage to streamline your progress.

These trophies form the foundation of your platinum run, so prioritize them!

Hidden Trophies in Sonic the Hedgehog

Sonic the Hedgehog harbors a few less obvious trophies. “Speed Demon” requires completing the game within a specific time limit, demanding near-perfect runs and route optimization. “Animal Lover” tasks players with freeing a substantial number of animals from Robotnik’s clutches throughout the game, encouraging thorough exploration of each stage.

“Light Speed” is awarded for achieving a fast completion time in Special Stages, requiring precision and quick reflexes. These hidden trophies often necessitate multiple playthroughs and a deep understanding of level layouts. Don’t overlook the importance of mastering Sonic’s momentum-based movement to maximize speed and efficiency.

These trophies add a layer of challenge for completionists, rewarding dedication and skillful gameplay.

Sonic the Hedgehog 2 Trophies

Sonic the Hedgehog 2’s trophy list builds upon the foundation of the first game, introducing new challenges tailored to its expanded gameplay. Expect trophies for completing acts without taking damage, achieving S-ranks on missions, and collecting all Chaos Emeralds—a staple of the Sonic experience.

“Super Sonic!” is a key trophy, naturally earned upon transforming into Super Sonic with all seven Emeralds. Mastering the two-player mode and utilizing Tails effectively can aid in tackling some of the more demanding challenges. The game’s increased speed and level design demand precise platforming and quick reflexes.

Be prepared for some tricky sections and boss battles; strategic use of the spin dash is crucial for success. Overall, the trophies are manageable, but require consistent performance.

Key Trophies in Sonic the Hedgehog 2

“Super Sonic!” stands as a pivotal achievement, requiring the collection of all seven Chaos Emeralds to unlock the golden transformation. This trophy is intrinsically linked to completing the game’s special stages and signifies significant progress;

S-Rank challenges are prevalent, demanding near-flawless runs through each act. Mastering level layouts and optimizing speed are essential for achieving these high scores. Expect to replay stages multiple times to refine your technique.

“Going Super Sonic!”, a related trophy, confirms the successful transformation. Completing the game with both Sonic and Tails is also a notable objective. These trophies represent the core gameplay loops and demonstrate mastery of Sonic the Hedgehog 2’s mechanics.

Challenging Trophies in Sonic the Hedgehog 2

Achieving consistent S-ranks across all acts presents a considerable hurdle. Precise platforming, efficient route planning, and minimizing time loss are crucial. Some acts demand pixel-perfect execution, requiring dedicated practice and memorization of enemy placements.

The “No Death” run, while not explicitly a trophy, is often a prerequisite for maximizing S-rank potential. This demands exceptional reflexes and a thorough understanding of level hazards. Expect numerous attempts and potential frustration.

Mastering the Special Stages can also prove difficult. These rotating mazes require quick thinking and precise control. Utilizing online guides and practicing consistently are highly recommended. Patience is key to overcoming these challenging segments and securing those coveted S-ranks.

Sonic CD Trophies

Sonic CD stands out as the easiest game to platinum within Sonic Origins, a sentiment echoed by many players. Its trophy list focuses heavily on achieving S-ranks in each act, but the game’s mechanics lend themselves well to consistent high scores.

Unique trophies revolve around finding all Time Stones in each level, encouraging exploration and mastery of the time travel mechanic. These aren’t overly difficult, but require a systematic approach to ensure no stone is missed.

S-Rank strategies involve utilizing the time travel system to optimize routes and avoid enemies. Mastering this mechanic is key to achieving top scores. The game’s forgiving nature and relatively short levels make it an accessible platinum for newcomers and veterans alike.

Unique Trophies in Sonic CD

Sonic CD’s trophy list distinguishes itself with challenges centered around the game’s core time travel mechanic. A significant portion of the unique trophies require players to locate and collect all Time Stones within each individual level. This demands thorough exploration and a strategic understanding of how to navigate each act across different timelines – past, present, and future.

These aren’t simply collect-a-thons; mastering the time travel system is crucial for accessing hidden areas and efficiently gathering all stones. Some stones are only obtainable by altering events in the past, adding a puzzle-solving element to the gameplay.

Successfully securing all Time Stones unlocks specific trophies, rewarding players for fully engaging with Sonic CD’s unique gameplay loop and demonstrating a comprehensive understanding of its level design.

S-Rank Strategies for Sonic CD

Achieving S-Ranks in Sonic CD hinges on speed, efficiency, and minimizing your time. Unlike other titles, simply finishing quickly isn’t enough; you must also collect a substantial number of rings throughout each act. Prioritize maintaining momentum and utilizing Sonic’s spin dash effectively to traverse levels swiftly.

Memorizing level layouts and optimal routes is paramount. Knowing where to find rings and how to avoid obstacles will significantly reduce your completion time. Exploiting the time travel mechanic to bypass sections or discover shortcuts can also contribute to a faster run.

Don’t be afraid to replay missions multiple times to refine your technique and optimize your route. Consistent practice and a focused approach are key to consistently securing those coveted S-Ranks.

Sonic the Hedgehog 3 & Knuckles Trophies

Sonic the Hedgehog 3 & Knuckles presents a unique challenge within Sonic Origins, demanding both skillful platforming and strategic exploitation of game mechanics. Key trophies revolve around completing acts, obtaining Chaos Emeralds, and achieving S-ranks on missions.

Players should focus on mastering the Drop Dash ability, crucial for speedrunning and accessing hidden areas. Utilizing the debug menu, where applicable, can simplify certain trophy requirements, though legitimate completion is entirely feasible.

Understanding enemy patterns and level layouts is vital for efficient gameplay. Don’t underestimate the importance of collecting rings, as they contribute to your overall score and can be essential for S-rank attempts. Consistent practice and a methodical approach are recommended.

Important Trophies in Sonic 3 & Knuckles

Several trophies in Sonic the Hedgehog 3 & Knuckles stand out as particularly noteworthy. Obtaining all seven Chaos Emeralds is crucial, unlocking access to the true final boss and a corresponding trophy. Completing the game with both Sonic and Knuckles is also essential, requiring separate playthroughs to fully experience the game’s content.

Achieving S-ranks on key missions, like those involving specific acts or boss battles, demands precision and speed. Mastering the Drop Dash and utilizing momentum-based techniques are vital for maximizing your score.

Furthermore, discovering hidden areas and secrets scattered throughout the levels contributes to overall completion and can unlock additional trophies. Prioritize these objectives for a smoother platinum run.

Exploiting Game Mechanics for Trophies

Sonic Origins allows for strategic exploitation of game mechanics to expedite trophy acquisition. The debug menu, available in most titles except Sonic CD, provides shortcuts for accessing levels, obtaining items, and even skipping challenging sections. This is particularly useful for S-rank attempts or collecting all Chaos Emeralds;

Mission replay is a powerful tool, enabling repeated attempts at S-ranks without restarting entire playthroughs. Some players have discovered that replaying the same mission multiple times contributes towards the “S-Rank 10 Missions” trophy.

Understanding level layouts and enemy patterns allows for optimized routes and efficient time completion, crucial for achieving high scores and unlocking related trophies. Mastering these techniques significantly reduces the overall completion time.

General Trophy Strategies

Sonic Origins trophy hunting benefits from mastering S-rank techniques, strategically utilizing debug menus where available, and repeatedly replaying missions for optimal scores.

S-Rank Acquisition Techniques

Achieving S-ranks in Sonic Origins is crucial for platinum completion, demanding a blend of speed, precision, and strategic route planning. Mastering momentum is key; maintain high speeds throughout levels, utilizing slopes and loops to your advantage.

Collect as many rings as possible, as ring count contributes to your final score. Prioritize quick stage completion times, minimizing pauses and unnecessary exploration. Learn enemy placements and develop efficient paths to avoid damage and wasted seconds.

For repeated S-rank trophies, as noted on Reddit, don’t hesitate to replay the same missions multiple times. This exploits the system, simplifying the grind. Remember, consistent execution and optimized routes are paramount for consistently securing those coveted S-ranks across all four classic titles.

Utilizing the Debug Menu (Where Applicable)

A significant advantage in obtaining the Sonic Origins platinum lies in leveraging the debug menu, available in most games within the collection. This tool allows players to bypass challenging sections, enabling easier access to S-ranks and completion milestones.

Specifically, Reddit discussions highlight its effectiveness in overcoming difficult stages in Sonic 1, 2, and 3 & Knuckles. The debug menu facilitates instant stage completion, ring acquisition, and invincibility, drastically reducing completion time and frustration.

However, remember that Sonic CD is reportedly the easiest game and doesn’t necessarily require the debug menu. While the debug menu offers a shortcut, mastering the core gameplay remains beneficial for a more fulfilling experience. Use it strategically to expedite the platinum process!

Mission Replay for S-Rank Trophies

Achieving S-ranks across all missions is crucial for platinum completion in Sonic Origins, and thankfully, the game allows for unlimited mission replays. This feature is particularly valuable, as obtaining S-ranks consistently demands precision and optimized routes. Don’t be discouraged by initial failures; repetition is key!

Interestingly, Reddit users have discovered a helpful quirk: the game registers repeated completions of the same mission towards the “S-Rank 10 Missions” trophy. This means you aren’t forced to complete ten unique missions, simplifying the process considerably.

Focus on mastering a few stages and replaying them until you consistently achieve S-ranks. Prioritize speed, ring collection, and minimizing damage to maximize your score. Utilize save states strategically to practice difficult sections and refine your technique.

Understanding Game-Specific Trophy Requirements

Sonic Origins’ trophy list isn’t uniform across all four included titles. While some trophies are shared, each game presents unique challenges and requirements demanding tailored strategies. Sonic CD, often cited as the easiest, focuses on time attack and finding hidden objectives. Conversely, Sonic 3 & Knuckles may require exploiting game mechanics for optimal results.

Sonic the Hedgehog and Sonic the Hedgehog 2 lean towards completionist goals – finishing stages, collecting emblems, and achieving S-ranks. Thoroughly explore each zone to uncover secrets and maximize your score.

Pay close attention to the trophy descriptions; they often hint at specific conditions. For example, some trophies require completing a game on a particular difficulty setting or performing specific actions within a stage. Careful planning and attention to detail are essential for a smooth platinum run.

Trophy-Specific Guides

Sonic Origins offers a tiered approach to trophy hunting: bronze, silver, gold, and platinum. Detailed walkthroughs will help you efficiently unlock each achievement, maximizing your success!

Bronze Trophy Walkthroughs

Sonic Origins’ bronze trophies primarily focus on basic game progression and completing initial stages. Many are earned simply by finishing acts, collecting rings, and defeating minor enemies. Expect trophies for clearing the first zones in each game – Green Hill Zone in Sonic the Hedgehog, Emerald Hill Zone in Sonic the Hedgehog 2, and so on.

Several bronze trophies reward experimentation with game mechanics, like using special abilities or finding hidden items. Don’t overlook exploring each level thoroughly! Some require defeating specific bosses, but these are generally the easier encounters. A significant number are tied to achieving a simple S-rank on missions, which can be repeated if needed.

Remember, the debug menu can assist with some of these, though legitimate playthroughs are recommended for a more fulfilling experience. Focus on consistent play and exploration, and these bronze trophies will accumulate quickly, forming a solid foundation for your platinum pursuit.

Silver Trophy Walkthroughs

Sonic Origins’ silver trophies demand a bit more skill and dedication than their bronze counterparts. Expect challenges like completing games on specific difficulties, achieving S-ranks on a greater number of missions, and mastering more complex level sections. Many require consistent, fast-paced gameplay and precise platforming.

Several silver trophies are tied to collecting all Chaos Emeralds, demanding thorough exploration and skillful boss battles. Others involve completing special stages or unlocking hidden content within each game; The S-rank requirements become stricter, often necessitating near-perfect runs.

Don’t hesitate to replay missions to refine your strategies and optimize your performance. Utilizing the debug menu can alleviate frustration in certain areas, but mastering the core gameplay is crucial. These trophies represent a significant step towards platinum, requiring both skill and perseverance.

Gold Trophy Walkthroughs

Sonic Origins’ gold trophies represent the pinnacle of challenge, demanding exceptional skill and dedication from players. These accolades typically involve achieving S-ranks on a substantial number of missions – often exceeding ten – and mastering the intricacies of each game’s mechanics. Expect incredibly precise platforming, flawless boss battles, and optimized route planning.

Many gold trophies require completing the game under extremely strict conditions, such as no-hit runs or time trials. Exploiting game glitches or debug menus might offer shortcuts, but true mastery involves conquering these challenges legitimately. Consistency and a deep understanding of each level are paramount.

Prepare for numerous attempts and a steep learning curve. These trophies are designed for dedicated Sonic fans seeking the ultimate test of their abilities, pushing the boundaries of speed and precision.

Platinum Trophy Unlocking

Sonic Origins’ platinum trophy signifies complete mastery of the collection, requiring dedication and skillful execution across all four classic titles. Obtaining this prestigious reward demands unlocking all other trophies – a testament to your Sonic prowess. While generally considered an easy platinum, expect a 10-hour commitment, potentially less with strategic use of debug menus in most games.

The journey involves S-ranking numerous missions, conquering challenging levels, and achieving specific feats within each game. Sonic CD, surprisingly, presents the least resistance. Consistent performance and understanding game-specific requirements are crucial.

Prepare for repetition, particularly when aiming for S-ranks. The platinum is attainable for players of varying skill levels, but perseverance is key. Celebrate your achievement – you’ve conquered the origins!

Sonic Origins Plus Trophies

Sonic Origins Plus introduces 12 Game Gear titles and playable Amy Rose, adding new trophies to the mix! Expect 36 total, with an easy 3/10 difficulty.

New Trophies Introduced in Sonic Origins Plus

Sonic Origins Plus significantly expands the trophy list with the inclusion of content from twelve classic Game Gear titles. These additions introduce a fresh set of challenges and achievements for dedicated players to pursue, extending the overall completion time and offering increased replayability.

The new trophies aren’t necessarily exceptionally difficult, maintaining the overall accessible nature of the Sonic Origins platinum; However, they do require players to engage with the Game Gear content, mastering the unique mechanics and level designs of these often-overlooked classics.

Furthermore, the introduction of Amy Rose as a playable character in Sonic the Hedgehog 1, Sonic the Hedgehog 2, and Sonic CD unlocks character-specific trophies. These encourage players to explore the games from a new perspective, utilizing Amy’s distinct abilities and playstyle to achieve specific objectives.

Successfully obtaining all trophies in Sonic Origins Plus will require dedication, but the expanded content and new character options provide a rewarding experience for both newcomers and long-time fans of the series.

Amy Rose Playable Character Trophies

Sonic Origins Plus introduces Amy Rose as a playable character in Sonic the Hedgehog 1, Sonic the Hedgehog 2, and Sonic CD, accompanied by a dedicated set of trophies designed to showcase her unique abilities. These trophies aren’t overwhelmingly difficult, but they necessitate adapting to Amy’s distinct gameplay mechanics, particularly her Pogo Hammer.

Expect trophies centered around utilizing the Pogo Hammer effectively – bouncing on enemies, reaching hidden areas, and completing stages with a specific style. Mastering her movement and understanding how to leverage the hammer are crucial for efficient trophy hunting.

The trophies are designed to encourage exploration and experimentation with Amy’s skillset, offering a fresh perspective on familiar levels. While not drastically altering the overall platinum difficulty, they add a layer of complexity and enjoyment for players seeking a complete experience.

Successfully unlocking all Amy Rose-related trophies demonstrates a comprehensive understanding of her character and a mastery of the Sonic Origins Plus content.

the orvis guide to fly fishing

The Orvis Guide to Fly Fishing: A Comprehensive Plan

Orvis provides a thoroughly revised and updated essential primer, addressing every requirement of the sport, offering excellent guidance for beginners and seasoned anglers alike.

This comprehensive resource, The Orvis Fly-Fishing Guide, features 101 tips and techniques, alongside insights from experienced Orvis guides, ensuring success on the water.

Explore the latest Orvis innovations, including the Helios fly rod and sun-protective gear, enhancing your fly fishing experience with quality and performance.

Orvis has long been synonymous with quality fly fishing equipment and instruction, fostering a legacy built on a passion for the sport and a commitment to conservation. This introduction delves into the core principles that define the Orvis approach to fly fishing, emphasizing a holistic experience that extends beyond simply catching fish.

For decades, Orvis has empowered anglers of all skill levels, from complete novices to seasoned pros, with the knowledge and tools necessary to succeed. The Orvis Fly-Fishing Guide serves as a cornerstone of this commitment, offering a comprehensive overview of the sport’s fundamentals. It’s a resource designed to build confidence and cultivate a deep appreciation for the art of fly fishing.

The Orvis philosophy centers around responsible angling, ethical practices, and a profound respect for the aquatic environment. Whether you’re exploring a remote river or a local stream, Orvis encourages a mindful approach that prioritizes the well-being of the fish and the preservation of their habitat. This introduction sets the stage for a journey into the captivating world of fly fishing, guided by the expertise and values of Orvis.

Understanding the Orvis Approach

The Orvis approach to fly fishing isn’t merely about mastering casting techniques or selecting the right fly; it’s a philosophy rooted in understanding the interconnectedness of the angler, the environment, and the fish. It prioritizes a thoughtful, observant style, encouraging anglers to “read the water” and adapt their strategies based on conditions.

Central to the Orvis method is a dedication to instruction and mentorship. Orvis guides are renowned for their expertise and their ability to tailor lessons to individual needs, fostering a supportive learning environment. This extends beyond technical skills, encompassing knot tying, fly presentation, and ethical angling practices.

Furthermore, Orvis champions conservation efforts, recognizing the importance of protecting the delicate ecosystems that sustain fly fishing. This commitment is reflected in their product development, sustainable practices, and advocacy for responsible resource management. The Orvis approach is a holistic one, blending skill, knowledge, and a deep respect for the natural world, creating a truly rewarding fly fishing experience.

Essential Gear for the Fly Fisher

Orvis equips anglers with high-performance rods, reels, lines, and accessories, ensuring optimal balance and value. Quality vests, packs, and tools complete the essential fly fishing setup.

Fly Rod Selection: Orvis Recommendations

Orvis offers a diverse range of fly rods tailored to various fishing scenarios and skill levels. The renowned Helios series, including the Helios D and Helios F, represents cutting-edge technology, providing exceptional feel and performance for discerning anglers.

For beginners, Orvis recommends considering rods with moderate action, offering forgiveness and ease of casting. These rods excel in delivering accurate presentations and handling a variety of fly sizes. As anglers progress, exploring faster-action rods like the Helios can unlock greater casting distance and line control.

When selecting a rod, consider the target species and typical fishing conditions. Lighter rods (2-4 weight) are ideal for small streams and delicate presentations, while heavier rods (7-9 weight) are better suited for larger rivers, lakes, and targeting larger fish. Orvis guides can provide personalized recommendations based on individual needs and preferences, ensuring the perfect rod for your fly fishing adventures. Don’t hesitate to seek their expertise!

Fly Reel Choices: Balancing Performance and Value

Orvis presents a spectrum of fly reels designed to complement their rod selection, balancing performance with value. A key consideration is opting for a large arbor reel, as highlighted in recent reviews, offering faster line retrieval and reduced line memory. This feature is particularly beneficial when fighting fish or quickly changing fishing locations.

Cast aluminum reels, like those featured in recent discussions, provide a lightweight yet durable option, ensuring proper balance with your chosen fly rod. Orvis reels are engineered for smooth drag performance, crucial for controlling powerful fish and preventing breakoffs.

When selecting a reel, match the reel size to your rod weight and target species. Smaller reels (2-4 weight) are suitable for delicate presentations, while larger reels (7-9 weight) offer the power and capacity needed for bigger fish. Orvis offers reels across this range, catering to diverse angling needs and budgets. Prioritize a reel that feels comfortable in hand and provides reliable performance.

Fly Lines: Matching Line to Rod and Conditions

Orvis emphasizes the critical importance of matching your fly line to both your rod’s weight and the prevailing fishing conditions. Fly lines are not one-size-fits-all; selecting the correct line significantly impacts casting distance, accuracy, and presentation. Weight forward (WF) lines are versatile and suitable for most situations, offering good energy transfer for casting.

For delicate presentations, especially with dry flies, a double taper (DT) line provides a softer loop and greater control. When fishing larger rivers or windy conditions, a heavier line weight might be necessary to cut through the wind and deliver the fly effectively. Orvis offers specialized lines for specific techniques, such as streamer lines for aggressive retrieves and sinking lines for reaching deeper fish.

Consider the line’s taper and density when making your selection. Floating lines are ideal for dry fly fishing, while sinking-tip or full-sinking lines are effective for nymphing or streamer fishing. Proper line management and occasional cleaning will extend the life and performance of your fly line.

Leaders and Tippet: The Invisible Connection

Orvis highlights leaders and tippet as crucial components for a natural fly presentation, often overlooked by beginners. The leader, connecting the fly line to the tippet, gradually tapers in diameter to reduce visibility and aid in turnover. Tippet, the final section attached to the fly, should be as fine as possible while maintaining strength to avoid spooking fish.

Choosing the correct leader length and tippet size depends on the fishing conditions and the size of the fly. Longer leaders are beneficial for clear water and wary fish, while shorter leaders offer better control in windy conditions or dense vegetation. Orvis recommends using fluorocarbon tippet for its near invisibility underwater and abrasion resistance.

Regularly replacing your tippet is essential, as it weakens with use and exposure to sunlight. Mastering basic knots, like the improved clinch knot and the blood knot, is vital for secure connections and a confident presentation. A properly matched leader and tippet system ensures a more natural drift and increases your chances of success.

Flies: A Beginner’s Guide to Patterns

Orvis emphasizes that selecting the right fly is paramount to success, but the sheer variety can be daunting for newcomers. A basic assortment should include patterns imitating common aquatic insects in their various life stages – nymphs, emergers, and adults. Dry flies, designed to float on the surface, imitate adult insects, while nymphs represent the underwater larval stage.

Streamers, larger flies resembling baitfish or leeches, are effective for predatory fish. Popular beginner patterns include the Adams (a versatile dry fly), the Pheasant Tail Nymph (a reliable subsurface option), and the Woolly Bugger (a classic streamer). Understanding insect life cycles and matching the hatch – identifying the insects fish are feeding on – is key.

Orvis guides suggest starting with a selection of generalist patterns and gradually expanding your fly box as you gain experience and learn to recognize specific insects in different waters. Don’t underestimate the power of a well-presented, simple fly!

Essential Accessories: Vests, Packs, and Tools

Orvis recognizes that beyond the core gear, a range of accessories significantly enhances the fly fishing experience. Fly fishing vests and packs are crucial for carrying essential items – flies, leaders, tippet, floatant, and tools – conveniently on the water. Vests offer traditional storage, while packs (chest, back, or hip) provide alternative carrying options.

Essential tools include nippers for trimming tippet, forceps for removing hooks, a hemostat for crimping barbs, and a fly floatant to keep dry flies buoyant. A retractable zingers are useful for keeping frequently used tools readily accessible. Polarized sunglasses are vital for reducing glare and spotting fish.

Orvis also recommends a good quality net for safely landing fish and a waterproof bag to protect valuables. Choosing accessories based on your fishing style and preferences will maximize comfort and efficiency on the river.

Mastering the Basic Fly Fishing Techniques

Orvis instruction emphasizes foundational techniques like the overhead cast, roll cast for tight spaces, and the double haul for increased line speed and distance.

Learning to read the water and present flies naturally are key skills, ensuring success and enjoyment on any fly fishing adventure.

The Overhead Cast: Foundation of Fly Fishing

The overhead cast, as taught by Orvis, is the cornerstone of fly fishing, providing the basis for all other casting techniques. Mastering this cast allows anglers to efficiently deliver a fly to a target with accuracy and grace.

Orvis guides break down the overhead cast into distinct phases: the pickup, backcast, forward cast, and follow-through. The pickup involves smoothly lifting the line from the water, transitioning into a powerful yet controlled backcast. A proper backcast forms a loop that unfurls fully behind the angler, loading the rod with energy.

The forward cast then utilizes this stored energy to propel the line forward, again forming a loop. Orvis emphasizes timing and smooth acceleration throughout the cast, avoiding abrupt movements that can disrupt the loop’s formation. The follow-through is crucial for maintaining line speed and accuracy, guiding the line towards the desired target.

Consistent practice, guided by Orvis’s instructional methods, is key to developing a reliable and efficient overhead cast. Understanding the mechanics and refining technique will unlock a world of possibilities on the water, enabling anglers to reach distant fish and present flies with precision.

Roll Casting: For Tight Spaces

When faced with limited backcast room – a common challenge on smaller streams or amidst dense vegetation – the Orvis roll cast becomes an invaluable technique. Unlike the overhead cast, it requires minimal backswing, making it ideal for confined environments.

Orvis instruction highlights that the roll cast relies on utilizing the weight of the fly line to “roll” the line forward. The angler begins with the line extended forward, then smoothly lifts the rod tip, forming a D-loop with the line. This loop is crucial, as it loads the rod and prepares for the forward stroke.

The forward cast is initiated with a sweeping motion, driving the rod tip downward and forward. This action causes the line to roll out along the water’s surface, delivering the fly to the target. Orvis guides emphasize maintaining a low rod tip throughout the cast to maximize efficiency and minimize disturbance.

Mastering the roll cast, as taught by Orvis, expands an angler’s versatility, allowing access to fish-holding areas previously unreachable with a traditional overhead cast. It’s a subtle yet powerful technique for navigating challenging conditions.

Double Haul Casting: Increasing Line Speed

For anglers seeking to extend casting distance and cut through wind, Orvis champions the double haul technique. This advanced cast builds upon the foundation of the overhead cast, adding a synchronized stripping action to dramatically increase line speed.

Orvis instruction breaks down the double haul into three key phases: the backcast, the haul on the backcast, and the forward cast, followed by a haul on the forward cast. As the backcast unfolds, the angler strips line from the reel with the non-casting hand, creating tension.

This tension is then transferred to the line during the forward cast, propelling it further and faster. Orvis guides stress the importance of timing – the hauls must be perfectly synchronized with the rod movement for optimal performance. It’s a coordinated effort between the rod and the line hand.

Successfully executing the double haul, as demonstrated by Orvis professionals, allows anglers to present flies to distant targets with greater accuracy and authority, enhancing their overall fly fishing experience and effectiveness.

Reading the Water: Identifying Fish Holding Areas

Orvis emphasizes that successful fly fishing hinges on understanding where fish are likely to hold within a given waterway. “Reading the water” involves observing subtle clues – current seams, depth changes, structure, and available cover – to pinpoint these prime locations.

Current seams, where faster and slower currents meet, are particularly attractive to fish as they offer a feeding lane with minimal energy expenditure. Orvis guides teach anglers to look for these seams created by rocks, logs, or changes in riverbed structure.

Depth is also crucial; fish often seek deeper pools or runs for security and cooler temperatures. Orvis instruction highlights the importance of identifying these deeper areas, especially during warmer months. Furthermore, structure like submerged rocks or overhanging vegetation provides cover and ambush points.

By carefully observing these elements, and applying the principles taught by Orvis, anglers can significantly increase their chances of locating fish and presenting their flies effectively, leading to a more rewarding fishing experience.

Fly Presentation: Making Your Fly Look Natural

Orvis stresses that simply casting a fly onto the water isn’t enough; convincing a fish it’s a real insect requires skillful presentation. This means ensuring the fly drifts naturally, mimicking the movement and behavior of the insects the fish are feeding on.

A drag-free drift is paramount. Orvis guides emphasize techniques to minimize any unnatural tension on the fly line, allowing the fly to float freely with the current. Mending the line – lifting and repositioning it – is a key skill taught by Orvis to achieve this.

Presentation also involves matching the fly’s size, shape, and color to the prevalent insects. Orvis resources provide guidance on identifying common insects and selecting appropriate fly patterns. Subtle adjustments to the cast and drift can further enhance the natural appearance.

Ultimately, successful fly presentation, as taught by Orvis, is about fooling the fish by creating a realistic imitation, increasing the likelihood of a strike and a successful catch.

Fly Fishing Tactics and Strategies

Orvis emphasizes adapting your approach based on conditions, utilizing dry fly fishing for surface feeders, nymph fishing for subsurface success, and streamer fishing to mimic prey.

Effective tactics involve understanding water types – rivers, lakes, and streams – and adjusting strategies accordingly, maximizing your chances of a rewarding experience.

Dry Fly Fishing: Targeting Surface Feeders

Orvis guides champion dry fly fishing as a visually rewarding technique, focusing on presenting artificial flies that imitate insects landing on or skating across the water’s surface. This method relies heavily on careful observation and precise presentation to fool rising trout.

Successful dry fly fishing demands understanding insect life cycles and identifying the specific hatches occurring on the water. Matching the hatch – selecting a fly that closely resembles the size, shape, and color of the natural insects – is paramount. Orvis emphasizes the importance of delicate casts and drag-free drifts, allowing the fly to move naturally with the current.

Presentation is key; a perfectly presented fly will entice a trout to rise, creating a thrilling visual experience. Orvis instruction covers techniques like mending the line to eliminate drag and reading the water to locate likely feeding lanes. Mastering dry fly fishing requires patience, practice, and a keen eye for detail, but the rewards are well worth the effort, offering a classic and captivating fly fishing experience.

Nymph Fishing: Subsurface Success

Orvis recognizes nymph fishing as a highly effective technique, particularly when trout are not actively rising to surface flies. This method involves presenting artificial flies that imitate the larval or pupal stages of aquatic insects, drifting them beneath the water’s surface where trout often feed.

Unlike dry fly fishing, nymph fishing often requires a more subtle approach, as the angler cannot directly see the fly. Orvis instruction focuses on utilizing indicators – small floats attached to the leader – to detect strikes, or learning to feel the subtle tugs of a fish taking the fly directly through the line.

Weighting the fly line and leader appropriately is crucial for getting the nymph down to the feeding depth. Orvis guides emphasize the importance of detecting subtle takes and setting the hook promptly. Mastering nymph fishing unlocks access to trout feeding opportunities often missed by dry fly anglers, providing consistent success even during challenging conditions.

Streamer Fishing: The Predator’s Approach

Orvis champions streamer fishing as an exciting technique that appeals to the predatory instincts of trout. Unlike delicate dry fly presentations, streamer fishing involves casting larger, more substantial flies that imitate baitfish, leeches, or other aquatic creatures. This method is particularly effective in rivers, lakes, and streams when trout are actively hunting.

The Orvis approach emphasizes varying retrieve speeds and actions to impart lifelike movement to the streamer. Techniques include stripping the line quickly to mimic a fleeing baitfish, or employing a slow, deliberate retrieve to suggest an injured prey.

Successful streamer fishing often requires covering water efficiently, searching for areas where trout may be lurking. Orvis guides teach anglers to focus on structure – rocks, logs, and weed beds – where predators often ambush their prey. Mastering the streamer technique provides a thrilling and productive way to target larger trout and unlock fishing opportunities beyond traditional methods.

Fishing Different Water Types: Rivers, Lakes, and Streams

Orvis recognizes that successful fly fishing demands adapting techniques to the specific environment. Rivers present moving water challenges, requiring anglers to read currents and present flies effectively in seams and eddies. Orvis instruction focuses on techniques like reach casting to counteract current and achieve a drag-free drift.

Lakes demand a different approach, often involving searching for fish with various retrieves and fly patterns. Orvis guides emphasize the importance of understanding lake structure and utilizing sinking lines to reach fish holding at different depths.

Streams, often smaller and more intimate, require precise casting and delicate presentations. Orvis promotes roll casting and other tight-line techniques for navigating confined spaces. Understanding seasonal fish movements, like migratory trout seeking spawning rivers, is also key. Adapting to these diverse environments, guided by Orvis expertise, unlocks fishing success across varied landscapes.

Advanced Techniques and Considerations

Orvis emphasizes mastering insect identification and fly imitation, alongside essential knot tying skills. Ethical angling, conservation, and utilizing Orvis guide services elevate expertise.

Matching the Hatch: Identifying and Imitating Insects

Orvis guides stress that successful fly fishing often hinges on “matching the hatch” – accurately identifying the insects that trout are currently feeding on and then selecting a fly that closely imitates their size, shape, color, and behavior. This requires keen observation of the water’s surface and the surrounding environment.

Begin by learning to recognize common aquatic insects in their various life stages: mayflies, caddisflies, and stoneflies are crucial. Observe which insects are emerging from the water, fluttering above the surface, or drifting downstream. Note their size, the color of their bodies and wings, and how they move.

Orvis emphasizes carrying a diverse selection of fly patterns to cover a range of potential hatches. Understanding insect life cycles is also key; knowing when specific insects are likely to hatch in a given location will help you anticipate and prepare. Don’t underestimate the importance of subtle variations in fly presentation to mimic natural insect movements – a dead drift is often essential.

Ultimately, mastering the art of matching the hatch transforms fly fishing from simply casting a fly to engaging in a sophisticated game of observation and imitation, significantly increasing your chances of success.

Knot Tying: Essential Knots for Fly Fishing

Orvis consistently highlights knot tying as a foundational skill for any fly fisher. A poorly tied knot can lead to a broken tippet and a lost fish, emphasizing the need for reliability and strength. Mastering a few essential knots is far more valuable than knowing many poorly executed ones.

The improved clinch knot is a versatile choice for attaching flies to tippet, while the blood knot is ideal for joining sections of tippet or leader material. For creating loops, the non-slip loop knot is invaluable, allowing for greater fly movement. Orvis instructors also recommend the surgeon’s knot for quick and secure connections.

Practice these knots regularly until they become second nature. Pay close attention to proper technique – ensuring tight wraps, sufficient lubrication, and a slow, deliberate pull to set the knot. Regularly inspect your knots for wear and tear during a fishing session, and retie as needed.

Strong, reliable knots are not just about preventing break-offs; they’re about confidence and enjoying a seamless connection to the fish on the line.

Fly Fishing Etiquette and Conservation

Orvis places significant emphasis on responsible fly fishing, encompassing both etiquette and conservation. Respect for the resource and fellow anglers is paramount. This includes allowing ample space between anglers on the water, avoiding wading directly through areas where others are fishing, and being mindful of noise levels.

Conservation efforts are equally crucial. Practice catch and release whenever possible, handling fish with care to minimize stress and injury. Avoid disturbing the stream bed unnecessarily, and pack out all trash. Support organizations dedicated to protecting fisheries and their habitats.

Orvis advocates for minimizing your impact on the environment. Use barbless hooks to facilitate easier release, and consider using non-toxic split shot. Be aware of local regulations and adhere to them strictly.

By embracing these principles, fly fishers can ensure the long-term health of our fisheries and preserve this cherished sport for future generations. Ethical angling is a cornerstone of the Orvis philosophy.

Orvis Fly Fishing Guides and Instruction

Orvis is renowned for its exceptional fly fishing guides and comprehensive instruction programs. Whether you’re a complete beginner or an experienced angler looking to refine your skills, Orvis offers tailored learning experiences.

Their guides are highly skilled professionals, possessing extensive knowledge of local waters, entomology, and effective fishing techniques. They provide personalized instruction, adapting to your individual learning style and goals. Expect to learn about casting, fly presentation, reading the water, and knot tying.

Orvis offers a range of instructional options, including schools, clinics, and guided trips. These programs cover everything from the fundamentals of fly fishing to advanced tactics for specific species and conditions.

The Orvis approach emphasizes a supportive and encouraging learning environment, fostering confidence and a deeper appreciation for the sport. Great guides show various techniques and the proper way to fly fish.

The Future of Fly Fishing with Orvis Innovations

Orvis continues to shape the future of fly fishing through ongoing innovation in equipment, technology, and conservation efforts. They are dedicated to enhancing the angling experience while minimizing environmental impact.

Recent advancements include the development of the Helios fly rod, designed for exceptional performance and sensitivity. Alongside this, Orvis has introduced a new line of sun-protective gear, prioritizing angler comfort and health on the water.

Orvis is also exploring sustainable materials and manufacturing processes, reducing their carbon footprint and promoting responsible angling practices. This commitment extends to supporting fisheries conservation initiatives worldwide.

Looking ahead, Orvis aims to integrate smart technology into their products, providing anglers with real-time data and insights to improve their success. They remain dedicated to providing quality gear and expert guidance for generations to come.