The 4L60E is a robust, electronically controlled four-speed automatic transmission widely utilized in General Motors vehicles. This guide details common issues and repair procedures.
What is the 4L60E?
The 4L60E transmission represents a significant advancement in automatic transmission technology, initially appearing in 1992 General Motors vehicles. It’s a four-speed automatic, electronically controlled, known for its durability and adaptability across a wide range of engines and vehicle types. Unlike its predecessors, the ‘E’ designation signifies electronic control, utilizing sensors and solenoids for precise shift management.
Internally, it features a planetary gearset configuration, providing four forward ratios and reverse. The valve body, a crucial component, directs hydraulic fluid to engage the appropriate gears. Common issues often stem from wear within this valve body, impacting shift quality. Understanding its core function is vital for effective troubleshooting and repair, as detailed in this guide.
Common Applications of the 4L60E
The 4L60E transmission found widespread use across numerous General Motors platforms from the early 1990s through the 2000s. It was a staple in rear-wheel-drive vehicles, including Chevrolet and GMC trucks and SUVs like the Silverado, Sierra, Tahoe, and Yukon. It also appeared in Pontiac models such as the Firebird and Grand Prix, and Buick models like the Regal.
Its versatility allowed it to be paired with various engines, from small-block V6s to powerful V8s. This broad application means a large number of vehicles on the road today utilize this transmission, increasing the demand for reliable troubleshooting information. Knowing the vehicle application can help pinpoint potential issues specific to that model.

Understanding 4L60E Symptoms
Recognizing symptoms like harsh shifting, slipping gears, delayed engagement, or a flashing check engine light are crucial first steps in 4L60E diagnosis.
Harsh Shifting
Harsh shifting in a 4L60E transmission often feels like a noticeable jolt or slam during gear changes. This symptom frequently indicates issues within the valve body, potentially stemming from worn valve bores or stuck valves. These imperfections disrupt smooth hydraulic pressure regulation, leading to abrupt engagements.
Furthermore, malfunctioning shift solenoids – specifically those controlling 1-2 or 2-3 shifts – can contribute to harshness. Low or contaminated transmission fluid can exacerbate these problems, reducing lubrication and hydraulic efficiency. Premature clutch application, a consequence of valve body wear, also plays a role. A thorough inspection of fluid condition and solenoid functionality is vital when diagnosing this issue.
Slipping Gears
Slipping gears within the 4L60E transmission manifests as the engine revving higher than expected without a corresponding increase in vehicle speed. This commonly points to worn or damaged clutches and bands, unable to effectively hold the gear. A failing torque converter clutch (TCC) can also mimic slipping, particularly at highway speeds.
Low transmission fluid levels are a frequent culprit, reducing hydraulic pressure needed for proper clutch engagement. Internal leaks can cause this fluid loss. Valve body malfunctions, hindering correct pressure distribution, can also contribute. Diagnosing slipping requires checking fluid levels, inspecting for leaks, and potentially performing pressure tests to pinpoint the root cause of the diminished holding power.
Delayed Engagement
Delayed engagement with the 4L60E means a noticeable pause between shifting into Drive or Reverse and the transmission actually engaging. This symptom often indicates low transmission fluid, reducing hydraulic pressure needed for quick clutch and band application. Worn valve body components, specifically sticking valves, can restrict fluid flow, causing the delay.
Furthermore, a failing torque converter can contribute to this issue. Internal leaks within the transmission can gradually lower fluid levels, exacerbating the problem. Diagnostic steps include verifying fluid level and condition, inspecting for leaks, and potentially a scan tool check for relevant DTCs. Addressing valve body wear or replacing failing solenoids may resolve the delayed engagement.
Transmission Not Shifting at All
A complete lack of shifting in a 4L60E transmission is a serious symptom, often indicating a major mechanical or electrical failure. Potential causes include a completely depleted transmission fluid level, a failed transmission control module (TCM), or a broken internal component like the pump. A stuck valve body, preventing fluid flow to the clutches and bands, is also a common culprit.
Initial troubleshooting should verify fluid level and check for any visible damage. Scanning for Diagnostic Trouble Codes (DTCs) is crucial, as these can pinpoint electrical issues. A failed solenoid or wiring harness problem could prevent proper signal transmission. In severe cases, internal damage necessitates a complete transmission overhaul or replacement.
Flashing Check Engine Light
A flashing Check Engine Light with a 4L60E transmission typically signals a severe transmission issue, often indicating a slipping condition that could cause significant damage. This usually triggers a “limp home” mode, restricting the transmission to a single gear to prevent further harm. Common causes include low transmission fluid, faulty solenoids, or internal clutch/band wear.
Immediately scan the vehicle for Diagnostic Trouble Codes (DTCs) – codes like P1760 are frequently associated with solenoid problems. Inspect the transmission fluid level and condition; burnt or low fluid is a red flag. Avoid driving the vehicle extensively with a flashing light, as continued operation can exacerbate internal damage and lead to costly repairs or complete transmission failure.

Common 4L60E Problems
Frequent 4L60E issues include torque converter failures, worn clutches and bands, valve body malfunctions, solenoid problems, and irregular transmission fluid levels or pressure.
Torque Converter Issues
Torque converter problems within the 4L60E transmission often manifest as slipping, shuddering, or a complete lack of power transfer. A failing torque converter clutch (TCC) is a common culprit, frequently triggering a flashing check engine light and causing the transmission to enter limp mode. Diagnostic Trouble Codes (DTCs) like P1740 are indicative of TCC circuit malfunctions.
Internal damage, such as worn seals or damaged stator blades, can also contribute to torque converter failure. Thorough inspection involves checking fluid condition for metallic debris, indicating internal wear. Replacement is often necessary when significant issues are detected, requiring careful attention to proper alignment and fluid filling procedures to avoid further transmission damage.
Worn Bands and Clutches
Worn bands and clutches are frequent sources of trouble within the 4L60E. As these components wear, they lose their ability to effectively apply and hold gears, resulting in slipping, harsh shifting, or a failure to engage certain gears altogether. Valve body wear exacerbates this issue, causing premature clutch application and reduced hydraulic pressure.
Inspection during an overhaul reveals burnt or glazed friction materials, indicating excessive heat and wear. Replacing these components requires a complete transmission disassembly and careful attention to proper installation procedures, including correct band adjustment and clutch pack clearances. Ignoring worn bands and clutches leads to escalating damage and eventual transmission failure.
Valve Body Malfunctions
Valve body malfunctions are a common culprit behind 4L60E transmission problems. This complex hydraulic control center directs fluid to the appropriate clutches and bands for smooth shifting. Wear within the valve bores, often occurring over time, can cause sticking valves, reduced pressure, and improper clutch application. Symptoms include harsh or erratic shifting, slipping gears, and delayed engagement.
A thorough inspection and cleaning of the valve body are crucial during diagnosis. Often, a rebuild or replacement is necessary to restore proper function. Addressing valve body wear prevents further damage to other transmission components and ensures reliable performance. The 4L60E valve body is a sophisticated component requiring specialized knowledge for effective repair.
Solenoid Problems
Solenoid issues frequently trigger diagnostic trouble codes (DTCs) like P1760 and similar, indicating a problem with the shift solenoids. These solenoids control fluid flow to engage different gears, and a failure can cause harsh shifting, slipping, or the transmission remaining stuck in a single gear. A stuck-open solenoid can lead to continuous clutch application, while a stuck-closed solenoid prevents gear engagement.
Testing solenoids with a multimeter and scan tool is essential for accurate diagnosis. Replacement is often straightforward, but ensuring proper electrical connections and fluid cleanliness is vital. Faulty solenoids can stem from electrical issues or internal contamination, impacting overall transmission performance and drivability.
Low Transmission Fluid
Insufficient transmission fluid is a common culprit behind 4L60E problems, leading to a cascade of issues. Low fluid levels reduce hydraulic pressure, causing slipping gears, harsh or delayed shifts, and even complete transmission failure. Leaks are the primary cause, originating from seals, gaskets, or the transmission cooler lines. Always check fluid levels using the correct procedure – typically with the engine running and in park or neutral.
Beyond quantity, fluid condition matters. Dark, burnt-smelling fluid indicates overheating and internal damage. Regular fluid and filter changes are crucial preventative maintenance, extending the transmission’s lifespan and preventing costly repairs. Ignoring low fluid can quickly escalate minor issues into major overhauls.

Diagnosing 4L60E Issues
Accurate diagnosis requires a scan tool to read DTCs, a thorough fluid check for level and condition, and a detailed visual inspection for leaks.
Using a Scan Tool for Diagnostic Trouble Codes (DTCs)
Employing a scan tool is the first step in 4L60E diagnosis. Retrieving Diagnostic Trouble Codes (DTCs) provides crucial clues about internal malfunctions. Common codes like P1760 (Torque Converter Clutch Solenoid Performance) pinpoint specific areas needing attention.
However, DTCs aren’t always definitive; further investigation is often necessary. A flashing check engine light often indicates a severe transmission issue, potentially triggering a limp mode. Record all codes before clearing them for retesting. Utilize freeze frame data to understand conditions when the code was set. Cross-reference codes with a reliable repair database for accurate interpretations and potential solutions, guiding focused troubleshooting efforts.
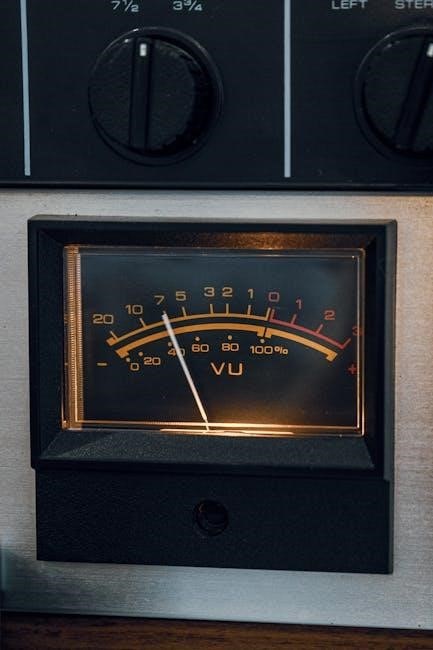
Checking Transmission Fluid Level and Condition
Assessing transmission fluid is a fundamental diagnostic step. Low fluid levels are a frequent cause of 4L60E problems, leading to slipping or failure to engage. Check the fluid level with the engine running and in park or neutral, following the vehicle’s specific procedure.
Beyond level, fluid condition is vital. Healthy fluid is bright red and translucent. Dark, burnt-smelling fluid indicates overheating and internal damage. The presence of metal shavings signals significant wear of internal components. Contamination from coolant suggests a cooler line failure. Regularly monitoring fluid condition can prevent catastrophic transmission failure and identify developing issues early on.
Performing a Visual Inspection
A thorough visual inspection can reveal external clues about 4L60E issues. Begin by checking the transmission cooler lines for leaks or damage – coolant in the fluid is a serious concern. Inspect the transmission pan for signs of leakage around the gasket.
Examine the transmission mount for cracks or deterioration, as a failing mount can mimic internal transmission problems. Look for any obvious damage to the transmission case itself. Carefully inspect the wiring harness and connectors for corrosion or loose connections, as these can disrupt electronic control. Don’t overlook checking the linkage for proper adjustment and wear.

Specific 4L60E Troubleshooting
Targeted diagnostics are crucial for resolving 4L60E problems, focusing on common codes like P1760 and addressing valve body wear or TCC issues.
Troubleshooting Shift Solenoids (P1760 & Similar)
P1760, and related codes, often indicate a problem with the 4L60E’s shift solenoids. These solenoids control fluid flow to engage different gears. Initial troubleshooting involves verifying proper voltage supply and ground connections to the solenoid. A scan tool can activate solenoids individually to test functionality; a lack of response suggests a faulty solenoid.
Resistance checks with a multimeter can also identify open or shorted solenoids. Before replacement, inspect the wiring harness for damage or corrosion. Valve body bores should be clean and free of debris to ensure proper solenoid operation. Replacing solenoids often resolves harsh shifting or erratic gear selection. Remember to use the correct solenoid for the specific application within the 4L60E.
Addressing Valve Body Wear
Valve body wear is a frequent issue in the 4L60E, leading to various performance problems. Over time, valve bores can become enlarged or oval-shaped, causing pressure loss and improper clutch application. Symptoms include delayed engagement, slipping gears, and harsh shifts. A thorough inspection of the valve body is crucial during any 4L60E overhaul.
Minor wear can sometimes be addressed with valve body sleeves or reaming, restoring proper clearances. However, significant wear often necessitates valve body replacement. When replacing, consider an upgraded valve body designed to address common 4L60E weaknesses. Ensure all valves move freely within their bores and that there are no signs of sticking or binding. Cleanliness is paramount during reassembly to prevent future issues.
Diagnosing Torque Converter Clutch (TCC) Problems
Torque Converter Clutch (TCC) issues in the 4L60E often manifest as shuddering during lock-up, or the TCC failing to engage altogether. Diagnostic Trouble Codes (DTCs) related to TCC performance, like P1740, are key indicators. Use a scan tool to monitor TCC apply and slip data while driving. A failing torque converter or solenoid can cause these symptoms.
Check the transmission fluid condition; debris can clog the TCC solenoid. Inspect the solenoid itself for proper operation using a multimeter. If the solenoid tests good, the torque converter is the likely culprit. A stall test can help confirm TCC functionality, but requires caution. Replacement of both the solenoid and converter is often recommended for a reliable repair.

4L60E Repair and Overhaul
Comprehensive rebuilds involve valve body repair, solenoid replacement, band and clutch servicing, and torque converter replacement – ensuring optimal 4L60E performance and longevity.
Valve Body Repair/Replacement
The 4L60E valve body is a complex component crucial for proper hydraulic pressure and shift timing. Wear within the valve bores is a frequent issue, leading to premature clutch application and reduced pressure. Repair often involves meticulous cleaning, replacing worn valves and springs, and potentially boring and sleeving bores. A complete valve body replacement is sometimes necessary, especially with significant damage or extensive wear.
Proper diagnosis is key; identifying sticking valves or solenoid malfunctions guides the repair process. When replacing the valve body, ensure compatibility with the transmission’s specific year and model. Thoroughly inspect all passages for debris before installation, and use new gaskets and seals to prevent leaks. Accurate reassembly is vital for smooth, reliable shifting.
Solenoid Replacement Procedures
Replacing 4L60E solenoids, like the 1-2 shift solenoid (often associated with code P1760), requires careful attention. Begin by disconnecting the negative battery cable and draining the transmission fluid. Access the solenoids, typically located within the valve body, and carefully remove the electrical connectors. Use the correct tools to avoid damaging the solenoid bore.
Before installing new solenoids, inspect the bores for contamination or damage. Apply a small amount of transmission fluid to the new solenoid seals. Ensure the correct solenoid is installed in the proper location. After installation, reconnect the electrical connectors and refill the transmission with the specified fluid. A scan tool is essential to clear any diagnostic trouble codes and verify proper operation.
Band and Clutch Replacement
Band and clutch replacement within the 4L60E transmission is a complex overhaul procedure, typically undertaken when experiencing slipping gears or complete transmission failure. This requires a complete transmission disassembly. Worn bands and clutches must be carefully inspected for wear, damage, or burnt material.
During reassembly, ensure proper clearances and torque specifications are followed meticulously. New seals and gaskets are crucial to prevent leaks. Soak the new clutches in transmission fluid before installation to ensure proper engagement. Accurate band adjustment is vital for smooth shifting and longevity. A complete rebuild often includes replacing the torque converter and valve body for optimal performance and reliability.
Torque Converter Replacement
Torque converter replacement is often necessary when addressing issues like shuddering, slipping, or complete failure within the 4L60E transmission. A failing torque converter can cause significant damage to other transmission components, making timely replacement crucial. Before removal, ensure the transmission is properly supported and all cooler lines are disconnected.
Installation requires careful alignment with the transmission input shaft and proper tightening of the mounting bolts. Always use a new torque converter seal to prevent leaks. Flushing the transmission cooler lines is highly recommended to remove any debris from the old converter. After installation, verify proper operation and check for any unusual noises or vibrations. A new torque converter often restores smooth acceleration and overall transmission performance.

Preventative Maintenance for the 4L60E
Regular fluid and filter changes, alongside maintaining a healthy cooling system, are vital for extending the 4L60E’s lifespan and preventing costly repairs.
Regular Fluid Changes
Consistent transmission fluid changes are arguably the most crucial preventative measure for the 4L60E. Over time, transmission fluid degrades, losing its lubricating properties and accumulating debris from worn clutches and bands. This contamination accelerates wear and tear on internal components.
Generally, a fluid and filter change should be performed every 30,000 to 60,000 miles, depending on driving conditions. Severe duty, such as towing or frequent stop-and-go traffic, necessitates more frequent intervals. Using the correct type of fluid – typically Dexron III or Dexron VI – is paramount; incorrect fluid can cause significant damage. A complete flush is sometimes recommended, but caution is advised as it can dislodge debris and potentially cause issues in older, high-mileage transmissions. Monitoring fluid condition visually is also important – dark, burnt-smelling fluid indicates a need for immediate service.
Filter Replacement
Alongside fluid changes, regular filter replacement is essential for maintaining the 4L60E’s health. The transmission filter traps debris – metal particles, clutch material, and other contaminants – preventing them from circulating and causing damage. A clogged filter restricts fluid flow, leading to overheating and reduced performance.
The filter should ideally be replaced with every fluid change, typically every 30,000 to 60,000 miles. Inspect the old filter for excessive debris, which can indicate internal wear. Ensure the new filter is properly seated and sealed to prevent leaks. Some 4L60E models utilize an internal filter accessible by removing the valve body, requiring more extensive disassembly. Proper filter maintenance significantly extends the transmission’s lifespan and helps avoid costly repairs down the road, contributing to smoother shifting and overall reliability.
Proper Cooling System Maintenance
Overheating is a primary killer of the 4L60E transmission. Maintaining a healthy cooling system is, therefore, paramount. This involves ensuring the transmission cooler – often integrated within the radiator – isn’t clogged or restricted. Inspect cooler lines for kinks, leaks, or damage. Flushing the cooler and lines periodically removes accumulated debris.

Verify the transmission cooler’s functionality and consider an auxiliary transmission cooler, especially for vehicles used for towing or heavy-duty applications. A failing radiator fan can also contribute to overheating. Regularly check coolant levels and ensure the cooling system is operating efficiently. Proper cooling prevents fluid breakdown, reduces wear on internal components, and significantly extends the 4L60E’s service life, avoiding expensive rebuilds.