Manuals

manual transmission amg

AMG vehicles, historically, offered engaging manual options, though increasingly rare. Today, only a select few models retain this choice, appealing to purists and driving enthusiasts.

Mercedes-AMG’s legacy includes a period where manual gearboxes were prevalent, now largely superseded by automatic transmissions, impacting collector interest.

Historical Context of AMG

AMG’s origins trace back to 1967, founded by Hans Werner Aufrecht and Erhard Melcher, initially focusing on high-performance modifications for Mercedes-Benz vehicles. Their early work centered around enhancing the 300 SE’s race engine, laying the foundation for a performance-focused brand.

In the 1980s, AMG began offering manual transmission options alongside automatics, catering to drivers seeking greater control. This period represents a crucial era where enthusiasts could experience AMG power with a traditional driving experience. The company evolved from tuning house to a fully-fledged manufacturer.

The Appeal of a Manual Transmission in High-Performance Cars

A manual transmission fosters a deeper connection between driver and machine, offering unparalleled control over gear selection and engine speed. This direct engagement enhances the driving experience, particularly in high-performance AMG vehicles, appealing to enthusiasts who prioritize feel and involvement.

For many, the skill of mastering a manual gearbox is intrinsically rewarding. It allows for precise control during spirited driving, track days, and even daily commutes, creating a more visceral and satisfying experience than automatic alternatives.

Early AMG Models with Manual Transmissions

AMG’s early years, particularly the 1980s, saw several models equipped with manual gearboxes, offering a raw driving experience before the automatic shift.

These initial offerings laid the foundation for AMG’s performance legacy, showcasing a commitment to driver engagement and control.

AMG in the 1980s: Manual Options

During the 1980s, AMG actively offered manual transmission options in several of its performance-enhanced Mercedes-Benz vehicles. This period represented a crucial era where drivers could directly connect with the power and handling of these modified cars.

Manual gearboxes were favored for their directness and control, aligning with AMG’s focus on delivering a spirited driving experience. These early AMG offerings catered to enthusiasts who appreciated the skill and involvement required to master a manual transmission, setting a precedent for future performance models.

The availability of manuals in the 80s underscored AMG’s commitment to providing a pure, unadulterated connection between driver and machine.

Specific Models Featuring Manual Gearboxes

Several AMG models proudly showcased manual gearboxes, notably within the Mercedes-Benz SLK-Class (R171 & R172) during certain production years. Specific generations of the C-Class also offered this option, appealing to drivers seeking a more engaging experience.

The CLA 200 d Shooting Brake and C 180 are documented as having manual transmission availability, though limited. These models represent a dwindling number of AMG-enhanced vehicles where drivers could choose to shift gears themselves.

These manual-equipped AMG cars are now highly sought after by collectors and enthusiasts.

The Decline of Manual AMG Options

Automatic transmissions gained prominence due to faster shift times and broader appeal. Manual options were discontinued as AMG prioritized performance and market trends, shifting focus.

Consumer preference and technological advancements ultimately led to the phasing out of manual gearboxes in most AMG lineups.

Shift Towards Automatic Transmissions

AMG’s transition towards automatic transmissions wasn’t abrupt, but a gradual evolution driven by performance gains. Modern automatics, particularly dual-clutch systems, offered significantly faster shift speeds than even skilled drivers could achieve with a manual gearbox.

This shift directly impacted acceleration and lap times, key metrics for AMG. Furthermore, automatics broadened the appeal of AMG vehicles, attracting customers who preferred ease of use over driver involvement. The increasing complexity of modern engines also favored the precision of automatic control systems.

Reasons for Discontinuation of Manuals

Several factors contributed to the phasing out of manual transmissions in AMG vehicles. Declining consumer demand played a significant role, as most buyers favored the convenience and performance of automatics. Manufacturing complexities and costs associated with offering both transmission types also influenced the decision.

AMG prioritized technological advancements, focusing resources on refining automatic systems. The ability to customize Mercedes cars to look like an AMG, without the performance, further diminished the need for a manual option.

Current AMG Models and Transmission Choices (as of 02/08/2026)

As of today, manual transmissions are exceptionally rare in the AMG lineup; Only the CLA 200 d Shooting Brake and C 180 currently offer a manual gearbox option.

Overview of Current AMG Lineup

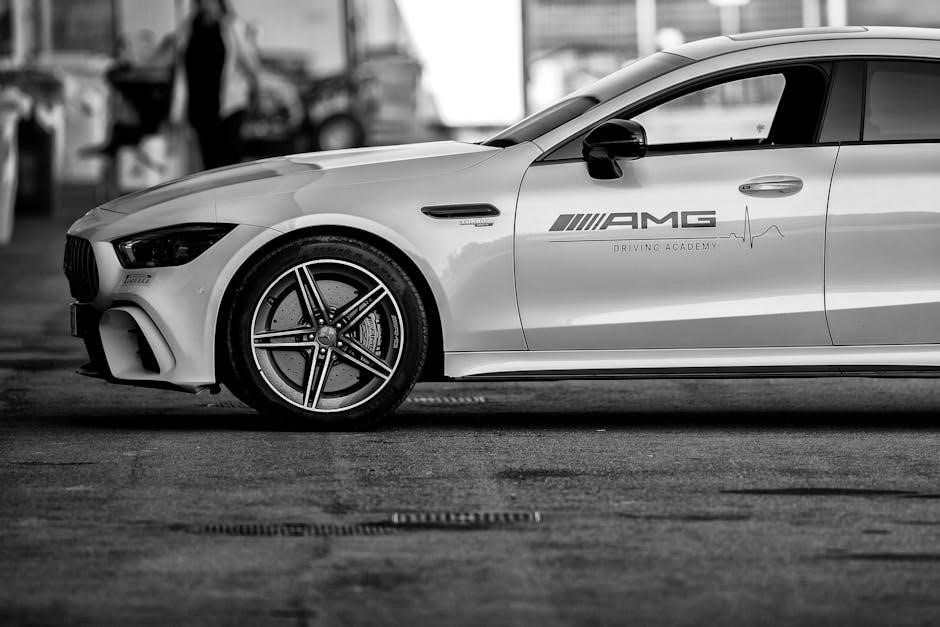
The AMG lineup in 2026 is expansive, encompassing everything from compact hot hatches like the A35 to high-performance SUVs like the GLE 63 S and the exotic AMG ONE. The C-Class, E-Class, and S-Class families all receive AMG variants, prioritizing luxury and power.

However, the trend leans heavily towards sophisticated automatic transmissions, including multi-clutch systems and advanced torque converters. While manual options exist in the CLA 200 d Shooting Brake and C 180, they represent a shrinking segment within the broader AMG portfolio, catering to a niche enthusiast base.

Availability of Manual Transmissions Today

As of February 8th, 2026, manual transmissions in AMG vehicles are exceptionally limited. Mercedes-Benz currently offers only 22 models with manual gearboxes out of nearly 240 total variants. Specifically, the CLA 200 d Shooting Brake and the C 180 are the primary AMG-adjacent options retaining a manual gearbox.

True AMG-branded vehicles largely forgo the manual, focusing on rapid-shifting automatics. This scarcity elevates the value of older manual AMGs, appealing to collectors and drivers seeking a more connected experience.

Popular AMG Models with Historical Manual Availability

The Mercedes-Benz SLK-Class (R171 & R172) and certain C-Class generations notably offered manual transmissions, becoming sought-after classics for enthusiasts.

These AMG variants provide a unique driving experience, contrasting with the prevalence of automatic gearboxes in modern lineups.

Mercedes-Benz SLK-Class (R171 & R172)

The SLK-Class, specifically the R171 (2004-2011) and R172 (2011-2016) generations, represent a sweet spot for manual transmission AMG enthusiasts. Certain engine configurations, particularly within these model years, were available with a traditional six-speed manual gearbox.

This option provided a more connected driving experience, appealing to those who preferred direct control over gear selection. These manual SLK AMG models are now increasingly collectible, commanding higher resale values due to their rarity and the engaging driving dynamics they offer. Finding a well-maintained example is becoming a challenge.

Mercedes-Benz C-Class (Specific Generations)

The Mercedes-Benz C-Class, across several generations, offered manual transmission options in AMG variants, though availability varied significantly by year and engine. Notably, certain C32 AMG (W203) and C55 AMG (W203) models were produced with a manual gearbox, providing a raw and engaging driving experience.

Later generations, like some W204 C63 AMG models, also featured manual options in select markets. These manual C-Class AMGs are highly sought after by collectors and enthusiasts, representing a diminishing breed of performance cars offering driver-focused control.

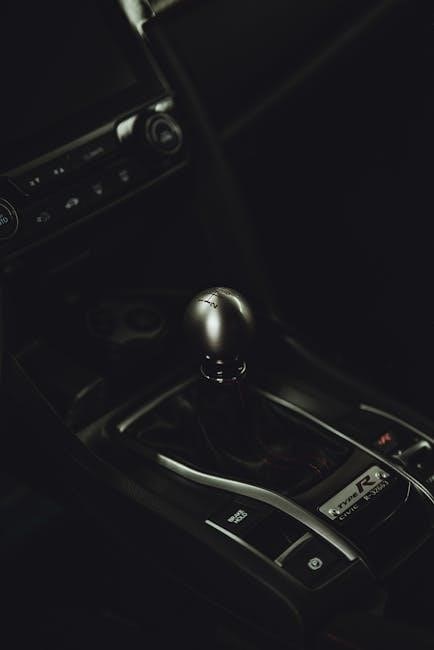
The Technical Aspects of AMG Manual Transmissions

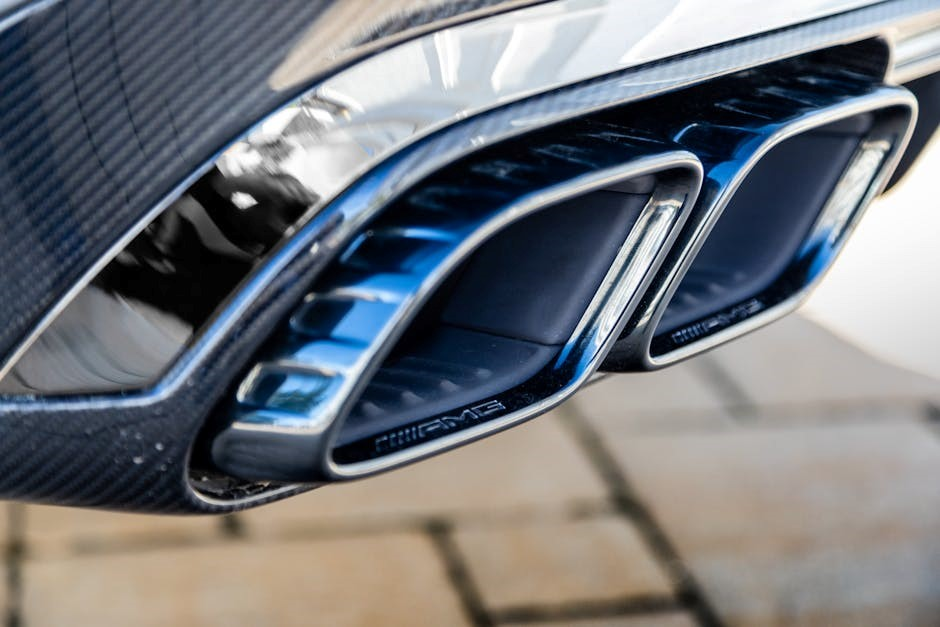
AMG’s manual gearboxes featured robust designs and carefully selected gear ratios for optimal performance. Clutch specifications prioritized durability and enhanced power handling capabilities.

These transmissions were engineered to withstand the stresses of high-performance driving, delivering a direct connection between engine and wheels.

Gearbox Design and Ratios

AMG’s manual transmissions weren’t simply standard Mercedes gearboxes; they often incorporated reinforced components to handle the increased torque output of their high-performance engines.

Gear ratios were meticulously chosen to balance acceleration and top-speed capabilities, providing a thrilling driving experience. These ratios aimed for quick shifts and optimal power delivery across the rev range.

The design prioritized durability and precision, ensuring reliable performance even under demanding conditions. Specific ratios varied between models, tailored to their individual engine characteristics and intended use.

Clutch Specifications and Performance

AMG manual transmissions featured heavy-duty clutches designed to withstand the substantial torque produced by their engines. These clutches utilized robust pressure plates and friction materials for enhanced durability and consistent engagement.

Performance characteristics included a relatively firm pedal feel, providing drivers with precise control and feedback. Clutch diameter and clamping force were carefully calibrated to prevent slippage during aggressive acceleration.

Upgraded clutches were often employed in higher-performance models, ensuring reliable operation even with significant power modifications.

The Driving Experience: Manual AMG vs. Automatic AMG

Manual AMGs deliver heightened driver engagement and control, demanding skill. Automatic versions prioritize ease and often quicker acceleration, though sacrificing some driver connection.

Driver Engagement and Control

Manual transmissions in AMG vehicles fundamentally alter the driving experience, placing complete control in the driver’s hands. This direct connection fosters a deeper engagement with the machine, demanding active participation in gear selection and clutch modulation.

The tactile feedback from the gearbox and the necessity of heel-toe downshifting create a more immersive and rewarding experience for enthusiasts. It’s a skill-based interaction, allowing drivers to precisely manage power delivery and maintain optimal engine performance, unlike the more detached feel of an automatic.

This level of control isn’t merely about speed; it’s about feeling connected to the car and mastering its capabilities.

Performance Differences: Acceleration and Lap Times

Historically, debates surround whether manual or automatic AMG models achieve superior acceleration and lap times. Modern automatics, particularly those with multiple clutches and sophisticated algorithms, often demonstrate quicker shifts and consistent performance.

However, a skilled driver in a manual AMG can minimize these differences, potentially matching or even exceeding automatic times on certain tracks. The driver’s ability to perfectly time shifts and maintain optimal engine RPM is crucial.

Ultimately, the performance gap has narrowed, with driver skill becoming the dominant factor.

Customization and Aftermarket Options

Manual conversions from automatic AMG models are possible, though complex and costly. Performance upgrades, like clutches and short-throw shifters, enhance the driving experience.

Converting Automatic AMGs to Manual

Converting an automatic AMG to a manual transmission is a significant undertaking, demanding substantial mechanical expertise and financial investment. It involves sourcing a compatible gearbox, clutch, flywheel, and pedal assembly from a manual-equipped AMG or a suitable aftermarket supplier.

Furthermore, modifications to the wiring harness, ECU, and potentially the driveshaft are necessary. This process isn’t simply a swap; it requires custom fabrication and careful calibration to ensure seamless integration and reliable operation. While challenging, it offers a unique driving experience for dedicated enthusiasts.

Performance Enhancements for Manual Transmissions

Enhancing a manual AMG transmission focuses on improving durability and shift quality. Upgraded clutches, capable of handling increased power, are crucial. Lightweight flywheels reduce rotational inertia, resulting in quicker engine response and faster acceleration.

Short-throw shifters minimize throw distance, providing precise and rapid gear changes. Stronger shift linkages and bushings eliminate slop and improve feel. Furthermore, optimized gear ratios can tailor the transmission to specific driving conditions, maximizing performance on track or the street.

The Resale Value of Manual AMG Vehicles

Manual AMG models command higher resale values due to rarity and collector demand. Their limited availability and appeal to enthusiasts drive up prices significantly.

Well-maintained, low-mileage examples fetch premiums, reflecting their unique status within the AMG lineage.

Collector’s Interest and Demand

Manual transmission AMG vehicles are experiencing a surge in collector interest, driven by nostalgia and a desire for a more connected driving experience. As automatic transmissions dominate the market, these manual variants represent a dwindling breed, increasing their exclusivity.

Enthusiasts actively seek out these models, recognizing them as a link to AMG’s heritage. This heightened demand translates to premium pricing in the used car market, particularly for well-preserved, original examples. The rarity factor significantly impacts their collectibility.

The appeal extends beyond mere nostalgia; it’s about the raw, engaging driving feel that a manual gearbox provides.

Factors Affecting Resale Price

Several key factors influence the resale value of manual transmission AMG vehicles; Mileage is crucial, with lower mileage examples commanding significantly higher prices. Originality is paramount; modifications often detract from value, especially for collectors.

Condition, documented service history, and rarity of the specific model all play a role. Limited-edition AMGs with manual gearboxes fetch substantial premiums. Market trends and overall demand for classic Mercedes-Benz vehicles also impact pricing.

Well-maintained examples, with complete records, consistently outperform those lacking documentation.

Mercedes-AMG Models with Manual Transmission Spec Sheet

Currently (02/08/2026), the CLA 200 d Shooting Brake and C 180 are listed with available manual transmissions, offering a driver-focused experience.

CLA 200 d Shooting Brake

The CLA 200 d Shooting Brake represents a compelling entry point into the AMG world with a manual transmission option. Priced around 1.950 (currency unspecified, likely Euros based on context), it delivers 150 horsepower.

This model appeals to buyers seeking efficiency and engagement. The manual gearbox provides a direct connection to the engine, enhancing the driving experience. It’s a practical yet sporty choice, blending AMG styling with everyday usability. This configuration is increasingly rare, making it desirable for enthusiasts.

C 180

The Mercedes-Benz C 180, when equipped with a manual transmission, offers a blend of luxury and driver involvement. As one of the 22 Mercedes models still offering a stick shift (as of 02/08/2026), it caters to a niche market.

This model provides a more affordable entry into the Mercedes range while retaining the satisfaction of a manual gearbox. It’s a practical choice for daily driving, offering a balance between comfort and control. Its availability underscores a continued, albeit limited, commitment to manual transmissions.

The Future of Manual Transmissions in AMG

Manual transmissions’ reintroduction hinges on market demand and evolving trends. While currently limited, enthusiast pressure could influence AMG’s future offerings, potentially reviving the option.

Potential for Reintroduction

AMG’s consideration of a manual transmission return isn’t impossible, driven by vocal enthusiast communities and a desire to reconnect with driving purists. However, significant engineering challenges and low demand pose hurdles.

Factors like the complexity of integrating manuals into modern, high-performance vehicles, alongside the dominance of dual-clutch systems, complicate the decision. A limited-edition, special-series AMG with a manual could gauge market interest without substantial investment, potentially paving the way for broader availability if successful.

Market Trends and Consumer Demand

Despite the overall automotive industry shift towards automatics, a niche but passionate market still desires manual transmissions, particularly in performance vehicles like AMGs. This demand is fueled by a desire for greater driver engagement and control.

However, global sales figures demonstrate a clear preference for automatics. AMG must balance enthusiast desires with broader market trends. A potential reintroduction would likely target specific regions or limited-edition models catering to this dedicated customer base.

AMG Founders: Hans Werner Aufrecht and Erhard Melcher

Aufrecht and Melcher, initially Mercedes engineers, focused on engine development – a foundation for future high-performance AMGs, though not directly linked to manual transmissions.

Their 1967 founding established a legacy of performance, eventually including manual gearbox options in select models during the 1980s;

Early Work on Mercedes 300 SE Race Engines

Hans Werner Aufrecht and Erhard Melcher’s initial collaboration centered on enhancing the Mercedes-Benz 300 SE’s racing capabilities. This involved significant engine modifications, laying the groundwork for AMG’s future performance focus. While their early work didn’t directly involve manual transmissions, it established a culture of pushing engineering boundaries.

These engine improvements were crucial for competitive racing, and the expertise gained would later influence AMG’s development of high-performance road cars, some of which were initially offered with manual gearboxes. The 300 SE work was a pivotal starting point, even if indirectly related to manual options.

Establishment of AMG in 1967

AMG was officially founded on July 1st, 1967, by Hans Werner Aufrecht and Erhard Melcher, building upon their prior engine development work. Initially, the company focused on tuning and modifying Mercedes-Benz vehicles for improved performance. While the early years didn’t exclusively center on manual transmissions, the foundation was laid for offering customized driving experiences.

The company’s early offerings included performance upgrades that, in some cases, complemented the availability of manual gearboxes in certain Mercedes-Benz models. This marked the beginning of AMG’s journey towards becoming a renowned high-performance automotive brand.

The AMG ONE and 2.0T C63S: Technological Advancements

AMG’s focus shifted towards advanced technologies like F1-derived systems in the ONE and C63S, prioritizing performance over traditional manual gearbox availability.

These innovations demonstrate a move away from driver-centric manual control towards automated, high-speed capabilities.

F1 Technology Transfer to Road Cars

Mercedes-AMG’s commitment to Formula 1 has profoundly influenced its road car development, notably in the AMG ONE. This hypercar directly incorporates technology from the Mercedes F1 W09 EQ Power+, including its 1.6-liter turbocharged hybrid powertrain.

However, this focus on cutting-edge, complex systems has coincided with the decline of manual transmissions. The emphasis shifted to maximizing performance through automated gear changes and sophisticated electronic control, rendering the simplicity of a manual gearbox less relevant to AMG’s technological direction.

While offering a unique driving experience, manual transmissions couldn’t effectively integrate with these advanced hybrid and aerodynamic technologies.

The Impact of High-Performance Technologies

The rise of dual-clutch transmissions (DCTs) and advanced automatic gearboxes significantly impacted manual AMG offerings. These technologies delivered faster shift times and improved efficiency, exceeding the capabilities of traditional manual systems.

Furthermore, the integration of complex engine management systems, traction control, and stability programs demanded seamless communication with the transmission – a challenge for manual gearboxes.

AMG prioritized maximizing performance through these integrated systems, ultimately leading to the discontinuation of manual options in most models, despite enthusiast demand.

Mercedes-AMG New Car Releases (Recent Years)

Recent AMG launches largely feature automatic transmissions, with limited manual availability. Pricing trends show a premium for performance, exceeding 400,000 yuan in many cases.

Pricing Trends for AMG Models

AMG models, particularly newer releases, demonstrate a consistent upward pricing trend, often starting around 400,000 yuan and escalating significantly with added features and performance upgrades.

Historically, manual transmission variants, when available, didn’t necessarily command a price premium over their automatic counterparts. However, due to their rarity today, classic AMG cars with manual gearboxes are experiencing increased collector demand, driving resale values higher.

This scarcity contributes to a premium, reflecting the enthusiast appeal and limited production numbers of these sought-after vehicles.

Overview of Recent AMG Vehicle Launches

Recent AMG launches predominantly feature advanced automatic transmissions, reflecting a broader industry shift towards faster and more efficient automated systems. The AMG ONE and the 2.0T C63S exemplify this, showcasing Formula 1-derived technology.

While manual transmission options are exceedingly rare in new AMG models, the focus is on performance enhancements through sophisticated drivetrain technology. These launches prioritize speed, responsiveness, and overall driving dynamics, largely overshadowing the demand for a traditional manual experience.

The A45 CES and various SUVs also follow this trend.

Mercedes-Benz India and Customer Engagement

Mercedes-Benz India, through platforms like MercedesDialogues, offered personalized responses – like Eberhard Kern’s – but manual AMG availability wasn’t a key discussion point.

Personalized Responses from Eberhard Kern

Eberhard Kern, as MD & CEO of Mercedes-Benz India, actively engaged with customers via MercedesDialogues, a platform for direct interaction. While demonstrating a commitment to customer service, records don’t indicate specific responses addressing the dwindling availability of manual transmissions in AMG vehicles.

His personalized replies focused on broader brand experiences and customer satisfaction, rather than detailed discussions about specific gearbox options or the historical presence of manuals within the AMG lineup. The focus remained on the overall Mercedes-Benz experience.

MercedesDialogues and Customer Interaction

MercedesDialogues served as a direct communication channel between Mercedes-Benz India and its customers, fostering a sense of personalized engagement. However, available information doesn’t reveal extensive discussions specifically concerning manual transmission preferences within AMG models on this platform.

While customers could pose questions to leadership like Eberhard Kern, the focus generally remained on broader brand experiences. Requests for the return of manual options in AMG cars, or inquiries about historical manual availability, weren’t prominently featured in documented interactions.

The AMG Brand and Customization

AMG enhances Mercedes-Benz vehicles, but customization doesn’t typically include adding a manual gearbox where one wasn’t originally offered, impacting transmission choices.

While aesthetic modifications are common, converting automatics to manuals remains a complex aftermarket endeavor.

Distinguishing AMG from Standard Mercedes-Benz

AMG models represent the high-performance division of Mercedes-Benz, offering enhanced engines, sport-tuned suspensions, and aggressive styling. Historically, the availability of a manual transmission further differentiated certain AMG cars, providing a more driver-focused experience.

However, this distinction has diminished as AMG increasingly prioritizes advanced automatic transmissions for quicker shifts and optimized performance. While customers can visually customize standard Mercedes-Benz cars to resemble AMG aesthetics, replicating the original manual gearbox option remains largely unattainable without significant aftermarket modifications.

The presence of a manual, therefore, serves as a key identifier for a specific era of AMG vehicles.

Options for Customizing Appearance

While a manual transmission itself isn’t an appearance customization, AMG vehicles offer extensive aesthetic personalization. Owners can modify exterior elements like body kits, spoilers, and wheels to enhance the sporty look. Interior options include unique upholstery, carbon fiber trim, and performance steering wheels.

These customizations allow owners to tailor their AMG to individual preferences, though they don’t replicate the rarity of a factory-equipped manual gearbox. The visual enhancements complement the driving experience, particularly for those seeking a classic AMG aesthetic.

Ultimately, appearance modifications are separate from the mechanical distinction of a manual transmission.

ge air conditioner manual pdf

GE air conditioner manuals‚ often available as a PDF‚ are essential guides for optimal performance. They detail installation‚ operation‚ and troubleshooting steps for various GE models.

What is a GE Air Conditioner Manual?

A GE Air Conditioner Manual is a comprehensive document provided by GE Appliances detailing everything you need to know about your specific air conditioning unit. Typically available as a PDF download‚ these manuals serve as a crucial resource for users seeking to understand their appliance’s features‚ operation‚ and maintenance requirements.

These guides contain vital information ranging from initial setup instructions and remote control functionality to detailed troubleshooting steps for common issues. They ensure safe and efficient operation‚ maximizing the lifespan of your GE air conditioner. Accessing the PDF version allows for convenient storage and easy reference whenever needed.

Why You Need a GE Air Conditioner Manual PDF

Having a GE Air Conditioner Manual PDF is incredibly beneficial for several reasons. It provides step-by-step guidance for installation‚ ensuring correct setup and optimal performance. Troubleshooting becomes significantly easier with access to dedicated sections addressing common issues‚ potentially saving costly repair bills.

The PDF format offers convenient accessibility – you can store it on your computer‚ tablet‚ or smartphone for quick reference. Understanding all features‚ including smart home integration‚ is simplified through detailed explanations. Ultimately‚ the manual empowers you to maximize your air conditioner’s efficiency and longevity‚ ensuring years of reliable cooling.

Finding Your GE Air Conditioner Manual PDF

GE appliance manuals‚ including PDF versions‚ are readily available online through the official GE website‚ third-party databases‚ and a simple Google search.

GE Appliances Official Website

GE Appliances’ official website is the most reliable source for your air conditioner’s manual PDF. Navigate to the “Support” or “Owners Manual” section‚ then search by model number. This ensures you receive the correct‚ up-to-date documentation specifically tailored for your unit.

The website often provides a comprehensive archive of manuals‚ even for older models. You can typically download the PDF directly or view it online. Utilizing the official source guarantees accuracy and avoids potentially outdated or incorrect information found on other platforms. GE also offers helpful troubleshooting guides and FAQs alongside the manuals.

Third-Party Manual Databases

Several third-party websites specialize in collecting and hosting manuals‚ including GE air conditioner manual PDFs. These databases can be useful if you’re unable to locate your manual on the official GE Appliances website‚ or if you have an exceptionally old model.

However‚ exercise caution when using these resources. Verify the manual’s accuracy by comparing it to information found on GE’s site whenever possible. Common databases include ManualsLib and similar platforms. Always double-check the model number to ensure compatibility before relying on instructions from a third-party source.

Using Google Search for Specific Models

A targeted Google search is often effective in locating a GE air conditioner manual PDF. Use specific keywords including “GE‚” the air conditioner’s model number‚ and “manual PDF.” For example‚ search “GE AHE06LZ manual PDF.” Refine your search by adding terms like “download” or “user guide.”

Google’s image search can also reveal direct links to PDFs. Scan the results carefully‚ prioritizing links from reputable sources. Be cautious of unfamiliar websites and always verify the manual’s model number matches your appliance before downloading and using the information.

Understanding the Manual Sections

GE air conditioner manuals‚ often in PDF format‚ typically include safety guidelines‚ installation steps‚ operating instructions‚ troubleshooting tips‚ and maintenance schedules for optimal use.

Safety Precautions

GE air conditioner manuals prioritize user safety with detailed precautions. PDF versions emphasize disconnecting power before maintenance‚ avoiding water exposure to electrical components‚ and proper grounding techniques. They warn against operating damaged cords or plugs‚ stressing the risk of electrical shock or fire.

The manuals also caution against modifying the unit‚ as this can void warranties and create hazards. Proper ventilation is highlighted to prevent carbon monoxide buildup‚ especially with combustion-powered units. Always follow the manufacturer’s instructions regarding refrigerant handling‚ as it requires specialized training and equipment. Ignoring these safety guidelines can lead to serious injury or property damage.

Installation Instructions

GE air conditioner manuals‚ often found as a PDF‚ provide step-by-step installation guidance. They detail proper window preparation‚ ensuring a secure and level mounting surface. The manuals specify correct electrical connections‚ emphasizing voltage requirements and grounding procedures. They illustrate bracket attachment and unit placement‚ highlighting clearance needs for airflow.

Detailed diagrams show how to secure the unit to prevent falls‚ a critical safety measure. Instructions cover condensate drainage setup‚ preventing water damage. The PDF often includes a parts list and tool requirements for a smooth installation process. Following these instructions ensures efficient operation and maximizes the unit’s lifespan.

Operating Instructions

The GE air conditioner manual PDF comprehensively explains operation. It details power-on procedures and mode selection – cool‚ fan‚ dry‚ and auto – clarifying each function’s purpose. Temperature adjustment instructions are provided‚ alongside fan speed controls for personalized comfort. The manual clarifies how to utilize sleep modes and timers for energy efficiency and convenience.

It also explains indicator lights and their meanings‚ aiding in quick issue identification. Detailed explanations cover air direction control‚ optimizing airflow within the room. The PDF often includes tips for maximizing cooling performance and maintaining optimal humidity levels‚ ensuring user satisfaction.

Initial Setup

The GE air conditioner manual PDF guides users through initial setup. It begins with unpacking and inspection‚ ensuring all components are present and undamaged. Proper placement is detailed‚ emphasizing adequate ventilation and avoiding direct sunlight. Electrical connection instructions are crucial‚ stressing correct voltage and grounding procedures for safety.

The manual explains how to install side panels and any required brackets‚ providing clear diagrams. It details filter installation‚ vital for air quality and unit performance. Initial operation instructions‚ including a test run‚ confirm proper functionality. The PDF often includes a checklist to ensure all steps are completed correctly.

Using the Remote Control

The GE air conditioner manual PDF dedicates a section to remote control operation. It details battery installation and replacement procedures‚ ensuring consistent functionality. Each button’s purpose is clearly explained – power‚ mode (cool‚ fan‚ dry‚ auto)‚ temperature adjustment‚ and fan speed control. The manual illustrates the display panel‚ clarifying indicator lights and their meanings.

Advanced features like sleep mode‚ timer settings‚ and energy saver options are thoroughly described. Troubleshooting tips for remote control issues‚ such as unresponsive buttons or limited range‚ are included. Diagrams often show the remote’s layout‚ making it easier to understand its functions.

Understanding Control Panel Features

Your GE air conditioner manual PDF provides a detailed breakdown of the control panel. It explains each button and indicator light’s function‚ covering power‚ mode selection (cool‚ fan‚ auto‚ dry)‚ and temperature settings. The manual clarifies how to adjust fan speeds and utilize features like sleep mode and energy saver.

Digital displays are explained‚ including error codes and their meanings‚ aiding in troubleshooting. Diagrams illustrate the panel layout for easy identification. The manual also details any specialized features‚ such as programmable timers or smart home integration options‚ ensuring users fully understand their air conditioner’s capabilities.

Troubleshooting Common Issues

GE air conditioner manual PDFs offer solutions for typical problems like cooling failures‚ leaks‚ or remote control malfunctions‚ guiding users through diagnostic steps.

Air Conditioner Not Cooling

If your GE air conditioner isn’t cooling‚ the PDF manual suggests checking the air filter for blockage – a common cause. Ensure the thermostat is set correctly and the unit isn’t in “Fan Only” mode. The manual details how to inspect the condenser coils for dirt accumulation‚ impacting heat exchange.

Furthermore‚ it guides users to verify proper airflow around the unit‚ free from obstructions. A GE manual PDF will also instruct you to check the compressor and fan motor for functionality‚ potentially requiring professional service if issues are detected. Following these steps‚ outlined in your specific model’s manual‚ can often restore cooling performance.

Water Leaking

A GE air conditioner leaking water‚ as detailed in the PDF manual‚ often stems from a clogged drain line. The manual provides instructions for locating and clearing this drain‚ typically with a wet/dry vacuum or gentle flushing. Improper installation‚ causing incorrect unit tilt‚ is another potential cause addressed within the manual.

The GE manual PDF also highlights the importance of checking for frozen evaporator coils‚ which can melt and overflow. Ensure adequate airflow and proper temperature settings to prevent this. If leaks persist‚ the manual advises inspecting the drain pan for cracks or damage‚ potentially requiring replacement by a qualified technician.

Remote Control Not Working

If your GE air conditioner’s remote isn’t functioning‚ the PDF manual suggests first replacing the batteries with fresh ones. It details the proper battery type and installation orientation. Next‚ ensure there’s a clear line of sight between the remote and the unit’s sensor‚ free from obstructions. The manual also explains how to reset the remote‚ often involving a specific button combination.

Further troubleshooting‚ as outlined in the GE manual PDF‚ includes checking for interference from other electronic devices. If issues continue‚ the manual advises verifying the remote’s signal is compatible with your specific GE model and considering a replacement if necessary.

Maintenance and Care

GE air conditioner PDF manuals emphasize regular filter cleaning for efficiency. They also provide guidance on proper winter storage procedures to prolong the unit’s lifespan.

Cleaning the Filter

GE air conditioner manuals‚ particularly the PDF versions‚ consistently highlight the importance of a clean air filter for maintaining optimal cooling performance and air quality. A dirty filter restricts airflow‚ forcing the unit to work harder and potentially leading to reduced efficiency and increased energy consumption.

Most GE models feature a washable filter‚ easily accessible for removal and cleaning. The manual will detail the specific location and removal process for your model. Typically‚ the filter should be cleaned every two to four weeks‚ depending on usage and environmental conditions. Vacuuming or gently washing with mild soap and water is recommended‚ ensuring it’s completely dry before reinstallation.

Regular filter cleaning not only improves cooling but also extends the lifespan of your GE air conditioner.

Winter Storage

GE air conditioner manuals‚ often found as a convenient PDF download‚ provide crucial guidance for proper winter storage‚ ensuring your unit remains in good working order. Before storing‚ thoroughly clean the unit‚ including the filter‚ as detailed in the manual. Disconnect the power cord and remove any window mounting hardware to prevent damage or loss.

The PDF will advise storing the air conditioner in a dry‚ indoor location‚ covered to protect it from dust and debris. Some manuals recommend covering the exterior to prevent corrosion. Properly draining any remaining water is also vital to avoid mold or mildew growth during storage. Following these steps‚ as outlined in your GE manual‚ will help guarantee a smooth start-up next cooling season.

GE Air Conditioner and Smart Home Integration

GE’s Cync (formerly C by GE) devices integrate with Google Nest‚ enabling voice control and remote operation via the Google Home app.

Compatibility with Google Nest

GE air conditioners‚ particularly those under the Cync (formerly C by GE) brand‚ demonstrate strong compatibility with the Google Nest ecosystem. This integration allows users to seamlessly control their air conditioning units using voice commands through Google Assistant.

Through the Google Home app‚ or a visual display like the Google Nest Hub‚ you can remotely adjust settings‚ turn units on or off‚ and even monitor energy usage. This smart home connectivity simplifies climate control and enhances convenience. Accessing the GE air conditioner manual PDF can further clarify setup and troubleshooting within this integrated system‚ ensuring optimal performance and a user-friendly experience.

Voice Control Features

GE air conditioners integrated with Google Nest offer a range of convenient voice control features. Utilizing Google Assistant‚ users can adjust temperature settings‚ change fan speeds‚ and power the unit on or off with simple voice commands. This hands-free operation enhances comfort and accessibility.

Commands like “Hey Google‚ turn on the air conditioner” or “Hey Google‚ set the temperature to 72 degrees” provide effortless control. Consulting the GE air conditioner manual PDF can reveal a complete list of compatible voice commands and troubleshooting tips for optimal voice control functionality‚ maximizing the benefits of this smart home integration.

GE Matrix and Strategic Planning (Related to GE Company)

GE’s strategic matrix‚ a multi-factor evaluation tool‚ doesn’t directly relate to the PDF manual itself‚ but reflects GE’s broader business approach.

Core Concepts of the GE Matrix

While seemingly distant from a GE air conditioner manual PDF‚ the GE Matrix illustrates the company’s strategic thinking. Developed to overcome limitations of the BCG Matrix‚ it assesses business units based on industry attractiveness and business unit strength. Industry attractiveness considers market size‚ growth rate‚ profitability‚ and competitive intensity. Business unit strength evaluates factors like market share‚ brand reputation‚ technological capabilities‚ and management quality.

This nine-cell matrix guides investment decisions: invest‚ selectively invest‚ or divest. Though not directly impacting manual creation‚ it embodies GE’s analytical approach to all ventures‚ including appliance development and support documentation like the PDF guides.

Additional Resources

GE Appliances support offers assistance‚ while online forums provide community-based help for your GE air conditioner and its manual PDF.

GE Appliances Support Contact Information

GE Appliances provides comprehensive support for all its products‚ including air conditioners. For immediate assistance‚ you can reach their support team via phone at 1-800-626-2000. This line is available during standard business hours‚ offering help with locating your air conditioner’s manual PDF‚ troubleshooting operational issues‚ or understanding warranty details.

Alternatively‚ GE’s website (www.geappliances.com) features an extensive support section with FAQs‚ downloadable manuals – including PDF versions – and live chat options. You can also submit a support request online‚ detailing your specific concern and model number. Ensure you have your model number handy when contacting support for faster service and accurate information regarding your GE air conditioner.

Online Forums and Communities

Numerous online forums and communities dedicated to home appliances can be invaluable resources when seeking help with your GE air conditioner. Websites like AppliancePartsHelp.com and DIY Home Improvement forums often host threads discussing specific GE models and common issues. Users frequently share links to PDF manuals and offer troubleshooting advice based on their experiences.

Reddit’s r/Appliances and similar subreddits provide platforms for asking questions and receiving peer-to-peer support. Searching these forums for your model number‚ coupled with keywords like “manual” or “PDF‚” can quickly yield relevant information and solutions. Remember to verify information found online with official GE documentation.

dmc fz300 manual

The Panasonic Lumix DMC-FZ300 offers comprehensive guidance, readily available as a free PDF download, detailing advanced features and troubleshooting for optimal use.

Overview of the Camera

The Panasonic Lumix DMC-FZ300 is a versatile bridge camera, and its accompanying manual—available as a downloadable PDF—is crucial for unlocking its full potential. This detailed guide provides extensive information, covering everything from initial setup to advanced shooting techniques. Users can quickly locate specific details via page jumps within the manual.

The manual serves as a valuable resource for understanding the camera’s features, troubleshooting common issues, and maximizing image quality. It’s a key component for both beginner and experienced photographers;

Key Features and Specifications

The DMC-FZ300’s manual details its impressive specifications, including its 25mm wide-angle lens with 60x optical zoom. The PDF provides a comprehensive overview of its capabilities, from image stabilization (Hybrid O.I.S.) to various shooting modes. It outlines the camera’s technical details, warranty information, and links to support resources.

Understanding these features, as explained in the manual, empowers users to fully utilize the camera’s potential and achieve optimal photographic results.

Getting Started with Your DMC-FZ300

The DMC-FZ300 manual guides initial setup, battery charging, and SD card formatting, ensuring a smooth start to your photographic journey with this camera.

Unboxing and Initial Setup

Upon unboxing your Panasonic Lumix DMC-FZ300, carefully inspect all included components. The comprehensive owner’s manual, available as a free PDF download, is your primary resource. It details everything from initial camera setup to navigating advanced features. Familiarize yourself with the camera’s layout and controls as outlined in the manual. Before first use, consult the manual for specific instructions on preparing the camera for operation, ensuring optimal performance and understanding of its capabilities.

Charging the Battery

To charge the battery of your Panasonic Lumix DMC-FZ300, refer to the detailed instructions within the downloadable PDF manual. It outlines the correct charging procedure, including connecting the provided AC adapter and cable. The manual specifies the charging indicator’s behavior and approximate charging time. Always use the designated Panasonic charger to avoid damage. Fully charge the battery before initial use for optimal performance, as detailed within the comprehensive owner’s manual.

Inserting and Formatting the SD Card

The DMC-FZ300 utilizes SD cards for image storage. Consult the PDF manual for precise instructions on inserting the card correctly into the designated slot. Formatting is crucial for compatibility and performance; the manual details the formatting process directly through the camera’s menu. Back up existing data before formatting! The manual emphasizes using an SD card that meets the camera’s specifications for optimal results and avoiding potential errors during operation.

Understanding the Camera Controls

The DMC-FZ300’s manual thoroughly explains button, dial, and menu functions, enabling customization of the quick menu for efficient operation and personalized settings.

Button and Dial Functions

The Panasonic Lumix DMC-FZ300 manual meticulously details each button and dial’s specific function, ensuring users fully grasp camera operation. It clarifies how to navigate settings, adjust shooting parameters, and access frequently used features quickly. Understanding these controls is paramount for both beginners and experienced photographers.

The manual provides a visual guide, often with diagrams, illustrating the location and purpose of each control element. This allows for intuitive operation and efficient workflow, maximizing the camera’s potential and minimizing learning curves.

Menu Navigation

The Panasonic Lumix DMC-FZ300 manual provides a detailed walkthrough of the camera’s menu system. It explains how to access various settings, categorized for ease of use, covering image quality, recording modes, and customization options. The manual highlights how to efficiently locate specific functions within the menu structure.

Users can quickly jump to relevant pages within the PDF manual to find information on particular settings. This streamlined approach ensures a user-friendly experience, even for those unfamiliar with complex camera menus.

Customizing the Quick Menu

The DMC-FZ300 manual details how to personalize the Quick Menu for faster access to frequently used settings. Users can add or remove items, arranging them according to their shooting preferences. This customization streamlines workflow, reducing time spent navigating through the full menu system.

The manual guides users through the process of tailoring the Quick Menu, enhancing efficiency and control over essential camera functions. It’s a key feature for experienced photographers.

Shooting Modes Explained

The DMC-FZ300 manual thoroughly explains each shooting mode – Auto, Aperture Priority, Shutter Priority, and Manual – for versatile photographic control and creativity.

Auto Mode for Beginners

For newcomers to photography, the Panasonic Lumix DMC-FZ300’s Auto mode simplifies image capture. The camera’s manual details how this intelligent mode automatically selects optimal settings – aperture, shutter speed, ISO – based on the scene.

This eliminates the need for manual adjustments, allowing beginners to focus on composition and capturing the moment. The manual further clarifies that Auto mode is ideal for everyday snapshots and various lighting conditions, ensuring consistently good results with minimal effort. It’s a fantastic starting point!

Aperture Priority (A) Mode

The DMC-FZ300’s Aperture Priority (A) mode, as explained in the camera’s manual, grants photographers control over the lens aperture, influencing depth of field. Users select the desired f-stop, while the camera automatically adjusts shutter speed for proper exposure.

This mode is ideal for portraits (shallow depth of field) or landscapes (large depth of field). The manual details how adjusting aperture impacts image brightness and creative effects, offering a balance between control and automation for more experienced users.

Shutter Priority (S) Mode

The Panasonic Lumix DMC-FZ300’s Shutter Priority (S) mode, detailed within the camera’s manual, allows photographers to dictate the shutter speed, controlling motion blur. Users set the desired shutter speed, and the camera automatically adjusts the aperture for correct exposure.

This mode excels in capturing fast-action shots (high shutter speed) or creating intentional motion blur (low shutter speed). The manual clarifies how shutter speed impacts image brightness and offers creative possibilities, balancing control and automation.

Manual Mode (M) for Full Control

The Panasonic Lumix DMC-FZ300’s Manual Mode (M), thoroughly explained in the camera’s manual, grants photographers complete control over both aperture and shutter speed. This mode allows precise exposure adjustments, essential for challenging lighting conditions or specific creative visions.

The manual details how to balance aperture and shutter speed for desired effects, emphasizing the interplay between ISO, aperture, and shutter speed. Mastering Manual Mode unlocks the camera’s full potential, offering unparalleled artistic freedom.

Focusing and Image Stabilization

The DMC-FZ300 manual details autofocus modes, manual focus operation, and utilizing the Hybrid O.I.S. for sharp, clear images, minimizing blur effectively.

Autofocus Modes and Settings

The Panasonic Lumix DMC-FZ300 manual thoroughly explains various autofocus (AF) modes, crucial for capturing sharp images. It details single AF for still subjects, continuous AF for tracking moving objects, and AF point selection options. Users can customize AF sensitivity and utilize face/eye detection for portraits.

The manual also covers AF assist lamp settings, enhancing focusing in low-light conditions. Understanding these settings allows photographers to optimize autofocus performance based on the specific shooting scenario, ensuring consistently focused results. Explore the manual for detailed explanations and practical examples.

Manual Focus Operation

The Panasonic Lumix DMC-FZ300 manual provides detailed instructions on utilizing manual focus (MF). It explains how to switch the lens to MF mode and adjust focus using the focus ring. The manual highlights the benefits of MF for precise control, particularly in challenging situations where autofocus struggles.

It also describes focus peaking, a helpful feature that visually highlights in-focus areas on the screen. Mastering manual focus, guided by the manual, unlocks creative possibilities and ensures sharp images when autofocus isn’t ideal.

Utilizing the Hybrid O.I.S. (Optical Image Stabilization)

The Panasonic Lumix DMC-FZ300 manual thoroughly explains the Hybrid Optical Image Stabilization (O.I.S.) system. It details how O.I.S. minimizes blur caused by hand-shake, crucial for sharp images at longer zoom ranges or in low light. The manual clarifies different O.I.S. modes available – how to activate and deactivate it via the menu.

It also explains how O.I.S. works in conjunction with the camera’s image stabilization features, maximizing clarity and reducing motion blur for both stills and videos.

Advanced Shooting Techniques

The DMC-FZ300 manual details creative control modes, filters, and panorama features, empowering users to explore advanced photographic techniques for stunning results.

Using Zoom Effectively

The Panasonic Lumix DMC-FZ300 manual provides insights into maximizing the camera’s impressive 60x optical zoom. It explains techniques for achieving sharp images even at maximum zoom levels, emphasizing the importance of utilizing the Optical Image Stabilization (O.I.S.) feature. The manual details how to smoothly transition between zoom ranges during video recording and offers guidance on composing shots effectively while utilizing the zoom function. Understanding the zoom’s capabilities, as outlined in the manual, allows photographers to capture distant subjects with clarity and precision, enhancing their creative possibilities.

Creative Control Modes and Filters

The Panasonic Lumix DMC-FZ300 manual thoroughly explains the camera’s diverse Creative Control modes and filters. These tools allow users to easily achieve artistic effects, such as High Dynamic Range (HDR) for balanced exposure, and various filter options like Miniature, Film Grain, and Soft Focus. The manual details how each mode alters image characteristics, empowering photographers to experiment and personalize their shots. It guides users in selecting the appropriate settings for desired creative outcomes, enhancing photographic expression.

Panorama Mode

The Panasonic Lumix DMC-FZ300 manual provides detailed instructions on utilizing the camera’s Panorama Mode. This feature enables capturing expansive, wide-angle scenes by seamlessly stitching together multiple images. The manual explains the panning technique required for smooth panorama creation, ensuring minimal distortion. It also clarifies settings adjustments for optimal results, like sweep speed and image overlap. Users learn to create stunning panoramic photographs, perfect for landscapes and architectural scenes, directly from their DMC-FZ300.

Understanding the DMC-FZ300’s Manual

The DMC-FZ300 manual, available as a PDF, offers detailed information on all camera functions, troubleshooting, and advanced features for enhanced usability.

Navigating the PDF Manual

The Panasonic Lumix DMC-FZ300’s PDF manual is designed for easy access to information. Users can quickly jump to specific pages by clicking linked page numbers within the document. This feature streamlines the process of finding details on advanced functions or troubleshooting common issues.

The manual’s structure allows for efficient navigation, ensuring users can locate the necessary guidance promptly. It’s a valuable resource for maximizing the camera’s capabilities and resolving any operational questions.

Locating Specific Information

Within the Panasonic Lumix DMC-FZ300’s manual, finding precise details is simplified through its organized structure. The PDF allows users to directly access information on advanced features, offering a quick route to understanding complex settings.

Utilizing the linked page numbers, users can efficiently pinpoint sections addressing specific functions or troubleshooting steps. This targeted approach ensures swift resolution of queries and maximizes the camera’s potential.

Troubleshooting Common Issues using the Manual

The Panasonic Lumix DMC-FZ300’s manual serves as a valuable resource for resolving typical problems. It provides detailed guidance for issues like camera malfunctions or image quality concerns, offering step-by-step solutions.

Users can quickly identify potential causes and implement recommended fixes, minimizing downtime and ensuring continued operation. The manual’s troubleshooting section empowers users to self-resolve common difficulties, enhancing their overall experience.

DMC Thread and Patterns (Related to DMC Brand)

DMC boasts a rich history of quality thread production since 1898 in Mulhouse, France, and offers convenient pattern kits with pre-calculated thread amounts.

DMC’s History and Quality

DMC, a name synonymous with embroidery, carries a remarkable legacy dating back to 1792, though its thread production truly began in 1898 within a dedicated factory in Mulhouse, France – a location still active today. This enduring commitment to a single manufacturing site speaks volumes about their dedication to consistent quality control.

The brand is deeply woven into the fabric of its community, with many residents proudly connected to the company’s history. DMC’s thread isn’t just a product; it’s a piece of heritage, representing generations of craftsmanship and a steadfast pursuit of excellence in every strand.

Finding Patterns Compatible with DMC Thread

DMC simplifies project beginnings with readily available patterns. Users can easily select a desired pattern and then utilize the convenient “Make it a Kit” feature. This tool automatically calculates the precise shades and quantities of DMC thread needed to perfectly recreate the chosen design, streamlining the preparation process.

For those who already possess thread, a “Pattern Only” option allows for instant download and home printing, offering flexibility and immediate access to creative inspiration.

Using the “Make it a Kit” Feature

DMC’s “Make it a Kit” function is a valuable tool for crafters. After selecting a pattern, this feature pre-calculates the exact DMC thread shades and quantities required for completion. This eliminates guesswork and ensures you have everything needed to bring your chosen design to life, saving time and reducing potential errors.

It’s a convenient way to gather all materials in one go, simplifying project preparation and enhancing the crafting experience.

Connectivity and Data Transfer

The DMC-FZ300 facilitates data transfer via USB to computers and offers wireless connectivity through Wi-Fi, utilizing the Panasonic Image App for convenience.

Connecting to a Computer via USB

To connect your Panasonic Lumix DMC-FZ300 to a computer using a USB cable, ensure the camera is powered off. Then, connect the USB cable to the camera’s USB port and the computer’s USB port. Power on the camera; it should appear as a removable drive on your computer.

You can then transfer images and videos directly. The manual provides detailed instructions for selecting the correct USB connection mode (Mass Storage or MTP) for compatibility with different operating systems, ensuring seamless data transfer and accessibility;

Wireless Connectivity (Wi-Fi)

The Panasonic Lumix DMC-FZ300 offers convenient Wi-Fi connectivity for transferring images wirelessly to smartphones or tablets. The camera’s manual details how to connect to a Wi-Fi network, utilizing the Panasonic Image App for simplified control and sharing.

This app allows remote shooting, image browsing, and direct uploading to social media platforms. Detailed steps within the manual guide users through the setup process, ensuring a stable connection and optimal wireless functionality.

Using the Panasonic Image App

The Panasonic Image App, detailed in the DMC-FZ300 manual, facilitates seamless wireless control and image transfer. It enables remote shooting, adjusting camera settings from your smartphone, and instantly viewing captured photos.

The manual provides step-by-step instructions for pairing the camera with the app via Wi-Fi, ensuring a stable connection. Users can also easily share images directly to social media or cloud storage services, streamlining their workflow.

Maintenance and Care

The DMC-FZ300 manual stresses regular lens and body cleaning, proper battery storage, and keeping the camera’s firmware updated for peak performance.

Cleaning the Lens and Body

According to the DMC-FZ300 manual, maintaining a clean lens is crucial for optimal image quality. Use a blower to remove loose dust and debris first. For fingerprints or smudges, gently wipe with a soft, lint-free cloth.

Avoid harsh chemicals or abrasive cleaners, as these can damage the lens coating. The camera body should also be cleaned with a soft, dry cloth. Be particularly careful around ports and buttons.

Regular cleaning prevents dust buildup and ensures the longevity of your Panasonic Lumix DMC-FZ300.

Battery Care and Storage

The DMC-FZ300 manual emphasizes proper battery handling for extended lifespan. Avoid extreme temperatures – don’t leave the battery in direct sunlight or freezing conditions. Fully charge the battery before initial use and after prolonged storage.

When storing for extended periods, discharge the battery to around 50% to prevent degradation. Remove the battery from the camera if it won’t be used for a while.

Only use the specified Panasonic charger to avoid damage.

Firmware Updates

The DMC-FZ300 manual advises checking the Panasonic website regularly for firmware updates. These updates can improve camera performance, add new features, and fix potential bugs. Download the latest firmware to a compatible SD card, following the instructions in the manual carefully.

Ensure the camera has sufficient battery charge during the update process.

Interrupting the update can cause serious damage, rendering the camera unusable, so follow the steps precisely as outlined in the official documentation.

Troubleshooting Common Problems

The DMC-FZ300 manual provides solutions for issues like the camera not powering on, image quality problems, and focusing difficulties, aiding quick resolution.

Camera Not Turning On

If your Panasonic Lumix DMC-FZ300 fails to power on, the official manual suggests checking the battery charge first. Ensure it’s fully charged and correctly inserted. Verify the power switch is in the ‘ON’ position.

Consult the manual’s troubleshooting section for further guidance, including checking the SD card and attempting a reset. If problems persist, the manual directs users to Panasonic’s support resources for assistance, potentially indicating a hardware issue requiring professional attention.

Image Quality Issues

Should your Panasonic Lumix DMC-FZ300 produce unsatisfactory images, the manual recommends reviewing your shooting settings. Check the resolution, ISO sensitivity, and white balance. Ensure the lens is clean and free of smudges.

The manual details how to adjust these parameters for optimal results. It also suggests examining the SD card for potential errors. For persistent issues, consult the manual’s troubleshooting section or Panasonic’s support for further assistance.

Focusing Problems

If you experience difficulty achieving sharp focus with your DMC-FZ300, the manual advises checking your autofocus mode. Experiment with different AF modes – single, continuous, or manual – to suit your subject. Verify sufficient lighting, as low light can hinder autofocus performance.

The manual explains how to utilize focus area settings and manual focus override. If problems persist, consult the troubleshooting section for detailed guidance and potential solutions.

Appendix

The DMC-FZ300’s manual provides detailed technical specifications, warranty details, and links to Panasonic’s support resources for further assistance and information.

Technical Specifications (Detailed)

The Panasonic Lumix DMC-FZ300’s detailed specifications include a 12.1MP 1/2.3-inch CMOS sensor, a 25-600mm (equivalent) zoom lens with 5x optical zoom, and 4K video recording capabilities. It features Hybrid O.I.S. for image stabilization, a 3-inch LCD screen, and Wi-Fi connectivity. The camera supports SD/SDHC/SDXC memory cards and boasts a fast autofocus system. Its ISO range extends up to 6400, and it offers various shooting modes for diverse photographic needs, all thoroughly explained within the comprehensive manual.

Warranty Information

The Panasonic Lumix DMC-FZ300 is covered by a standard one-year limited warranty against defects in materials and workmanship from the date of original purchase. This warranty doesn’t cover damage from misuse, accidents, or unauthorized repairs. Refer to the included warranty card or Panasonic’s website for complete details, terms, and conditions. The manual provides guidance on registering your product to ensure warranty coverage and access to support services.

Resources and Support Links

For the Panasonic Lumix DMC-FZ300, comprehensive resources are readily available online. Panasonic’s official support website offers downloadable manuals, FAQs, and troubleshooting guides. Users can access the PDF manual directly from Panasonic’s site. Additionally, online forums and communities dedicated to photography provide valuable tips and assistance. The official Rowan website (linked to DMC) offers inspiration and product details, while the Panasonic Image App enhances connectivity.

manual for living

Life’s complexities demand guidance; a “manual” offering philosophical insights from various traditions, like those explored by Baggini, provides a framework for navigating existence.

Why We Seek Guidance

Humans inherently grapple with fundamental questions about how to live a meaningful life, a pursuit documented throughout history. The desire for a “manual,” as highlighted in Baggini’s work, stems from a recognition that life isn’t straightforward. We seek direction when facing uncertainty, adversity, or simply the overwhelming nature of existence.

Philosophical texts, like those of Epictetus, offer pragmatic reflections on serenity and joy, providing tools for navigating challenges. This search isn’t about finding easy answers, but rather a framework for thoughtful consideration and informed decision-making, acknowledging life’s inherent complexities and the absence of a pre-defined path.

The Limitations of Traditional Advice

Conventional wisdom often falls short when confronting life’s nuanced challenges. While well-intentioned, traditional advice can be overly simplistic or culturally bound, failing to address individual circumstances. Baggini’s “Life: A User’s Manual” acknowledges this, presenting philosophical perspectives as starting points for personal exploration, not prescriptive rules.

Furthermore, readily available self-help often lacks the depth and critical thinking fostered by philosophical inquiry. A manual grounded in ancient wisdom, like Stoicism or Epicureanism, encourages a deeper understanding of values and principles, moving beyond superficial solutions and promoting lasting well-being.

Part 1: Foundational Philosophies

Exploring Stoicism, Epicureanism, and Greek thought provides essential frameworks for a fulfilling life, offering timeless wisdom as presented in Baggini’s comprehensive guide.

Stoicism: Embracing Virtue and Acceptance

Stoicism, as a pragmatic guide to serenity, emphasizes focusing on what we can control – our thoughts and actions – and accepting what we cannot, mirroring Epictetus’ teachings. This philosophy isn’t about suppressing emotions, but understanding their source and responding with reason.

The Dichotomy of Control is central; distinguishing between internal and external factors allows for peace. Negative Visualization, contemplating potential setbacks, prepares us for adversity and diminishes its sting. Stoicism, presented in modern manuals, offers a robust toolkit for navigating life’s inevitable challenges with resilience and virtue, fostering inner peace amidst chaos.

The Dichotomy of Control

Central to Stoic practice, the Dichotomy of Control distinguishes between elements within our power – our judgments, values, and efforts – and those outside it, like external events or others’ actions. Focusing energy solely on the controllable fosters tranquility and reduces frustration.

Attempting to control the uncontrollable leads to suffering; acceptance, however, doesn’t imply passivity. Instead, it frees us to act virtuously within our sphere of influence. This principle, highlighted in Epictetus’ work, provides a practical framework for navigating life’s uncertainties and cultivating inner resilience, a cornerstone of a well-lived life.

Practicing Negative Visualization

A Stoic technique, negative visualization involves contemplating potential setbacks – loss, illness, or disappointment – not to dwell on negativity, but to appreciate present blessings and diminish their emotional sting. By mentally preparing for adversity, we lessen its impact when it inevitably arrives.

This isn’t pessimism; it’s pragmatic realism. Imagining the loss of something valued highlights its importance, fostering gratitude. It also reduces the fear of future misfortune, allowing for a more serene and accepting approach to life’s inherent uncertainties, ultimately contributing to a more robust and peaceful existence.

Epicureanism: The Pursuit of Tranquility

Contrary to popular belief, Epicureanism isn’t about hedonistic indulgence. It centers on ataraxia – freedom from disturbance – and aponia – the absence of physical pain. True pleasure, for Epicurus, arises from prudence, friendship, and a simple life. Avoiding pain, both physical and mental, is paramount.

This philosophy emphasizes minimizing suffering through careful choices and cultivating strong social bonds. It’s about discerning which desires are natural and necessary, and which are vain and ultimately lead to dissatisfaction. Tranquility isn’t found in excess, but in moderation and contentment.

Understanding Pleasure and Pain

Epicureanism distinguishes between different types of pleasure and pain. Natural and necessary pleasures, like food and shelter, should be satisfied moderately. Natural but unnecessary pleasures, like luxurious meals, should be enjoyed with restraint. Vain pleasures, such as wealth and fame, are to be avoided as they bring anxiety.

Pain, similarly, is categorized. Physical pain is unavoidable, but mental anguish stems from false beliefs and fears – particularly the fear of death and the gods. By understanding the nature of pleasure and pain, and by minimizing unnecessary suffering, one can achieve a state of lasting tranquility and contentment, the ultimate Epicurean goal.

The Importance of Friendship

Epicurean philosophy elevates friendship to a paramount virtue, considering it a crucial component of a happy life. Friendship isn’t merely enjoyable; it provides security, trust, and mutual support, diminishing anxieties and fostering a sense of belonging. Genuine friends offer honest feedback and shared experiences, enriching one’s existence.

Epicurus believed that having a circle of reliable friends is more valuable than any material possession or social status. These relationships offer a safe haven from the uncertainties of life, allowing individuals to navigate challenges with greater resilience and find deeper meaning in their daily experiences.

Ancient Greek Philosophy: Socrates and Plato

Ancient Greek thinkers, particularly Socrates and Plato, laid foundational stones for ethical living. Their inquiries into virtue, justice, and the ideal state continue to resonate today. Socrates’ relentless questioning – the Socratic Method – encourages critical self-examination, challenging assumptions and pursuing truth through dialogue.

Plato, Socrates’ student, expanded upon these ideas with his Theory of Forms, positing a realm of perfect ideals that shape our imperfect reality. Understanding these forms, and striving towards them, provides a moral compass for navigating life’s complexities and achieving a fulfilling existence.

The Socratic Method

The Socratic Method isn’t about imparting answers, but cultivating self-awareness through rigorous questioning. It’s a process of dismantling preconceived notions and exposing underlying contradictions in beliefs. This relentless inquiry, though potentially unsettling, is crucial for genuine understanding and ethical decision-making.

Applying this method to personal challenges – asking “why” repeatedly, examining assumptions, and considering alternative perspectives – functions as a powerful tool for self-improvement. It’s a dynamic approach to problem-solving, fostering intellectual humility and a commitment to lifelong learning, essential components of a well-lived life.

Plato’s Theory of Forms

Plato’s Theory of Forms posits a realm of perfect, eternal archetypes underlying the imperfect, transient world we perceive. While abstract, this concept offers a framework for striving towards ideals – justice, beauty, goodness – rather than settling for flawed imitations. Recognizing the limitations of the material world encourages a focus on cultivating inner virtues.

For a “manual for living,” this translates to seeking principles beyond fleeting pleasures or societal norms. It suggests aligning oneself with these higher Forms, pursuing knowledge and wisdom as pathways to a more meaningful and fulfilling existence, transcending the everyday.

Part 2: Navigating Life’s Challenges

Life inevitably presents adversity; philosophical tools, like Stoicism and understanding emotional regulation, offer resilience and meaning amidst suffering, aiding practical living.

Dealing with Adversity

Life’s inherent challenges necessitate robust coping mechanisms. Drawing from philosophical traditions, particularly Stoicism as presented in Epictetus’s work, we can cultivate resilience. This isn’t about avoiding suffering, but rather altering our relationship to it.

The concept of post-traumatic growth suggests adversity can foster positive change. Finding meaning within suffering, rather than simply enduring it, becomes paramount. A pragmatic approach, focusing on what we can control – our responses – is key. Baggini’s “Life: A Users Manual” emphasizes this search for guidance, offering perspectives to navigate difficult times and build inner strength.

Resilience and Post-Traumatic Growth

Adversity, while painful, can be a catalyst for profound personal evolution. Resilience isn’t simply bouncing back, but adapting and growing through hardship. Post-traumatic growth acknowledges that suffering can lead to increased strength, deeper appreciation, and a renewed sense of purpose.

Philosophical frameworks, like Stoicism, offer tools to cultivate this resilience. By focusing on internal virtue and accepting what lies beyond our control, we lessen suffering’s grip. Baggini’s work highlights the enduring relevance of these ancient philosophies in modern life, providing a “manual” for navigating challenges and fostering positive transformation.

Finding Meaning in Suffering

The human experience inevitably includes suffering, but its meaning isn’t inherent; it’s constructed. Philosophers throughout history have grappled with this question, seeking ways to reconcile pain with a purposeful life. Rather than avoiding hardship, a “manual for living” encourages us to explore its potential for growth.

Baggini’s compilation of philosophical wisdom suggests that meaning can be found through values, connection, and contribution. Even in the face of adversity, identifying what truly matters and acting in accordance with those principles can transform suffering into a source of strength and wisdom, echoing Epictetus’ teachings.

Managing Emotions

Emotions are integral to the human experience, yet often feel overwhelming. A “manual for living,” drawing on philosophical insights, doesn’t advocate for emotional suppression, but rather for understanding and regulation. Recognizing the origins and impact of our feelings is the first step towards skillful management.

This involves cultivating self-awareness and employing techniques like mindfulness – observing emotions without judgment. Philosophical frameworks, such as Stoicism, offer strategies for detaching from reactive impulses and responding with reason. Ultimately, emotional intelligence is key to navigating life’s challenges with serenity and joy.

Understanding Emotional Regulation

Emotional regulation isn’t about eliminating feelings, but about responding to them adaptively. It’s the ability to manage the intensity and duration of emotional experiences, preventing them from overwhelming us. This skill involves recognizing emotional triggers and developing coping mechanisms.

Philosophical approaches, like those found in Epictetus’ teachings, emphasize focusing on what we can control – our reactions – rather than external events. Techniques include cognitive reappraisal (reframing thoughts) and practicing self-compassion. Mastering emotional regulation fosters resilience and enhances overall well-being, contributing to a more peaceful existence.

The Role of Mindfulness

Mindfulness, a core practice for emotional well-being, involves paying attention to the present moment without judgment. It’s about observing thoughts and feelings as they arise, acknowledging them without getting carried away. This practice, rooted in Eastern philosophies, aligns with the Stoic emphasis on accepting what is.

Cultivating mindfulness helps us detach from rumination and worry, fostering a sense of calm and clarity; Regular practice can enhance self-awareness, allowing us to respond to challenges with greater equanimity. It’s a powerful tool for navigating life’s inevitable difficulties, promoting inner peace and resilience.

Relationships and Social Connection

Human beings are inherently social creatures, and strong relationships are vital for a fulfilling life. Philosophy emphasizes the importance of empathy – understanding and sharing the feelings of others – as a cornerstone of healthy interactions. Building healthy boundaries is equally crucial, defining what we are comfortable with and communicating those needs effectively.

Epicureanism highlights the value of friendship, recognizing it as a significant source of pleasure and tranquility. Nurturing these connections requires effort, honesty, and a willingness to compromise. Meaningful relationships provide support, belonging, and a sense of purpose, enriching our overall well-being.

Building Healthy Boundaries

Establishing firm yet flexible boundaries is essential for protecting your emotional and mental well-being. This involves recognizing your own limits – what you’re comfortable with and what depletes your energy – and communicating those needs assertively. Boundaries aren’t about building walls, but about defining where you end and another person begins.

Healthy boundaries foster mutual respect in relationships. Learning to say “no” without guilt, and to prioritize self-care, are vital skills. It’s about acknowledging your own value and refusing to accept treatment that undermines it. This proactive approach cultivates healthier, more balanced connections.

The Importance of Empathy

Empathy, the ability to understand and share the feelings of another, is a cornerstone of meaningful human connection. It moves beyond simple sympathy, requiring genuine effort to see the world from another’s perspective. Cultivating empathy strengthens relationships, fostering trust and compassion;

A life guided by empathy reduces conflict and promotes understanding. It allows for more effective communication and collaboration, as you’re better equipped to anticipate and respond to others’ needs. Recognizing shared humanity, even amidst disagreement, builds bridges and creates a more harmonious existence, enriching both individual lives and society.

Part 3: Practical Tools for Living

Applying philosophical principles requires actionable strategies; goal setting, rational decision-making, and habit formation offer tangible methods for a more purposeful life.

Goal Setting and Purpose

Establishing a meaningful existence necessitates identifying core values and aligning actions with them. This process, akin to crafting a “life plan,” moves beyond superficial desires.

Philosophical inquiry, as presented in resources like Baggini’s work, encourages introspection to uncover what truly matters. It’s about defining a personal philosophy—a guiding principle—rather than simply chasing external achievements.

A purposeful life isn’t a destination but a continuous journey of self-discovery and deliberate action. It requires consistent evaluation and adjustment, ensuring goals remain aligned with evolving values and a broader sense of meaning.

Identifying Your Values

Uncovering your fundamental values is paramount to purposeful living, forming the bedrock of authentic decision-making. This introspective process, highlighted in philosophical guides, demands honest self-assessment.

Consider what principles consistently guide your choices, even when unobserved. What qualities do you admire in others? What activities bring genuine fulfillment, beyond fleeting pleasure? These reflections reveal core values.

Values aren’t merely abstract ideals; they are actionable principles. Identifying them allows for the creation of a “meaningful life plan,” as suggested by Baggini, ensuring alignment between aspirations and deeply held beliefs.

Creating a Meaningful Life Plan

A life plan, rooted in identified values, transcends simple goal-setting; it’s a roadmap towards a fulfilling existence. This isn’t about rigid adherence, but a flexible framework guiding choices, acknowledging life’s unpredictable nature.

Consider long-term aspirations alongside daily actions. How can your skills and passions contribute to something larger than yourself? Baggini’s work emphasizes that life isn’t a straight path, so adaptability is key.

Regularly revisit and refine your plan, ensuring it remains aligned with evolving values and circumstances. A meaningful life isn’t found, it’s actively constructed.

Decision Making

Effective decision-making balances rationality and intuition, recognizing both have limitations. While logical analysis is crucial, dismissing gut feelings entirely can be detrimental. A “manual for living” encourages self-awareness regarding personal biases.

Be mindful of cognitive biases – systematic patterns of deviation from norm or rationality in judgment. These can cloud objectivity, leading to suboptimal choices.

Consider potential consequences, not just immediate outcomes; Philosophical frameworks offer tools for evaluating options, promoting thoughtful deliberation, and ultimately, more informed decisions aligned with core values.

Rationality vs. Intuition

A balanced approach to decision-making necessitates acknowledging both rationality and intuition. Purely rational choices, while seemingly logical, can overlook crucial emotional or contextual factors. Conversely, relying solely on intuition risks impulsivity and neglecting careful consideration.

The “manual for living” suggests viewing these not as opposing forces, but as complementary modes of thought. Rationality provides structure and analysis, while intuition offers quick assessments based on experience.

Cultivating self-awareness allows discerning when to prioritize logic and when to trust instinctive responses, leading to more holistic and effective judgments.

Avoiding Cognitive Biases

Our minds are prone to systematic errors in thinking – cognitive biases – that distort reality and impair sound judgment. Recognizing these biases is crucial for effective decision-making, a core tenet of a “manual for living.”

Confirmation bias, for example, leads us to favor information confirming existing beliefs, while anchoring bias causes over-reliance on initial data. Awareness of such pitfalls allows for more objective evaluation.

Actively seeking diverse perspectives, questioning assumptions, and employing critical thinking skills are vital strategies for mitigating the influence of these inherent mental shortcuts.

Self-Improvement and Growth

A fulfilling life isn’t static; it demands continuous self-improvement and personal growth. This involves cultivating positive habits, breaking detrimental ones, and embracing lifelong learning – essential components of a practical “manual for living.”

The power of habit, as understood through philosophical and psychological lenses, highlights the importance of consistent action. Small, incremental changes accumulate over time, leading to significant transformation.

Furthermore, a commitment to continuous learning expands our understanding of ourselves and the world, fostering adaptability and resilience in the face of life’s inevitable challenges.

The Power of Habit

Habits, both constructive and destructive, profoundly shape our daily lives and ultimately define our character. Understanding their formation and leveraging their power is crucial for self-improvement, a cornerstone of any effective “manual for living.”

Philosophical traditions emphasize the importance of intentional action. By consciously cultivating positive habits – routines aligned with our values – we gradually build a life of virtue and purpose.

Conversely, recognizing and breaking negative habits requires self-awareness and disciplined effort. This process, though challenging, unlocks the potential for lasting personal growth and well-being.

Continuous Learning

A truly fulfilling life isn’t about reaching a destination, but embracing a journey of perpetual growth and discovery. Continuous learning, therefore, forms a vital component of any practical “manual for living,” fostering adaptability and resilience in a constantly evolving world.

Philosophical inquiry encourages questioning assumptions and seeking deeper understanding. This intellectual curiosity fuels personal development and broadens our perspectives.

Engaging with new ideas, whether through formal education, reading, or simply open-minded conversation, expands our capacity for wisdom and allows us to navigate life’s complexities with greater clarity.

Part 4: Philosophical Perspectives on Modern Life

Modernity presents unique challenges; applying ancient wisdom—considering technology’s impact and the pursuit of happiness—becomes crucial for a virtuous 21st-century existence.

Technology and its Impact

The relentless advance of technology profoundly reshapes modern life, demanding philosophical scrutiny. While offering unprecedented connectivity and access to information, it simultaneously presents novel challenges to well-being and authentic living. Consider the potential for distraction, the erosion of privacy, and the cultivation of superficial relationships.

Philosophical frameworks, such as Stoicism’s emphasis on inner resilience, can provide a counterbalance to technology’s external pressures. Cultivating mindful engagement—intentionally choosing how and when to interact with technology—becomes paramount. The key lies not in rejecting technology outright, but in harnessing its power responsibly, ensuring it serves human flourishing rather than diminishing it.

The Search for Happiness

The pursuit of happiness is a central human endeavor, yet its nature remains elusive. Ancient philosophies offer diverse perspectives. Epicureanism emphasizes tranquility through minimizing pain and cultivating simple pleasures, while Stoicism locates happiness in virtue and acceptance of what we cannot control.

Modern life often equates happiness with external achievements – wealth, status, possessions – a path prone to disappointment. A “manual for living” encourages introspection: defining happiness on your terms, aligning actions with values, and fostering meaningful connections. True contentment isn’t a destination, but a byproduct of a well-lived, purposeful life.

Living a Virtuous Life in the 21st Century

Applying ancient virtues to modern challenges requires careful consideration. Epictetus’s teachings, as presented in “A Manual for Living,” remain remarkably relevant, urging focus on what lies within our control – our thoughts and actions.

Navigating a world of rapid technological change and complex social issues demands ethical grounding. Cultivating virtues like honesty, compassion, and resilience becomes paramount. A “manual” isn’t about rigid rules, but about developing a moral compass to guide decisions, fostering integrity, and contributing positively to a rapidly evolving society.

abbott id now user manual pdf

Abbott ID NOW User Manual PDF: A Comprehensive Guide

Abbott provides a detailed ID NOW instrument user manual and quick start guide, often accessible via a USB drive, offering comprehensive instructions for operation.

The ID NOW platform represents a significant advancement in rapid molecular diagnostics, offering a streamlined approach to infectious disease detection. This instrument-based system utilizes isothermal technology for quick, qualitative results. Abbott designed it for ease of use, providing a pathway for rapid identification directly at the point of care. Accessing the ID NOW instrument user manual is crucial for understanding its capabilities and ensuring accurate operation. The system’s design aims to minimize complexity while maximizing speed and reliability, supporting timely clinical decisions.

Understanding the ID NOW Platform Technology

The ID NOW platform employs isothermal nucleic acid amplification technology, differing from traditional PCR methods. This innovative approach simplifies the process, eliminating the need for thermal cycling and reducing testing time. The system rapidly detects target molecules, providing results within minutes. Understanding this core technology, detailed within the ID NOW instrument user manual, is vital for interpreting results accurately. Mutations within target regions can potentially affect primer binding, impacting test performance, as outlined in available documentation.

Accessing the ID NOW User Manual PDF

Abbott typically provides the ID NOW instrument user manual in PDF format, often distributed on a dedicated USB drive accompanying the instrument itself. Users can also potentially access it through Abbott’s support channels or authorized distributors. Referencing the manual is crucial for proper setup, operation, and troubleshooting. Always ensure you have the latest version for accurate instructions and to understand potential limitations, including those related to viral mutations affecting test accuracy.

System Components and Overview

The ID NOW system is an instrument-based platform designed for rapid, isothermal detection of infectious diseases. Key components include the ID NOW instrument itself and specialized ID NOW cartridges. These cartridges contain all necessary reagents for testing. A network connection is also vital for data management, often utilizing AEGISPOC. Understanding these components, as detailed in the user manual, is essential for successful operation and accurate result interpretation.

ID NOW Instrument

The ID NOW instrument is the core of the system, facilitating rapid molecular testing. It’s designed for ease of use, but proper setup and maintenance, as outlined in the user manual, are crucial. The instrument processes ID NOW cartridges, delivering qualitative results. Abbott recommends utilizing the provided USB drive for software updates and accessing comprehensive operational instructions. Regular cleaning and adherence to guidelines ensure optimal performance and reliability.

ID NOW Cartridges

ID NOW cartridges are single-use, self-contained units crucial for sample processing and analysis. The user manual details proper cartridge handling, loading procedures, and interpretation of results. These cartridges contain all necessary reagents for isothermal amplification and detection. Understanding potential limitations, such as those related to viral mutations affecting primer binding, is vital for accurate testing. Always refer to the manual for specific assay instructions and quality control guidelines.

Setting Up the ID NOW Instrument

The ID NOW instrument setup, as detailed in the user manual, involves initial configuration and network connectivity. Proper network connection is essential for data reporting to EMR/LIS/HIS systems like AEGISPOC. The manual guides administrators through the process, recommending logging out when setup or testing isn’t immediately possible. Following these instructions ensures optimal performance and compliance with regulatory requirements, as outlined by Abbott Diagnostics Scarborough, Inc.

Initial Instrument Setup

The ID NOW instrument’s initial setup, thoroughly explained in the user manual, prepares the system for operation. This includes unpacking, physical placement, and powering on the device. Administrators should carefully follow the provided steps to ensure correct functionality. The manual emphasizes the importance of adhering to established protocols before proceeding to network connection and test execution, guaranteeing accurate results and system reliability as per Abbott’s guidelines.

Network Connection and Requirements

Establishing a network connection for the ID NOW instrument, detailed in the user manual, is crucial for data reporting to EMR/LIS/HIS systems like AEGISPOC. The manual outlines specific requirements, ensuring seamless integration and data transfer. Proper network configuration allows for efficient result management and adherence to regulatory standards. Abbott emphasizes secure connectivity for reliable operation and data integrity, vital for accurate patient diagnosis and tracking.

Running a Test with ID NOW

The ID NOW user manual provides step-by-step guidance for test execution, covering both sample collection procedures and cartridge operation. It’s essential to follow these instructions precisely for accurate results. The manual details proper handling to avoid contamination and ensure sample integrity. Users must adhere to the outlined protocols for cartridge loading and instrument interaction, maximizing the system’s performance and reliability for rapid, qualitative infectious disease detection.

Sample Collection Procedures

The ID NOW user manual emphasizes meticulous sample collection, crucial for reliable test outcomes. It details appropriate specimen types and collection methods, stressing the importance of avoiding contamination. Proper handling and storage are outlined to maintain sample integrity before analysis. Following these procedures, as detailed in the manual, minimizes the risk of inaccurate results and ensures optimal performance of the ID NOW platform for rapid infectious disease detection.

Cartridge Loading and Operation

The Abbott ID NOW user manual provides step-by-step guidance on cartridge loading, a critical process for accurate testing. It details proper cartridge insertion into the instrument, ensuring secure connection. The manual clearly explains the automated operation sequence initiated after loading, including the isothermal amplification process. Following these instructions precisely, as outlined in the manual, guarantees optimal cartridge performance and reliable, rapid detection of target analytes within the ID NOW system.

Interpreting Test Results

The Abbott ID NOW user manual emphasizes careful result interpretation. It details how to differentiate between positive, negative, and invalid test outcomes, providing clear explanations for each. Understanding result reporting is crucial; the manual outlines the specific data displayed and its significance. It also acknowledges potential limitations, like mutations affecting detection, and stresses that the test cannot definitively rule out infection, as detailed within the comprehensive ID NOW documentation.

Positive, Negative, and Invalid Results

The Abbott ID NOW user manual thoroughly explains interpreting results. A positive result indicates the presence of the target analyte, while a negative result suggests its absence. However, the manual cautions that a negative result doesn’t eliminate infection. Invalid results, often due to procedural errors, require retesting. Detailed troubleshooting guides within the ID NOW documentation assist in identifying causes and ensuring accurate interpretations, referencing the full instrument user manual for complete guidance.

Understanding Result Reporting

The Abbott ID NOW user manual details comprehensive result reporting procedures, often integrating with EMR/LIS/HIS systems via network connection (AEGISPOC). Reporting includes clear identification of positive, negative, and invalid test outcomes. The manual emphasizes adherence to regulatory guidelines and proper documentation. Users should consult the full ID NOW instrument user manual for specific reporting formats and data transmission protocols, ensuring accurate and compliant record-keeping for patient care and laboratory workflows.

Quality Control Procedures

The Abbott ID NOW user manual stresses the importance of rigorous quality control (QC) testing to ensure accurate and reliable results. Regular QC tests, as outlined in the manual, help validate instrument performance and identify potential issues. Detailed procedures for running QC tests and troubleshooting failures are provided. Abbott recommends following these guidelines meticulously, as mutations can impact test accuracy, and proper QC is vital for maintaining laboratory standards.

Running Quality Control Tests

The Abbott ID NOW user manual details specific procedures for executing quality control tests, crucial for verifying system functionality. These tests involve utilizing designated QC materials and following precise steps for cartridge loading and operation. The manual emphasizes documenting all QC results meticulously. Any deviation from expected values necessitates immediate troubleshooting, guided by the manual’s comprehensive error resolution section, ensuring consistent and dependable performance of the ID NOW platform.

Troubleshooting QC Failures

The Abbott ID NOW user manual provides a dedicated section for addressing quality control failures, outlining systematic steps for investigation. It directs users to re-run tests with fresh QC materials, verify instrument settings, and examine cartridge integrity. If failures persist, the manual advises checking for potential issues like improper storage or expired reagents. Detailed error code explanations and recommended corrective actions are included, ensuring users can effectively resolve QC issues and maintain reliable test results.

Maintenance and Cleaning

The Abbott ID NOW user manual emphasizes routine maintenance for optimal performance. It details specific cleaning procedures for the instrument’s internal components, requiring approved disinfectants to prevent contamination. Regular tasks include wiping down external surfaces and inspecting the sample chamber. The manual stresses the importance of adhering to the recommended cleaning schedule to ensure accurate results and prolong the instrument’s lifespan, safeguarding against potential malfunctions and maintaining operational efficiency.

Routine Maintenance Tasks

The Abbott ID NOW user manual outlines daily and weekly maintenance checks. Daily tasks involve visually inspecting the instrument for damage and cleaning the exterior surfaces. Weekly routines include checking fluid levels and performing a system check as detailed in the manual. Proper adherence to these tasks, utilizing approved cleaning agents, ensures consistent performance and minimizes potential errors, contributing to reliable test results and extending the instrument’s operational life.

Cleaning the ID NOW Instrument

The Abbott ID NOW user manual emphasizes regular cleaning with approved disinfectants to maintain optimal performance. Exterior surfaces should be wiped down daily, while internal components require periodic cleaning as specified. Avoid abrasive cleaners or excessive moisture. The manual details specific cleaning procedures for potential spills and contamination, ensuring accurate results and preventing instrument damage. Following these guidelines is crucial for laboratory safety and reliable operation of the ID NOW system.

Troubleshooting Common Issues

The Abbott ID NOW user manual provides extensive troubleshooting guidance for error messages and test failures. Common issues include cartridge errors, instrument communication problems, and invalid results. The manual directs users to specific solutions, ranging from restarting the instrument to checking network connections. It also addresses potential causes of test failures, like improper sample collection or mutations affecting detection. Referencing the manual’s detailed error code explanations is vital for efficient problem resolution.

Error Messages and Solutions

The Abbott ID NOW user manual meticulously details each error message displayed by the instrument. Solutions range from simple fixes, like re-seating the cartridge, to more complex troubleshooting steps involving network verification or contacting Abbott support. The manual emphasizes understanding the specific error code to pinpoint the issue. Common errors relate to cartridge recognition, temperature control, or communication failures, each with a prescribed corrective action outlined for users.

Addressing Test Failures

The Abbott ID NOW user manual provides a structured approach to addressing test failures, starting with repeating the test using a new cartridge and sample. It highlights potential causes like insufficient sample volume or improper cartridge loading. The manual stresses the importance of reviewing quality control results and considering potential mutations within the target regions, which could affect detection. If failures persist, users are directed to consult the troubleshooting guide or contact Abbott’s technical support for assistance.

Limitations of the ID NOW Test

The Abbott ID NOW user manual clearly outlines test limitations, emphasizing potential for false negatives due to viral mutations impacting primer/probe binding. It acknowledges the test cannot definitively rule out infection. Factors like sample collection technique and storage can affect accuracy. The manual advises users that, as with all molecular tests, results must be interpreted alongside clinical presentation and other diagnostic findings for comprehensive patient care and informed decisions.

Potential for False Negatives due to Mutations

The Abbott ID NOW user manual details how mutations within the virus’s target regions can hinder accurate detection. These changes may affect the primer and probe binding process, potentially leading to a false negative result. The manual stresses that viral evolution is ongoing, and new variants might emerge, impacting test performance. Therefore, negative results shouldn’t be solely relied upon, and clinical context is crucial for proper diagnosis.

Factors Affecting Test Accuracy

The Abbott ID NOW user manual highlights several factors influencing test accuracy. Proper sample collection is paramount; inadequate or improperly collected samples can yield inaccurate results. Adherence to specified storage and transport conditions is also critical. Furthermore, the manual emphasizes that, as with all molecular tests, the ID NOW test isn’t designed to rule out infection, and clinical judgment remains essential.

Regulatory Information and Compliance

The Abbott ID NOW system, as detailed in the user manual, operates under stringent regulatory guidelines. Abbott Diagnostics Scarborough, Inc. maintains compliance with relevant standards, ensuring the test’s reliability and validity. All trademarks referenced within the documentation are legally protected. The manual itself reflects Abbott’s commitment to adhering to industry regulations and providing a compliant diagnostic solution for infectious disease detection, as of 2021.

Contacting Abbott Support

For comprehensive assistance beyond the ID NOW user manual, Abbott provides dedicated support channels. Users encountering issues or requiring clarification on procedures should consult official Abbott resources. While specific contact details aren’t directly provided in the snippets, referencing the manual itself will likely contain avenues for technical support and customer service. Promptly addressing concerns ensures optimal system performance and accurate test results, vital for reliable diagnostics.

nec phone system manual

NEC Phone System Manual: A Comprehensive Guide

This manual details NEC’s diverse phone systems‚ from the DSX series to the advanced SV9100‚ covering installation‚ programming‚ troubleshooting‚ and maintenance procedures.

NEC phone systems represent a robust and versatile communication solution for businesses of all sizes. From small offices requiring a basic setup to large enterprises demanding advanced features‚ NEC offers a scalable range of systems. This introduction provides a foundational understanding of NEC’s offerings‚ encompassing both digital and IP-based technologies. Key models include the DSX series (DSX-40‚ DSX-80‚ DSX-160)‚ the SL2100‚ the SV8100‚ and the flagship SV9100.

These systems support a wide array of digital telephones like the DT330‚ DT410‚ and DT430‚ alongside modern IP phones such as the DT700 and DT800 series. NEC’s commitment to innovation is evident in its soft-switch implementation with the SV7000. Understanding the core capabilities and compatibility of these systems is crucial for effective deployment and ongoing management. This guide will navigate you through the intricacies of NEC phone systems‚ ensuring optimal performance and reliability.

NEC System Overview: Models and Capabilities

NEC’s phone system portfolio caters to diverse business needs‚ offering a spectrum of models with varying capacities and features. The DSX series – DSX-40‚ DSX-80‚ and DSX-160 – provides foundational PBX functionality‚ differing primarily in system size. The SL2100 is ideal for growing offices‚ offering wall-mountable convenience. Stepping up‚ the SV8100 and SV9100 deliver advanced IP capabilities‚ supporting the DT700/DT800 IP phone series.

The SV9100 stands out with its comprehensive feature set and scalability. NEC’s SV7000 utilizes soft-switch technology for flexible service delivery. These systems support a wide range of digital phones (DT330‚ DT410‚ DT430) and offer features like conference calling. System capacity can scale significantly‚ accommodating up to 108 users in some configurations. Choosing the right model depends on current and future communication requirements.

Understanding the NEC DSX Series

The NEC DSX series represents a robust and reliable foundation for business communication‚ comprising the DSX-40‚ DSX-80‚ and DSX-160 models. These systems share core call features‚ making them consistent in operation‚ but differ significantly in their capacity to support extensions. The primary distinction lies in the system’s scalability – the DSX-40 is suited for smaller businesses‚ while the DSX-160 can accommodate larger organizations.

Despite varying sizes‚ all DSX models offer essential PBX functionalities. Installation is relatively straightforward‚ with the DSX-40’s wall-mountable KSU providing space-saving convenience. They support a range of NEC digital telephones‚ ensuring compatibility and a consistent user experience. Understanding the capacity differences is crucial when selecting the appropriate DSX model for your specific business needs and anticipated growth.

DSX-40 System Details

The NEC DSX-40 is designed for small businesses requiring a dependable and cost-effective communication solution. This system typically supports up to 40 extensions‚ making it ideal for offices with a limited number of employees. Its compact‚ wall-mountable Key System Unit (KSU) simplifies installation and conserves valuable office space. The DSX-40 offers standard PBX features‚ including call transfer‚ hold‚ and conference calling‚ enhancing communication efficiency.

Compatibility with NEC’s DT330‚ DT410‚ and DT430 digital telephones ensures a consistent and user-friendly experience. While offering fewer advanced features compared to larger DSX models‚ the DSX-40 provides a solid foundation for essential business communication needs. It’s a practical choice for businesses prioritizing reliability and affordability over extensive scalability.

DSX-80 System Details

The NEC DSX-80 expands upon the capabilities of the DSX-40‚ catering to medium-sized businesses with growing communication demands. Supporting up to 80 extensions‚ this system provides greater scalability and flexibility. Like the DSX-40‚ it utilizes a wall-mountable KSU for convenient installation. The DSX-80 boasts a more robust feature set‚ including enhanced call handling options and improved conferencing capabilities.

It maintains compatibility with the DT330‚ DT410‚ and DT430 digital telephones‚ ensuring a seamless transition for existing users. The DSX-80 offers a balance between affordability and functionality‚ making it a popular choice for businesses seeking a reliable and feature-rich phone system without excessive cost. It’s a step up in capacity and features from the DSX-40‚ suitable for expanding organizations.

DSX-160 System Details

The NEC DSX-160 represents the largest capacity model within the DSX series‚ designed for medium to large businesses requiring extensive communication infrastructure. Supporting up to 160 extensions‚ it provides significant scalability and accommodates substantial growth. Maintaining the wall-mountable KSU design for ease of installation‚ the DSX-160 delivers a comprehensive suite of features‚ building upon the functionalities of the DSX-40 and DSX-80.

It remains compatible with the DT330‚ DT410‚ and DT430 digital phones‚ offering consistency across the system. The DSX-160 is ideal for organizations needing advanced call management‚ robust conferencing‚ and the ability to handle a high volume of simultaneous calls. It provides a cost-effective solution for businesses seeking a powerful and reliable phone system capable of supporting a large workforce.

Exploring the NEC SL2100 System

The NEC SL2100 is a versatile phone system tailored for growing offices‚ offering a balance of features and affordability. It’s designed for easy installation with its wall-mountable KSU‚ saving valuable space. This system supports a range of digital phones‚ including the DT330‚ DT410‚ and DT430 series‚ providing users with flexible options. The SL2100 is particularly well-suited for businesses needing a reliable and scalable communication solution.

Recent updates highlight the importance of considering upgrades‚ especially with impending changes affecting the SL2100. It’s a popular choice for businesses seeking a robust system without the complexity of larger‚ more expensive platforms. The SL2100 delivers essential call features and can be expanded to meet evolving business needs.

The NEC SV8100 Phone System

The NEC SV8100 represents a significant step up in functionality‚ supporting both digital and IP phone technologies. It’s compatible with the DT700 series of NEC IP phones‚ offering a modern communication experience. This system is designed for medium-sized businesses requiring advanced features like voicemail‚ auto-attendant‚ and call routing. The SV8100 provides a solid foundation for unified communications‚ integrating voice and data seamlessly.

Its architecture allows for scalability‚ accommodating growing business needs. The SV8100 is often chosen for its reliability and comprehensive feature set. Businesses upgrading from older systems will find the SV8100 a powerful and flexible solution‚ offering improved productivity and enhanced communication capabilities. It’s a key component in many modern office environments.

NEC SV9100 System: Features and Functionality

The NEC SV9100 is a sophisticated communication platform designed for businesses demanding advanced features and scalability. It supports a wide range of devices‚ including the DT800 series of IP telephones‚ and offers robust unified communications capabilities. Key functionalities include advanced call handling‚ integrated voicemail‚ and customizable auto-attendant systems. A tutorial overview details physical features and call handling procedures‚ covering both internal and external calls.

The SV9100’s flexibility allows businesses to tailor the system to their specific needs. It’s a popular choice for organizations seeking a future-proof communication solution. Understanding its features is crucial for maximizing its potential‚ and recent updates affect upgrades from older systems like IPK-II and SL2100.

Physical Features of the SV9100

The NEC SV9100 system boasts a modular design‚ allowing for flexible configuration and expansion. The core unit is typically rack-mountable‚ optimizing space utilization in server rooms or communication closets. It supports a variety of connection types‚ accommodating both traditional analog lines and modern IP connections. Compatible phones include the DT700 and DT800 series‚ offering a range of physical button layouts and display options.

The system’s physical architecture facilitates easy maintenance and upgrades. Power redundancy options are available to ensure business continuity. The SV9100’s physical components are designed for reliability and longevity‚ contributing to a lower total cost of ownership. A detailed tutorial showcases these physical aspects.

Call Handling on the SV9100 System

The NEC SV9100 excels in call management‚ supporting both internal and external calls with ease. Placing external calls is straightforward‚ utilizing line appearances assigned to extensions. Internal calls can be made directly by extension number. The system offers features like call transfer‚ conference calling (supporting up to three parties as demonstrated in available tutorials)‚ and call hold.

Advanced call handling includes features like call forwarding‚ do-not-disturb‚ and caller ID presentation. The SV9100’s intuitive interface simplifies call control for users. A comprehensive overview video details these functionalities. Efficient call handling is crucial for business productivity‚ and the SV9100 delivers robust capabilities.

NEC IP Phone Series: DT700 and DT800

NEC’s DT700 and DT800 series represent their cutting-edge IP phone offerings‚ designed for seamless integration with the SV8100 and SV9100 phone systems. The DT700 series provides a cost-effective entry point into IP telephony‚ while the DT800 series caters to users demanding advanced features and a more sophisticated user experience;

These phones support a wide range of functionalities‚ including high-definition voice quality‚ Gigabit Ethernet connectivity‚ and programmable keys. The DT800 series is specifically engineered for optimal performance with the SV9100. A wide range of choices are available‚ from basic 12-key models to advanced 32-key options‚ including self-labeling and cordless mobile handsets.

Digital Telephones: DT330‚ DT410‚ and DT430

NEC offers a robust line of digital telephones‚ including the popular DT330 (DTL-12D-1)‚ DT410 (DTZ-6DE-3)‚ and DT430 (DTZ-12D-3) models. These phones provide reliable performance and essential features for everyday office communication. The DT330 is a basic 12-key phone‚ ideal for users with minimal calling needs. The DT410‚ available in black‚ offers a 24-button configuration for increased functionality.

The DT430‚ also in black‚ expands upon the DT410 with even more programmable keys and advanced features. These digital phones are compatible with various NEC phone systems‚ offering a cost-effective solution for businesses seeking traditional telephony. They deliver clear audio quality and user-friendly operation.

Conference Calling on NEC Phone Systems

NEC phone systems facilitate efficient conference calling‚ enabling multiple participants to connect seamlessly. This feature is invaluable for team collaboration‚ client meetings‚ and remote communication. Setting up a conference call is straightforward‚ typically involving initiating a call and then adding additional parties. The NEC systems support conferences with up to a certain number of participants‚ depending on the specific model and system configuration.

Video tutorials demonstrate the simple steps for creating three-party conferences‚ showcasing the ease of use. Conference calling enhances productivity by reducing the need for individual calls and streamlining communication. Proper system programming ensures optimal audio quality and reliable connections for all conference attendees.

Scaling Your NEC Phone System

NEC phone systems are designed for scalability‚ accommodating business growth and evolving communication needs. The DSX series‚ for example‚ can be expanded to support a growing number of users and extensions. Systems like the SV8100 and SV9100 offer flexible expansion options‚ allowing businesses to add capacity as required. A system can scale up to 108 extensions with included digital phones.

Understanding system capacity and available expansion modules is crucial for planning future growth. Options include adding more line cards‚ extension cards‚ or even linking multiple systems together. Careful planning ensures a smooth transition and avoids disruptions to communication services. Proper configuration is key to maximizing the scalability of your NEC phone system.

System Capacity and Expansion Options

NEC systems offer varied expansion capabilities. The 28i Phone System‚ ideal for growing offices‚ provides a space-saving KSU. DSX series models (DSX-40‚ DSX-80‚ DSX-160) share similar features‚ differing primarily in system size. The SV8100 and SV9100 are compatible with the DT700 and DT800 series IP phones‚ respectively‚ facilitating future IP integration.

Expansion typically involves adding line and extension cards. Linking multiple systems is also possible for larger organizations. The SV7000‚ utilizing a soft switch‚ provides a server-type solution for diverse PBX services. Careful assessment of current and projected needs is vital when selecting expansion options. Consider factors like user count‚ call volume‚ and desired features to optimize system performance and investment.

NEC SV7000: Soft Switch Implementation

The NEC SV7000 represents a significant shift‚ implementing traditional PBX services on a soft switch platform. This server-type product delivers a flexible and scalable communication solution. Unlike traditional hardware-based systems‚ the SV7000 leverages software to manage call processing and features‚ offering greater adaptability and cost-effectiveness.

This implementation allows for centralized management and simplified administration. The SV7000 supports a wide range of telephony features‚ including voice mail‚ auto-attendant‚ and conferencing. Its open architecture facilitates integration with other business applications. Transitioning to a soft switch like the SV7000 enables businesses to embrace IP telephony and benefit from advanced communication capabilities‚ while maintaining reliable performance.

Programming and Administration

Effective programming and administration are crucial for maximizing the potential of your NEC phone system. This involves configuring system parameters‚ user extensions‚ call routing rules‚ and feature settings. NEC systems offer various programming interfaces‚ including web-based graphical user interfaces (GUIs) and command-line interfaces (CLIs)‚ catering to different skill levels.

Administrators can customize the system to meet specific business needs‚ such as setting up call queues‚ implementing auto-attendants‚ and defining user permissions. Regular system maintenance‚ including software updates and backup configurations‚ is essential for optimal performance and reliability. Thorough documentation of programming changes is highly recommended for efficient troubleshooting and future modifications.

Troubleshooting Common Issues

Addressing common issues promptly ensures minimal disruption to your NEC phone system’s functionality. Call quality problems often stem from network congestion‚ faulty cabling‚ or incorrect codec settings; checking these areas is vital. Phone registration issues can arise from incorrect IP address configurations‚ password mismatches‚ or server connectivity problems‚ requiring careful verification of network settings.

Other frequent concerns include voicemail access difficulties‚ call forwarding failures‚ and feature malfunctions. Utilizing the system’s diagnostic tools and reviewing event logs can pinpoint the root cause. Consulting the NEC documentation or seeking support from a qualified technician is recommended for complex issues. Regular system health checks can proactively identify and resolve potential problems.

Call Quality Problems

Poor call quality on an NEC phone system can manifest as choppy audio‚ static‚ or dropped calls. Network congestion is a primary culprit‚ especially during peak hours; Quality of Service (QoS) settings can prioritize voice traffic. Inspect cabling for damage or interference‚ ensuring proper connections. Codec mismatches between phones and the system can also cause issues – verify compatible settings.

Furthermore‚ bandwidth limitations‚ particularly with VoIP systems‚ can degrade audio. Test internet speeds and consider upgrading if necessary. Examine phone hardware for defects‚ and update firmware to the latest version. Investigate potential interference from other electronic devices. A systematic approach to troubleshooting‚ starting with the simplest solutions‚ is crucial for resolving call quality problems effectively.

Phone Registration Issues

Phone registration failures on an NEC system typically stem from incorrect configuration settings. Verify the phone’s MAC address is correctly entered in the system’s programming. Network connectivity problems are common; ensure the phone has a valid IP address and can reach the system’s server. Check firewall settings to confirm they aren’t blocking necessary ports for SIP or other protocols.

Incorrect extension numbers or passwords will also prevent successful registration. Double-check these credentials within the system’s administration interface. Firmware inconsistencies between the phone and the system can cause conflicts; update both to the latest versions. If issues persist‚ a factory reset of the phone‚ followed by re-registration‚ may resolve the problem. Thoroughly document all changes made during troubleshooting.

NEC Phone System Maintenance

Regular NEC phone system maintenance is crucial for optimal performance and longevity. This includes periodic software updates for both the system and IP phones‚ addressing security vulnerabilities and enhancing functionality. Dust accumulation within the main system unit can cause overheating; clean it regularly with compressed air. Back up the system’s configuration files frequently to facilitate quick recovery in case of failure;

Monitor system logs for error messages or unusual activity‚ proactively identifying potential issues. Inspect cabling for damage or loose connections‚ ensuring reliable communication. Schedule preventative maintenance checks with a qualified technician annually. Proper maintenance minimizes downtime‚ extends the system’s lifespan‚ and ensures consistent call quality.

Choosing the Right NEC Phone for Your Needs

Selecting the appropriate NEC phone depends heavily on user requirements and system compatibility. Consider the number of keys needed – 12‚ 24‚ or 32 – based on call volume and feature usage. Digital phones (DT330‚ DT410‚ DT430) are suitable for basic needs‚ while IP phones (DT700‚ DT800) offer advanced features and integration with unified communications.

For mobile users‚ explore NEC’s cordless options. Assess whether self-labeling keys are beneficial for customized call handling. Ensure the chosen phone is compatible with your specific NEC system (SV8100‚ SV9100‚ SL2100‚ etc.). Prioritize features like speakerphone‚ headset compatibility‚ and call transfer capabilities to enhance productivity and user experience.

Wide Range of Phone Choices

NEC offers a comprehensive portfolio of telephones to suit diverse business needs. Choices span from traditional digital phones like the DT330‚ DT410‚ and DT430‚ providing reliable basic functionality‚ to cutting-edge IP phones such as the DT700 and DT800 series‚ enabling advanced features and seamless integration.

Beyond standard desk phones‚ NEC provides cordless mobile handsets for increased flexibility. Users can select models with varying key counts – 12‚ 24‚ or 32 – and benefit from self-labeling keys for personalized call management. Compatibility extends across numerous NEC systems‚ including SV9100‚ SV8100‚ Aspire‚ and older models like DS1000 and SL2100‚ ensuring a scalable and adaptable communication solution.

NEC System Compatibility

Ensuring seamless integration is crucial‚ and NEC phone systems demonstrate broad compatibility. The versatile DT700 series of IP phones functions flawlessly with both the SV8100 and SV9100 phone systems‚ offering a unified communication experience. The more advanced DT800 series IP telephones are primarily designed for the sophisticated capabilities of the SV8100 and SV9100 platforms.

Furthermore‚ NEC’s extensive range supports legacy systems like the DS1000‚ DS2000‚ SL2100‚ and SL1100‚ facilitating upgrades without complete infrastructure overhauls. Compatibility also extends to the UX5000 and DSX series. This widespread support allows businesses to leverage existing investments while transitioning to newer technologies‚ maximizing return on investment and minimizing disruption.

Upgrading Your NEC Phone System

Strategic upgrades are vital for maintaining a competitive edge. For users of the NEC SL2100‚ SV9100‚ or older IPK-II systems‚ now is a critical time to consider modernization. Upgrading unlocks advanced features‚ enhances security‚ and improves overall system performance. Transitioning to newer models like the SV8100 or SV9100 provides access to cutting-edge IP telephony capabilities.

A phased approach is recommended‚ starting with a thorough assessment of current needs and future scalability requirements. Consider migrating to a soft switch implementation like the NEC SV7000 for increased flexibility. Careful planning minimizes disruption and ensures a smooth transition‚ maximizing the benefits of a modernized communication infrastructure. Don’t delay‚ as opportunities are time-sensitive!

Resources and Support

Comprehensive support for your NEC phone system is readily available. Numerous online resources offer detailed documentation‚ FAQs‚ and troubleshooting guides. Authorized NEC dealers provide expert installation‚ programming‚ and maintenance services‚ ensuring optimal system performance. For immediate assistance‚ NEC’s official support channels offer direct access to skilled technicians;

Furthermore‚ a vibrant online community forum connects users‚ fostering knowledge sharing and collaborative problem-solving. Websites offer NEC phones for sale‚ both new and refurbished‚ alongside essential accessories. Remember to leverage these resources to maximize your investment and maintain a reliable communication infrastructure. Proactive support ensures long-term system stability and user satisfaction.

Future of NEC Phone Systems

NEC continues to innovate in unified communications‚ focusing on cloud-based solutions and enhanced integration with business applications. Expect further development of IP telephony‚ leveraging SIP protocols for greater flexibility and scalability. The SV7000’s soft-switch implementation foreshadows a shift towards software-defined networking within NEC systems;

Future systems will likely prioritize seamless mobility‚ supporting a wider range of devices and remote work scenarios. Advancements in artificial intelligence may introduce intelligent call routing and automated support features. Staying informed about NEC’s evolving product line – including the SV9100‚ SV8100‚ and Aspire series – is crucial for long-term communication strategy. Expect continued emphasis on user-friendly interfaces and robust security protocols.

nord stage 4 manual

The Nord Stage 4 expands sonic possibilities, offering a refined sound experience. Exclusively featuring the Nord Stage 4 in compositions demonstrates its powerful capabilities, as of November 2025.

Overview of the Nord Stage 4

The Nord Stage 4 represents a significant evolution in stage performance instruments, building upon a legacy of sound quality and playability. As of late 2025, the platform prioritized stability and security, ensuring user data protection and consistent naming conventions. This instrument seamlessly integrates piano, organ, and synthesizer sections, offering unparalleled versatility for live performance and studio production.

The Nord Stage 4’s capabilities are showcased through compositions utilizing solely its sounds, highlighting its comprehensive sonic palette. It’s designed for musicians seeking a powerful, expressive, and reliable instrument.

Key Features and Improvements

The Nord Stage 4 boasts enhanced features focused on expanding creative potential. Stability and security updates, implemented through December 2025, ensure a reliable user experience. The instrument’s core platform received updates, alongside naming consistency improvements. Compatibility with the Nord Triple Pedal unlocks advanced piano section functionality, including sustain control.

Further enhancements refine the instrument’s sound engine and user interface, providing musicians with greater control and expressiveness. These improvements solidify the Nord Stage 4’s position as a premier stage instrument.

Understanding the Nord Stage 4 Interface

The Nord Stage 4 interface prioritizes intuitive control and seamless navigation, allowing musicians to quickly access and manipulate its extensive features and parameters effectively.

Control Panel Layout

The Nord Stage 4’s control panel is meticulously designed for performance and immediate access. Key sections – Piano, Organ, and Synth – each have dedicated control areas, facilitating quick sound shaping. Numerous knobs, buttons, and sliders provide tactile control over parameters. The layout emphasizes a logical workflow, grouping related functions together.

A central LED display offers clear visual feedback. The panel’s organization minimizes menu diving, allowing musicians to focus on playing. Dedicated buttons for effects and layering further enhance usability. This thoughtful arrangement ensures a responsive and intuitive experience, crucial for live performance and studio work.

Display Navigation

The Nord Stage 4’s display serves as the central hub for parameter adjustments and patch selection. Navigation is primarily achieved through a combination of dedicated buttons and the data wheel. The display clearly presents current settings, waveforms, and patch information.

Menu structures are logically organized, allowing for efficient access to various functions. Users can quickly scroll through lists, edit parameters, and save their creations. The display’s brightness is adjustable for optimal visibility in different lighting conditions. Intuitive visual cues guide users through the interface, ensuring a seamless experience.

Button Functions and Assignments

The Nord Stage 4 features a comprehensive array of buttons, each assigned specific functions for controlling various parameters. Dedicated buttons provide direct access to essential features like sound selection, layer activation, and effect adjustments.

Many buttons offer secondary functions when used in conjunction with the Shift key, expanding the instrument’s control surface. Button assignments are clearly labeled and logically organized, facilitating intuitive operation. Users can customize certain button assignments to suit their individual playing styles and preferences, enhancing workflow.

Piano Section Deep Dive

The Nord Stage 4’s piano section benefits from compatibility with the Nord Triple Pedal, unlocking sustain and advanced piano functionalities for expressive performance.

Piano Sounds and Sample Libraries

The Nord Stage 4 boasts an extensive library of piano sounds, meticulously sampled to capture the nuances of iconic instruments. Users can explore a diverse range, from classic grand pianos to intimate uprights and vintage electric pianos. The instrument’s advanced sampling engine ensures exceptional realism and dynamic response, providing an authentic playing experience.

Furthermore, the Nord Stage 4 supports external sample libraries, allowing musicians to expand their sonic palette with custom sounds and specialized collections. This flexibility empowers users to tailor the instrument to their unique creative vision and musical requirements, offering limitless possibilities for sonic exploration.

Piano Performance Modes

The Nord Stage 4 offers versatile piano performance modes designed to cater to diverse playing styles. These include standard piano mode for authentic acoustic feel, layering capabilities for rich, complex textures, and split modes for dividing the keyboard into distinct zones. Performance mode allows for instant access to multiple piano sounds and settings, streamlining live performances.

Compatibility with the Nord Triple Pedal unlocks advanced functionalities within the piano section, including sustain, sostenuto, and soft pedal control, enhancing expressive capabilities. These modes provide musicians with the tools to fully realize their artistic vision.

Using the Nord Triple Pedal

The Nord Stage 4 seamlessly integrates with the Nord Triple Pedal, unlocking a more nuanced and expressive piano experience. The right pedal functions as a standard sustain pedal, while the middle pedal provides sostenuto, sustaining only the held notes. The left pedal offers soft pedal functionality, reducing volume and altering timbre.

This pedal enhances dynamic control and allows for authentic piano techniques. Proper configuration within the Stage 4’s settings ensures optimal responsiveness and accurate pedal assignments for a truly immersive performance.

Organ Section Exploration

The Nord Stage 4 features authentic organ models – Hammond, Farfisa, and Vox – delivering classic tones. Explore drawbar settings for customized sound shaping and control.

Organ Models (Hammond, Farfisa, Vox)

The Nord Stage 4 boasts meticulously modeled organ sounds, faithfully recreating the character of iconic instruments. Experience the rich, complex tones of the Hammond organ, perfect for soulful blues and vibrant gospel. Delve into the distinctive, transistor-driven sound of the Farfisa, ideal for vintage rock and psychedelic explorations;

Alternatively, embrace the bright, punchy character of the Vox Continental, renowned for its presence in classic British Invasion tracks. Each model offers unique sonic qualities and responsiveness, allowing for a diverse range of organ performances. These models provide authentic and inspiring sounds.

Drawbar Settings and Control

The Nord Stage 4 provides intuitive control over organ sounds via its drawbar settings. Users can precisely sculpt the harmonic content of each organ model, adjusting the volume of individual harmonics to create custom tones. This allows for recreating classic organ registrations or designing entirely new sounds.

Dedicated drawbar controls offer tactile and immediate adjustments, while the interface facilitates saving and recalling favorite settings. Experimentation with drawbar combinations unlocks a vast palette of organ textures, from gentle and mellow to aggressive and powerful.

Leslie Speaker Simulation

The Nord Stage 4 boasts a highly refined Leslie speaker simulation, crucial for authentic organ sounds. Users can adjust the rotor speed – both fast and slow – and ramp time, emulating the swirling, dynamic character of a physical Leslie cabinet. Control over the drive and bleed further enhances realism.

Multiple microphone placements are simulated, offering different tonal characteristics. The depth and distance parameters allow for shaping the spatial impression, placing the Leslie within a virtual acoustic space. This delivers a truly immersive organ experience.

Synth Section Mastery

The Nord Stage 4’s synth section offers diverse engine types, extensive modulation options, and intuitive patch creation tools for crafting unique and expressive sounds.

Synth Engine Types

The Nord Stage 4 boasts a powerful and versatile synth section, featuring multiple distinct engine types to cater to a wide range of sonic palettes. These include classic waveforms, FM synthesis, and wavetable options, allowing for everything from vintage analog emulations to cutting-edge digital textures. Each engine possesses unique characteristics and parameters, offering extensive control over sound design. Users can combine these engines within a single patch, layering and modulating them to create complex and evolving sounds. The synth section’s flexibility empowers musicians to explore limitless sonic territories, pushing the boundaries of musical expression.

Modulation Options

The Nord Stage 4 provides extensive modulation capabilities, crucial for bringing dynamic movement and expression to your sounds. LFOs (Low Frequency Oscillators) offer a variety of waveforms for rhythmic and evolving modulation of parameters like pitch, filter cutoff, and amplitude. Envelopes shape the attack, decay, sustain, and release of sounds, while the modulation wheel and control pedals allow for real-time performance control. These options can be routed to virtually any parameter, enabling intricate and responsive sound manipulation, enhancing the instrument’s versatility.

Creating and Editing Synth Patches

The Nord Stage 4 empowers users to craft unique synth patches through a comprehensive editing environment. Users can sculpt sounds by adjusting oscillators, filters, and amplifiers. The intuitive interface allows for detailed control over modulation sources, including LFOs and envelopes, shaping the sonic character. Patch creation involves layering multiple synth engines, and saving custom sounds for later recall. Editing existing patches is equally straightforward, fostering experimentation and personalized sound design.

Effects Section – Shaping Your Sound

The Nord Stage 4 offers diverse effects, allowing users to sculpt their sound with parameters and routing options for sonic refinement and creative expression.

Types of Effects Available

The Nord Stage 4 boasts a comprehensive effects section, providing a palette of sonic tools for shaping your sound. These include modulation effects like chorus, phaser, and flanger, adding movement and texture. Delay and reverb options range from subtle ambience to expansive spaces.

Furthermore, compression, EQ, and amp simulations offer dynamic control and tonal sculpting. Dedicated effects like distortion and tremolo add character and grit. Each effect type features adjustable parameters, allowing for precise customization and creative sound design, enhancing the instrument’s versatility.

Effect Parameters and Control

Nord Stage 4’s effects offer deep parameter control, accessible via the intuitive interface. Each effect features multiple adjustable settings, allowing precise tailoring of the sound. Parameters like depth, rate, feedback, and mix are readily available for manipulation.

Dedicated knobs and buttons provide real-time control, while the display offers visual feedback. Users can save customized effect settings as presets for quick recall. This level of control empowers musicians to sculpt their sound with nuance and precision, maximizing creative expression.

Effect Routing and Combinations

The Nord Stage 4 allows flexible effect routing, enabling users to chain and combine effects in various configurations. Effects can be applied to individual sections – Piano, Organ, or Synth – or to the overall output. This routing flexibility unlocks a vast palette of sonic possibilities.

Multiple effect slots permit layering different effects, creating complex and evolving textures. Experimentation with effect order and combinations is encouraged, fostering unique sound design. Saving these customized effect chains as presets streamlines workflow and ensures consistent results.

Advanced Features and Functions

Nord Stage 4 facilitates layering and splits, morphing transitions, and includes an arpeggiator/sequencer for dynamic performance and complex musical arrangements.

Layering and Splits

The Nord Stage 4 excels in layering and split functionality, allowing musicians to combine multiple sounds for rich textures. Users can stack up to three sounds simultaneously, adjusting individual levels and panning. Splits enable assigning different sounds to distinct keyboard regions, facilitating versatile performance scenarios.

These features are crucial for creating complex arrangements live or in the studio. The intuitive interface simplifies sound assignment and parameter control, ensuring seamless transitions between layers and splits. This empowers performers to emulate orchestral arrangements or create unique hybrid sounds.

Morphing and Transitions

The Nord Stage 4 introduces enhanced morphing and transition capabilities, offering dynamic sound shaping during performances. Morphing allows smooth crossfades between layered sounds, controlled via a dedicated morph slider or external expression pedal. This creates evolving textures and expressive sonic shifts.

Transition effects add further nuance, enabling seamless changes between program patches. Users can customize transition types and durations, ensuring fluid and musical transitions. These features elevate live performance, providing a captivating and immersive experience for both performer and audience.

Arpeggiator and Sequencer

The Nord Stage 4 boasts a powerful arpeggiator and sequencer, expanding creative possibilities beyond traditional playing. The arpeggiator offers diverse patterns, adjustable speed, and octave ranges, ideal for generating rhythmic textures and melodic sequences. Its sequencer allows recording and playback of musical phrases, adding layers of complexity to live performances.

Users can save and recall arpeggiator and sequencer patterns, integrating them seamlessly into their setups. These tools unlock new avenues for improvisation and composition, making the Nord Stage 4 a versatile instrument.

Connectivity and Integration

The Nord Stage 4 seamlessly integrates with MIDI devices and offers USB connectivity for computer integration, enhancing workflow and expanding control options.

MIDI Implementation

The Nord Stage 4 boasts comprehensive MIDI implementation, enabling versatile control and synchronization with external devices. It supports MIDI In, Out, and Thru for seamless integration with sequencers, controllers, and other instruments. Users can transmit and receive a wide range of MIDI data, including Note On/Off, Velocity, Aftertouch, Control Change, and Program Change messages.

Detailed MIDI settings within the Nord Stage 4 allow for customization of MIDI channels, velocity sensitivity, and control assignments, tailoring the instrument’s response to individual performance preferences and external gear. This robust MIDI functionality unlocks creative possibilities for live performance and studio production.

USB Connectivity

The Nord Stage 4 features USB connectivity for both MIDI and data transfer. Through a standard USB cable, the instrument can seamlessly connect to computers running music software, facilitating bidirectional communication. This allows for MIDI data exchange, enabling control of virtual instruments and synchronization with digital audio workstations (DAWs).

Furthermore, USB connectivity enables the transfer of Nord Stage 4 patches, programs, and system updates, ensuring the instrument remains current with the latest features and improvements. It simplifies backup and restoration of valuable sound libraries.

Pedal and Expression Control

The Nord Stage 4 offers extensive pedal and expression control options, enhancing performance expressiveness. It’s fully compatible with the Nord Triple Pedal, unlocking advanced functionalities within the Piano section – sustain, soft, and sostenuto. Standard expression pedals can be assigned to control various parameters, like volume, modulation, or effects.

Multiple pedal inputs allow for layered control schemes, enabling nuanced dynamic shaping of sound. This flexibility empowers musicians to tailor the instrument’s response to their individual playing style and artistic vision.

Nord Stage 4 Compact vs. 88 Key Models

The Nord Stage 4 comes in Compact (73-key) and 88-key versions, differing in size, portability, and keybed feel, offering choices for diverse needs.

Size and Portability

The Nord Stage 4 presents a crucial decision: the Compact versus the 88-key model. Portability is significantly impacted by this choice. The Compact, with 73 keys, offers a reduced footprint and lighter weight, making it ideal for musicians frequently traveling or with limited stage space. Conversely, the 88-key version, while providing a full piano experience, is larger and heavier, potentially requiring more effort for transport and setup.

Keybed Differences

The Nord Stage 4’s keybeds vary between models, influencing the playing experience. The 88-key version boasts fully weighted hammer action, replicating the feel of an acoustic piano, ideal for pianists prioritizing realism. The Compact model features a lighter, semi-weighted action, offering a balance between playability and portability. This makes it suitable for organists and synth players.

Feature Comparison

Both Nord Stage 4 models share core functionalities – piano, organ, and synth sections, plus effects. However, portability distinguishes them. The Compact’s 73 keys and lighter weight make it travel-friendly, sacrificing some low-end range. The 88-key model provides a full piano experience but is less convenient for transport. Both are compatible with the Nord Triple Pedal, unlocking advanced piano features like sustain. Ultimately, the choice depends on performance needs and mobility preferences.

Troubleshooting Common Issues

Addressing sound output, MIDI connectivity, or display/button malfunctions requires checking connections and consulting the official Nord documentation for solutions and support.

Sound Output Problems

If experiencing no sound, first verify all cable connections to your amplifier or audio interface are secure. Ensure the Nord Stage 4’s master volume is raised and not muted. Check individual part levels (Piano, Organ, Synth) within your current Program. Confirm correct output routing in the global settings – are you sending to the intended outputs?

Also, examine headphone connections if using them. A faulty cable or incorrect headphone impedance can cause issues. If using external effects, bypass them to isolate the problem. Finally, consult the Nord Stage 4 manual’s troubleshooting section for detailed diagnostics and potential solutions related to audio output.

MIDI Connectivity Issues

When facing MIDI problems, ensure the Nord Stage 4’s MIDI settings align with your connected device (computer, sequencer, another keyboard). Verify the correct MIDI input/output ports are selected in both the Nord Stage 4’s menu and your controlling device’s software. Check the MIDI cable itself for damage or loose connections.

Furthermore, confirm that MIDI clock synchronization is configured appropriately – either internal or external. Refer to the Nord Stage 4 manual for detailed instructions on MIDI implementation and troubleshooting steps, including MIDI Thru functionality and channel assignments.

Display and Button Malfunctions

If the Nord Stage 4’s display exhibits issues like flickering, dimness, or complete failure, try a power cycle – turn the unit off and on. For unresponsive buttons, gently clean around them with a soft, dry cloth. Avoid liquids! If problems persist, consult the Nord Stage 4 manual for factory reset instructions.

Resources and Support

Access the official Nord website for comprehensive documentation, software updates, and the latest firmware for your Nord Stage 4. Online forums also provide community support.

Official Nord Website and Documentation

The official Nord website serves as the primary hub for all Nord Stage 4 resources. Users can find an extensive library of documentation, including the complete Nord Stage 4 manual, which details every function and parameter. Regularly check for software updates and crucial firmware releases to ensure optimal performance and access to the newest features.

Clavia provides detailed specifications, helpful tutorials, and a comprehensive FAQ section addressing common user inquiries. Downloading the latest documentation guarantees you have the most current information regarding your instrument’s capabilities and troubleshooting steps.

Online Forums and Communities

Engaging with online forums and communities dedicated to the Nord Stage 4 provides a valuable platform for knowledge sharing and collaborative problem-solving. Users frequently discuss the intricacies of the instrument, share custom patches, and offer insights into maximizing its potential. These communities often supplement the official Nord documentation.

Experienced Nord users readily assist newcomers with questions regarding the manual, specific features, and troubleshooting common issues. Participating in these forums fosters a supportive environment for learning and expanding your Nord Stage 4 expertise.

Software Updates and Firmware

Regularly checking for software updates and firmware releases is crucial for maintaining optimal Nord Stage 4 performance and accessing new features. Clavia consistently refines the instrument’s functionality through these updates, addressing bug fixes and enhancing overall stability. The official Nord website serves as the primary source for these downloads.

Updating the firmware ensures compatibility with the latest features and improvements detailed in the Nord Stage 4 manual. Following the provided instructions carefully during the update process is essential to avoid potential issues.

magic chef dehydrator manual

Magic Chef Dehydrator Manual: A Comprehensive Guide

This manual provides comprehensive instructions for safe and effective operation of your Magic Chef dehydrator, covering everything from initial setup to advanced techniques.

Carefully review this guide before first use to maximize performance and ensure longevity of your MCL10PFDRT model.

It includes detailed information on cleaning, troubleshooting, recipes, and warranty details for optimal food preservation.

Welcome to the world of healthy and delicious homemade dehydrated foods! Your Magic Chef dehydrator, specifically the MCL10PFDRT model, is designed to preserve fruits, vegetables, meats, and herbs, extending their shelf life while retaining vital nutrients and flavors.

Dehydration is an age-old method of food preservation, and with this appliance, you can easily enjoy the benefits of this technique in your own kitchen. This manual serves as your complete guide, offering step-by-step instructions and helpful tips to ensure successful dehydration every time.

Whether you’re a seasoned dehydrator or a beginner, this manual will walk you through the process, from understanding the components to mastering advanced techniques like making fruit leather or homemade seasonings. The Magic Chef logo represents quality and reliability, and we are confident that this dehydrator will become a valuable addition to your culinary arsenal.

Understanding Your Model: MCL10PFDRT

The Magic Chef MCL10PFDRT food dehydrator is engineered for efficient and consistent performance. This model features multiple trays, allowing for substantial batch processing of your favorite foods. Understanding each component is crucial for optimal operation.

Key features include adjustable temperature control, enabling you to customize the dehydration process for various food types – from low temperatures for delicate fruits to higher temperatures for jerky. A built-in timer provides precise control over drying times, preventing over or under-dehydration.

The dehydrator’s design promotes even air circulation, ensuring uniform drying across all trays. Familiarize yourself with the placement of the power button, temperature settings, and timer controls for a seamless experience. This manual details each feature, helping you unlock the full potential of your MCL10PFDRT.

Safety Precautions

Prioritize safety when operating your Magic Chef dehydrator. Always unplug the unit before cleaning or attempting any maintenance to prevent electrical shock. Allow the dehydrator to cool completely before handling or disassembling components – hot surfaces can cause burns.

Never immerse the base of the dehydrator in water or other liquids. Ensure the power cord is not damaged and avoid using extension cords if possible. Keep the dehydrator away from flammable materials and ensure adequate ventilation during operation.

Supervise children when the dehydrator is in use. Do not operate the appliance outdoors. Regularly inspect the unit for any signs of damage and discontinue use if issues are detected. Following these precautions will ensure safe and enjoyable food dehydration.

Getting Started

Begin your dehydration journey by carefully unboxing your Magic Chef appliance and familiarizing yourself with all included components.

Proper setup and initial cleaning are crucial for optimal performance and food safety.

Unboxing and Component Identification

Upon receiving your Magic Chef MCL10PFDRT Food Dehydrator, carefully inspect the packaging for any signs of damage during transit. Once confirmed, open the box and verify that all components are present.

You should find the dehydrator base, multiple stacking trays (typically 5 or more, depending on the model), a top cover, and potentially a fruit leather sheet or mesh screen for smaller items.

Refer to the included parts diagram in this manual to visually identify each component. Ensure you have the power cord and that it is in good condition.

Familiarize yourself with the location of the power switch and temperature control dial. Retain the packaging materials for potential future use, such as warranty claims or storage.

If any components are missing or damaged, immediately contact Magic Chef customer support for assistance.

Initial Setup and Cleaning

Before your first use, thoroughly clean all removable parts of your Magic Chef MCL10PFDRT dehydrator. Wash the trays, top cover, and any included accessories with warm, soapy water. Avoid abrasive cleaners, as they may damage the surfaces.

Rinse all components thoroughly and allow them to air dry completely before reassembling. Wipe down the dehydrator base with a damp cloth; never immerse the base in water.

Ensure the unit is placed on a stable, level surface away from water sources and direct sunlight.

Plug in the power cord and verify the unit powers on correctly. A brief initial ‘burn-off’ odor may be present during the first use – this is normal and will dissipate.

Proper cleaning and setup are crucial for optimal performance and food safety.

Operating Instructions

This section details powering on, setting the temperature, utilizing the timer, and proper food placement for your Magic Chef dehydrator.

Powering On and Temperature Control

Before powering on your Magic Chef dehydrator, ensure it is placed on a stable, level surface and properly plugged into a grounded electrical outlet. The power button is typically located on the front or side of the unit; a clear indicator light will illuminate when activated.

Temperature control is crucial for successful dehydration. Your MCL10PFDRT model likely features adjustable temperature settings, ranging from warm (for fruits and vegetables) to higher temperatures (ideal for jerky). Refer to the recipe guidelines within this manual for specific temperature recommendations based on the food you are dehydrating.

Precise temperature control ensures optimal enzyme activity and prevents spoilage. Avoid exceeding recommended temperatures, as this can cook the food instead of dehydrating it. Regularly monitor the dehydrator during operation to maintain consistent temperatures and achieve desired results. Always unplug the unit before cleaning or making adjustments.

Setting the Timer

The timer function on your Magic Chef dehydrator is essential for precise dehydration, preventing over or under-drying of your food. Locate the timer control, usually a dial or digital interface, on the unit’s control panel.

To set the timer, rotate the dial or use the digital buttons to input the desired dehydration time. Refer to the recipe and timing guidelines provided in this manual for recommended durations for various foods – jerky, fruits, and vegetables all require different processing times.

Many models feature an automatic shut-off function when the timer reaches zero, ensuring safety and energy conservation. Always double-check the timer setting before starting the dehydration process. Note that dehydration times can vary based on food thickness, humidity, and desired texture.

Tray Placement and Food Distribution

Proper tray placement and even food distribution are crucial for consistent dehydration results with your Magic Chef dehydrator. Ensure all trays are securely seated within the unit before starting operation.

Arrange food in a single layer on each tray, avoiding overcrowding or overlapping. This allows for optimal air circulation, promoting uniform drying throughout the entire batch. For smaller items, like herbs or berries, consider using mesh liners to prevent them from falling through the tray openings.

Rotate trays periodically during the dehydration process, especially if your dehydrator doesn’t have a fan for even heat distribution. This helps to compensate for any temperature variations within the unit, ensuring all food dries at a similar rate.

Dehydrating Jerky: A Step-by-Step Guide

Preparing jerky requires careful attention to food safety and proper dehydration techniques. Begin by slicing meat thinly, approximately ¼ inch thick, against the grain for optimal tenderness.

Marinate the meat for at least four hours, or preferably overnight, to enhance flavor and aid in preservation. Pat the marinated meat dry before arranging it in a single layer on the dehydrator trays, ensuring pieces don’t overlap.

Set the dehydrator temperature to 160°F (71°C) and the timer for 4-8 hours, depending on the thickness of the meat and desired level of dryness. Check for doneness by bending a piece; it should crack but not break.

Dehydrating Fruits: Best Practices

Dehydrating fruits preserves their natural sweetness and creates healthy snacks. Begin with ripe, but not overripe, fruit. Wash and slice fruits into uniform pieces, approximately ¼ inch thick, for even drying.

Pre-treatment can prevent browning; consider dipping apples or bananas in lemon juice. Arrange fruit in a single layer on the dehydrator trays, avoiding overlap to ensure proper air circulation.

Set the dehydrator temperature between 135°F (57°C) and 175°F (79°C), depending on the fruit type. Drying times vary from 6-12 hours; check for pliability – fruit should be leathery and slightly sticky, not brittle.

Dehydrating Vegetables: Techniques for Optimal Results

Dehydrating vegetables concentrates their flavors, creating versatile ingredients for soups, stews, and snacks. Blanching is crucial for most vegetables – briefly submerge in boiling water, then ice water – to stop enzyme activity and preserve color and nutrients.

Slice vegetables uniformly, around ¼ inch thick, for consistent drying. Root vegetables like carrots and potatoes require longer drying times than leafy greens.

Arrange vegetables in a single layer on the dehydrator trays, ensuring good airflow. Set the temperature between 125°F (52°C) and 155°F (68°C). Drying times range from 8-16 hours; vegetables should be brittle and snap easily when fully dehydrated.

Advanced Techniques

Explore creative possibilities beyond basic dehydration, including fruit leather, herb drying for potent flavors, and crafting unique homemade seasoning blends with your dehydrator.

Making Fruit Leather

Fruit leather is a delicious and healthy snack easily created with your Magic Chef dehydrator. Begin by preparing your fruit – apples, berries, peaches, or a combination work wonderfully! Puree the fruit until smooth, adding a touch of lemon juice to prevent browning and enhance flavor.

Spread the puree thinly and evenly onto dehydrator trays lined with plastic wrap or parchment paper. Aim for a thickness of about 1/8 to 1/4 inch for optimal drying. This ensures a pliable, chewy texture;

Dehydrate at 135°F (57°C) for 6-12 hours, or until the leather is no longer sticky to the touch. Drying time will vary depending on fruit type and puree thickness. Once cooled, peel the fruit leather from the liner and roll it up. Store in an airtight container for a delightful, naturally sweet treat!

Herb Drying for Long-Term Storage

Preserve the fresh flavors of your garden with your Magic Chef dehydrator! Herb drying is a simple process for creating potent seasonings. Begin by harvesting herbs – basil, oregano, rosemary, and thyme are excellent choices – preferably before flowering for maximum flavor.

Rinse the herbs gently and pat them dry. Remove leaves from stems, and spread them in a single layer on dehydrator trays. Avoid overcrowding to ensure even air circulation.

Dehydrate at 95-115°F (35-46°C) for 2-4 hours, or until the leaves crumble easily. Monitor closely, as drying times vary. Once cooled, store dried herbs in airtight containers away from light and heat to maintain their aroma and potency for extended periods!

Creating Homemade Seasonings

Unlock a world of flavor by crafting your own custom seasonings with your Magic Chef dehydrator! Dehydrating allows you to concentrate flavors and create unique blends. Start with fresh ingredients like garlic, onions, peppers, and spices.

Slice vegetables thinly and spread them in a single layer on dehydrator trays. Dehydrate at 125-135°F (52-57°C) for 6-12 hours, or until completely brittle.

Once cooled, grind the dehydrated ingredients into a powder using a spice grinder or food processor. Combine with other dried herbs and spices to create signature rubs, marinades, or seasoning salts. Store in airtight containers, and enjoy the convenience of homemade flavor!

Maintenance and Troubleshooting

Regular cleaning and prompt troubleshooting ensure optimal performance and longevity of your Magic Chef dehydrator. Always unplug before any maintenance!

Cleaning Your Dehydrator

Maintaining a clean dehydrator is crucial for food safety and optimal performance. Always unplug the unit and allow it to cool completely before cleaning. Removable trays and the dehydrator base can be washed with warm, soapy water.

Avoid abrasive cleaners or scouring pads, as these can damage the surfaces. For stubborn residue, soak the trays in warm, soapy water for easier removal. The exterior of the dehydrator can be wiped down with a damp cloth.

Ensure all parts are thoroughly dried before reassembling and storing. Do not immerse the motor housing in water. Regular cleaning prevents the buildup of food particles and ensures hygienic food preservation. A clean dehydrator operates more efficiently and extends its lifespan.

Inspect the unit for any damage during cleaning.

Removing Stuck-On Food

Occasionally, food particles may adhere firmly to the dehydrator trays. To address this, begin by soaking the affected trays in warm, soapy water for an extended period – ideally several hours, or even overnight. This softens the residue, making it easier to remove.

Avoid using metal utensils or abrasive scrubbers, as they can scratch the tray surfaces. Instead, opt for a soft sponge or cloth combined with a gentle cleaning solution. A paste of baking soda and water can also be effective for stubborn spots.

For particularly difficult residue, carefully use a plastic scraper. Ensure all traces of cleaning solution are rinsed away before drying and reassembling the dehydrator.

Troubleshooting Common Issues (No Power, Uneven Drying)

If the dehydrator fails to power on, first verify the power cord is securely plugged into both the unit and a functioning outlet. Check your circuit breaker or fuse box to ensure the circuit hasn’t tripped. If the issue persists, contact customer support;

Uneven drying often results from overcrowding trays. Ensure adequate space between food pieces for proper air circulation. Rotate trays periodically during the drying process to promote consistent results.

Also, confirm the dehydrator is assembled correctly, and the heating element isn’t obstructed. Consistent slice thickness is crucial for uniform drying; adjust accordingly.

Replacing Parts

To ensure the longevity of your Magic Chef dehydrator, replacement parts may occasionally be necessary. Contacting Magic Chef customer support is the recommended first step to identify the correct part number for your MCL10PFDRT model.

Commonly replaced parts include trays, the fan motor, and the heating element. Always unplug the dehydrator and allow it to cool completely before attempting any part replacement.

Carefully follow the instructions provided with the new part, or consult the full manual for detailed guidance. Improper installation can lead to malfunction or safety hazards.

Genuine Magic Chef replacement parts are recommended to maintain performance and warranty validity.

Recipes and Timing Guidelines

Discover delicious recipes for jerky, fruits, and vegetables, alongside precise drying times tailored for your Magic Chef dehydrator model, MCL10PFDRT.

Jerky Recipes and Drying Times

Creating flavorful jerky with your Magic Chef dehydrator is a rewarding experience. Begin with lean cuts of beef, venison, or poultry, thinly sliced for optimal drying. Marinades are key – experiment with teriyaki, peppered, or sweet and savory blends for unique tastes.

For a basic beef jerky, marinate for at least 6 hours, then lay slices in a single layer on the dehydrator trays, ensuring no overlap. Set the temperature to 160°F (71°C). Drying times vary based on thickness and desired chewiness.

Generally, expect 4-8 hours for beef jerky. Check for flexibility – it should bend without breaking. For poultry jerky, ensure an internal temperature of 165°F (74°C) is reached before dehydrating. Always prioritize food safety! Adjust times based on your preference, and remember that thicker pieces require longer drying periods.

Properly dehydrated jerky will be leathery and store well in airtight containers.

Fruit Recipes and Drying Times

Dehydrating fruit preserves its natural sweetness and creates healthy snacks. Apples, bananas, mangoes, and pineapple are excellent choices for beginners. Pre-treatment can prevent browning; consider a lemon juice dip for lighter fruits like apples and pears.

Slice fruit uniformly to ensure even drying. Arrange slices in a single layer on the dehydrator trays, avoiding overlap. Set the temperature to 135°F (57°C) for optimal results. Drying times depend on the fruit type and slice thickness.

Apples typically take 6-12 hours, bananas 8-16 hours, and mangoes 10-18 hours. Check for pliability – fruit should be leathery but not brittle. Properly dried fruit will be slightly chewy and intensely flavored. Store in airtight containers to maintain freshness.

Experiment with different fruit combinations and enjoy the delicious results!

Vegetable Recipes and Drying Times

Dehydrating vegetables concentrates their flavors, creating versatile ingredients for soups, stews, and snacks. Popular choices include tomatoes, carrots, bell peppers, and green beans. Blanching is crucial for most vegetables to stop enzyme activity and preserve color and nutrients.

Blanching involves briefly boiling or steaming vegetables before drying. Arrange blanched vegetables in a single layer on the dehydrator trays, ensuring adequate airflow. Set the temperature to 125°F (52°C) for optimal results. Drying times vary based on the vegetable and thickness.

Tomatoes take 6-12 hours, carrots 8-16 hours, and bell peppers 10-18 hours. Vegetables should be brittle and snap easily when fully dried. Store in airtight containers, protected from light and moisture.

Explore different vegetable blends and seasonings for unique flavor profiles!

Warranty Information

Your Magic Chef dehydrator is covered by a limited warranty against defects in materials and workmanship.

Register your product promptly to activate coverage and access customer support for assistance.

Registering Your Product

Registering your new Magic Chef MCL10PFDRT Food Dehydrator is a crucial step to validate your warranty and ensure access to important product updates and support. This simple process allows us to efficiently handle any potential warranty claims and provide you with timely assistance should you encounter any issues.

To register, locate the product registration card included within the packaging of your dehydrator. Alternatively, you can conveniently register online through the official Magic Chef website. You will need your model number (MCL10PFDRT), the date of purchase, and your contact information.

Online registration is the fastest and most secure method. Keep your proof of purchase safe, as it may be required when submitting a warranty claim. Registering your appliance demonstrates ownership and streamlines the support process, guaranteeing a smoother experience throughout the lifespan of your Magic Chef dehydrator.

Contacting Customer Support

Should you require assistance with your Magic Chef MCL10PFDRT Food Dehydrator, our dedicated customer support team is readily available to provide expert guidance and resolve any concerns you may have. We are committed to ensuring your complete satisfaction with our product and offering prompt, helpful support.

You can reach our customer support team via telephone during business hours. Please have your model number and proof of purchase readily available when contacting us. Alternatively, you can submit a detailed inquiry through the contact form on the official Magic Chef website.

Our website also features a comprehensive FAQ section addressing common questions and troubleshooting tips. We strive to respond to all inquiries within 24-48 hours. We value your feedback and are dedicated to providing exceptional customer service.

thomson refrigerator manual

Thomson Refrigerator Manual: A Comprehensive Guide

Welcome! This manual provides essential guidance for your Thomson refrigerator, ensuring optimal performance and longevity․ Explore detailed instructions, troubleshooting, and support resources․

Understanding Your Thomson Refrigerator

Congratulations on choosing a Thomson refrigerator! This section introduces you to the core functionalities and features designed for efficient food preservation․ Your appliance, whether a mini fridge or a larger model like the THM 70 IX Fridge-Freezer, utilizes advanced cooling technology, potentially leveraging the Joule-Thomson effect․

Familiarize yourself with key components such as the interior light, temperature control, adjustable shelves, crisper drawers, and leveling legs․ Understanding these elements will maximize usability․ Remember to retain this manual for future reference, as it contains vital information regarding operation, maintenance, and potential troubleshooting steps․ Thomson prioritizes user experience, aiming for effortless operation with every product․

Model Identification and Specifications

Identifying your specific Thomson refrigerator model is crucial for accessing accurate support and replacement parts․ Refer to the product label, typically located inside the refrigerator compartment or on the rear panel․ Common models include the 3․2 Cu․ Ft․ Mini Fridge (stainless steel) and the TFR441-B with a 4․6CU FT capacity․

Specifications vary by model, encompassing dimensions, energy consumption, and cooling capacity․ The THM 70 IX Fridge-Freezer, for example, has unique features․ Curtis International Ltd․ oversees Thomson brand products, alongside others like Brandt and Thomson CSF․ Knowing your model number ensures you obtain the correct documentation and assistance when needed․

Safety Precautions

Prioritize safety when installing and operating your Thomson refrigerator․ Always disconnect the appliance from the power supply before cleaning or performing maintenance․ Avoid using flammable cleaning agents, as they pose a fire hazard․ Ensure proper ventilation around the refrigerator to prevent overheating․

Do not store explosive substances inside the unit․ If the power cord is damaged, it must be replaced by a qualified technician․ Keep the appliance out of direct sunlight and away from heat sources․ If you encounter issues, consult the troubleshooting section or contact Thomson support for assistance – 1-800-968-9853․

Initial Setup and Installation

Carefully unpack your Thomson refrigerator and inspect it for any shipping damage․ Remove all packaging materials, including tape and protective film․ Choose a location that is level, well-ventilated, and away from direct sunlight or heat sources․ Ensure sufficient space around the appliance for proper air circulation․

Position the refrigerator and use the front leveling legs to adjust its height, ensuring stability․ Once leveled, allow the unit to stand upright for at least four hours before plugging it in․ This allows the refrigerant to settle, optimizing performance and preventing damage․

Unpacking and Inspection

Upon delivery, thoroughly inspect the exterior of the Thomson refrigerator for any visible signs of damage incurred during transit․ Carefully unpack the appliance, retaining all original packaging materials until you are completely satisfied with the condition of the unit․

Check for loose components or accessories inside the refrigerator․ Verify that all included items, such as shelves, crisper drawers, and the user manual, are present․ If any damage or missing parts are discovered, immediately contact the retailer or Thomson customer support for assistance and do not operate the appliance․

Positioning and Leveling

Select a location for your Thomson refrigerator that is well-ventilated, away from direct sunlight, and heat sources like stoves or radiators․ Ensure sufficient space around the unit – at least 2 inches on the sides and back, and 4 inches above – for proper air circulation․

Use a level to check if the refrigerator is sitting evenly on the floor․ Adjust the front leveling legs by rotating them clockwise or counterclockwise until the unit is stable and does not wobble․ Proper leveling ensures efficient operation and prevents unnecessary noise․ Regularly re-check and adjust as needed․

Key Components and Features

Your Thomson refrigerator is equipped with several key components designed for optimal food preservation and convenience․ These include an interior light for easy visibility, a temperature control system to maintain desired cooling levels, and adjustable refrigerator shelves to accommodate various items․

Additionally, you’ll find a crisper drawer for keeping fruits and vegetables fresh, adjustable front leveling legs for stability, and spacious refrigerator door shelves for storing bottles and smaller items․ The Dispense-A-Can Storage maximizes space efficiency․ Familiarize yourself with these features for the best experience․

Interior Light Operation

The interior light in your Thomson refrigerator automatically illuminates when the door is opened, providing clear visibility of the contents․ This feature simplifies locating items, especially in low-light conditions․ The light utilizes energy-efficient technology for prolonged use․

If the bulb requires replacement, ensure the refrigerator is disconnected from the power supply before attempting any repairs․ Refer to the troubleshooting section for guidance on bulb replacement procedures․ A functioning interior light enhances user convenience and contributes to a positive refrigeration experience․ Always ensure proper illumination for optimal food management․

Temperature Control Settings

Adjusting the temperature within your Thomson refrigerator is crucial for preserving food quality and safety․ The temperature control dial, typically located inside the refrigerator compartment, allows you to select your desired cooling level․ Higher numbers generally indicate colder temperatures, while lower numbers represent warmer settings․

It’s recommended to start with a mid-range setting and monitor the internal temperature using a thermometer․ Avoid drastic adjustments, as this can impact food preservation․ Proper temperature control ensures optimal freshness and prevents spoilage, contributing to a healthier lifestyle and reduced food waste․

Refrigerator Shelves – Adjustment and Removal

Maximizing storage space in your Thomson refrigerator is easy with adjustable shelves․ Most shelves can be repositioned to accommodate items of varying heights․ Gently lift the shelf upwards and then outwards to remove it․ To reinstall, slide the shelf back into the desired slots, ensuring it’s securely in place․

Regularly adjusting and removing shelves allows for flexible organization, preventing overcrowding and ensuring proper air circulation․ This contributes to consistent cooling throughout the refrigerator․ Always handle shelves with care to avoid damage, and never overload them beyond their weight capacity․

Crisper Drawer – Usage and Maintenance

Optimize freshness of your produce using the crisper drawer in your Thomson refrigerator․ These drawers are designed to maintain ideal humidity levels for fruits and vegetables, extending their shelf life․ Separate drawers may offer humidity control – adjust accordingly․

For maintenance, remove the drawer periodically and wash it with warm, soapy water․ Ensure it’s completely dry before reinserting․ Avoid placing excessively wet produce directly into the drawer to prevent condensation buildup․ Regularly check for and remove any spoiled items to maintain hygiene and prevent odors․

Front Leveling Legs – Adjustment Guide

Ensure stability and proper door sealing by adjusting the front leveling legs of your Thomson refrigerator․ Locate the legs at the bottom front corners of the appliance․ Use a level to check if the refrigerator is perfectly horizontal and vertical․

To adjust, rotate the legs clockwise to raise that corner, and counter-clockwise to lower it․ Small adjustments are key! Confirm the refrigerator doesn’t wobble․ Proper leveling minimizes noise and ensures efficient operation․ Regularly check and readjust as needed, especially after moving the appliance․

Refrigerator Door Shelves – Capacity and Safety

Maximize storage with the adjustable door shelves in your Thomson refrigerator, designed for frequently used items like condiments and beverages․ Be mindful of weight distribution; avoid overloading shelves to prevent tipping or damage․

The door shelves have a specified weight capacity – do not exceed it․ Ensure items are securely placed to avoid falling when opening the door․ Regularly check shelf stability․ Avoid storing extremely heavy or bulky items on the upper shelves for enhanced safety and prevent potential accidents․

Operating Instructions

Begin by ensuring your Thomson refrigerator is properly installed and connected to a grounded power outlet․ To initiate cooling, set the desired temperature using the internal temperature control․ Allow several hours for the refrigerator to reach the selected temperature․

Utilize the interior light for optimal visibility when accessing food․ Follow recommended food storage guidelines to maintain freshness and prevent spoilage․ Regularly monitor the temperature to ensure consistent cooling․ Familiarize yourself with the control panel for efficient operation and enjoy your Thomson appliance!

Setting the Temperature

Adjusting the temperature is crucial for optimal food preservation․ Locate the temperature control dial or digital panel inside your Thomson refrigerator․ Higher numbers generally indicate colder temperatures, while lower numbers represent warmer settings․ Begin with a mid-range setting and allow 24 hours for stabilization․

Monitor food temperatures to fine-tune the setting․ Avoid drastic adjustments; small increments are recommended․ Remember that frequent door openings can affect internal temperature․ For optimal performance, maintain a refrigerator temperature between 37°F (3°C) and 40°F (4°C)․

Using the Interior Light

The interior light illuminates the refrigerator’s contents for easy visibility․ Typically, the light automatically activates when the door is opened and deactivates upon closure․ If the bulb is not functioning, first ensure the refrigerator is properly connected to a power source․

To replace the bulb, disconnect the refrigerator from power․ Consult the ‘Key Components and Features’ section for bulb type and location․ Carefully remove the old bulb and install the new one․ If the light still doesn’t work, contact Thomson support for assistance․ Avoid prolonged use with the door open․

Food Storage Guidelines

Proper food storage is crucial for maintaining freshness and preventing spoilage․ Store raw meats on the lowest shelf to avoid cross-contamination․ Utilize the crisper drawers for fruits and vegetables, adjusting humidity settings as needed․ Dairy products should be kept in the coldest part of the refrigerator, typically on upper shelves․

Leftovers should be stored in airtight containers and consumed within a few days․ Avoid overcrowding the refrigerator, as this can impede airflow and affect cooling efficiency․ Regularly check expiration dates and discard any spoiled items promptly․

Maintenance and Cleaning

Regular maintenance ensures your Thomson refrigerator operates efficiently and reliably․ Perform routine cleaning with a mild detergent and warm water, avoiding abrasive cleaners․ Wipe up spills immediately to prevent staining and odor buildup․ Periodically defrost the freezer compartment to remove ice accumulation, improving cooling performance․

Clean the condenser coils at the back of the refrigerator every six months to maintain optimal heat exchange․ Inspect door seals for damage and replace if necessary․ Following these simple steps will prolong the life of your appliance and keep it functioning at its best․

Regular Cleaning Procedures

To maintain a hygienic and efficient Thomson refrigerator, implement regular cleaning․ Begin by disconnecting the power supply․ Remove all food items and shelves․ Wash interior surfaces with a solution of baking soda and warm water – approximately one tablespoon of baking soda per quart of water․ Avoid harsh chemicals or abrasive cleaners․

Clean shelves and drawers separately, then thoroughly rinse and dry before replacing․ Wipe down the exterior with a damp cloth․ Pay attention to door handles and seals․ Consistent cleaning prevents odor buildup and ensures optimal performance․

Defrosting Your Refrigerator

If ice accumulates excessively within your Thomson refrigerator, manual defrosting is necessary․ Disconnect the power supply and remove all food items․ Leave the door open to allow the ice to melt naturally – this may take several hours․ To expedite the process, place bowls of warm water inside․

Avoid using sharp objects to chip away at the ice, as this can damage the refrigerator’s interior․ Once all ice has melted, thoroughly dry the interior with a clean cloth before reconnecting the power and replacing food․

Cleaning the Condenser Coils

Regularly cleaning the condenser coils enhances your Thomson refrigerator’s efficiency․ Locate the coils – typically at the back or underneath the unit․ Disconnect power before cleaning! Use a vacuum cleaner with a brush attachment to gently remove dust, dirt, and debris from the coils․

Avoid bending or damaging the coils during cleaning․ A clean condenser allows for better heat dissipation, reducing energy consumption and ensuring optimal cooling performance․ Repeat this process at least twice a year, or more frequently if needed, to maintain peak efficiency․

Troubleshooting Common Issues

Encountering problems? This section addresses frequent concerns with your Thomson refrigerator․ If the refrigerator isn’t cooling, check the temperature settings and ensure the door seals are intact․ Excessive noise might indicate an uneven surface – adjust the leveling legs․

Water leaks could stem from a clogged defrost drain; clear any obstructions․ If issues persist, do not attempt complex repairs yourself․ Consult the repair information section or contact Thomson support for professional assistance․ Prioritize safety and avoid damaging the appliance․

Refrigerator Not Cooling

Is your Thomson refrigerator failing to maintain a cold temperature? First, verify the temperature control settings are appropriately adjusted – a lower setting means greater cooling․ Inspect the door seals for any gaps or damage, as compromised seals allow warm air to enter․ Ensure the condenser coils are clean and free of dust, as buildup hinders heat dissipation․

Also, confirm the refrigerator isn’t overloaded, blocking airflow․ If the problem continues, avoid self-repair and consult the support resources or a qualified technician for diagnosis and repair․

Excessive Noise

Is your Thomson refrigerator producing unusual or loud noises? Initially, ensure the refrigerator is level and stable; an uneven surface can cause vibrations․ Check if items inside are rattling against each other or the shelves – rearrange contents to eliminate contact․ Confirm the condenser fan is unobstructed and spinning freely; debris can cause noise․

If the noise persists, it could indicate a compressor or fan motor issue․ Avoid attempting internal repairs yourself․ Contact Thomson support or a qualified technician for professional diagnosis and resolution to prevent further damage․

Water Leaks

Discovering water leaks from your Thomson refrigerator requires immediate attention․ First, verify the drain tube located at the back of the refrigerator isn’t clogged; a blockage can cause water overflow․ Inspect the water supply line (if applicable, for ice makers/dispensers) for loose connections or cracks․ Ensure the door seals are clean and creating a tight closure; damaged seals allow warm, moist air to enter․

If the leak continues, do not attempt complex repairs․ Contact Thomson support or a qualified appliance technician for professional assessment and repair to prevent potential water damage․

Repair Information and Resources

Should your Thomson refrigerator require repair, several resources are available․ Consider exploring local Repair Cafés for free, volunteer-based assistance – a sustainable and cost-effective option․ For more complex issues, accessing official Thomson support is crucial․ Curtis International Ltd․ provides support; contact information is detailed within this manual and online․

For qualified technicians, electrical schematics may be available upon request․ Always prioritize safety; attempting repairs without proper knowledge can be hazardous․ Remember to retain proof of purchase for warranty claims and potential service appointments․

Finding Repair Cafes

If your Thomson refrigerator is defective and the manual doesn’t offer a solution, a Repair Café can be an excellent resource․ These community-based workshops offer free repair services, promoting sustainability and reducing waste․ Skilled volunteers assist with diagnosing and fixing various appliances, including refrigerators․

To locate a Repair Café near you, utilize online search engines or visit dedicated Repair Café directories․ These organizations often operate on scheduled days, so checking their availability beforehand is recommended․ Bring your refrigerator’s manual and any relevant documentation to aid the repair process․

Accessing Thomson Support

For service assistance and product information regarding your Thomson refrigerator, Curtis International Ltd․ provides dedicated support channels․ You can reach them directly by calling 1-800-968-9853․ This helpline is staffed to address your queries and guide you through troubleshooting steps․

Additionally, explore the Thomson brand’s associated companies – THOMSON BRANDT, THOMSON CSF, and others – as they may offer supplementary resources or regional support options․ Retain your refrigerator’s model number (e․g․, THM 70 IX) when contacting support to expedite the assistance process and ensure accurate guidance․

Specific Model: THM 70 IX Fridge-Freezer

The THM 70 IX fridge-freezer is a popular Thomson model, boasting a 3․2 Cu․ Ft․ capacity and a sleek stainless steel finish․ Key features include an interior light for enhanced visibility, adjustable temperature control, and versatile refrigerator shelves․ It also incorporates a convenient crisper drawer for optimal food preservation and robust front leveling legs for stability․

Furthermore, the door shelves offer ample storage, and a dispense-a-can storage area maximizes space efficiency․ This model’s 60-page manual (approximately 942KB or 1MB) provides comprehensive instructions, ensuring a seamless user experience․ Familiarize yourself with its components for optimal operation․

Understanding the Joule-Thomson Effect (Relevant to Cooling Systems)

The Joule-Thomson effect is a fundamental principle behind the cooling systems in many refrigerators, including Thomson models․ This phenomenon describes the temperature change observed when a gas is forced through a valve or porous plug under adiabatic conditions – meaning no heat is exchanged with the surroundings․

Specifically, expanding a gas causes a temperature drop, which is harnessed for refrigeration․ Documents detail how thermal stages utilize this effect․ Understanding this principle provides insight into how your Thomson refrigerator efficiently maintains low temperatures, ensuring optimal food preservation and performance․

Curtis International Ltd․ – Contact Information

For service assistance and product information regarding your Thomson refrigerator, please contact Curtis International Ltd․ directly․ They are the primary support channel for all Thomson appliance inquiries and repair needs․ The provided documentation indicates a dedicated support line is available at 1-800-968-9853․

Curtis International Ltd․ is the official distributor and service provider for the Thomson brand, encompassing various associated companies like Thomson Brandt, Thomson CSF, and others․ Reaching out to them ensures you receive accurate and authorized assistance for your specific model and any related concerns․

Thomson Brand and Associated Companies

The Thomson brand operates under the umbrella of Curtis International Ltd․, a company with a diverse portfolio of associated entities․ These include Thomson Brandt, a European brand, and Thomson CSF, historically a significant French electronics corporation․ Further affiliations extend to Japanese companies such as TLV Company Limited, Tohoku Metal Industries Limited, Tokico Limited, and Tokuyama Soda Company Limited․

This network of companies contributes to the manufacturing, distribution, and support of Thomson products, including refrigerators․ Understanding these connections highlights the global reach and collaborative nature of the Thomson brand’s operations, ensuring quality and service standards are maintained․

User Manual Availability and Download

Accessing your Thomson refrigerator’s user manual is straightforward․ While a physical copy is often included with your appliance, digital versions are readily available for download․ These online manuals typically encompass 60 pages and require approximately 942KB or 1MB of storage space․

Locate your specific model number – such as THM 70 IX – to ensure you download the correct documentation․ Online resources and the Curtis International Ltd․ website are primary sources․ Having a digital copy provides convenient access to troubleshooting tips, safety precautions, and operational instructions whenever needed․

Warranty Information

Your Thomson refrigerator is protected by a limited warranty, safeguarding against manufacturing defects in materials and workmanship․ The specific terms and duration of this warranty vary depending on the model and region of purchase․

Carefully review the warranty documentation included with your appliance for complete details․ Typically, the warranty covers parts and labor for a specified period․ Registration of your product may be required to activate the full warranty benefits․ Retain your proof of purchase, as it’s essential for any warranty claims․ Contact Thomson support for assistance․

Electrical Schematics (For Qualified Technicians)

Access to detailed electrical schematics is restricted to qualified and certified technicians only․ These diagrams illustrate the complex wiring configurations within the Thomson refrigerator, crucial for accurate diagnostics and repairs․

Improper handling of electrical components can pose significant safety risks․ These schematics are not intended for use by untrained individuals․ Contact Thomson support or an authorized service center to request access to these documents, providing proof of your professional qualifications․ Always disconnect power before servicing any electrical components․

forest river owners manual pdf free download

Forest River Owners Manual PDF: A Comprehensive Guide

Accessing your Forest River RV’s manual in PDF format is now streamlined, offering free downloads via the official website and authorized dealer networks.

Understanding Forest River RVs

Forest River, a prominent RV manufacturer, boasts a diverse portfolio encompassing travel trailers, fifth wheels, motorhomes, and destination trailers under various brands like Wildwood, Rockwood, Flagstaff, and Palomino.
Understanding the intricacies of your specific Forest River RV model is paramount for safe and enjoyable travels. Each RV, despite the overarching brand, features unique components, systems, and operational procedures.
Consequently, a dedicated owner’s manual is indispensable. These manuals provide detailed instructions on everything from setting up and operating appliances to maintaining the chassis and addressing potential issues.
Locating the correct PDF manual ensures you have access to model-specific guidance, maximizing your RV experience and minimizing unexpected complications on the road.

Why You Need the Owners Manual

Possessing your Forest River RV’s owner’s manual is absolutely crucial for several reasons. It’s your primary resource for understanding the specific features and operational procedures of your RV model.
The manual details proper setup, operation, and winterization techniques, preventing potential damage and costly repairs. It also provides vital safety information, ensuring the well-being of you and your passengers.
Furthermore, the manual serves as a troubleshooting guide for common issues, potentially saving you time and money on service calls.
Having the PDF version readily available on your smartphone or tablet grants instant access to this essential information, wherever your adventures take you. Don’t underestimate its value!

Locating the Official Forest River Owners Manual PDF

Finding the official Forest River Owners Manual PDF is a straightforward process. Your initial step should be the official Forest River website; it’s the primary source for these documents.
Alternatively, authorized Forest River dealer portals often host downloadable PDFs tailored to the models they sell. These portals frequently offer a search function, allowing you to quickly locate the manual specific to your RV’s year and model number.
Remember to verify the authenticity of the source to avoid outdated or inaccurate information. Utilizing these official channels guarantees you receive the correct and most up-to-date manual for your Forest River RV.

Forest River Website – Primary Source

The Forest River website serves as the definitive, primary source for locating your RV’s owner manual in PDF format. Navigating the site, utilize the search function and input your RV’s specific model and year to pinpoint the correct documentation.
The website provides access to a comprehensive library of manuals, covering a wide range of Forest River brands and models.
Furthermore, you can often find component-specific manuals directly linked from the main RV manual page. This ensures you have all the necessary information at your fingertips, readily available for free download and convenient offline access.

Authorized Dealer Portals

Forest River’s network of authorized dealers frequently provides access to owner manuals in PDF format through their dedicated online portals. Many dealerships maintain a resource section on their websites specifically for owner support, including downloadable manuals.
Contacting your local Forest River dealer directly is an excellent approach; they can often email you the appropriate PDF manual for your RV model.
These dealer portals often offer a more personalized experience, potentially including model-specific guides and troubleshooting tips alongside the standard owner’s manual, all available as a free download.

Component-Specific Manuals: A Deep Dive

Beyond the overall RV manual, Forest River utilizes component-specific documentation, readily available as downloadable PDFs. These manuals cover individual systems like appliances, audio/visual setups, awnings, and crucial axle/suspension components.
The Forest River website features a dedicated search function allowing users to pinpoint manuals for specific parts.
Accessing these PDFs ensures detailed instructions for operation, maintenance, and troubleshooting.
This granular approach provides a comprehensive understanding of each system, empowering owners with the knowledge to address issues or perform routine upkeep effectively, all available for free download.

Appliance Manuals

Forest River RV appliance manuals, accessible as free PDF downloads, are vital for understanding your RV’s kitchen and comfort systems. These documents detail operation, safety precautions, and maintenance schedules for refrigerators, stoves, microwaves, water heaters, and air conditioners.
Locating these manuals through the Forest River website or component manufacturer sites ensures you have the most accurate and up-to-date information.
Properly utilizing these guides extends appliance lifespan, optimizes performance, and helps prevent costly repairs.
Understanding troubleshooting steps within the manuals empowers owners to resolve minor issues independently, enhancing the RV experience.

Audio/Visual & Multimedia Systems

Free PDF downloads of Forest River RV audio/visual system manuals are crucial for maximizing your entertainment experience on the road. These guides cover everything from setting up your RV’s television, stereo, and DVD player to troubleshooting connectivity issues and understanding advanced features.
Accessing these manuals via the Forest River website or directly from component manufacturers ensures you have the latest instructions.
Properly utilizing these resources allows owners to fully enjoy their multimedia systems, enhancing travel comfort and entertainment.
Understanding the system’s capabilities and maintenance requirements prolongs its lifespan and prevents frustrating malfunctions.

Awning Operation & Maintenance

Locating the free PDF of your Forest River RV awning’s manual is essential for safe and effective operation. These guides detail proper extension and retraction procedures, preventing damage to the awning fabric and mechanism.
Maintenance instructions cover cleaning, fabric protection, and winter storage to maximize the awning’s lifespan.
Understanding the awning’s features, like automatic retraction sensors or adjustable pitch, enhances usability.
Downloading the manual from the Forest River website or component manufacturer provides the most accurate and up-to-date information, ensuring worry-free enjoyment of your outdoor living space.

Axle & Suspension Guides

Free PDF downloads of Forest River RV axle and suspension guides are crucial for maintaining ride quality and safety. These manuals provide detailed information on weight distribution, tire pressure recommendations, and suspension component inspection procedures.
Understanding your axle’s load capacity and suspension system’s specifications prevents overloading and potential damage.
Maintenance schedules outline lubrication requirements and visual checks for wear and tear.
Accessing these guides via the Forest River website or component manufacturer ensures you have the correct information for your specific model, promoting safe and comfortable travels.

Troubleshooting Common Issues with Manuals

When accessing Forest River owners manuals in PDF format, several issues can arise. Corrupted downloads or incompatible PDF readers may prevent access, requiring re-downloading or updating software.
Searching for specific information within lengthy manuals can be challenging; utilize the PDF reader’s search function with relevant keywords.
If a manual is missing, check the Forest River website’s component-specific section or contact your authorized dealer.
Remember that component manuals often address issues not covered in the main RV manual, offering a more detailed troubleshooting resource.

Forest River Wildwood Manuals – Specific Models

Locating the correct PDF manual for your Forest River Wildwood model is crucial for maintenance and repair. Unlike generic RV guides, Wildwood manuals are often downloadable in PDF format directly from the official Forest River website or through authorized dealer portals.
Ensure you have your RV’s VIN readily available, as it may be required to pinpoint the exact manual for your year and configuration.
Wildwood manuals cover a wide range of models, from travel trailers to fifth wheels, so precise identification is key.
Component manuals, detailing appliances and systems, supplement the main Wildwood manual for comprehensive support.

Rockwood & Flagstaff A-Frame Manuals

Finding the PDF manual for your Rockwood or Flagstaff A-Frame RV is essential for understanding its unique features. These manuals, available as free downloads, detail the specific operation and maintenance procedures for A-Frame models.
A consolidated PDF covering all Forest River trailers, including Rockwood and Flagstaff A-Frames, can be a starting point for general information.
However, always prioritize locating the manual specific to your A-Frame’s year and model number for accurate guidance.
Remember to supplement the main manual with component-specific PDFs for appliances, awnings, and other systems.

Palomino Unit Manuals

Locating the correct PDF manual for your Palomino RV is crucial for optimal ownership and maintenance. Forest River provides dedicated resources for Palomino unit owners, offering free downloadable manuals tailored to specific models and production years.
You can find dedicated “OWNERS MANUAL FOR PALOMINO UNITS” resources online, ensuring you have access to the precise information needed for your RV.
Remember to cross-reference the manual’s model year with your RV’s manufacturing date to guarantee compatibility.
Don’t forget to explore component-specific manuals alongside the main Palomino unit manual for comprehensive guidance.

Dealing with Older RV Models (2015 and Earlier)

Finding PDF manuals for Forest River RVs manufactured in 2015 or earlier can present unique challenges, but resources are still available. While direct links on the official website might be limited for older models, component-specific manuals remain accessible.
Utilize the “OWNERS MANUAL FOR A UNIT 2015 OR NEWER” section as a starting point, as some information may overlap.
Explore authorized dealer portals and online RV forums, where owners often share archived manuals.
Remember to carefully verify the manual’s applicability to your specific model year and configuration.

Forest App Optimization for Manual Access

Optimizing the Forest app on your smartphone ensures seamless access to digital RV manuals and related resources. Enable App Lock for enhanced security, preventing unauthorized access to your stored documents.
Add Forest to your AutoLaunch/AutoStart apps list for immediate availability upon device startup.
Grant all notification permissions to receive timely updates regarding manual revisions or new features.
Crucially, disable power-saving settings for Forest within your battery configuration; this prevents the app from being throttled or shut down, guaranteeing uninterrupted manual access when you need it most.

Enabling App Lock

Securing your Forest app with an App Lock feature is a vital step in protecting your sensitive RV documentation. This function prevents unauthorized individuals from accessing your downloaded Forest River owners manuals and other critical information.
Within the app’s settings, locate the “Privacy” or “Security” section.
Toggle the “App Lock” option to activate it.
You will likely be prompted to set a PIN, pattern, or utilize biometric authentication (fingerprint or facial recognition) for access.
Remember this security credential, as it will be required each time you open the Forest app, safeguarding your valuable RV resources.

AutoLaunch/AutoStart Configuration

Configuring the Forest app for AutoLaunch or AutoStart ensures seamless access to your Forest River owners manuals upon device startup. This feature eliminates the need to manually open the app each time you require your RV documentation.
Navigate to your device’s settings, typically under “Apps” or “Application Manager.”
Locate the Forest app within the list of installed applications.
Enable the “AutoLaunch” or “AutoStart” option (the terminology may vary depending on your device’s operating system).
This setting allows the app to automatically launch in the background, providing quick and convenient access to your essential RV manuals whenever needed.

Notification Permissions

Enabling all notification permissions for the Forest app is crucial for receiving timely updates regarding your Forest River owners manuals. These notifications can alert you to new manual revisions, important safety recalls, or helpful tips for maintaining your RV.
Access your device’s settings and navigate to the “Apps” or “Application Manager” section.
Select the Forest app from the list of installed applications.
Tap on “Notifications” and ensure that all notification categories are toggled “on.”
Allowing notifications guarantees you’ll stay informed about any changes or additions to your RV’s documentation, enhancing your ownership experience.

Battery Saving Settings

To ensure uninterrupted access to your Forest River owners manuals within the Forest app, it’s vital to disable power-saving related options. Battery optimization features can restrict the app’s background activity, potentially hindering manual downloads or updates.
Navigate to your device’s “Battery” settings and locate the “Battery Optimization” or similar section.
Find the Forest app in the list and select “Don’t Optimize.”
This prevents the system from limiting the app’s performance when running in the background.
Disabling these restrictions guarantees seamless access to crucial documentation, even when your device’s battery is low, supporting informed RV maintenance and operation.

Forest River & Environmental Initiatives: Trees for the Future

Forest River demonstrates a commitment to sustainability through a partnership with Trees for the Future, a real-tree-planting organization. This initiative links virtual engagement within the Forest app to tangible environmental impact.
Users earn virtual coins within the app, and Forest River facilitates the donation of these earnings to Trees for the Future.
These donations directly fund the planting of real trees globally, contributing to reforestation efforts and combating deforestation.
This unique program allows Forest River customers to actively participate in environmental conservation while accessing their RV manuals, showcasing a dedication to both product support and ecological responsibility.

EU Deforestation Regulation & Forest River

Forest River is proactively addressing the EU’s Regulation (EU) 2023/1115, focused on deforestation-free products and supply chains. This regulation aims to minimize the European Union’s contribution to global deforestation and forest degradation.
By prioritizing the consumption of deforestation-free commodities, Forest River aligns with the EU’s goals of responsible sourcing and environmental stewardship.
This commitment extends to all aspects of their operations, ensuring compliance with the new standards and promoting sustainable practices throughout their supply network.
Forest River’s dedication to responsible manufacturing supports the EU’s efforts to protect vital forest ecosystems worldwide.

Braga Game Travel Arrangements (Contextual Reference)

Discussions surrounding travel arrangements to Braga, Portugal, for a game have surfaced within online RV communities. Users are coordinating a five-day trip, seeking advice and sharing plans related to the journey.
This context, while seemingly unrelated, highlights the active online presence of Forest River RV owners and their engagement in travel-related discussions.
The need for readily accessible information, such as owners’ manuals in PDF format, becomes even more apparent when planning extended trips.
Having quick access to troubleshooting guides and component manuals ensures a smoother and more enjoyable travel experience for Forest River owners venturing to destinations like Braga.

PDF Manual Availability – General Overview

Forest River RV owners can generally find PDF versions of their manuals readily available online, primarily through official channels; The Forest River website and authorized dealer portals serve as the primary sources for these downloadable documents.
These PDFs encompass comprehensive guides for various models, including Wildwood, Rockwood, and Flagstaff, as well as Palomino units.
Furthermore, component-specific manuals – covering appliances, audio systems, awnings, and axles – are also accessible in PDF format.
This widespread availability ensures owners have convenient access to vital information for maintenance, troubleshooting, and optimal RV operation, enhancing their ownership experience.

Alternative Sources for Manuals (Caution Advised)

While the official Forest River website is the recommended source, alternative online platforms may offer PDF manuals. However, exercising caution is crucial when utilizing these sources.
Third-party websites may host outdated, incomplete, or even inaccurate versions of the manuals, potentially leading to incorrect maintenance or operational procedures.
Always verify the authenticity and currency of any downloaded manual against information available on the official Forest River site or through an authorized dealer.

Prioritize official sources to ensure you have the most reliable and up-to-date documentation for your specific RV model, safeguarding its performance and your safety.

Understanding Component Manual Sections

Component manuals, accessible as PDFs, are divided into key sections for efficient troubleshooting and maintenance. Typically, you’ll find a ‘Safety Precautions’ segment outlining critical warnings.
‘Installation Instructions’ detail proper setup, while ‘Operating Procedures’ explain daily use.
‘Maintenance Schedules’ provide guidelines for routine upkeep, extending component lifespan.
‘Troubleshooting Guides’ assist in diagnosing common issues, and ‘Parts Lists’ facilitate replacements.
Familiarizing yourself with these sections allows for targeted information retrieval, ensuring you can effectively address specific needs related to your RV’s appliances, audio systems, or suspension components.

Tips for Effective Manual Use

Maximize your Forest River manual’s utility by adopting a few key strategies. First, download and save the PDF to multiple devices for accessibility.
Utilize the search function to quickly locate specific information, avoiding lengthy browsing.
Bookmark frequently referenced sections for rapid access.
Don’t hesitate to annotate the PDF with notes or highlights for personalized reminders.
When troubleshooting, cross-reference the main RV manual with component-specific guides.
Finally, remember that manuals are living documents; check for updates on the Forest River website to ensure you have the latest information.

Staying Updated with Manual Revisions

Forest River frequently updates its manuals to reflect design changes and address reported issues. Regularly checking the official Forest River website is crucial for accessing the most current PDF versions.
Pay attention to the date of revision listed on the manual itself.
Subscribe to Forest River’s newsletter or online forums to receive notifications about updates.
Component manufacturers also release revisions; check their websites for appliance or system-specific changes.
Downloading a fresh copy annually is a proactive approach.
Ignoring updates can lead to incorrect maintenance or operation, potentially voiding warranties, so stay informed!