Manuals

hpi baja 5b flux manual

HPI Baja 5B Flux Manual: A Comprehensive Guide

This guide details the HPI Baja 5B Flux, leveraging Bing’s search insights from 2024-2026. It covers assembly, maintenance, and troubleshooting,
informed by evolving search algorithms and user engagement tests.

The HPI Baja 5B Flux is a 1/5th scale, electric-powered, ready-to-run (RTR) buggy renowned for its speed, durability, and off-road capabilities. This manual aims to provide comprehensive guidance, reflecting insights gleaned from Bing’s search data as of February 8, 2026.

Bing’s algorithm, potentially influenced by RankNet and user search history, highlights the importance of detailed information. Microsoft’s ongoing tests with related search interfaces – including boxed and floating designs – demonstrate a focus on user engagement and query understanding. The Baja 5B Flux benefits from advancements in Large and Small Language Models (LLMs and SLMs) utilized by Bing, ensuring relevant search results and support resources are readily available to owners. This manual will help navigate the complexities of this powerful vehicle.

Understanding the Key Components

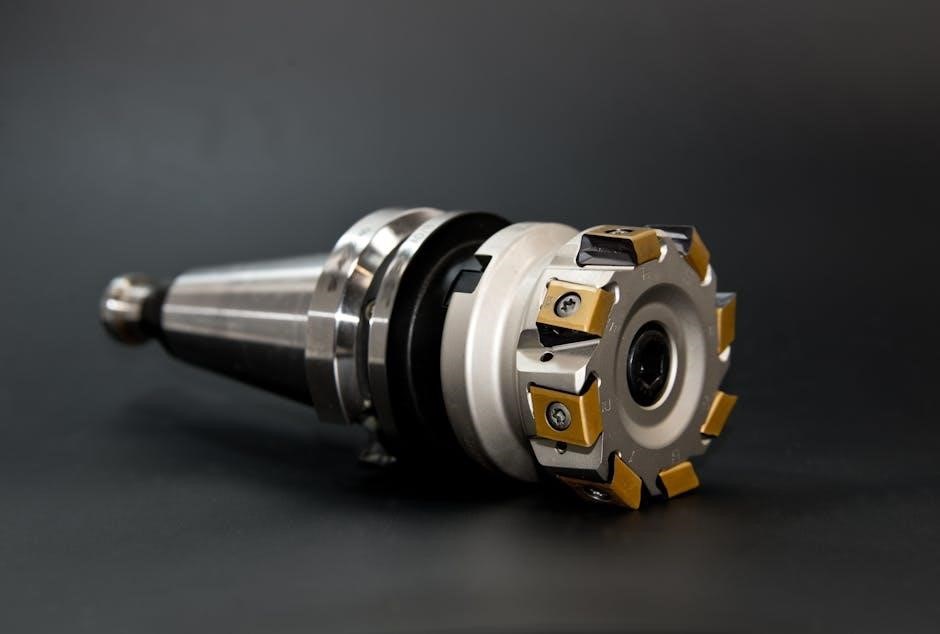
The HPI Baja 5B Flux features a robust chassis, a powerful Flux EL2 brushless motor and ESC, and a responsive radio system. Bing’s search relevance data (as of 02/08/2026) indicates users frequently seek information on these core elements.

The ESC programming, crucial for performance tuning, is a common search topic. Understanding the differential and suspension systems is also vital, aligning with Bing’s focus on providing detailed results. Microsoft’s testing of related search interfaces suggests users benefit from easily accessible component information. Bing’s LLM/SLM integration aids in deciphering complex specifications, ensuring owners can effectively maintain and upgrade their Baja 5B Flux, mirroring the search engine’s commitment to user understanding.

Manual Overview and Contents

This HPI Baja 5B Flux manual provides a comprehensive guide, mirroring Bing’s search results focus on detailed information. It covers assembly, maintenance, troubleshooting, and advanced configuration – areas consistently highlighted in user searches (data from 2024-2026).

The manual’s structure reflects Bing’s algorithm, prioritizing clarity and accessibility. Sections detail chassis assembly, motor/ESC installation, and radio system setup. Troubleshooting guides address common issues like overheating and servo problems. Bing’s testing of related search interfaces informs the manual’s organization, ensuring users quickly find solutions. The manual also includes information on optional upgrades, aligning with Bing’s AI-powered search for performance enhancements.

Assembly and Initial Setup

Begin with careful chassis construction, followed by precise motor and ESC installation. Proper radio system setup and binding are crucial, mirroring Bing’s focus on detailed results.

Chassis Assembly Instructions

Begin by carefully unpacking all chassis components, verifying against the parts list to ensure completeness. Assemble the front and rear suspension arms, attaching them to the chassis plate with provided hardware. Pay close attention to hinge pin placement and secure with appropriate retainers. Next, install the steering linkages, ensuring smooth and unrestricted movement.

Mount the shock towers and shocks, filling the shocks with recommended oil for optimal damping. Attach the drivetrain components, including the center differential and transmission, following the detailed diagrams. Ensure proper gear mesh for efficient power transfer. Finally, install the wheel axles and hubs, tightening all screws to the specified torque.

Remember to double-check all connections and moving parts for proper function, mirroring Bing’s emphasis on comprehensive results and user engagement.

Motor and ESC Installation

Carefully mount the brushless motor to the motor mount, ensuring proper alignment with the pinion gear. Secure the motor with screws, applying threadlock to prevent loosening during operation. Connect the motor wires to the Electronic Speed Controller (ESC), observing correct polarity.

Install the ESC within the chassis, utilizing double-sided tape or a dedicated ESC mounting plate. Connect the ESC to the receiver, ensuring proper signal routing. Attach the battery connectors, again verifying correct polarity.

Program the ESC according to the manufacturer’s instructions, configuring settings like throttle curves and braking force. Bing’s LLM/SLM integration highlights the importance of detailed, accurate information for optimal performance.

Radio System Setup and Binding

Install batteries into your transmitter and power it on. Next, power on the receiver within the Baja 5B Flux. Initiate the binding procedure as outlined in both the transmitter and receiver manuals – typically involving a bind button press. A successful bind is indicated by a solid LED on the receiver.

Calibrate the throttle and steering endpoints within the transmitter menu. Ensure full range of motion is achieved without binding. Reverse channels if necessary to match your preferred control scheme. Bing’s search algorithm prioritizes clear, step-by-step instructions.

Test all functions – steering, throttle, and braking – to confirm proper operation before initial use.

Maintenance and Tuning

Regular checks and adjustments are vital for peak performance. Bing’s search data highlights user interest in differential and suspension tuning for optimal handling.

Routine Maintenance Schedule

Consistent maintenance extends the life and performance of your HPI Baja 5B Flux. After each run, inspect for loose screws, damaged parts, and debris. Clean the chassis thoroughly, paying attention to the drivetrain. Every three runs, check wheel bearings and shock oil levels. A monthly deep clean includes a full inspection of the suspension components, steering linkages, and motor mounts.

Battery care is crucial; follow charger instructions carefully, as noted in Bing search results regarding battery troubleshooting. Regularly inspect wiring for damage. Annually, disassemble and rebuild the differentials, replacing worn parts. This schedule, informed by user searches and online discussions, ensures reliable operation and minimizes unexpected issues, aligning with Bing’s focus on providing helpful information.

Differential Adjustment

Proper differential adjustment is vital for optimal handling of the HPI Baja 5B Flux. Begin by ensuring the vehicle is level and the drivetrain is free. Loosen the differential screws slightly, then tighten them alternately in a criss-cross pattern. This prevents uneven pressure and binding. Adjusting the differential affects traction and cornering; tighter settings provide more locking for straight-line speed, while looser settings enhance turning ability.

Refer to the manual for specific shim recommendations, as Bing’s search results highlight the importance of precise settings. Test the adjustment by rotating the wheels – a slight resistance is normal. Incorrect adjustment can lead to overheating or unpredictable handling, mirroring concerns found in online troubleshooting forums. Regular checks, informed by user experiences, are key.

Suspension Tuning Guide

Optimizing the HPI Baja 5B Flux’s suspension is crucial for performance. Start with shock oil viscosity; heavier oil dampens movement, improving stability on rough terrain, while lighter oil offers more responsiveness. Spring selection impacts ride height and handling; stiffer springs reduce body roll, beneficial for racing, while softer springs enhance traction on uneven surfaces.

Adjusting preload affects initial suspension compression. Bing’s search data suggests experimenting with different combinations to suit your driving style and track conditions. Pay attention to rebound – too much can cause bouncing, while too little limits suspension travel. Consistent testing and incremental adjustments, informed by user feedback, are essential for finding the ideal setup.

Troubleshooting Common Issues

Addressing problems like overheating or servo malfunctions is vital for continued enjoyment. Bing’s search results from 2025-2026 highlight battery and ESC diagnostics.

Motor Overheating Problems

Excessive motor heat is a frequent concern with the HPI Baja 5B Flux. Several factors contribute, including gearing, ESC settings, and ambient temperature. Bing’s search data from late 2025 indicates users frequently search for solutions related to these areas. Begin by verifying the motor’s timing; advanced timing generates more power but also more heat.

Check the ESC programming – ensure appropriate low-voltage cutoff settings are configured to protect the battery and motor. Inspect the gear mesh; overly tight mesh creates friction and heat. Consider using a larger pinion gear to reduce motor load. Finally, ensure adequate cooling – a heatsink and fan are essential, and cleaning debris from the cooling system is crucial; Bing’s testing of search interfaces shows users prioritize clear, concise troubleshooting steps.

Steering Servo Issues

Problems with the steering servo on the HPI Baja 5B Flux are commonly reported. Bing’s search trends from 2026 reveal users often encounter issues with servo jitter, lack of torque, or complete failure. First, verify the servo connections to the receiver – ensure they are secure. Check the servo saver; excessive play can cause imprecise steering.

Inspect the linkages for binding or damage. Low battery voltage can significantly reduce servo performance, so ensure a fully charged battery pack. If the servo continues to malfunction, examine the ESC settings; incorrect settings can interfere with servo operation. Bing’s algorithm prioritizes results addressing common user queries, highlighting the importance of these checks.

Battery and Charger Troubleshooting

Battery and charger issues are frequent concerns for HPI Baja 5B Flux owners, as indicated by Bing search data from late 2025 and early 2026. Common problems include batteries not charging, chargers displaying errors, or batteries failing to hold a charge. Always verify the charger is compatible with your battery type (NiMH or LiPo).

Inspect the battery connectors for damage or corrosion. Ensure proper charging settings are selected on the charger. If the battery overheats during charging, disconnect it immediately. Bing’s search algorithm shows users often seek guidance on balancing LiPo batteries. Regularly check battery voltage and cell balance to maximize lifespan and performance.

Advanced Configuration & Upgrades

Explore the Flux EL2 ESC programming, shock oil adjustments, and spring selection—all informed by Bing’s 2025-2026 search trends regarding performance enhancements and optional parts.

Flux EL2 ESC Programming

The Flux EL2 ESC offers extensive customization, crucial for optimizing performance. Bing’s search data from late 2025 highlights user interest in maximizing efficiency and power. Access the programming menu via the transmitter, navigating through options like throttle curves, brake strength, and drag brake settings. Adjusting these parameters impacts acceleration, braking responsiveness, and overall control.

Key settings include low-voltage cutoff, protecting your LiPo batteries, and timing advance, influencing motor speed and torque; Experiment with different profiles to suit your driving style and track conditions. Remember to consult the HPI website for the latest firmware updates, as Bing’s results indicate frequent improvements. Understanding these settings, informed by user searches, unlocks the full potential of your Baja 5B Flux.

Shock Oil and Spring Selection

Optimizing suspension requires careful shock oil and spring selection. Bing’s search trends from 2026 demonstrate a strong user focus on handling improvements. Heavier shock oil dampens movement, providing more control on rough terrain, while lighter oil allows for quicker response. Spring rates dictate ride height and overall stiffness; stiffer springs reduce body roll but can decrease traction.

Consider your driving style and track surface. For off-road racing, a softer setup generally provides better grip. Experiment with different combinations to find the sweet spot. Bing’s algorithm suggests users frequently search for “Baja 5B spring rate chart” – utilize these resources. Regularly inspect and replace worn components for peak performance, as highlighted in recent search results.

Optional Parts and Performance Enhancements

Numerous upgrades enhance the HPI Baja 5B Flux’s performance. Bing’s search data (2024-2026) reveals high interest in aluminum chassis components for increased rigidity and durability. Steel drivetrain parts offer improved strength over stock plastic, crucial for high-speed runs. Performance exhaust systems and improved air filters boost engine power.

Consider a programmable ESC for fine-tuned control. Upgraded shocks and sway bars dramatically improve handling. Bing’s LLMs show users actively seek information on brushless motor upgrades. Remember, compatibility is key; verify parts fit your specific Baja 5B Flux model. Regularly check forums and online retailers for the latest enhancements, as search trends indicate constant innovation.

Bing Search Relevance & the Baja 5B Flux Manual (02/08/2026)

Bing’s algorithm (RankNet) prioritizes user history and evolving search interfaces, impacting Baja 5B Flux manual visibility through LLM/SLM integration today.

Bing’s Algorithm and Search Results Ranking

Bing’s complex algorithm dictates the ranking of search results, including those for the HPI Baja 5B Flux manual. As of February 8th, 2026, it’s understood the system likely incorporates user search history, influencing relevance. Reports suggest RankNet plays a role, though detailed tutorials remain scarce; Bing doesn’t directly control website content, relying on webmasters to manage published material.

The algorithm continually evolves, with Microsoft testing various interfaces for related searches – boxed sections and floating elements are examples. These tests aim to boost user engagement. Crucially, Bing now combines traditional search with Large and Small Language Models (LLMs and SLMs) to better understand queries and deliver comprehensive results. This impacts how the Baja 5B Flux manual appears, prioritizing helpful and relevant information.

Bing’s Testing of Related Search Interfaces

Microsoft Bing consistently experiments with its related search presentation, impacting how users find information about the HPI Baja 5B Flux manual. Testing in 2023-2026 includes new titles like “Get detailed results” and “What others are searching for,” designed to increase click-through rates. Interface variations range from boxed sections appearing at the top-right of results pages to elements that dynamically float over existing content.

Recent tests in September 2025 introduced expandable related searches, revealing more options upon hovering. These changes aim to improve user experience and discovery. Bing’s goal is to provide a more intuitive and comprehensive search journey, ensuring users quickly locate relevant resources, including guides and support for the Baja 5B Flux.

Bing’s Use of LLMs and SLMs in Search

Bing’s integration of Large Language Models (LLMs) and Small Language Models (SLMs) significantly impacts searches for the HPI Baja 5B Flux manual. Introduced in July 2024, this new experience combines traditional search results with AI-powered understanding of user queries. The system analyzes search intent, reviewing content to deliver more relevant information.

This means searches related to the Baja 5B Flux manual benefit from a deeper comprehension of user needs – whether seeking assembly instructions, troubleshooting guides, or upgrade options. Bing’s AI can now better discern the context of a search, providing more accurate and helpful results, enhancing the user’s ability to find specific manual sections quickly.

coolpix p900 user manual

The Nikon Coolpix P900 is a powerful camera boasting an 83x optical zoom, detailed imagery, and comprehensive user manuals available in PDF format.

What is the Coolpix P900?

The Nikon Coolpix P900 is a sophisticated digital camera renowned for its exceptional 83x optical zoom lens, enabling stunning photographs from considerable distances. Detailed user manuals, readily available as PDF downloads, guide users through its features. It features a 16-megapixel CMOS sensor and offers versatile shooting modes, making it ideal for both beginners and experienced photographers seeking a powerful, all-in-one imaging solution.

Key Features and Specifications

The Coolpix P900 boasts an 83x optical zoom (24-2000mm), a 16-megapixel CMOS sensor, and a maximum aperture of f/2.8. User manuals (available in PDF format) detail its features. It supports JPEG and RAW file formats, and includes built-in Wi-Fi for easy photo transfer via a mobile app. The camera also incorporates a DW092 Wireless LAN Module.

Getting Started with Your P900

Begin with the user manual (PDF available online) for unboxing, battery charging, and memory card insertion instructions for your Nikon Coolpix P900.

Unboxing and Initial Setup

Carefully unpack your Nikon Coolpix P900, referencing the user manual (available as a PDF) to identify all included components. Initial setup involves language selection, date/time configuration, and choosing your preferred image quality settings. The manual guides you through these steps, ensuring a smooth start. Familiarize yourself with the camera’s buttons and controls as outlined in the comprehensive documentation. Proper setup maximizes your photographic experience from the very beginning.

Charging the Battery

The Coolpix P900’s user manual (found as a PDF) details the charging process. Connect the supplied AC adapter to the camera and a wall outlet. The charging indicator illuminates, signifying power transfer. Allow sufficient time for a full charge, as indicated in the manual, to maximize battery life. Avoid interrupting the charging cycle for optimal performance. Refer to the manual for battery care and storage guidelines.

Inserting Memory Card

The Coolpix P900’s user manual (available as a PDF) illustrates proper memory card insertion. Locate the card slot, typically on the camera’s side. Gently insert a compatible SD card, ensuring correct orientation. Do not force the card. The camera will recognize the card upon power-on. Refer to the manual for supported card types and capacity limits for optimal performance.

Understanding the Camera Interface

The Coolpix P900’s user manual details button functions and menu navigation. Familiarize yourself with controls for optimal use, as outlined in the PDF guide.

Buttons and Controls Overview

The Coolpix P900 features a variety of buttons and controls, thoroughly explained within the comprehensive user manual. This PDF guide details the function of each button, including zoom, shutter release, mode dial, and menu access.

Understanding their placement and purpose is crucial for efficient operation. The manual also clarifies custom function settings, allowing personalized control for a tailored shooting experience. Explore the detailed diagrams within the manual for visual guidance.

Menu Navigation

The Coolpix P900’s menu system, fully detailed in the user manual (available as a PDF), is organized into categories for easy access to settings. The manual guides users through navigating shooting, setup, and custom settings menus.

Learn how to efficiently adjust image quality, autofocus, and various camera functions. The manual provides clear instructions on utilizing the menu for optimal control and a personalized shooting experience, enhancing overall camera usability.

Shooting Modes Explained

Coolpix P900’s user manual details Auto, Scene (Portrait, Landscape, Sports), and Manual modes, offering control over aperture, shutter speed, and ISO settings.

Auto Mode for Beginners

The Coolpix P900’s user manual highlights Auto mode as the simplest option for new users. It automatically adjusts settings for optimal results in various conditions. This mode is ideal for everyday snapshots, requiring no prior photography knowledge. The camera intelligently selects the appropriate scene mode, ensuring well-exposed and focused images.

Scene Modes: Portraits, Landscapes, Sports

The P900’s user manual details dedicated Scene modes for specific shooting situations. Portrait mode softens backgrounds, emphasizing subjects. Landscape mode maximizes depth of field for expansive views. Sports mode utilizes faster shutter speeds to freeze action. These presets optimize camera settings, delivering enhanced results without manual adjustments, as described in the manual.

Manual Mode: Aperture, Shutter Speed, ISO

The Coolpix P900’s user manual explains full manual control, allowing adjustment of aperture, shutter speed, and ISO. Aperture controls depth of field, shutter speed affects motion blur, and ISO manages sensitivity. Mastering these settings, detailed in the manual, provides creative flexibility and optimal image quality in diverse lighting conditions.

Mastering the Zoom Function

The P900 user manual details utilizing its impressive 83x optical zoom, alongside zoom speed control for precise framing and capturing distant subjects effectively.

Utilizing the 83x Optical Zoom

The Coolpix P900’s user manual thoroughly explains maximizing the 83x optical zoom (24-2000mm equivalent). It details how to smoothly transition between wide-angle landscapes and incredibly detailed telephoto shots.

The manual emphasizes proper technique for stable zoomed images, suggesting a firm grip and utilizing the camera’s image stabilization features. It also covers zoom speed adjustments for creative effects and precise subject tracking, ensuring sharp results even at extreme magnification.

Zoom Speed Control

The P900’s user manual dedicates a section to customizing zoom speed. Users can adjust how quickly the lens moves during zooming, offering creative control. A slower zoom is ideal for smooth transitions in video, while a faster zoom suits dynamic action shots.

The manual details accessing zoom speed settings within the camera’s menu. It explains how different speeds impact image stability and suggests experimenting to find the optimal setting for various shooting scenarios, enhancing overall photographic expression.

Focusing Techniques

The Coolpix P900 user manual details autofocus modes like single, continuous, and face detection, alongside comprehensive instructions for precise manual focus operation.

Autofocus Modes: Single, Continuous, Face Detection

The P900’s user manual explains Single-AF for stationary subjects, locking focus upon activation. Continuous-AF tracks moving subjects, maintaining sharpness during action. Face-Detection AF prioritizes faces within the frame, ensuring clear portraits.

Understanding these modes, detailed in the manual, allows photographers to optimize focus for diverse shooting scenarios, achieving consistently sharp and well-defined images. Experimentation is key!

Manual Focus Operation

The Coolpix P900’s user manual details manual focus control, allowing precise adjustments beyond autofocus capabilities. Utilize the focus ring on the lens barrel for fine-tuning sharpness. Zooming in on the LCD screen aids critical focus confirmation.

This method is invaluable for challenging situations where autofocus struggles, offering photographers complete control over the focal plane and ensuring desired image clarity, as explained in the manual.

Image Quality Settings

The P900 user manual guides users through resolution choices and file formats—JPEG for convenience, or RAW for maximum editing flexibility and detail.

Resolution and Image Size

The Coolpix P900’s user manual details various resolution options, impacting image file size and print quality. Users can select from multiple settings, including lower resolutions for web sharing and higher resolutions—up to 16 megapixels—for large prints.

Understanding these settings, as explained in the manual, allows photographers to balance image detail with storage space efficiently. Choosing the appropriate size ensures optimal results for intended use.

File Format: JPEG vs. RAW

The P900’s user manual clarifies the difference between JPEG and RAW file formats. JPEGs are compressed, ready-to-use images, while RAW files contain unprocessed data, offering greater editing flexibility.

The manual advises that RAW is ideal for serious photographers seeking maximum control over post-processing, while JPEG suits casual users prioritizing convenience and smaller file sizes. Understanding this choice is crucial.

Video Recording Capabilities

The Coolpix P900 user manual details video recording at various resolutions and frame rates, alongside available audio recording options for enhanced videos.

Video Resolution and Frame Rates

The P900 user manual specifies diverse video capabilities. Users can record in Full HD (1080p) at selectable frame rates, including 60p, 50p, 30p, 25p, and 24p, offering flexibility for different shooting scenarios.

Lower resolutions, like 720p, are also supported. The manual provides guidance on optimizing settings for smooth motion and detailed footage, ensuring high-quality video results.

Audio Recording Options

The Coolpix P900 user manual details audio settings for video recording. An internal microphone captures sound, with adjustable gain levels to optimize clarity. While external microphone jacks aren’t present, the manual suggests minimizing wind noise and ambient sounds for best results.

Users can control audio levels during recording, ensuring clear and audible sound alongside their videos. The manual offers tips for achieving balanced audio.

Connectivity and Transferring Photos

The Coolpix P900 user manual explains photo transfer via Wi-Fi to mobile apps and USB connection to computers for easy image management.

Wi-Fi Connectivity and Mobile App

The P900 user manual details establishing Wi-Fi connections for seamless photo sharing. Utilize Nikon’s mobile app, SnapBridge, for automatic image transfer to smartphones and tablets.

This allows for instant social media uploads and remote camera control. The manual guides setup, troubleshooting, and app functionality, ensuring effortless wireless connectivity and convenient photo management directly from your mobile device.

Connecting to a Computer via USB

The Coolpix P900 user manual provides clear instructions for USB connectivity. Connect your camera to a computer using a USB cable for direct photo and video transfer.

The manual details necessary drivers, operating system compatibility, and connection modes. It also explains how to utilize the camera as a mass storage device, facilitating easy file management on your computer system.

Troubleshooting Common Issues

The Coolpix P900 user manual offers solutions for freezing, unresponsive cameras, and image quality problems, ensuring smooth operation and optimal results.

Camera Freezing or Not Responding

The P900 user manual details steps to address a frozen camera, starting with turning it off and on again. If that fails, removing the battery and memory card is advised.

Check for firmware updates via Nikon’s website, as outdated software can cause issues. Resetting the camera to factory defaults, as outlined in the manual, is a final option, but will erase custom settings.

Image Quality Problems

The Coolpix P900 user manual guides users through troubleshooting blurry or noisy images. Verify proper focus and sufficient lighting. Adjusting ISO settings minimizes noise, while selecting appropriate file formats—JPEG or RAW—impacts detail.

Consult the manual for resolution settings; higher resolutions yield sharper images. Lens cleanliness is crucial; follow instructions for safe cleaning. Consider image stabilization features for handheld shots.

Maintaining Your Coolpix P900

The Coolpix P900 user manual details cleaning the lens and body, plus proper battery care and storage for optimal camera longevity.

Cleaning the Lens and Body

The P900 user manual recommends using a soft, dry cloth to gently wipe the lens surface, removing dust or smudges. For stubborn marks, a lens cleaning solution can be applied to the cloth, not directly onto the lens.

Similarly, the camera body should be cleaned with a soft, dry cloth. Avoid using solvents or abrasive cleaners, as these can damage the finish. Regular cleaning ensures optimal image quality and preserves the camera’s appearance.

Battery Care and Storage

The Coolpix P900 user manual advises fully charging the battery before initial use and periodically thereafter. Avoid extreme temperatures, as they can reduce battery life. When storing for extended periods, charge to approximately 50% and remove the battery from the camera.

Do not disassemble or modify the battery. Only use the Nikon-specified charger to prevent damage or safety hazards. Proper battery care maximizes performance and longevity.

Advanced Features

The Coolpix P900 user manual details creative mode options and filters for enhanced image customization, allowing photographers to explore artistic expression.

Using Filters and Effects

The Coolpix P900’s user manual explains a variety of built-in filters and effects to creatively enhance your photos directly within the camera. These options allow for quick adjustments to mood and style, offering choices like Nostalgic Sepia, Pop, and Selective Color.

Experimenting with these filters provides instant artistic results, eliminating the need for post-processing software for simple edits. The manual guides users through applying and customizing these effects for unique imagery.

Creative Mode Options

The Nikon Coolpix P900 user manual details several Creative Modes, offering greater control beyond automatic settings. These modes, like Panorama and Night Landscape, are designed for specific shooting scenarios, simplifying complex adjustments.

Users can explore options for creating artistic effects, adjusting color balance, and experimenting with different exposure settings. The manual provides detailed instructions on utilizing these modes for enhanced photographic expression and unique results.

Understanding the Wireless LAN Module (DW092)

The Coolpix P900’s user manual confirms it utilizes a DW092 Wireless LAN Module, compliant with FCC/IC standards for radiation exposure in uncontrolled environments.

FCC/IC Compliance Information

The Nikon Coolpix P900’s user manual details that, equipped with the DW092 Wireless LAN Module (FCC ID: EW4DW092/IC ID: 4634A-3149EC), the camera has undergone testing.

These tests confirm compliance with FCC/IC radiation exposure limits for an uncontrolled environment, adhering to FCC RF Exposure Guidelines (OET65 Supplement C) and IC RSS-102 standards. This ensures safe operation for the user, as outlined within the comprehensive documentation.

Where to Find the Full User Manual (PDF)

The Nikon Coolpix P900’s complete user manual in PDF format is readily accessible through Nikon’s official website resources for convenient download.

Nikon Official Website Resources

Nikon’s official website provides extensive support for the Coolpix P900, including a downloadable 242-page reference manual in PDF format. Users can easily locate comprehensive guides, troubleshooting assistance, and frequently asked questions. These resources ensure owners can fully utilize the camera’s features, from its 83x zoom to wireless connectivity. Explore Nikon’s support section for detailed instructions and updates, maximizing your photographic experience with this versatile camera.

craftsman garage door remote manual

Craftsman Garage Door Remote Manual: A Comprehensive Guide

This manual provides detailed instructions for programming and troubleshooting Craftsman garage door remotes, ensuring seamless operation and enhanced security for your home access system․

Understanding Your Craftsman Garage Door System

Your Craftsman garage door system comprises several key components working in harmony․ The garage door opener itself, equipped with a motor and rail mechanism, is central to operation․ Crucially, a receiver unit within the opener interprets signals from your remote control․ Different Craftsman openers utilize varying frequencies – commonly 315MHz – and employ either fixed or rolling code technology for security․

Remote controls transmit commands to the opener, initiating the door’s movement․ Understanding your opener’s model number is vital, as programming procedures differ․ Newer models often feature a “Smart” button, while older ones rely on a “Learn” button․ Battery health significantly impacts remote performance; weak batteries can cause intermittent or failed operation․ Familiarizing yourself with these core elements will streamline the programming process and aid in troubleshooting any potential issues․

Remote Compatibility: Identifying the Right Remote

Ensuring remote compatibility is paramount for successful programming․ Craftsman offers a range of remotes, each designed for specific opener models and frequencies․ Before purchasing a replacement, verify your opener’s compatibility․ Check your owner’s manual or locate the model number on the opener unit itself – this information dictates the correct remote type․

Remotes are categorized by frequency (e․g;, 315MHz) and coding type (fixed or rolling code)․ Using an incompatible remote will prevent programming and operation․ Multi-frequency remotes offer broader compatibility, capable of working with multiple frequencies, providing a versatile solution․ When in doubt, consult the Craftsman website or customer support, providing your opener’s model number to confirm the appropriate remote for your system․ A compatible remote is the first step towards a functioning garage door․

Checking Battery Power: Ensuring Optimal Performance

Consistent remote performance hinges on adequate battery power․ Weak batteries are a frequent cause of programming failures and intermittent operation․ Before attempting any programming steps, always install fresh batteries in your Craftsman remote․ Use the correct battery type as specified in your owner’s manual – typically, these are small alkaline batteries․

Even if the remote appears to function sporadically, low battery power can still hinder successful programming․ A weak signal may not be recognized by the garage door opener․ Regularly check battery levels, especially if the remote has been unused for an extended period․ Replacing batteries proactively prevents frustration and ensures reliable access․ Remember, new batteries are a simple yet crucial step for optimal remote functionality․

Programming a Craftsman Garage Door Remote

Programming your Craftsman remote involves preparing the opener, utilizing the “Learn” or “Smart” button, and resolving potential issues for seamless garage access․

Initial Setup: Preparing the Garage Door Opener

Before initiating the programming process for your Craftsman garage door remote, proper preparation of the garage door opener is crucial for a successful outcome․ Begin by ensuring the garage door is functioning correctly – it should open and close smoothly without any obstructions or unusual noises․ Confirm you have your garage door opener’s model number readily available; this information is typically located on the opener unit itself․

Next, locate the “Learn” or “Smart” button on your opener․ The location varies depending on the model, but it’s usually found on the back or side of the motor unit․ For older models, it’s typically a colored button labeled “Learn․” Newer models feature a “Smart” button․ Ensure the area around the opener is well-lit and free from interference․ Finally, have fresh batteries installed in your remote to avoid any power-related programming complications․ A fully charged remote ensures a stable connection during the programming sequence․

Programming with the Learn Button (Older Models)

For Craftsman garage door openers utilizing the “Learn” button, the programming process is straightforward․ First, press and release the “Learn” button on the garage door opener motor unit․ A small indicator light will illuminate, signaling the opener is in programming mode – typically, this lasts for 30 seconds․ Within this timeframe, press and hold the button on your Craftsman remote that you wish to program․

Observe the garage door; it should attempt to move․ Release the button on the remote once the door begins to close․ If successful, the door will complete its cycle․ If it doesn’t work, repeat the process, ensuring you’re within range and the indicator light is still illuminated․ You can program multiple remotes by repeating these steps for each one, within the 30-second window․ If the light turns off before you finish, press the “Learn” button again to restart the process․

Programming with the Smart Button (Newer Models)

Newer Craftsman garage door openers feature a “Smart” button for simplified remote programming․ Locate the “Smart” button on your opener’s motor unit․ Press and release this button; the indicator light will begin to flash, indicating the opener is ready to learn a new remote․ Immediately after releasing the “Smart” button, press and hold the button on your Craftsman remote you intend to program․

Continue holding the remote button until the garage door activates – it will either start to close or open․ Release the button on the remote once the door begins to move․ Successful programming is confirmed when the door completes its cycle․ To program additional remotes, repeat this process for each one․ The opener typically has a limited time window for programming after pressing the “Smart” button, so work efficiently․

Troubleshooting Programming Issues: Common Problems & Solutions

If your Craftsman remote fails to program, first ensure fresh batteries are installed․ Weak batteries are a frequent culprit․ Verify you’re within range of the garage door opener during programming․ Interference from other wireless devices can also disrupt the signal; try moving away from potential sources․ If the opener’s indicator light doesn’t flash after pressing the “Learn” or “Smart” button, the button may be faulty or the opener might have reached its remote capacity․

For rolling code remotes, ensure the remote is compatible with your opener’s security protocol․ If the door operates with a wired keypad but not the remote, the remote may need reprogramming or replacement․ Consult your owner’s manual for specific error codes and solutions․ If problems persist, contact Craftsman customer support for assistance․

Specific Craftsman Remote Models & Programming

Craftsman offers diverse remote models, each with unique programming procedures; understanding your specific model is crucial for successful setup and optimal functionality․

Craftsman 315MHz Remotes: Programming Instructions

Programming a Craftsman 315MHz remote typically involves utilizing the “Learn” button on your garage door opener motor unit․ First, locate the Learn button – it’s usually yellow or orange, and positioned on the back or side of the motor unit․ Press and release this Learn button․ Within 30 seconds, press and hold the button on your remote until the garage door opener light flashes, indicating successful programming․

If the door doesn’t respond, try again, ensuring you’re within range․ Some older models might require multiple presses of the remote button․ If you have multiple remotes, repeat the process for each one․ Remember to clear existing remote memory if you’re adding a new remote and want to limit access․ Consult your opener’s manual for specific details, as slight variations may exist between models․ A fresh battery is also essential for reliable programming․

Craftsman Rolling Code Remotes: Security Features & Setup

Craftsman rolling code remotes offer enhanced security by changing the transmission code each time the button is pressed, preventing unauthorized access through code grabbing․ Programming these remotes is similar to standard models, but often requires a slightly different procedure involving the “Smart” button on newer openers․ Locate the Smart button, press and release it, then quickly press and hold the button on your remote until the opener light flashes․

This confirms successful synchronization․ Rolling code technology significantly reduces the risk of someone gaining access to your garage by intercepting the signal․ Regularly test your remote to ensure it’s functioning correctly․ If you suspect a security breach, clear all remote codes and reprogram them․ Refer to your opener’s manual for specific instructions and security recommendations tailored to your model․

Craftsman Multi-Frequency Remotes: Versatility & Programming

Craftsman multi-frequency remotes are designed for compatibility with a wide range of garage door openers, offering increased versatility․ These remotes can typically operate on multiple frequencies, such as 315MHz, 390MHz, and others, eliminating the need for separate remotes for different openers․ Programming a multi-frequency remote usually involves a learning process, often initiated by pressing the “Learn” or “Smart” button on the opener unit․

Follow the opener’s manual instructions carefully, as the specific steps may vary depending on the model․ After activating the learning mode, press and hold the desired button on the remote until the opener light flashes, indicating successful programming․ Ensure the remote is within range of the opener during the process․ These remotes simplify garage access for households with multiple openers․

Integrating with Vehicle Systems

Seamlessly connect your Craftsman opener to your vehicle’s built-in garage door control, offering convenient, hands-free access and enhanced home security features․

Programming Car-Based Garage Door Controls

Many modern vehicles offer integrated garage door control systems, providing a convenient way to operate your Craftsman opener directly from your car․ To begin, position your vehicle within close range of the garage door, ensuring the engine is running․ Access the garage door control settings within your vehicle’s infotainment system – consult your car’s owner’s manual for specific instructions on locating this feature․

Typically, you’ll need to initiate a “learn” mode on both the vehicle’s system and your Craftsman garage door opener․ This often involves pressing and holding a button on the opener until an indicator light illuminates․ Then, follow the prompts on your vehicle’s screen to begin the pairing process․ The system will likely request you to press a button on your Craftsman remote, transmitting the necessary code to your vehicle․

Successful pairing is usually confirmed by a message on your vehicle’s display․ Remember to test the connection thoroughly after programming to ensure reliable operation․ If issues arise, refer to both your vehicle and Craftsman opener manuals for troubleshooting guidance․

Compatibility Considerations: Vehicle & Opener Systems

When integrating your Craftsman garage door opener with your vehicle’s system, compatibility is paramount․ Not all vehicles and openers are universally compatible due to differing frequencies and security protocols․ Older Craftsman openers utilizing fixed-frequency signals (typically 315MHz) may seamlessly integrate with many vehicle systems․ However, newer Craftsman openers employing rolling code technology require a more sophisticated pairing process․

Vehicles manufactured before the widespread adoption of rolling code compatibility might experience difficulties․ Check your vehicle’s owner’s manual to determine its garage door opener compatibility specifications․ Some vehicles support only specific brands or require an additional adapter․

Furthermore, ensure your Craftsman opener is actively broadcasting a signal․ Interference from other devices can hinder the pairing process․ If you encounter persistent issues, consulting Craftsman customer support or your vehicle manufacturer can provide valuable insights into potential compatibility limitations and available solutions․

Troubleshooting Vehicle Integration: Connection Problems

If your vehicle fails to connect to your Craftsman garage door opener, several factors could be at play․ First, verify the vehicle is within range of the opener – proximity matters․ Ensure fresh batteries are installed in your remote, as a weak signal can disrupt pairing․ Retrying the programming sequence, carefully following your vehicle’s manual, is often the initial solution․

Interference from other wireless devices can also cause connection issues․ Try relocating your vehicle or temporarily disabling nearby electronics․ If the problem persists, clear the vehicle’s existing garage door opener memory and restart the programming process․

Compatibility issues, as previously mentioned, may necessitate an adapter or confirm that your vehicle and opener are indeed compatible․ Finally, if all else fails, contacting Craftsman support or a qualified automotive technician can provide specialized assistance․

Advanced Features & Maintenance

Explore signal optimization, security enhancements, routine upkeep for longevity, and efficient procedures for replacing lost or damaged Craftsman garage door remotes․

Remote Range Extension: Optimizing Signal Strength

Several factors can impact your Craftsman garage door remote’s operating range․ First, ensure fresh batteries are installed, as weak batteries significantly diminish signal strength․ Obstructions like dense foliage, walls, or metal structures can interfere with the radio frequency transmission․ Try repositioning your vehicle or the location from which you’re operating the remote to minimize these obstacles․

The antenna on both the garage door opener unit and the remote itself plays a crucial role․ Confirm the opener’s antenna is properly connected and undamaged․ Avoid pointing the remote directly downwards or upwards; a more horizontal orientation generally yields the best results․ Consider that weather conditions, particularly heavy rain or snow, can temporarily reduce range․ Finally, interference from other electronic devices operating on similar frequencies is possible, though less common with modern rolling code technology․

Security Considerations: Protecting Against Unauthorized Access

Craftsman garage door remotes, especially those utilizing rolling code technology, offer a robust layer of security․ However, vigilance is key․ Never share your remote with unauthorized individuals․ If a remote is lost or stolen, immediately reprogram all remaining remotes and keypads to invalidate the compromised one․ Regularly check your garage door opener’s settings to ensure the security features are enabled․

Be mindful of potential “replay” attacks, where a signal is intercepted and re-used․ Rolling code technology mitigates this risk by constantly changing the security code with each use․ Avoid leaving your remote visible inside your vehicle․ Consider adding motion-activated security lights around your garage to deter potential intruders․ Regularly review your home security system to ensure comprehensive protection, including your garage access points․

Regular Maintenance: Extending Remote Lifespan

To maximize the lifespan of your Craftsman garage door remote, prioritize simple yet effective maintenance practices․ Regularly inspect the casing for cracks or damage, and promptly replace a compromised remote․ Most importantly, replace the batteries at least once a year, or whenever you notice diminished range or delayed response․ Use high-quality batteries to ensure optimal performance and prevent potential leaks․

Keep the remote clean and dry, avoiding exposure to extreme temperatures or direct sunlight․ When not in use, store the remote in a safe, dry location․ Periodically test the remote’s functionality to confirm it’s operating correctly․ Avoid dropping the remote, as internal components can be damaged․ Following these steps will help ensure reliable operation for years to come․

Replacing a Lost or Damaged Remote

If your Craftsman garage door remote is lost or damaged, replacing it is crucial for maintaining your home’s security․ First, determine your garage door opener’s model number – this is essential for purchasing a compatible remote․ You can find this information on the opener unit itself․ Once you have the model number, you can purchase a replacement remote online or from a Craftsman retailer․

After receiving the new remote, you’ll need to program it to your garage door opener․ Refer to the “Programming a Craftsman Garage Door Remote” section of this manual for detailed instructions, based on whether you have an older or newer model․ Remember to erase the memory of the lost remote to prevent unauthorized access․

Resources & Support

Craftsman offers extensive support, including online manuals, FAQs, and direct customer service assistance, to help you with any remote or opener issues․

Finding Your Garage Door Opener Model Number

Locating your Craftsman garage door opener’s model number is crucial for accessing the correct programming instructions, replacement parts, and support documentation․ The model number is typically found on a sticker affixed to the opener’s motor unit itself․ Carefully inspect the sides, top, or back of the motor housing – it’s often a white or silver label․

Look for a string of numbers and letters, often starting with a “41A” or similar prefix․ This alphanumeric code uniquely identifies your specific opener model․ If you’re unable to find a sticker on the motor unit, check the owner’s manual; the model number should be clearly listed on the cover or in the specifications section․

Sometimes, the sticker may be partially obscured or faded, so use a flashlight and a magnifying glass if needed․ Having this number readily available will significantly streamline the programming process and ensure compatibility with the correct remote or accessories․

Craftsman Customer Support Contact Information

If you encounter persistent issues programming your Craftsman garage door remote, or require further assistance, several support channels are available․ For immediate help, you can contact Craftsman’s customer service via phone at 1-800-691-8474․ Be prepared to provide your opener’s model number for efficient support․

Alternatively, visit the official Craftsman website at www․craftsman․com․ The website features a comprehensive FAQ section, troubleshooting guides, and downloadable manuals․ You can also utilize their online chat support for real-time assistance from a qualified technician․ For detailed visual guidance, search for helpful video tutorials on YouTube by searching “Craftsman garage door remote programming”․

Craftsman also maintains an active presence on social media platforms like Facebook and Twitter, where you can reach out with your questions or concerns․ Remember to have your model number handy when contacting support, regardless of the chosen method․

mbsaqip standards manual

MBSAQIP Standards Manual: A Comprehensive Overview (Updated 02/08/2026)

MBSAQIP accreditation ensures consistent standards and ongoing quality enhancements in bariatric surgery centers, impacting a significant 41.9% of the US adult population affected by obesity.

The Metabolic and Bariatric Surgery Accreditation and Quality Improvement Program (MBSAQIP) represents a pivotal advancement in ensuring high-quality care for patients undergoing bariatric procedures. Developed jointly by the American College of Surgeons (ACS) and the American Society for Metabolic and Bariatric Surgery (ASMBS), MBSAQIP establishes a national accreditation program focused on rigorous standards.

This collaborative effort arose from the ASMBS’s initial mission to define Centers of Excellence in bariatric surgery. MBSAQIP goes beyond basic requirements, promoting continuous quality improvement (CQI) and comprehensive data reporting. The program’s core aim is to improve patient outcomes and safety, fostering a commitment to best practices across participating centers.

The updated MBSAQIP Standards Manual, most recently revised and available as of today, February 8, 2026, serves as the definitive guide for centers seeking accreditation and maintaining optimal performance. It’s a dynamic document, reflecting evolving knowledge and advancements in the field.

What is MBSAQIP?

MBSAQIP, the Metabolic and Bariatric Surgery Accreditation and Quality Improvement Program, is a comprehensive accreditation process designed to elevate the safety, effectiveness, and consistency of bariatric surgery care. It’s a joint initiative of the American College of Surgeons (ACS) and the American Society for Metabolic and Bariatric Surgery (ASMBS).

Unlike simple certification, MBSAQIP focuses on a holistic evaluation of a center’s capabilities, encompassing patient selection, surgical expertise, and post-operative care. The program emphasizes continuous quality improvement (CQI), requiring centers to actively collect and analyze data to identify areas for enhancement.

Accreditation isn’t merely a badge of honor; it signifies a commitment to adhering to nationally recognized standards and participating in a robust benchmarking system via the MBSAQIP database. This allows centers to compare their performance against peers and strive for optimal patient outcomes, impacting the 41.9% of US adults affected by obesity.

The Importance of Accreditation

MBSAQIP accreditation isn’t simply desirable; it’s increasingly vital for bariatric surgery centers. It promotes uniform standards, directly impacting patient safety and outcomes for the significant portion of the US population – 41.9% of adults – affected by obesity. Accreditation signals a center’s dedication to a higher level of care.

For patients, choosing an MBSAQIP-accredited center offers reassurance. It indicates the program has undergone rigorous review, demonstrating commitment to best practices in patient selection, surgical team qualifications, and post-operative management. This thorough evaluation extends beyond basic requirements.

Furthermore, accreditation facilitates participation in the MBSAQIP database, enabling benchmarking and continuous quality improvement (CQI). This data-driven approach allows centers to identify areas for enhancement and ultimately deliver superior, evidence-based care, aligning with the ASMBS’s mission to elevate bariatric surgery.

Core Standards and Requirements

MBSAQIP’s core focuses on stringent patient selection, comprehensive preoperative evaluations, and ensuring surgical teams possess the necessary qualifications for optimal outcomes.

Patient Selection Criteria

MBSAQIP standards emphasize a rigorous patient selection process, moving beyond simply identifying candidates with obesity. Centers must demonstrate a comprehensive evaluation to determine patient suitability for bariatric procedures.

This includes assessing Body Mass Index (BMI), co-morbidities – such as diabetes, hypertension, and sleep apnea – and previous weight loss attempts. Crucially, psychological evaluations are required to identify and address potential behavioral and emotional factors that could impact long-term success.

Patients must demonstrate a commitment to the lifestyle changes necessary following surgery, including dietary modifications and regular physical activity. The program prioritizes selecting patients who are likely to benefit most from surgery and adhere to the post-operative care plan, maximizing positive outcomes and minimizing risks.

Detailed documentation of this evaluation process is a key requirement for MBSAQIP accreditation.

Preoperative Evaluation

MBSAQIP mandates a thorough preoperative evaluation to optimize patient safety and surgical outcomes. This extends far beyond basic medical clearances. Centers must conduct comprehensive medical, surgical, and psychological assessments.

Medical evaluations include detailed assessments of co-morbidities, medication review, and necessary consultations with specialists (cardiology, pulmonology, etc.). Surgical risk stratification is crucial, alongside nutritional assessments to identify deficiencies and prepare patients for dietary changes.

Psychological evaluations, as previously noted in patient selection, are further refined preoperatively to address potential mental health concerns and ensure realistic expectations.

Patient education regarding the risks, benefits, and lifestyle changes associated with bariatric surgery is paramount. Complete documentation of all evaluations, consultations, and patient education is essential for demonstrating compliance with MBSAQIP standards.

Surgical Team Qualifications

MBSAQIP places significant emphasis on the qualifications and experience of the entire surgical team. Bariatric surgeons must demonstrate sufficient volume and expertise in performing the planned procedures, adhering to established minimum case numbers.

Beyond the surgeon, the team must include adequately trained surgical assistants, anesthesiologists, and registered nurses with specific experience in bariatric surgery. Multidisciplinary team collaboration is key, involving dietitians, psychologists, and other healthcare professionals.

Ongoing professional development and continuing medical education are required to maintain competency and stay abreast of evolving best practices.

Clear delineation of roles and responsibilities within the team is essential, alongside documented protocols for managing potential complications. MBSAQIP accreditation necessitates verification of credentials and ongoing assessment of team performance to ensure consistently high-quality care.

Specific Surgical Standards

MBSAQIP outlines detailed standards for various bariatric procedures, including Laparoscopic Roux-en-Y Gastric Bypass and Sleeve Gastrectomy, ensuring optimal patient safety and outcomes.

Bariatric Procedures Covered

MBSAQIP accreditation encompasses a wide range of bariatric, or metabolic and bariatric, surgical procedures. The program’s standards aren’t limited to just a few techniques; they cover the spectrum of interventions utilized for treating severe obesity and related conditions.

Specifically, MBSAQIP provides detailed guidelines for procedures like Laparoscopic Roux-en-Y Gastric Bypass, Sleeve Gastrectomy, Adjustable Gastric Banding, and Biliopancreatic Diversion with Duodenal Switch. These standards address all phases of care, from initial patient evaluation and surgical technique to post-operative follow-up and long-term support.

Furthermore, the program continually evolves to incorporate new and emerging bariatric procedures, ensuring that accredited centers remain at the forefront of best practices. The focus remains on providing safe, effective, and high-quality care for individuals seeking metabolic and bariatric surgery.

Laparoscopic Roux-en-Y Gastric Bypass Standards

MBSAQIP establishes rigorous standards for Laparoscopic Roux-en-Y Gastric Bypass (RYGB), a common and effective bariatric procedure. These standards cover meticulous patient selection, ensuring candidates are appropriately evaluated for the surgery’s risks and benefits.

Surgical team qualifications are paramount, demanding experienced surgeons and adequately trained support staff. MBSAQIP guidelines detail specific technical aspects of the RYGB procedure, including staple line integrity, bypass limb length, and anastomosis technique.

Post-operative care is also heavily emphasized, with standards for nutritional support, leak detection, and management of potential complications; Accredited centers must demonstrate proficiency in these areas through data collection and continuous quality improvement initiatives, ultimately aiming for optimal patient outcomes and minimized adverse events.

Sleeve Gastrectomy Standards

MBSAQIP outlines specific standards for Sleeve Gastrectomy, another prevalent bariatric procedure. These standards prioritize careful patient evaluation to determine suitability, considering factors beyond BMI, including psychological readiness and co-morbidities.

The program mandates surgeons demonstrate expertise in the technique, emphasizing complete gastric resection along the lesser curvature with a precisely calibrated gastric tube. Standards address staple line reinforcement and leak testing protocols to mitigate post-operative risks.

Post-operative nutritional guidelines are crucial, focusing on adequate protein intake and vitamin supplementation. Accredited centers must actively monitor for complications like strictures or GERD, demonstrating a commitment to comprehensive patient care and continuous quality improvement through data analysis and benchmarking.

Quality Improvement and Data Reporting

MBSAQIP emphasizes Continuous Quality Improvement (CQI) through meticulous data collection, submission, and analysis, enabling benchmarking and driving advancements in bariatric care;

Continuous Quality Improvement (CQI)

MBSAQIP places paramount importance on Continuous Quality Improvement (CQI) as a cornerstone of accredited programs. This isn’t merely a procedural requirement, but a deeply ingrained philosophy focused on consistently evaluating and refining all aspects of bariatric surgical care. Centers are expected to proactively identify areas for enhancement, implement evidence-based changes, and meticulously monitor the impact of those changes on patient outcomes.

The program encourages a multidisciplinary approach to CQI, involving surgeons, nurses, dietitians, and other key personnel. Regular data analysis, peer review, and participation in national benchmarking initiatives are crucial components. MBSAQIP’s framework supports a culture of learning and adaptation, ensuring that centers are continually striving to deliver the highest quality, safest, and most effective care possible to patients undergoing metabolic and bariatric surgery. This dedication to improvement directly translates to better patient results and a more robust healthcare system.

Data Collection and Submission

MBSAQIP relies heavily on comprehensive data collection and submission from accredited centers to maintain its robust benchmarking capabilities and drive quality improvement initiatives. Centers are required to meticulously gather a standardized set of clinical data points for each patient undergoing bariatric surgery, encompassing preoperative assessments, intraoperative details, and postoperative outcomes.

This data is then submitted through the MBSAQIP Database, a secure platform designed for efficient and accurate reporting. The submission process is carefully defined to ensure data integrity and comparability across participating centers. Regular audits and validation procedures are employed to maintain the reliability of the information. Accurate and timely data submission is not only a requirement for maintaining accreditation but also a vital contribution to advancing the field of metabolic and bariatric surgery, allowing for meaningful comparisons and identification of best practices.

MBSAQIP Database and Benchmarking

The MBSAQIP Database serves as the central repository for all clinical data submitted by accredited centers, forming the foundation for rigorous benchmarking and performance analysis. This secure platform allows centers to compare their outcomes against national averages and identify areas for potential improvement.

Benchmarking isn’t simply about ranking; it’s a powerful tool for learning from peers and adopting best practices. The database facilitates comparisons across key metrics, including complication rates, length of stay, and patient-reported outcomes. Participating centers receive detailed reports highlighting their performance relative to others, enabling targeted quality improvement efforts. This continuous cycle of data collection, analysis, and feedback is central to the MBSAQIP’s mission of promoting excellence in metabolic and bariatric surgery and ensuring optimal patient care.

The 2019 MBSAQIP Standards Manual

The 2019 MBSAQIP Standards Manual details comprehensive guidelines for bariatric surgery centers, available for free download as a PDF or text file online.

Key Updates in the 2019 Manual

The 2019 revision of the MBSAQIP Standards Manual represented a significant step forward in refining accreditation criteria for bariatric surgery programs. This updated edition, released by the ACS/ASMBS, focused on bolstering patient safety and optimizing surgical outcomes. A core emphasis was placed on strengthening requirements for preoperative evaluation, ensuring a thorough assessment of patient suitability for bariatric procedures.

Furthermore, the manual detailed enhancements to standards concerning surgical team qualifications, demanding demonstrated expertise and competency across all personnel involved in patient care. Updates also addressed the crucial area of continuous quality improvement (CQI), advocating for more robust data collection and analysis to identify areas for program enhancement. The 2019 manual aimed to provide a more detailed and actionable framework for centers striving to achieve and maintain MBSAQIP accreditation, ultimately benefiting patients seeking metabolic and bariatric surgery.

Accessing the MBSAQIP Standards Manual

The MBSAQIP Standards Manual is a vital resource for bariatric surgery centers pursuing accreditation and maintaining high-quality patient care. Fortunately, accessing this crucial document is readily achievable. A digital version of the 2019 MBSAQIP Standards Manual is available for free download in PDF format. It can also be found as a Text File (.txt) for convenient viewing and searching.

Interested parties can easily locate the manual through online searches or directly through the American College of Surgeons (ACS) and the American Society for Metabolic and Bariatric Surgery (ASMBS) websites. These organizations serve as the primary custodians of the MBSAQIP program and provide direct links to the latest version of the standards. Regularly checking these sources ensures access to the most current guidelines and updates, supporting continuous improvement efforts within bariatric surgery programs.

Future Revisions and Updates

The MBSAQIP program is committed to continuous improvement, meaning the Standards Manual isn’t a static document. Expect ongoing revisions and updates to reflect advancements in bariatric surgery, evolving best practices, and emerging data regarding patient safety and outcomes. The Metabolic and Bariatric Surgery Accreditation and Quality Improvement Program (MBSAQIP) recently announced an updated edition of its Optimal standards.

These updates are driven by a dedication to providing the highest quality of care and ensuring centers adhere to the latest evidence-based guidelines. The ACS/ASMBS collaboratively release these revised standards, signaling a proactive approach to maintaining program rigor. Centers should routinely monitor official MBSAQIP communication channels – including the ACS and ASMBS websites – for announcements regarding upcoming changes and implementation timelines. Staying informed is crucial for maintaining accreditation and delivering exceptional patient care.

bosch dishwasher user manual pdf

Accessing your Bosch Serie 6 Dishwasher Manual is crucial; find comprehensive guides and PDF versions online to unlock your appliance’s full potential.

These manuals, like the Bosch EXXCEL manual, offer vital instructions for safe operation, installation, and effective maintenance of your dishwasher.

Availability of PDF Manuals

Bosch dishwasher manuals, including PDF formats, are readily available online through the official Bosch website and various appliance support platforms;

You can easily download a Bosch EXXCEL dishwasher manual as a PDF file, offering convenient access to operating instructions and troubleshooting guides.

These digital versions ensure you always have the information you need, whether you’re setting up a new appliance or addressing a specific issue, like a dishwasher not drinking water.

Finding your specific model’s manual is simplified by entering your model number on dedicated support websites, providing instant access to the correct PDF document.

Importance of Reading the Manual

Reading the Bosch dishwasher user manual, especially the PDF version, is paramount for safe and efficient operation. It details crucial safety instructions for installation and use, preventing potential hazards.

Understanding the manual ensures proper appliance setup, including water hardness settings and connection procedures, maximizing cleaning performance and longevity.

The manual guides you through selecting appropriate wash programs and utilizing special functions, like half load or extra dry, optimizing every wash cycle.

Furthermore, it provides essential troubleshooting steps for common issues, potentially saving costly service calls and ensuring your dishwasher operates flawlessly.

Safety Instructions

Bosch dishwasher manuals emphasize crucial safety guidelines for installation, operation, and maintenance, ensuring user well-being and preventing potential appliance damage.

General Safety Warnings

Bosch dishwasher manuals consistently prioritize user safety, detailing critical warnings against improper use. PDF versions highlight the importance of reading all instructions before operation.

These manuals caution against using the dishwasher for anything other than household dishware, preventing potential malfunctions or hazards. They also stress the need to supervise children around the appliance.

Furthermore, the manuals warn against modifying or attempting repairs without qualified service personnel, ensuring continued safe and efficient operation of your Bosch dishwasher.

Grounding Instructions

Bosch dishwasher manuals, available as PDF downloads, emphasize the critical importance of proper grounding for electrical safety. These instructions detail how to connect the appliance to a grounded electrical outlet.

The manuals explicitly state that improper grounding can lead to electric shock hazards. They advise against altering the plug or using adapter plugs that bypass the grounding feature.

Always consult a qualified electrician if you are unsure about grounding procedures, ensuring your Bosch dishwasher is safely connected and operates within specified electrical parameters.

Proper Installation Safety

Bosch dishwasher manuals, often found as PDF files, prioritize safety during installation. They stress reading all instructions before beginning, emphasizing adherence to local plumbing and electrical codes.

The manuals warn against self-installation if you lack experience, recommending professional help. They detail proper hose connections to prevent leaks and secure mounting to avoid tipping.

Furthermore, they caution against extending or modifying factory-supplied connections, ensuring the dishwasher operates safely and efficiently within its designed parameters, as outlined in the documentation.

Getting Started: Installation & Setup

Bosch dishwasher manuals (available as PDFs) guide unpacking, inspection, and connecting to water/electricity; referencing them ensures correct initial setup.

Unpacking and Inspection

Upon delivery, carefully unpack your Bosch dishwasher, consulting the PDF manual for specific guidance. Thoroughly inspect for any shipping damage – dents, scratches, or missing components.

The manual details what should be included: the dishwasher itself, spray arms, racks, drain hose, and installation hardware. Document any damage immediately with photos and contact your retailer or Bosch support.

Retain all packaging materials until you’ve confirmed the dishwasher is functioning correctly. The manual emphasizes verifying all parts are present before proceeding with installation, preventing delays later.

Water Hardness Settings

Your Bosch dishwasher’s PDF manual stresses the importance of setting the correct water hardness level for optimal cleaning performance. Hard water contains minerals that reduce detergent effectiveness and can leave spots on dishes.

The manual provides instructions on how to test your water hardness using a test strip or by contacting your local water utility. Based on the results, adjust the dishwasher’s settings – typically ranging from 1 (softest) to 7 (hardest).

Incorrect settings can lead to residue or etching. Refer to the manual’s chart to determine the appropriate salt dosage if your model requires it, ensuring sparkling clean results.

Connecting to Water and Electricity

The Bosch dishwasher PDF manual provides detailed instructions for safely connecting your appliance to both water and electrical supplies. It emphasizes following local plumbing and electrical codes during installation.

For water connection, the manual specifies using a new supply hose and ensuring a secure, leak-proof fit. Electrical connection requires a grounded outlet with the correct voltage, as detailed in the specifications section of the manual.

Important: Never attempt to modify the power cord or bypass the grounding system. Improper connections can create hazards; always consult a qualified technician if unsure.

Understanding Your Dishwasher

The Bosch dishwasher user manual PDF details interior components, control panel functions, and the detergent compartment for optimal performance and usage.

Interior Components Overview

Bosch dishwasher interiors, as detailed in the user manual PDF, feature adjustable racks, spray arms, and a filter system. The upper rack accommodates glasses and smaller items, often with adjustable height settings.

Lower racks are designed for plates, pots, and pans. Spray arms, crucial for cleaning, rotate to deliver water to all areas. The filter system captures food particles, preventing clogging and ensuring efficient operation.

Understanding these components, as outlined in the manual, allows for proper loading and maximizes cleaning performance. Regular inspection and cleaning of these parts are essential for longevity.

Control Panel Explanation

The Bosch dishwasher control panel, thoroughly explained in the user manual PDF, features buttons or touch controls for selecting wash programs, adjusting settings, and initiating cycles. Common options include Auto, Normal, Delicate, and Quick Wash.

Special functions like Half Load, Extra Dry, and Sanitize are also accessible. Indicator lights display cycle progress, remaining time, and any error messages. The manual details each button’s function, ensuring users can customize washes.

Understanding the control panel is key to optimizing cleaning results and utilizing the dishwasher’s full capabilities, as described in the provided documentation.

Detergent Compartment Details

The Bosch dishwasher’s detergent compartment, detailed in the user manual PDF, is typically located inside the door. It’s divided into sections for detergent, rinse aid, and sometimes, pre-wash detergent.

The manual specifies the correct amount of detergent based on water hardness and load size. Proper filling ensures optimal cleaning performance. Rinse aid dispenses automatically, aiding drying and preventing water spots.

Understanding compartment markings and capacity is crucial, as outlined in the documentation, to avoid over or under-dosing, maximizing wash effectiveness and protecting your dishwasher.

Operating Instructions

Bosch dishwasher operation, detailed in the user manual PDF, involves proper loading, selecting wash programs, and utilizing special functions for optimal results.

Loading the Dishwasher Correctly

Proper loading, as outlined in your Bosch dishwasher user manual PDF, is essential for optimal cleaning performance. Ensure items don’t block spray arms.

Position dishes facing the center, and avoid overcrowding. Place larger items on the lower rack, and delicate glassware on the upper rack.

Utensils should be placed in the cutlery basket with handles down for safety and thorough cleaning. Refer to the manual for specific rack configurations and loading recommendations to maximize space and efficiency.

Selecting Wash Programs

Your Bosch dishwasher user manual PDF details various wash programs tailored to different needs. Options include Auto, Eco, Normal, and Intensive, each with specific temperature and duration settings.

The Auto program adjusts based on soil level, while Eco prioritizes energy efficiency. Normal is suitable for everyday loads, and Intensive tackles heavily soiled items.

Consult the manual to understand each program’s characteristics and choose the most appropriate one for your dishes, ensuring optimal cleaning and resource conservation.

Using Special Functions (e.g., Half Load, Extra Dry)

The Bosch dishwasher user manual PDF outlines helpful special functions for customized cleaning. The Half Load option conserves water and energy when washing smaller loads, enhancing efficiency.

Extra Dry increases drying performance, ideal for plastics or items needing thorough dryness. Other functions, like Delicate or Machine Care, cater to specific dish types or appliance maintenance.

Refer to your manual for detailed instructions on activating and utilizing these features, optimizing your dishwasher’s performance and achieving desired results with every wash cycle.

Maintenance and Cleaning

Bosch dishwasher user manual PDFs detail essential upkeep, including spray arm and filter cleaning, ensuring optimal performance and longevity of your appliance.

Cleaning the Spray Arms

Bosch dishwasher user manual PDFs emphasize regular spray arm cleaning for peak performance. Remove the spray arms – typically by unscrewing or unclipping – as detailed in your specific model’s manual.

Inspect the small holes for food particles or mineral deposits; use a toothpick or fine wire to carefully clear any blockages. Rinse thoroughly under running water to remove dislodged debris.

Ensure the spray arms rotate freely after cleaning. Reinstall securely, verifying proper attachment to maintain effective water distribution during wash cycles, as outlined in the manual.

Filter Cleaning Procedures

Bosch dishwasher user manual PDFs detail crucial filter cleaning steps. Locate the filter assembly – usually at the bottom of the dishwasher’s interior – and remove it following the manual’s instructions.

Rinse the filter components under running water, using a soft brush to remove stubborn food particles. Check for any damage and replace if necessary.

Reassemble the filter correctly and securely, ensuring proper placement to prevent debris from recirculating during wash cycles, as illustrated in your Bosch model’s manual.

Dishwasher Cleaning Recommendations

Bosch dishwasher user manual PDFs recommend regular cleaning to maintain peak performance. Run an empty cycle with a dishwasher cleaner monthly, following the manual’s dosage guidelines.

Wipe down the door seals and interior surfaces with a damp cloth and mild detergent. Avoid abrasive cleaners that could damage the stainless steel.

Periodically clean the spray arms (refer to the manual) and ensure the filter is clear of debris, as detailed in your Bosch model’s specific PDF instructions.

Troubleshooting Common Issues

Bosch dishwasher user manual PDFs detail solutions for problems like starting failures, poor cleaning, and leaks; consult your manual first!

Dishwasher Not Starting

If your Bosch dishwasher fails to start, the user manual PDF is your first resource. Check the power supply and ensure the door is securely latched, as detailed in the manual.

Verify the control panel isn’t locked; the manual explains how to disable child locks. A tripped circuit breaker or a faulty power cord are also potential causes, outlined within the PDF.

Consult the troubleshooting section of your specific model’s manual for error codes displayed, offering precise diagnostic steps. Resetting the dishwasher, as described in the manual, can sometimes resolve the issue.

Poor Cleaning Performance

Experiencing unsatisfactory cleaning results? Your Bosch dishwasher user manual PDF provides solutions. First, confirm proper loading techniques, as illustrated within the manual, avoiding overcrowding and ensuring spray arm clearance.

Verify the correct detergent is used and the detergent compartment is functioning correctly, details found in the manual. Check water temperature; it must reach the recommended level for optimal cleaning, as specified in the PDF.

A clogged filter significantly impacts performance; the manual details cleaning procedures. Finally, select the appropriate wash program for the load type, guided by the manual’s program descriptions.

Water Leaks and Drainage Problems

Discovering leaks or drainage issues? Your Bosch dishwasher user manual PDF is the first resource. Inspect the door seal for damage or debris, referencing the manual’s diagrams for proper seating.

Check the water inlet and drain hoses for kinks or obstructions; the manual illustrates their correct positioning. A clogged drain filter can cause backups – consult the PDF for cleaning instructions.

Ensure the drain hose is properly elevated, as detailed in the manual, to prevent backflow. If issues persist, the manual guides you through troubleshooting steps before contacting service.

Technical Specifications

Refer to your Bosch dishwasher user manual PDF for precise dimensions, weight, water consumption, and energy efficiency details specific to your model.

Dimensions and Weight

Consult your Bosch dishwasher’s user manual PDF for exact measurements, as specifications vary significantly between models. These documents detail the appliance’s height, width, and depth, crucial for installation planning.

Weight is also specified, impacting flooring considerations and ease of movement during installation or servicing. The manual provides these critical figures, ensuring a proper fit within your kitchen cabinetry and structural support.

Always prioritize referencing the PDF for your specific model number to avoid inaccuracies.

Water Consumption Details

Your Bosch dishwasher’s user manual PDF outlines water usage per cycle, a key factor for both cost savings and environmental responsibility. Different wash programs consume varying amounts of water; the manual details these specifics.

Understanding these details allows you to select the most efficient cycle for your load, minimizing water waste. The PDF will also indicate water pressure requirements for optimal performance.

Referencing the manual ensures accurate information for your specific model, promoting responsible water usage.

Energy Efficiency Information

The Bosch dishwasher user manual PDF provides crucial details regarding energy consumption, helping you understand your appliance’s efficiency. It specifies the energy rating and kilowatt-hours (kWh) used per wash cycle.

Different programs have varying energy demands; the manual clearly outlines these differences, enabling informed choices for eco-friendly operation.

Consulting the PDF allows you to maximize energy savings and minimize your environmental impact, aligning with sustainable practices.

Service and Support

Bosch provides extensive support; locate your model number within the manual PDF to access tailored assistance and warranty details efficiently.

Finding Your Model Number

Locating your Bosch dishwasher’s model number is essential for accessing specific support and downloading the correct PDF user manual. This unique identifier ensures you receive accurate information tailored to your appliance.

Typically, the model number is found on a sticker or plate inside the dishwasher door, often along the edge. Consult your Bosch appliance manual – available as a PDF online – for a visual guide if needed. Having this number readily available streamlines the process of contacting Bosch customer support or finding replacement parts.

Without the correct model number, accessing the appropriate manual and receiving specialized assistance becomes significantly more challenging.

Contacting Bosch Customer Support

For personalized assistance with your Bosch dishwasher, and to discuss issues not covered in the PDF user manual, Bosch provides multiple support channels. You can often find helpful FAQs and troubleshooting guides online, alongside downloadable manuals.

To speak directly with a representative, visit the official Bosch website and navigate to the support section. There, you’ll find contact numbers for phone support, as well as options for live chat or submitting an inquiry via email. Be prepared to provide your dishwasher’s model number for efficient service.

Bosch aims to provide prompt and effective solutions to ensure your appliance operates optimally.

Warranty Information

Bosch dishwashers are backed by a limited warranty, details of which are thoroughly outlined in your product’s PDF user manual. The warranty typically covers defects in materials and workmanship for a specified period, often varying based on the dishwasher series.

Carefully review the manual to understand the scope of coverage, including what components are protected and the duration of the warranty. Registration of your appliance may be required to activate the full warranty benefits. Keep your proof of purchase readily available, as it’s essential for any warranty claims.

Bosch strives to ensure customer satisfaction through reliable products and comprehensive warranty support.

chamberlain 050actwf manual

Chamberlain 050ACTWF Manual: A Comprehensive Guide

This guide provides detailed instructions for the Chamberlain 050ACTWF garage door opener, covering installation, programming, maintenance, and troubleshooting, alongside PDF resources․

The Chamberlain 050ACTWF is a chain drive garage door opener designed for residential use, offering reliable performance and security․ While now discontinued, it remains a popular model with many homeowners․ This manual serves as a comprehensive resource for those who own or are installing this specific opener․

Understanding its features and proper operation is crucial for maximizing its lifespan and ensuring safe usage․ This opener typically includes a robust chain drive system, safety sensors, and compatibility with various remote controls․ Accessing the installation manual, available as a PDF, is highly recommended for complete instructions․

Despite being a discontinued part, replacement options and support resources are still available through Chamberlain’s website and authorized dealers․

Understanding the Discontinued Status of 050ACTWF

The Chamberlain 050ACTWF has been officially discontinued as a current model․ This doesn’t mean it’s unsupported, but rather that Chamberlain no longer manufactures this specific unit․ Discontinuation often occurs as manufacturers release newer models with updated features, improved safety standards, or enhanced technology․

Despite its discontinued status, many 050ACTWF openers remain in service․ Finding replacement parts might require a bit more effort, but they are still generally available through various online retailers and Chamberlain’s support channels․

Owners should retain their installation manual for future reference, as it contains vital information for maintenance and repair․ Exploring replacement options for a complete upgrade is also advisable when parts become scarce․

Safety Precautions & Warnings

Always prioritize safety! Disconnect power before maintenance, avoid short-neck bulbs, and be aware of potential LED interference with remote controls․

General Safety Information

Prior to installing or servicing your Chamberlain 050ACTWF garage door opener, carefully review all provided safety information within the installation manual․ Garage door systems operate with significant force and can pose serious injury risks if not handled correctly․ Always disconnect the power supply to the opener before performing any maintenance or repairs․

Never allow children to operate the garage door or play near the opener․ Keep the remote controls out of reach of children․ Regularly inspect the garage door balance to ensure smooth operation and prevent unexpected closures․ Be mindful of pinch points and avoid placing hands or objects in the door’s path while it’s moving․ Follow all local safety codes and regulations during installation and operation․

Ensure proper adjustments and testing are completed after installation or any repairs․ A malfunctioning opener can create a hazardous situation․

Disconnecting Power Before Maintenance

Before undertaking any maintenance, repair, or even simple inspection of your Chamberlain 050ACTWF garage door opener, completely disconnect the power supply․ This is a crucial safety step to prevent accidental operation and potential injury․ Locate the circuit breaker that controls the garage door opener and switch it to the ‘off’ position․

Alternatively, you can unplug the opener directly from the electrical outlet, if accessible․ Confirm the power is off by attempting to operate the opener with the wall button or remote control – it should not respond․ Always double-check to ensure the power is truly disconnected before proceeding with any work․

Re-establish power only after all maintenance is completed and all components are securely reassembled․

Light Bulb Compatibility & LED Interference

The Chamberlain 050ACTWF opener has specific light bulb requirements to ensure optimal performance and prevent interference with remote control operation․ Avoid using short-neck or specialty light bulbs, as these can cause issues․ Crucially, LED bulbs can sometimes generate radio frequency interference, disrupting the signal between the remote and the opener․

To mitigate this, Chamberlain recommends using only LED bulbs listed as compatible on their website: chamberlain․com/bulb․ Using an incompatible LED bulb may result in reduced remote control range or intermittent operation․ If you experience issues after installing an LED, try a different bulb or revert to an incandescent bulb․

Always check the wattage rating and ensure it doesn’t exceed the opener’s maximum limit․

Installation Guide

Proper installation involves removing the light lens, disconnecting power, and carefully assembling the Chamberlain chain drive opener, following the detailed manual instructions․

Removing the Light Lens

Before beginning any installation or maintenance procedures on your Chamberlain 050ACTWF garage door opener, safely removing the light lens is a crucial first step․ The process is generally straightforward, designed for ease of access․ According to available resources, you should gently pull down on the light lens to detach it from the opener housing․

It’s important to avoid excessive force during this step, as the lens is typically held in place by clips or a friction fit․ Inspect the lens and surrounding area for any damage before proceeding․ Once removed, set the light lens aside in a safe location to prevent breakage or loss during the subsequent installation phases․ Refer to your complete installation manual for visual aids and specific instructions tailored to your model․

Disconnecting Power to the Garage Door Opener

Prioritizing safety is paramount when working with electrical devices like your Chamberlain 050ACTWF garage door opener․ Before undertaking any maintenance, installation, or troubleshooting, completely disconnect the power supply․ Locate the garage door opener’s power source – typically a standard electrical outlet․

Simply switching off the wall switch is insufficient; physically unplug the opener from the outlet․ This ensures a complete power disconnection, preventing accidental activation during your work․ Double-check that the opener is fully de-energized before proceeding․ Refer to your owner’s manual for specific safety guidelines and warnings related to electrical disconnection․ This critical step minimizes the risk of electric shock and ensures a safe working environment․

Assembling the Chamberlain Chain Drive Opener

Carefully unpack all components of your Chamberlain 050ACTWF chain drive opener, verifying that all listed parts are present․ Begin by attaching the rail sections together, ensuring secure connections as per the installation manual’s diagrams․ Next, mount the assembled rail to the ceiling supports, utilizing appropriate hardware for your ceiling type․

Then, carefully position the opener unit onto the rail assembly, aligning it correctly․ Securely fasten the opener to the rail, ensuring a stable and vibration-free connection․ Finally, connect the chain to the garage door, adjusting the chain tension for smooth operation․ Refer to the detailed instructions within your owner’s manual for precise assembly guidance․

Programming & Remote Control Setup

Successfully program your Chamberlain 050ACTWF with easy initial steps, ensuring remote compatibility and resolving potential interference issues for seamless control․

Initial Programming Steps

To begin programming your Chamberlain 050ACTWF, first ensure the garage door opener has power and is in learning mode․ Typically, this involves pressing and releasing the ‘Learn’ button on the motor unit – its location is detailed in the full installation manual․

Next, within 30 seconds of activating learning mode, press and hold the button on your remote control until the garage door opener light flashes, indicating successful programming․ Repeat this process for each additional remote you wish to pair with the system․

If programming fails, verify the battery in the remote and repeat the steps․ Consult the comprehensive PDF manual for detailed diagrams and troubleshooting tips to ensure a smooth setup process․

Remote Control Compatibility

The Chamberlain 050ACTWF is generally compatible with a wide range of Chamberlain and LiftMaster remote controls utilizing rolling code technology․ However, compatibility isn’t universal; older, non-rolling code remotes may require a compatibility bridge or may not function at all․

Specifically, remotes with frequencies around 390 MHz are typically supported․ Checking the PDF manual or Chamberlain’s website for a current compatibility list is highly recommended before purchasing new remotes․

LED bulb interference can sometimes affect remote signal strength, so using Chamberlain-approved bulbs is crucial for reliable operation․ Always refer to the official documentation for the most accurate information․

Troubleshooting Remote Control Issues

If your Chamberlain 050ACTWF remote isn’t working, first ensure the batteries are fresh and correctly installed․ Next, try reprogramming the remote following the instructions in the installation manual․ Interference from LED bulbs is a common culprit; switch to Chamberlain-approved bulbs to test․

Check for obstructions between the remote and the garage door opener․ If multiple remotes are affected, the receiver in the opener might be the issue․ A factory reset, detailed in the PDF manual, can sometimes resolve this․

Finally, verify compatibility – older remotes may not work with rolling code systems․

Maintenance & Troubleshooting

Regular upkeep and addressing operational problems promptly ensures longevity and safety of your Chamberlain 050ACTWF opener; check the door balance frequently․

Regular Maintenance Schedule

To ensure optimal performance and extend the lifespan of your Chamberlain 050ACTWF garage door opener, a consistent maintenance schedule is crucial․ Inspect the chain or belt drive monthly for proper tension and lubrication, applying a suitable lubricant as needed․

Check all hardware – bolts, nuts, and brackets – quarterly, tightening any that are loose․ Examine the door tracks for obstructions and ensure smooth roller movement․ Test the safety reversal system monthly by placing an object in the door’s path;

Clean the opener’s lens and housing annually to remove dust and debris․ Finally, visually inspect wiring for any signs of damage or wear, addressing issues promptly to prevent potential hazards․

Addressing Common Operational Problems

If your Chamberlain 050ACTWF opener isn’t responding, first verify the power supply and check the circuit breaker․ For doors that reverse unexpectedly, examine the safety sensors, ensuring they are aligned and free from obstructions․ Remote control issues often stem from battery depletion or programming conflicts – re-program the remote following the manual’s instructions․

Grinding noises may indicate a need for chain or belt lubrication․ Slow operation could be due to a binding door; inspect the tracks and rollers․ If the door only opens or closes partially, adjust the travel limits․ Always disconnect power before attempting any repairs․

Checking the Garage Door Balance

A properly balanced garage door is crucial for safe and reliable operation with your Chamberlain 050ACTWF opener․ To test, manually disconnect the opener using the emergency release cord․ Then, gently lift the door halfway; it should remain stationary, not drift up or down․

If the door feels heavy or moves on its own, the springs are likely unbalanced and require professional adjustment․ Do not attempt to adjust the springs yourself, as this can be dangerous․ Inspect the door’s tracks and rollers for any obstructions or damage that might affect balance․ Regularly checking balance prevents strain on the opener․

Warranty Information

Maintaining warranty validity requires proper installation and adherence to guidelines; review coverage details within the Chamberlain 050ACTWF manual for specific terms․

Maintaining Warranty Validity

To ensure your Chamberlain 050ACTWF warranty remains valid, meticulous adherence to the installation and operational guidelines outlined in the owner’s manual is crucial․ Retain proof of purchase, as this serves as primary documentation for any warranty claims․ Regular maintenance, performed according to the recommended schedule, demonstrates responsible ownership and supports your claim․

Modifications or repairs performed by unauthorized personnel will immediately void the warranty․ Utilizing non-approved replacement parts also compromises coverage․ Carefully review the warranty documentation for specific exclusions and limitations․ Proper use of the opener, avoiding overloading or misuse, is essential․ Following these steps safeguards your investment and ensures access to warranty benefits should the need arise․

Warranty Coverage Details

The Chamberlain 050ACTWF warranty typically covers defects in materials and workmanship for a specified period, often one year from the date of purchase․ This coverage encompasses the motor, gear case, and electronic components․ However, wear-and-tear items like belts, chains, and light bulbs are generally excluded․

Warranty service involves repair or replacement of defective parts, at Chamberlain’s discretion․ Labor costs for warranty repairs may or may not be covered, depending on the specific terms․ The warranty does not extend to damage caused by improper installation, misuse, accidents, or unauthorized modifications․ Refer to the full warranty statement for complete details and limitations․

Resources & Documentation

Access the 050ACTWF installation manual in PDF format, explore the Chamberlain support website, and locate replacement parts for your opener easily․

Downloading the 050ACTWF Installation Manual (PDF)

Obtaining the official Chamberlain 050ACTWF installation manual in PDF format is crucial for a safe and successful setup․ This comprehensive document, spanning 12 pages, details every step of the process, from unpacking and assembly to programming and safety precautions․

Users can readily download this essential resource from various online platforms dedicated to garage door opener support․ The PDF version allows for convenient offline access, enabling you to refer to the instructions at any time, even without an internet connection․

Ensure you download the manual from a trusted source to guarantee its authenticity and completeness․ Having this manual readily available will significantly simplify the installation and maintenance of your Chamberlain 050ACTWF opener․

Chamberlain Support Website

Chamberlain’s official support website serves as a central hub for all 050ACTWF related resources, despite the model being discontinued․ It provides access to frequently asked questions, troubleshooting guides, and helpful articles addressing common operational issues․

The website also features a dedicated section for finding replacement parts, crucial for maintaining your opener’s functionality over time․ Furthermore, users can explore detailed information regarding LED bulb compatibility to avoid potential remote control interference․

Directly accessing chamberlain․com allows you to stay updated on the latest support information and connect with Chamberlain’s customer service team for personalized assistance․ This online platform is an invaluable asset for 050ACTWF owners․

Finding Replacement Parts

Locating replacement parts for the discontinued Chamberlain 050ACTWF requires a strategic approach․ While direct availability may be limited, Chamberlain’s website offers guidance on compatible alternatives for various components․

Third-party retailers specializing in garage door opener parts often stock components suitable for this model, including chains, gears, and remote controls․ Providing the 050ACTWF model number when searching is crucial for accurate results․

Consider exploring LiftMaster’s website as well, as many parts are interchangeable between the two brands․ Carefully review part specifications to ensure compatibility before purchasing, guaranteeing a proper fit and optimal performance․

Technical Specifications

The 050ACTWF features a chain drive, horsepower ratings vary, and requires standard 120V power; detailed specifications are available in the installation manual․

Detailed Specifications of the 050ACTWF

The Chamberlain 050ACTWF is a ½ horsepower chain drive garage door opener designed for standard sectional doors․ It operates on a 120V AC power supply, with a 60Hz frequency․ The unit features a lifting capacity suitable for single-car garages, typically accommodating doors weighing up to 350 pounds․

Its chain drive system provides reliable performance, though it may be louder than belt-drive models․ The opener includes a rolling code technology for enhanced security, preventing unauthorized access․ The motor voltage is 120V, and the maximum vertical travel is often around 7 feet․ Refer to the official installation manual for precise dimensions and weight limits, as variations may exist based on specific configurations․

Detailed electrical specifications, including amperage draw, are also outlined within the documentation․

Power Requirements

The Chamberlain 050ACTWF garage door opener requires a standard 120-volt AC (alternating current) power supply, operating at a frequency of 60 Hertz․ A dedicated 15-amp circuit is generally recommended to prevent overloading and ensure reliable operation․

It’s crucial to verify that the electrical outlet used is properly grounded for safety․ Avoid using extension cords, as they can reduce power delivery and pose a fire hazard․ The opener’s power consumption varies during operation, with higher draw during door movement and lower draw in standby mode․

Always disconnect power at the breaker before performing any maintenance or wiring adjustments․ Consult a qualified electrician if you are unsure about your electrical setup․

Frequently Asked Questions (FAQ)

Q: My remote isn’t working․ What should I do? A: First, check the battery․ Then, reprogram the remote following the instructions in the manual․ Interference from LED bulbs can also be a cause․

Q: The garage door opens partway and stops․ A: This could indicate a balance issue or obstruction․ Check the door’s balance and clear any obstacles․

Q: Is the 050ACTWF still in production? A: No, it’s discontinued․ Replacement options are available through Chamberlain’s website․

Q: Where can I find a PDF of the manual? A: Links to the PDF installation manual are provided in the Resources section of this guide․

manual de marca ejemplos

Brand manuals‚ crucial for cohesive identity‚ define visual and verbal elements‚ ensuring consistent application across all platforms – a vital resource for organizations․

What is a Brand Manual?

A brand manual‚ sometimes called a style guide‚ is a comprehensive document detailing how a brand should be presented to the world․ It’s far more than just a logo guide; it’s a holistic representation of a brand’s identity․ Think of it as the definitive rulebook for everything related to your brand’s communication and visual presentation․

These manuals encompass guidelines on logo usage‚ color palettes‚ typography‚ imagery‚ and even brand voice and messaging․ They ensure consistency across all touchpoints – from marketing materials and digital platforms to packaging and internal communications․ Essentially‚ a brand manual safeguards brand equity by establishing clear standards and preventing diluted or inconsistent brand representation․ It’s a living document‚ evolving with the brand‚ but always maintaining core identity principles;

Importance of a Brand Manual for Consistency

Maintaining brand consistency is paramount in today’s competitive landscape‚ and a brand manual is the cornerstone of achieving this․ Without a defined set of guidelines‚ brand representation can become fragmented and diluted‚ leading to confusion among consumers and a weakened brand identity․

A manual ensures that every employee‚ partner‚ and vendor understands how to accurately portray the brand‚ regardless of their role or location․ This consistency builds brand recognition‚ fosters trust‚ and strengthens brand equity․ It prevents misinterpretations and ensures a unified message across all channels․ Ultimately‚ a well-maintained brand manual translates into a more professional‚ credible‚ and memorable brand experience for your audience․

Target Audience for Brand Manuals

Brand manuals aren’t solely for designers; their reach extends far beyond the creative department․ The primary audience encompasses all individuals representing the brand – marketing teams‚ sales representatives‚ customer service agents‚ and even external partners like advertising agencies and printers․

Essentially‚ anyone communicating with the public on behalf of the brand needs access to this document․ It’s crucial for onboarding new employees‚ ensuring consistent messaging‚ and maintaining brand standards․ Even legal teams benefit from understanding brand guidelines for trademark protection․ A comprehensive manual empowers everyone to act as brand ambassadors‚ reinforcing a unified and professional image across all touchpoints․

Core Components of a Brand Manual

Essential elements include history‚ mission‚ values‚ personality‚ visual guidelines (logo‚ color‚ typography)‚ imagery rules‚ and voice/messaging – building a cohesive brand identity․

Brand History and Background

A brand’s narrative is foundational․ This section details the origins‚ evolution‚ and key milestones of the organization․ It’s not merely a chronological listing of dates‚ but a compelling story that explains why the brand exists․ Include founding principles‚ pivotal moments that shaped its identity‚ and significant achievements․

Detailing the brand’s journey builds authenticity and provides context for current values․ Explain how past experiences influence present strategies․ This section should articulate the brand’s heritage‚ demonstrating its commitment to its core beliefs over time․ It establishes a sense of trust and resonates with audiences who appreciate a brand with a rich and meaningful past․ A well-crafted history humanizes the brand․

Brand Mission‚ Vision‚ and Values

Clearly defined principles guide all brand actions․ The mission statement articulates the brand’s current purpose – what it does and for whom․ The vision statement outlines its aspirational future – where it wants to be․ Core values are the fundamental beliefs that underpin the brand’s culture and decision-making;

These elements aren’t just words; they’re the ethical compass for the organization․ They should be concise‚ memorable‚ and genuinely reflect the brand’s identity․ Explain how these principles translate into tangible behaviors and customer experiences․ This section ensures internal alignment and provides a framework for evaluating strategic choices‚ fostering a consistent and purposeful brand presence․

Brand Personality and Voice

Defining a human-like personality for your brand fosters connection․ Is it sophisticated‚ playful‚ authoritative‚ or friendly? This personality dictates the brand voice – the distinct style of communication used across all channels․ Consider adjectives that best describe how the brand should sound to its audience․

A brand voice guide details tone‚ language‚ and even humor․ It specifies what to avoid‚ ensuring consistency․ Examples illustrate appropriate and inappropriate phrasing․ This section prevents conflicting messaging and strengthens brand recognition․ A well-defined personality and voice create a relatable and memorable brand experience‚ building trust and loyalty with the target audience․

Visual Identity Guidelines

Visual guidelines establish standards for logo usage‚ color palettes‚ and typography‚ ensuring a unified and recognizable brand appearance across all materials․

Logo Usage Guidelines

Logo guidelines are paramount for maintaining brand consistency․ These rules dictate appropriate logo sizes‚ clear space surrounding the mark‚ and acceptable color variations․ Precise specifications prevent distortion or misuse‚ safeguarding brand recognition․

Detailed examples illustrate correct applications across diverse backgrounds and media․ Conversely‚ the manual explicitly showcases incorrect logo usage – stretching‚ skewing‚ altering colors‚ or adding effects – to prevent deviations from the established visual identity․

Horizontal and vertical logo lockups are often defined‚ alongside minimum size requirements for both print and digital applications․ Adherence to these guidelines ensures a professional and unified brand presentation‚ strengthening brand equity and consumer trust․

Logo Variations and Clear Space

Logo variations cater to diverse applications‚ offering options like full-color‚ black and white‚ and reversed (white on a dark background) versions․ Each variation maintains legibility and brand recognition across different contexts․ The manual details when to utilize each version‚ ensuring consistency․

Crucially‚ clear space defines the minimum unobstructed area surrounding the logo․ This buffer zone‚ typically measured as a proportion of the logo’s height or width‚ prevents visual clutter and ensures the logo stands out․

Guidelines specify the minimum allowable distance from other elements – text‚ images‚ or other graphics – to maintain visual prominence․ Strict adherence to clear space rules protects the logo’s integrity and reinforces brand professionalism․

Incorrect Logo Usage Examples

Illustrating improper logo handling is vital․ A brand manual dedicates sections to “don’ts‚” showcasing examples of distorted‚ stretched‚ or skewed logo applications․ These visuals demonstrate how altering the logo’s proportions compromises its intended impact and brand identity․

Incorrect color variations – using unapproved shades or altering the logo’s color scheme – are also highlighted․ Similarly‚ examples of the logo placed on busy or distracting backgrounds‚ violating clear space guidelines‚ are provided․

The manual explicitly forbids adding effects like drop shadows or outlines‚ and demonstrates the negative impact of rotating or otherwise manipulating the logo’s original design․ These visual warnings reinforce correct usage and protect brand consistency․

Color Palette

A brand’s color palette is foundational to its visual identity‚ and a manual meticulously defines approved colors․ This section details both primary and secondary colors‚ providing precise specifications for reproduction across various media․

Crucially‚ color codes are listed in multiple formats – Hex codes (for digital use)‚ RGB (Red‚ Green‚ Blue) for screen displays‚ and CMYK (Cyan‚ Magenta‚ Yellow‚ Black) for print materials․ This ensures color consistency regardless of the output method․

The manual clarifies the intended emotional associations with each color and outlines acceptable usage percentages‚ preventing overuse of dominant shades and maintaining visual balance․ It also specifies colors not to be used‚ safeguarding brand integrity․

Primary Color Codes (Hex‚ RGB‚ CMYK)

Defining primary colors with precision is paramount․ A brand manual will list each primary color with its corresponding codes for seamless implementation․ For digital applications‚ the Hex code (e․g․‚ #FFFFFF for white) is essential for web design and online graphics․

For screen displays‚ RGB values (e․g․‚ 255‚ 255‚ 255 for white) are provided‚ ensuring accurate color representation on monitors․ Crucially‚ for printed materials‚ CMYK values (e․g․‚ 0‚ 0‚ 0‚ 0 for white) are detailed‚ guaranteeing consistent color reproduction through the printing process․

These codes act as the definitive reference point‚ eliminating ambiguity and ensuring all brand materials adhere to the established visual identity․ Accurate color representation builds brand recognition and trust․

Secondary Color Usage

Secondary colors complement the primary palette‚ adding depth and versatility to brand communications․ A brand manual meticulously outlines how these colors should be utilized‚ preventing overuse or inappropriate pairings․ Typically‚ secondary colors serve as accents‚ supporting the primary colors without overshadowing them․

Guidelines specify acceptable combinations – which secondary colors work well with each primary color – and define their intended purpose; For example‚ a secondary color might be reserved for call-to-action buttons‚ highlighting key information‚ or differentiating sections within a design․

Clear rules ensure visual harmony and prevent a disjointed brand appearance․ The manual will often include examples demonstrating correct and incorrect secondary color applications․

Typography

Typography is a cornerstone of brand identity‚ dictating readability and conveying personality․ A brand manual establishes precise guidelines for font selection‚ usage‚ and hierarchy․ It typically designates primary and secondary fonts – the main fonts for headings and body copy‚ respectively – ensuring consistency across all materials․

Detailed rules cover font sizes‚ weights (bold‚ italic)‚ line heights‚ and letter spacing for various applications‚ like headlines‚ subheadings‚ body text‚ and captions․ The manual clarifies when to use each font and how to create visual hierarchy through typographic contrast․

Examples demonstrate proper usage‚ and often include “do’s and don’ts” to prevent inconsistent or aesthetically displeasing typography․

Primary and Secondary Fonts

Primary fonts typically embody the core brand personality‚ used prominently in headlines‚ logos‚ and key messaging․ Examples often include classic serifs for a traditional feel or modern sans-serifs for a contemporary look․ The manual specifies exact font families‚ weights (e․g․‚ Regular‚ Bold‚ Light)‚ and styles (e․g․‚ Italic)․

Secondary fonts complement the primary font‚ providing versatility for body copy‚ captions‚ and supporting text․ They should be highly legible and harmonize with the primary font’s aesthetic․ A brand manual details acceptable pairings and clarifies when to switch between them․

Clear examples illustrate correct usage‚ ensuring a consistent typographic voice across all brand communications‚ from digital platforms to printed materials․

Font Hierarchy and Usage Rules

A well-defined font hierarchy establishes visual importance within content․ Brand manuals dictate specific font sizes and weights for headings (H1‚ H2‚ H3‚ etc․)‚ subheadings‚ body copy‚ captions‚ and other text elements․ This ensures readability and guides the viewer’s eye․

Usage rules detail precisely where each font and size should be applied․ For instance‚ H1s might always be the primary font in a large bold weight‚ while body copy utilizes the secondary font at 12pt․ These rules prevent inconsistent typography․

Examples showcase correct application across various mediums – website‚ brochures‚ social media – reinforcing the brand’s visual consistency and professional appearance․ Strict adherence to these guidelines is paramount․

Imagery and Photography Guidelines

Visual storytelling through imagery must align with brand personality; guidelines define style‚ tone‚ and subject matter for consistent‚ impactful visual communication․

Image Style and Tone

Establishing a distinct image style and tone is paramount for brand recognition and emotional connection․ The manual de marca should meticulously detail the desired aesthetic – is it vibrant and energetic‚ or sophisticated and minimalist? Specify preferred photography styles: documentary‚ lifestyle‚ studio‚ or illustrative․

Define the emotional resonance images should evoke․ Should they inspire trust‚ excitement‚ or serenity? Detail acceptable and unacceptable subjects‚ compositions‚ and editing techniques․ For example‚ specify natural lighting preferences‚ color grading guidelines‚ and the inclusion (or exclusion) of human subjects․

Provide visual examples demonstrating both compliant and non-compliant imagery․ This clarity ensures all visual content consistently reflects the brand’s core values and personality‚ strengthening brand identity across all channels․

Photography Guidelines

Detailed photography guidelines within a manual de marca ensure visual consistency․ Specify preferred image resolutions‚ file formats (e․g․‚ JPEG‚ PNG‚ TIFF)‚ and aspect ratios for various applications – web‚ print‚ social media․ Outline acceptable lighting conditions: natural light‚ studio setups‚ or specific color temperatures․

Address subject matter: are lifestyle shots preferred‚ or product-focused imagery? Define model casting guidelines‚ emphasizing diversity and representation aligned with brand values․ Include stipulations regarding retouching – natural looks versus heavily edited images․

Provide examples of approved and disapproved photography styles․ Address composition rules‚ such as the rule of thirds‚ and specify any prohibited elements (e․g․‚ overly staged scenes‚ distracting backgrounds)․ These guidelines guarantee a cohesive and recognizable visual identity․

Iconography Style

A manual de marca must detail the iconography style to maintain visual harmony․ Specify whether icons should be outlined‚ filled‚ flat‚ or incorporate gradients․ Define the preferred stroke weight and corner radius for consistent appearance․ Establish a consistent visual language – are icons literal representations or abstract symbols?

Outline acceptable color palettes for icons‚ referencing the brand’s primary and secondary colors․ Provide examples of approved icon designs and explicitly prohibit styles that deviate from the established guidelines․

Address icon size and spacing considerations for different applications․ Specify file formats (SVG is often preferred for scalability)․ Ensure icons complement the overall brand aesthetic and enhance user experience‚ contributing to a unified and recognizable brand identity․

Brand Voice and Messaging

Brand voice guidelines establish a consistent tone‚ ensuring all communications reflect the brand’s personality and values‚ fostering recognition and trust․

Tone of Voice Guidelines

Establishing a clear tone of voice is paramount for brand consistency․ These guidelines detail how the brand communicates‚ not just what it says․ Is the brand formal or informal? Playful or serious? Technical or approachable?

A well-defined tone ensures all content – from website copy to social media posts – feels authentically “on-brand․” Consider adjectives that best describe the desired tone: authoritative‚ friendly‚ innovative‚ compassionate‚ or sophisticated․ Provide specific examples of phrasing to emulate and avoid․

For instance‚ a tech company might favor precise‚ technical language‚ while a lifestyle brand might opt for a more conversational and emotive style․ Documenting these nuances prevents miscommunication and strengthens brand recognition across all touchpoints․

Key Messaging Pillars

Key messaging pillars represent the core themes and messages the brand consistently communicates․ These aren’t slogans‚ but rather foundational statements that underpin all brand communication․ Typically‚ brands identify 3-5 key pillars that encapsulate their value proposition and resonate with their target audience․

Each pillar should be supported by supporting messages and talking points․ For example‚ a pillar of “Innovation” might be supported by messages highlighting new technologies or forward-thinking solutions․ These pillars ensure consistent messaging across all channels‚ reinforcing brand identity and building trust․

Clearly defining these pillars prevents diluted messaging and ensures every communication contributes to a cohesive brand narrative․ They act as a compass‚ guiding content creation and strategic communication efforts․

Do’s and Don’ts of Brand Communication

A brand manual’s “Do’s and Don’ts” section provides clear guidelines for maintaining brand consistency․ Do use approved brand messaging‚ adhere to the defined tone of voice‚ and utilize approved visual assets․ Do ensure all communications align with the brand’s core values and target audience․

Don’t deviate from the established visual identity – altering logos‚ colors‚ or typography is prohibited․ Don’t use unapproved imagery or fonts․ Don’t adopt a tone of voice inconsistent with brand guidelines․ Don’t make exceptions without explicit approval from brand management․

These guidelines safeguard brand equity and prevent misrepresentation‚ ensuring a unified and recognizable brand presence across all touchpoints․

Brand Applications & Examples

Brand manuals showcase practical applications – marketing collateral‚ digital assets‚ and packaging – demonstrating consistent brand implementation across diverse channels and materials․

Marketing Materials (Brochures‚ Flyers)

A brand manual dictates precise guidelines for marketing collateral like brochures and flyers‚ ensuring a unified message and visual aesthetic․ This includes specifying approved layouts‚ image usage‚ and typography․ Consistent application of the color palette‚ as defined within the manual‚ is paramount․

The manual will detail how the logo should be positioned and sized on these materials‚ alongside clear space requirements; Messaging should adhere to the established brand voice and key messaging pillars․ Examples within the manual often showcase correct and incorrect applications‚ providing clear visual references for designers and marketers․

Furthermore‚ the manual might include templates or mockups to streamline the design process and guarantee adherence to brand standards․ This level of control strengthens brand recognition and reinforces a professional image across all marketing efforts․

Digital Presence (Website‚ Social Media)

A comprehensive brand manual extends to the digital realm‚ providing strict guidelines for website design and social media content․ This encompasses everything from button styles and image resolutions to the tone of voice used in online interactions․ Consistent logo placement and sizing across all digital platforms are crucial‚ as detailed in the manual․

The manual will specify approved fonts for web use and dictate how the color palette translates to screen displays․ Social media guidelines will cover profile picture dimensions‚ cover photo specifications‚ and content templates․ Maintaining a consistent brand identity online builds trust and recognition․

Examples of appropriate and inappropriate social media posts‚ adhering to the brand’s voice‚ are often included․ This ensures all digital communications reinforce the overall brand message and contribute to a cohesive online presence․

Packaging Design

The brand manual dictates precise guidelines for packaging‚ ensuring it consistently reflects the brand’s identity at the point of sale․ This includes specifying materials‚ colors‚ typography‚ and imagery to be used on all product packaging․ Detailed examples showcase correct logo placement‚ clear space requirements‚ and acceptable variations for different package sizes․

Guidelines extend to structural packaging elements‚ like box shapes and label designs‚ ensuring they align with the brand’s aesthetic․ The manual often includes mockups demonstrating how the brand elements should integrate with product photography and descriptive text․

It also addresses legal requirements for packaging‚ such as nutritional information or warning labels‚ ensuring they are presented in a manner consistent with the overall brand style․ Consistency in packaging builds brand recognition and trust with consumers․

Legal Considerations & Brand Protection

Brand manuals detail trademark usage‚ copyright information‚ and enforcement policies‚ safeguarding brand assets and preventing unauthorized replication or modification․

Trademark Usage

Trademark guidelines within a brand manual are paramount for legal protection․ They meticulously define how the brand’s trademarks – logos‚ names‚ slogans – can be used‚ ensuring consistent and legally sound application․ The manual should specify acceptable and unacceptable variations‚ including size‚ color‚ and placement․

Detailed instructions regarding proper attribution and the inclusion of trademark symbols (™ or ®) are essential․ It must explicitly prohibit alterations to the trademark’s design or meaning․ Furthermore‚ the manual should outline scenarios where trademark usage requires explicit permission‚ such as co-branding or licensing agreements․

Clear examples of correct and incorrect trademark usage are invaluable‚ preventing unintentional infringement and maintaining brand integrity․ This section reinforces the legal boundaries surrounding the brand’s intellectual property․

Copyright Information

Copyright stipulations within a brand manual clearly define ownership of original works – including text‚ images‚ designs‚ and videos – created by or for the brand․ This section establishes the brand’s exclusive rights to reproduce‚ distribute‚ and display these materials․ It should explicitly state the copyright holder (e․g․‚ © [Brand Name] [Year]) and the scope of protection․

The manual must outline permissible uses of copyrighted material by internal teams and external partners‚ emphasizing restrictions on unauthorized reproduction or modification․ Guidelines on crediting creators and obtaining necessary permissions for third-party content are crucial․

A clear statement regarding the consequences of copyright infringement‚ both legal and reputational‚ reinforces the importance of adherence․ Providing contact information for copyright inquiries further streamlines compliance and protects the brand’s intellectual assets․

Brand Guidelines Enforcement

Consistent brand application necessitates a clear enforcement strategy detailed within the manual․ This section outlines procedures for monitoring adherence to the guidelines across all brand touchpoints – marketing materials‚ digital platforms‚ and internal communications․ It should designate responsible parties‚ such as a brand manager or marketing team‚ for oversight․

The manual should define a process for reviewing and approving brand-related content before publication‚ ensuring compliance․ It must also address corrective actions for violations‚ ranging from minor adjustments to formal warnings․

Regular training sessions for employees and partners on brand guidelines are essential․ A documented escalation path for unresolved issues and a commitment to consistent enforcement demonstrate the brand’s dedication to maintaining a unified identity․

insignia portable air conditioner manual

Insignia Portable Air Conditioner Manual: A Comprehensive Guide

This manual provides detailed instructions for Insignia portable AC units‚ including setup‚ operation‚ maintenance‚ and troubleshooting for models like NS-AC08PWH1․

Insignia portable air conditioners offer a convenient cooling solution for various spaces‚ ranging from small rooms to larger areas‚ with models like the NS-AC06PWH1 covering up to 250 sq․ ft․ These units are designed for ease of use and portability‚ allowing you to move cool air where it’s needed most․

This guide provides comprehensive information on setting up‚ operating‚ maintaining‚ and troubleshooting your Insignia unit․ Understanding your specific model number is crucial for accessing the correct support resources and ensuring optimal performance․ Regular maintenance‚ such as filter cleaning‚ will maximize efficiency and longevity․

Understanding Your Model Number

Your Insignia portable air conditioner’s model number – such as NS-AC06PWH1‚ NS-AC10PWH9‚ or NS-AC10PWH9-C – is essential for accurate support and parts identification․ Locating this number allows access to specific manuals‚ troubleshooting guides‚ and replacement components․

The model number is typically found on the unit itself․ Knowing your model ensures you receive the correct information when contacting Insignia customer service or searching for replacement filters and exhaust hoses online at retailers like Best Buy․

Locating the Model Number on Your Unit

Finding your Insignia portable air conditioner’s model number is straightforward․ It’s usually printed on a sticker or label affixed to the back or side of the unit․ Carefully inspect these areas‚ often near the power cord connection or ventilation openings․

The label will clearly display “Model Number” followed by the alphanumeric code (e․g․‚ NS-AC08PWH1)․ Record this number; it’s crucial for accessing specific documentation‚ ordering parts‚ and receiving accurate support from Insignia․

Importance of Knowing Your Model Number

Your Insignia portable air conditioner’s model number is essential for several reasons․ It ensures you access the correct user manual‚ troubleshooting guides‚ and compatible replacement parts – like filters for NS-AC08PWH1․

When contacting Insignia support‚ providing the model number allows representatives to offer tailored assistance․ It also guarantees you receive accurate information regarding features‚ specifications‚ and potential error codes specific to your unit‚ streamlining the support process․

Setting Up Your Insignia Portable Air Conditioner

Proper setup is crucial for optimal performance․ Begin by ensuring adequate ventilation‚ as portable ACs require an exhaust path․ Carefully unpack your Insignia unit and inspect for any damage․

The next step involves installing the exhaust hose‚ directing hot air outside․ Secure all connections to prevent air leakage‚ which reduces cooling efficiency․ Refer to your specific model’s instructions – like those for NS-AC06PWH1 – for detailed guidance on these initial steps․

Initial Setup and Ventilation Requirements

Before operating your Insignia portable air conditioner‚ ensure a stable‚ level surface․ Crucially‚ adequate ventilation is paramount; the unit expels hot air via the exhaust hose․ Position the unit near a window or vent for effective exhaust․

Avoid obstructions around the intake and exhaust vents․ Proper airflow maximizes cooling efficiency․ Confirm the window kit fits securely‚ preventing warm air from re-entering the room․ These initial steps are vital for optimal performance․

Installing the Exhaust Hose

Properly installing the exhaust hose is critical for your Insignia portable air conditioner’s function․ Connect the hose securely to the unit’s exhaust port and the included window kit․ Ensure a tight seal to prevent hot air recirculation․

Adjust the window kit to fit your window opening snugly․ Extend or retract the hose to avoid kinks or bends‚ maximizing airflow․ A secure connection minimizes energy waste and optimizes cooling performance․ Regularly check for leaks․

Operating Your Insignia Portable Air Conditioner

To begin‚ ensure the unit is plugged into a grounded outlet․ Use the power button to turn on your Insignia AC․ Explore the basic controls for intuitive operation․ Adjust fan speed for desired airflow‚ and set the temperature using the controls․

Select from cooling modes – Cool‚ Fan‚ or Dry – based on your needs․ The remote control offers convenient‚ long-distance operation․ Familiarize yourself with all functions for optimal comfort․

Powering On and Basic Controls

First‚ connect the power cord to a grounded electrical outlet․ Press the power button to initiate operation; a light indicator confirms activation․ The control panel features buttons for mode selection (Cool‚ Fan‚ Dry)‚ temperature adjustment‚ and fan speed․

Use the “+” and “-” buttons to set your desired temperature․ The display will show the set temperature․ Explore the timer function for scheduled operation‚ enhancing convenience and energy efficiency․

Adjusting Fan Speed and Temperature

To adjust fan speed‚ utilize the dedicated “Fan Speed” button on the control panel․ Cycle through Low‚ Medium‚ and High settings to customize airflow․ Temperature adjustment is achieved using the “+” and “-” buttons; the display shows the set point․

Lower temperatures increase cooling intensity‚ while higher settings reduce it․ Experiment to find a comfortable balance‚ considering room size and personal preference for optimal climate control․

Using the Cooling Modes (Cool‚ Fan‚ Dry)

Your Insignia portable AC offers three modes: Cool actively lowers room temperature‚ utilizing the compressor and fan․ Fan provides air circulation without cooling‚ ideal for ventilation․ Dry mode functions as a dehumidifier‚ removing moisture from the air while offering gentle cooling․

Select the desired mode using the “Mode” button on the control panel․ Each mode is indicated by a corresponding icon on the display‚ ensuring easy operation and customized comfort․

Remote Control Operation

The Insignia portable air conditioner includes a remote control for convenient operation from a distance․ This allows you to adjust settings without physically accessing the unit․ The remote replicates all functions available on the main control panel‚ including power‚ mode selection‚ temperature adjustment‚ and fan speed․

Ensure clear line of sight between the remote and the air conditioner for optimal performance․ Proper remote functionality enhances user convenience and accessibility․

Remote Control Overview

The Insignia remote control features clearly labeled buttons for intuitive operation․ Key buttons include Power (on/off)‚ Mode (Cool‚ Fan‚ Dry)‚ Temperature Up/Down‚ Fan Speed (Low‚ Medium‚ High)‚ and a Timer function․ A display screen may show the current settings․

Understanding each button’s function is crucial for efficient use․ The remote’s compact design allows for easy handling and storage‚ providing convenient control over your portable air conditioner․

Pairing the Remote Control

Typically‚ Insignia portable air conditioners don’t require explicit “pairing” of the remote control; it should function immediately with fresh batteries installed․ If the remote isn’t responding‚ first ensure there are no obstructions between the remote and the unit’s sensor․

Try replacing the batteries with new ones․ If issues persist‚ consult the specific model’s documentation or Insignia support for further assistance‚ as some models may have reset procedures․

Maintenance and Cleaning

Regular maintenance ensures optimal performance and longevity of your Insignia portable air conditioner․ Crucially‚ the washable air filter‚ located on the back of units like the NS-AC08PWH1‚ requires periodic cleaning – typically every two weeks – to maintain airflow․

Additionally‚ inspect and clean the exhaust hose connections to prevent blockages․ Always disconnect the unit from power before any cleaning procedures are undertaken․

Cleaning the Air Filter

To clean the air filter on your Insignia portable air conditioner (like model NS-AC08PWH1)‚ locate it behind the grills on the unit’s rear panel․ Gently remove the filter and vacuum away loose dust․ For a deeper clean‚ wash the filter with mild soap and water‚ ensuring it’s completely dry before reinstalling;

A clean filter maximizes airflow and cooling efficiency‚ contributing to optimal performance and extending the lifespan of your appliance․

Filter Location (e․g․‚ NS-AC08PWH1)

For the Insignia 250 Sq․ Ft․ Portable Air Conditioner‚ specifically model NS-AC08PWH1‚ the washable air filter is conveniently located behind the grills on the back of the unit․ Accessing the filter requires removing the rear grill cover․ This design allows for easy removal and cleaning‚ ensuring optimal airflow․

Always refer to your specific model’s documentation for precise filter location details‚ as placement can vary․

Cleaning the Exhaust Hose and Connections

Regularly inspect the exhaust hose for dust and debris buildup‚ which can reduce cooling efficiency․ Disconnect the hose from both the air conditioner and the window kit․ Wipe down the exterior with a damp cloth; avoid harsh chemicals․

Check the connections for a secure fit‚ ensuring no air leaks․ Clean the window kit opening to prevent recirculation of hot air․ A clean hose and secure connections are vital for optimal performance․

Troubleshooting Common Issues

If your Insignia air conditioner isn’t cooling‚ check the air filter‚ exhaust hose‚ and window kit for obstructions․ Water leaks may indicate improper drainage or a clogged drain hole – consult the manual․

Error codes signal specific problems; refer to the manual’s code list or Insignia support․ Before attempting repairs‚ always disconnect power and consult official sources for guidance to avoid damage․

Air Conditioner Not Cooling

If your Insignia portable AC isn’t cooling effectively‚ first check the air filter for dirt and debris‚ ensuring it’s clean for optimal airflow․ Inspect the exhaust hose for kinks or disconnections‚ and verify the window kit seals tightly․

Confirm the unit isn’t set to “Fan Only” mode․ Low refrigerant levels can also cause this issue; contact a qualified technician for refrigerant service․

Water Leaking from the Unit

Some condensation is normal during operation‚ especially in humid conditions․ However‚ excessive water leakage requires investigation․ Ensure the unit is positioned on a level surface to facilitate proper drainage․

Check the drain plug is securely closed․ If the unit is consistently leaking‚ it could indicate a blockage in the internal drain system‚ requiring professional attention․ Avoid operating in extremely humid environments for extended periods․

Error Codes and Their Meanings

Insignia portable air conditioners utilize error codes to signal malfunctions․ While specific codes vary by model (like NS-AC06PWH1 or NS-AC10PWH9)‚ consulting the full manual is crucial for accurate diagnosis․ Common issues include sensor failures or compressor problems․

If an error code appears‚ first power cycle the unit․ If the code persists‚ check connections and contact Insignia support for assistance‚ providing the exact error code for efficient troubleshooting․

Safety Precautions

Insignia portable air conditioners require careful operation․ Always adhere to electrical safety guidelines‚ avoiding damp environments and damaged cords․ Proper grounding methods are essential – ensure the unit is correctly grounded to prevent shocks․

Never attempt self-repair‚ especially regarding refrigerant․ Contact a qualified technician for service․ Disconnect the unit before cleaning or maintenance․ Keep flammable materials away‚ and supervise children around the appliance․

Electrical Safety Guidelines

Insignia air conditioners demand strict adherence to electrical safety․ Avoid operating the unit in damp areas to prevent shock hazards․ Inspect the power cord regularly for damage‚ and never use a damaged cord․ Ensure the outlet is properly grounded‚ as recommended․

Do not overload circuits with other appliances․ Always disconnect the unit from the power source before cleaning or performing maintenance․ If the power cord is damaged‚ it must be replaced by a qualified technician․

Proper Grounding Methods

Insignia portable air conditioners require proper grounding for safety․ Utilize a three-prong grounded outlet; never remove the grounding prong․ If an extension cord is necessary‚ use a heavy-duty‚ three-wire grounded cord․ Avoid using adapters that bypass the grounding feature․

Confirm the outlet is correctly wired and grounded by a qualified electrician if unsure․ Improper grounding can increase the risk of electrical shock․ Always follow local electrical codes and regulations․

Understanding BTU and Coverage Area

BTU (British Thermal Unit) measures an air conditioner’s cooling capacity․ Higher BTU ratings cool larger spaces; Insignia offers models like the 6‚000 BTU (NS-AC06PWH1) for approximately 250 sq; ft․ rooms․

Selecting the correct BTU is crucial; too low‚ and it won’t cool effectively․ Too high‚ and it may cycle on/off frequently․ Consider room size‚ insulation‚ and sunlight exposure when choosing a model․

What is BTU?

BTU stands for British Thermal Unit‚ and it’s the standard measurement for an air conditioner’s cooling power․ Specifically‚ one BTU is the amount of energy needed to raise the temperature of one pound of water by one degree Fahrenheit․

In simpler terms‚ a higher BTU rating indicates a more powerful air conditioner capable of cooling a larger area․ Insignia portable ACs come in various BTU levels to suit different room sizes and cooling needs․

Matching BTU to Room Size (e․g․‚ 250 Sq․ Ft․ Models)

Selecting the correct BTU is crucial for efficient cooling․ A 6‚000 BTU Insignia model‚ like the NS-AC06PWH1‚ is generally suitable for rooms around 250 square feet․ Larger spaces require higher BTU ratings to maintain comfortable temperatures․

Underestimating BTU needs can lead to the unit running constantly without adequately cooling the room‚ while overestimating can result in inefficient operation and wasted energy․ Consider room insulation and sun exposure too․

Replacing Parts and Accessories

Maintaining your Insignia portable AC requires occasional part replacements․ Replacement air filters are essential for optimal performance and can be sourced online or at retailers like Best Buy․ Finding a replacement exhaust hose might require checking with Insignia support or specialized appliance parts suppliers․

Always use compatible parts specified for your specific model number (e․g․‚ NS-AC10PWH9) to ensure proper fit and function․ Encompass offers replacement parts and accessories․

Finding Replacement Filters

Locating replacement filters for your Insignia portable air conditioner is straightforward․ Filters‚ crucial for maintaining air quality and cooling efficiency‚ are available for purchase at Best Buy‚ both online and in-store․ For models like the NS-AC08PWH1‚ ensure you select a filter designed for your specific unit․

Online retailers also offer compatible filters; always verify the model number before ordering․ Regular filter replacement—typically every few weeks with heavy use—is recommended․

Sourcing Replacement Exhaust Hoses

If your Insignia portable air conditioner’s exhaust hose requires replacement‚ several options are available․ Best Buy is a primary source‚ offering hoses compatible with various models‚ including NS-AC10PWH9․ Online marketplaces‚ like AliExpress‚ also carry replacement hoses‚ often at competitive prices‚ but confirm compatibility․

When purchasing‚ verify the hose’s diameter and length match your unit’s specifications․ A properly fitted hose is vital for efficient operation and preventing warm air recirculation․

Contacting Insignia Support

For assistance with your Insignia portable air conditioner‚ the official Insignia website provides extensive support resources‚ including FAQs and troubleshooting guides․ Direct customer service contact is also available through Best Buy‚ as Insignia is a Best Buy exclusive brand․

You can typically find contact information – phone numbers and online chat options – on the Best Buy website’s support section․ Be prepared to provide your model number (e․g․‚ NS-AC06PWH1) for efficient assistance․

Official Insignia Website and Support Resources

The primary resource for Insignia portable air conditioner support is the Best Buy website‚ as Insignia products are exclusively sold there․ Navigate to Best Buy’s support section and search for “Insignia air conditioner” to access relevant FAQs‚ user manuals‚ and troubleshooting guides․

These resources often include detailed information specific to your model number (like NS-AC10PWH9 or NS-AC10PWH9-C)․ You’ll find assistance with setup‚ operation‚ and common issues‚ potentially resolving your problem without direct contact․

Contacting Customer Service

If the online resources don’t resolve your issue‚ contacting Insignia customer service through Best Buy is the next step․ Access Best Buy’s customer support page and navigate to the Insignia section․ Options typically include live chat‚ phone support‚ and email submission․

Have your model number (e․g․‚ NS-AC06PWH1) readily available‚ as it’s crucial for efficient assistance․ Be prepared to describe the problem clearly and any troubleshooting steps already taken․ Professional help is available․

Specific Model Troubleshooting (NS-AC06PWH1)

For the NS-AC06PWH1 250 Sq․ Ft․ model‚ ensure the air filter is clean‚ as this is a common cause of reduced cooling․ Check the exhaust hose connection for leaks or obstructions‚ impacting efficiency․ If water leaks‚ verify proper drainage and unit leveling;

Encompass offers replacement parts for this model․ If issues persist‚ consult the full manual or contact Insignia support‚ providing the model number for targeted assistance․

Specific Model Troubleshooting (NS-AC10PWH9/NS-AC10PWH9-C)

When troubleshooting NS-AC10PWH9 or NS-AC10PWH9-C models‚ prioritize checking the exhaust hose and connections for secure fitting and airflow obstructions․ Confirm the air filter is clean to maintain optimal cooling performance․ If encountering error codes‚ refer to the manual for specific meanings․

For persistent issues‚ utilize the Best Buy website’s search function with the model number to locate support resources or contact Insignia customer service directly․

Refrigerant Considerations

Insignia portable air conditioners are sealed systems containing refrigerant․ Do not attempt to service the refrigerant yourself; this requires specialized tools and certification․ If you suspect a refrigerant leak or notice significantly reduced cooling performance‚ do not disassemble the unit․

Instead‚ contact a qualified HVAC service technician to inspect the air conditioner and‚ if necessary‚ safely add refrigerant․ Improper handling can damage the unit and void the warranty․

When to Check Refrigerant Levels

You shouldn’t routinely check refrigerant levels in your Insignia portable air conditioner as it’s a sealed system․ However‚ if you notice consistently warm air blowing despite proper settings‚ or a significant decrease in cooling capacity‚ it may indicate a refrigerant issue․

Reduced performance isn’t always refrigerant-related‚ so first ensure filters are clean and the exhaust hose is correctly installed․ If problems persist‚ professional inspection is crucial․

Professional Refrigerant Service

Attempting to service the refrigerant system yourself is strongly discouraged and potentially dangerous․ Contact a qualified HVAC technician for any suspected refrigerant leaks or low levels․ They possess the necessary tools‚ training‚ and certifications to handle refrigerants safely and effectively․

A technician will accurately diagnose the issue‚ repair any leaks‚ and recharge the system with the correct type and amount of refrigerant‚ ensuring optimal performance and preventing environmental damage․

Purchasing Insignia Portable Air Conditioners

Insignia portable air conditioners are readily available for purchase at Best Buy‚ both online and in physical store locations․ They offer a variety of models to suit different room sizes and cooling needs‚ like the 250 Sq․ Ft․ units․

Best Buy frequently provides a Price Match Guarantee‚ ensuring you receive the lowest price available․ Always check their website or inquire in-store for current details and eligibility requirements before making your purchase․

Where to Buy (e․g․‚ Best Buy)

Insignia portable air conditioners are primarily sold at Best Buy․ You can conveniently purchase them through their website‚ offering delivery options directly to your home․ Alternatively‚ visit a local Best Buy store to browse available models and receive assistance from sales associates․

Checking Best Buy’s website allows you to verify stock availability at nearby stores․ This ensures you can quickly acquire the unit you need‚ such as the 6‚000 BTU models‚ without delay․

Price Match Guarantee Information

Best Buy offers a Price Match Guarantee for Insignia portable air conditioners․ If you find a lower price on an identical‚ in-stock product at a qualifying retailer‚ Best Buy will match it․ This ensures you receive the best possible deal on your purchase‚ including models like the NS-AC06PWH1․

To claim a price match‚ provide proof of the lower price at the time of purchase or within 14 days after․ Certain exclusions apply‚ so review Best Buy’s full policy online․

Air Conditioner Vent Accessories

While primarily focused on functionality‚ some users explore accessories for their Insignia portable air conditioners․ Online searches reveal related items like “Daisy Perfume Clip” and other car vent accessories‚ though these aren’t directly compatible with the unit’s exhaust hose․

Focus remains on proper exhaust hose installation for efficient cooling․ Adapters or extensions aren’t officially supported by Insignia‚ and modifications could impact performance or void warranties․

Daisy Perfume Clip and Other Car Accessories (Related Search Results)

Interestingly‚ searches for Insignia portable AC accessories frequently yield results for car air conditioner vent clips‚ specifically “Daisy Perfume Clips․” These are unrelated automotive items‚ appearing due to broad keyword matching․ They offer no functionality with the Insignia unit’s exhaust system․

It’s crucial to differentiate between genuine AC accessories – like replacement filters and hoses – and these unrelated car products․ Prioritize official Insignia parts for optimal performance․

bread slicer manual

Bread slicers, especially manual models with adjustable guides, ensure consistently even slices. They offer compatibility with various knives, promoting ease and efficiency in the kitchen.

What is a Bread Slicer and Why Use One?

A manual bread slicer is a kitchen tool designed to guide a knife, creating uniform bread slices. These slicers typically feature a wooden frame with adjustable slots, allowing users to select their desired slice thickness. Utilizing a bread slicer eliminates uneven slices, a common issue with freehand cutting, and minimizes crumb scattering.

They are favored for their simplicity, affordability, and lack of electrical components. Manual slicers accommodate various knife types – bread knives, saws, and even electric knives – offering versatility. Ultimately, a bread slicer enhances baking enjoyment and presentation, delivering professional-looking results with minimal effort.

Brief History of Bread Slicing Technology

Before automated slicers, bread was traditionally cut by hand, resulting in inconsistent slices. The invention of the first bread-slicing machine in 1928 by Otto Frederick Rohwedder revolutionized baking, though early models were complex and expensive.

Manual bread slicers emerged as a more accessible alternative, offering home bakers a way to achieve uniform slices without significant investment. These early manual designs focused on guiding the blade, evolving into the adjustable-slot models seen today. They represent a bridge between entirely manual methods and fully automated systems.

Types of Bread Slicers

Manual bread slicers utilize adjustable guides and a hand-held knife, offering affordability and control, while electric models provide automated, faster slicing capabilities.

Manual Bread Slicers: A Detailed Overview

Manual bread slicers represent a cost-effective and space-saving solution for home bakers. These devices typically feature a wooden frame with adjustable stainless steel wire guides. Users select desired slice thickness by loosening screws, repositioning the guides, and re-tightening.

Compatibility extends to bread knives, saws, and even electric knives – an eight-inch or larger blade is recommended. A crumb collection slot simplifies cleanup, preventing messes during slicing. Though requiring manual effort, they offer precision and control, yielding uniform slices with practice.

Instructions, often illustrated, guide users through the simple setup and operation process, making them accessible for all skill levels.

Electric Bread Slicers: Features and Benefits

While focusing on manual slicers, it’s important to note electric models offer automated convenience. These units typically include a leveling foot for stability and require a grounded outlet for safe operation. Before slicing, the paddle must be removed.

Electric slicers are recommended for use with bread cutters or dentate cutters, avoiding fruit or kitchen knives to prevent bread deformation. They provide consistent, hands-free slicing, ideal for frequent bread users. However, they require more counter space and electrical power.

Understanding Your Manual Bread Slicer

Manual bread slicers feature a wooden frame with adjustable notches, secured by screws, and a crumb collection slot for cleaner, more efficient slicing.

Components of a Typical Manual Bread Slicer

A standard manual bread slicer primarily consists of a sturdy wooden frame designed to securely hold a loaf during slicing. Crucially, it incorporates adjustable side guides, often featuring notched slots, allowing users to select desired slice thickness. These guides are typically secured with screws for stability.

A notable feature is the integrated crumb collection area, a slot designed to catch stray crumbs during the slicing process, maintaining a cleaner workspace. The design accommodates various knife types – bread knives, saws, and even electric knives – ensuring versatility. Some models include adjustable feet for leveling, enhancing stability during operation.

Adjusting Slice Thickness: A Step-by-Step Guide

To adjust slice thickness on a manual bread slicer, begin by loosening the screws securing the side guides. Gently move the guides to the desired notch, referencing the markings for thickness. Ensure both sides are adjusted to the same setting for uniform slices.

Once aligned, firmly tighten the screws to lock the guides in place. A simple learning curve allows proficient adjustment. Remember, finer notches yield thinner slices, while wider gaps create thicker portions. Regularly check and readjust as needed for consistent results.

Using Your Manual Bread Slicer Safely and Effectively

Manual bread slicers require a sharp bread or serrated knife for optimal results, ensuring flat, thorough slices with controlled pressure and technique.

Preparing the Bread for Slicing

Before slicing, assess your bread’s condition – warm, stale, frozen, or partially thawed each presents unique challenges. A manual slicer thrives with a firm loaf; slightly stale bread often yields cleaner cuts than very fresh, soft bread.

Ensure the loaf is stable and positioned securely within the guides. Consider the bread’s shape; some manual slicers accommodate various sizes, while others are best suited for standard loaves. Removing any loose crust pieces beforehand can also contribute to a smoother slicing experience, minimizing crumbs.

Proper Knife Selection for Optimal Results

Choosing the right knife is crucial for successful manual bread slicing. An eight-inch or larger bread knife, or even a bread saw, is highly recommended for optimal performance. Avoid using fruit or kitchen knives, as they may crush the bread instead of slicing cleanly.

A serrated blade is ideal, as it effortlessly navigates the bread’s crust and soft interior. Ensure the knife is sharp; a dull blade requires excessive force, increasing the risk of uneven slices and potential injury. Regularly sharpen your bread knife for consistently excellent results.

The Slicing Process: Technique and Tips

Begin with a gentle learning curve; proficiency comes with practice. Position the bread securely within the manual slicer’s guides. Cut with the bread knife against the stainless steel wire, maintaining a smooth, even pressure. Avoid sawing motions; a clean, decisive slice yields the best results.

Utilize the crumb slot to maintain a tidy workspace. Remember to adjust the slicer’s settings for desired thickness. Whether slicing warm or stale bread, a sharp knife and proper technique are key.

Maintenance and Care

Regular cleaning of your manual bread slicer is essential. Sweep crumbs from the slot after each use to maintain hygiene and optimal performance.

Cleaning Your Bread Slicer

Maintaining a clean manual bread slicer is crucial for both hygiene and longevity. After each use, diligently sweep out accumulated crumbs from the designated crumb slot; this prevents stale buildup and potential sanitation issues. Periodically, wipe down the wooden frame with a slightly damp cloth – avoid excessive moisture, as wood can warp.

Ensure the guide rails are free of debris. For stubborn residue, a soft brush can be employed. Never submerge the wooden components in water. Regular cleaning ensures consistent, safe slicing and extends the life of your valuable kitchen tool, keeping it in prime condition for years to come.

Troubleshooting Common Issues

If your manual bread slicer feels unstable, adjust the front, right foot to level it – ensuring a secure base is paramount. Uneven slices often indicate loose screws on the adjustable guide; tighten them firmly. Difficulty slicing may stem from a dull knife; sharpen it before attempting again.

Persistent crumb buildup can hinder smooth operation; thoroughly clean the crumb slot. If the bread still slips, ensure the knife is appropriate (eight inches or larger is recommended). Addressing these simple issues will restore optimal performance.

Safety Precautions

Always use a sharp bread knife and maintain focus during slicing. Secure the slicer on a stable surface to prevent accidents and ensure safe operation.

Electrical Safety (for Electric Slicers)

While focusing on manual slicers, it’s crucial to acknowledge electrical safety for their powered counterparts. Always ensure the slicer is properly grounded using a three-pronged plug and a compatible outlet. Before plugging in, verify the outlet voltage matches the slicer’s requirements.

Never operate the slicer with a damaged cord or plug. Disconnect the power before cleaning or performing any maintenance. Avoid using extension cords if possible; if necessary, use a heavy-duty cord rated for the slicer’s wattage.

Remember to remove the paddle and hook before cutting, and never immerse the base in water. Prioritize safety to prevent electrical shock and ensure long-lasting performance.

Preventing Injuries During Operation

When using a manual bread slicer, prioritize hand safety. Always maintain a firm grip on the bread and utilize a sharp bread knife – avoid fruit or kitchen knives. Focus on controlled, even pressure during slicing, guiding the knife against the stainless steel wire.

Be mindful of the blade’s path and keep fingers clear. Never attempt to slice bread while distracted. After each slice, carefully sweep crumbs from the collection slot to prevent buildup and maintain a clean workspace.

Proper technique and attention minimize risks, ensuring a safe and efficient bread-slicing experience.

Bread Types and Slicing Considerations

Manual bread slicers adapt to warm, stale, frozen, or partially thawed bread, though a sharp knife is crucial for optimal, clean slices.

Slicing Warm vs. Stale Bread

Manual bread slicers present unique challenges depending on bread freshness. Warm bread, being soft, requires a very sharp knife and a gentle, sawing motion to avoid squashing.

Stale bread, conversely, offers more resistance and may crumble more easily. A slightly thicker slice setting on your manual slicer can help compensate. Ensure the guide rail is securely fastened for consistent results with both textures.

Remember, a dull knife will exacerbate issues with either bread type, leading to uneven slices and increased effort. Prioritize sharpness for best outcomes.

Handling Frozen or Partially Thawed Bread

Manual bread slicing of frozen or partially thawed loaves demands extra caution. Fully frozen bread is extremely difficult and dangerous to slice with a manual slicer; avoid this entirely.

Partially thawed bread, while slightly easier, remains challenging. A very sharp, serrated bread knife is crucial. Reduce slice thickness initially, as the bread may be brittle and prone to crumbling.

Apply slow, deliberate pressure, and ensure a firm grip on both the bread and the slicer for stability and safety.

Advanced Techniques

Manual bread slicers achieve uniformity by adjusting guides and employing consistent pressure with a sharp knife, regardless of bread shape or size.

Achieving Uniform Slice Thickness

Consistent slice thickness with a manual bread slicer relies heavily on precise adjustment of the guide rails. Loosen the screws, reposition for desired thickness, and firmly retighten them.

Employing a sharp bread knife, maintain even downward pressure and a smooth sawing motion against the stainless steel wire. Avoid jerky movements; a fluid technique yields the best results. Regularly sweep accumulated crumbs from the slot to prevent interference with the knife’s path, further enhancing slice consistency.

Slicing Different Bread Shapes and Sizes

Manual bread slicers excel with standard loaf shapes, but adapting to variations requires finesse. For round or irregularly shaped breads, center the loaf as best as possible within the guide.

Slight adjustments to hand positioning and slicing angle may be necessary to maintain consistent thickness. Larger loaves might require multiple passes, repositioning the bread after each slice. Remember, a sharp knife is crucial for clean cuts, regardless of the bread’s dimensions or form.

Choosing the Right Bread Slicer

Manual bread slicers are affordable and ideal for occasional use, offering adjustable slice thickness and compatibility with existing knives for precise results.

Factors to Consider When Purchasing

When selecting a manual bread slicer, prioritize build quality and material – sturdy wood construction is common; Assess the adjustability of slice thickness; notches or screw mechanisms should offer precise control. Compatibility with your preferred knife size (eight inches or larger is recommended) is crucial.

Consider crumb collection features for easier cleanup. Evaluate the slicer’s stability and whether adjustable feet are included for leveling. Finally, review included instructions for clarity and ease of understanding, ensuring a smooth learning curve for proficient slicing of various bread types.

Comparing Manual and Electric Models

Manual bread slicers offer affordability and simplicity, requiring no electricity and providing precise control over slice thickness via adjustable guides. They’re ideal for occasional use and smaller households. However, they demand more physical effort and skill for consistent results.

Electric slicers, while pricier, deliver speed and uniformity with minimal effort. They’re suited for frequent use and larger loaves, but require electrical outlets and careful cleaning. Manual models excel in portability and quiet operation, a key advantage over their electric counterparts.

Frequently Asked Questions (FAQ)

Manual bread slicers commonly ask about blade compatibility – eight-inch or larger knives work best. Adjusting screws controls slice thickness easily.

Common Questions About Bread Slicers

Many users inquire about the suitability of different knives; a bread saw or electric knife is preferable, avoiding fruit or kitchen knives for optimal results. Questions frequently arise regarding slice thickness adjustment – loosening screws allows movement to desired settings, then tightening secures it.

Another common concern involves crumb management; the integrated slot efficiently collects crumbs during slicing. Users also ask about leveling – adjustable feet on some models ensure stability. Finally, compatibility is often questioned; these slicers work well with various knife types, offering versatile bread preparation;

Where to Find Replacement Parts

Locating replacement parts for manual bread slicers often involves checking directly with the retailer where the slicer was originally purchased. Online marketplaces are also valuable resources, offering a wide selection of components like adjustable screws or crumb trays.

Manufacturer websites frequently provide parts diagrams and direct ordering options. For older or discontinued models, specialized appliance parts retailers may be necessary. Carefully noting the model number is crucial for ensuring compatibility when searching for replacements, guaranteeing a proper fit and function.

gmc sierra user manual

Welcome! This manual provides essential information about your 2024 GMC Sierra, covering features, operation, and maintenance for a superior ownership experience.

Welcome and Key Features

Congratulations on selecting the GMC Sierra! This vehicle is designed for capability, comfort, and innovative technology. Key features include a robust engine, spacious cabin configurations like the Crew Cab, and advanced infotainment systems.

Explore connectivity options like Bluetooth and USB integration for seamless device pairing. The Sierra excels in towing and hauling, offering impressive capacities. This manual will guide you through understanding and utilizing these features, ensuring a rewarding driving experience. Download the free PDF owner’s manual for detailed guidance!

Understanding This User Manual

This GMC Sierra owner’s manual is your comprehensive guide to vehicle operation and maintenance, spanning models from 1995 to 2024. It details safety features, driving techniques, and in-vehicle technology.

Review the information carefully to maximize your driving enjoyment and vehicle longevity. Warning lights and common issues are addressed for quick troubleshooting. A PDF version is readily available for convenient access. Familiarize yourself with the contents to fully understand your Sierra’s capabilities and ensure safe, informed operation.

Vehicle Overview

The GMC Sierra is a K4 class pickup truck, available in rear or all-wheel drive, offering versatile configurations like the Crew Cab for diverse needs.

Exterior Features and Controls

Your GMC Sierra’s exterior boasts a robust design with features like automatic headlights and power-adjustable mirrors. Understand the operation of the remote keyless entry system for secure access. Familiarize yourself with the location and function of the tailgate, including the available power liftgate option. Explore the exterior lighting, encompassing headlights, taillights, and optional fog lamps. Learn about the windshield wiper and washer controls for optimal visibility in various weather conditions. Properly utilizing these features ensures safe and convenient operation of your vehicle.

Interior Features and Controls

The GMC Sierra’s cabin offers a comfortable and technologically advanced experience. Locate and understand the function of all interior controls, including climate control, audio system, and power windows. Familiarize yourself with the steering wheel-mounted controls for convenient access to key functions. Explore the seating adjustments, including power-adjustable seats with memory settings. Learn about the interior lighting options and the operation of the available sunroof or moonroof. Understanding these controls enhances your driving comfort and convenience.

Getting Started

Before driving, review the vehicle start-up procedure and familiarize yourself with the Driver Information Center for vital system alerts.

Ignition and Vehicle Start-Up

Starting your GMC Sierra is straightforward. Ensure the vehicle is in Park (P) or Neutral (N), and firmly depress the brake pedal. Then, press the start/stop button. The engine will ignite, and the instrument panel will illuminate.

If the vehicle doesn’t start, verify the battery charge and ensure all accessories are switched off. Some models may require the key fob to be within proximity. Always consult the full owner’s manual for specific instructions related to your GMC Sierra’s year and configuration, as procedures can vary.

Understanding the Driver Information Center

The Driver Information Center displays crucial vehicle data. Access it via steering wheel controls to cycle through information like fuel economy, engine temperature, and tire pressure. Warning lights and indicators alert you to potential issues, requiring immediate attention.

Customize the display to prioritize the information most relevant to you. Refer to your GMC Sierra’s owner’s manual for a detailed explanation of each icon and function. Understanding this center enhances your driving experience and promotes safe operation by keeping you informed.

Driving Your GMC Sierra

Mastering your GMC Sierra involves understanding basic operations, plus specialized techniques for towing and hauling, ensuring a safe and controlled driving experience.

Basic Driving Operations

Familiarize yourself with the GMC Sierra’s controls – steering, acceleration, and braking – for smooth operation. Before driving, adjust your seat, mirrors, and fasten your seatbelt. Understand the gear selector positions (Park, Reverse, Neutral, Drive, Manual). Practice gentle acceleration and braking for optimal control. Be aware of the vehicle’s dimensions, especially when maneuvering in tight spaces. Regularly check your surroundings and maintain a safe following distance. The driver information center provides crucial vehicle data. Remember to consult the full owner’s manual for detailed instructions and safety precautions.

Towing and Hauling

Proper towing and hauling require careful preparation. Consult your GMC Sierra’s owner’s manual for specific weight limits – Gross Vehicle Weight Rating (GVWR) and Gross Combined Weight Rating (GCWR). Ensure your trailer has appropriate brakes and safety chains. Utilize the trailer hitch receiver and wiring harness correctly. Adjust tire pressure for the load. When hauling, distribute weight evenly in the cargo bed. Be mindful of increased stopping distances and reduced maneuverability; Drive at a reduced speed and avoid sudden braking or steering changes.

Safety Features

Your GMC Sierra includes advanced safety systems like airbags and stability control. Refer to the owner’s manual for detailed operation and limitations of each feature.

Airbag System

Your GMC Sierra is equipped with an advanced airbag system designed to provide occupant protection in certain collision events. This system includes frontal, side-impact, and roof rail airbags. Important: Always wear your seatbelt, as airbags are designed to work with seatbelts, not replace them.

The owner’s manual details airbag locations, deployment information, and crucial safety precautions. Improper seating positions, especially for children, can increase the risk of injury during airbag deployment. Never place rear-facing child seats in front of active airbags. Familiarize yourself with the system’s limitations and warnings for optimal safety.

Stability Control System

Your GMC Sierra features a sophisticated Stability Control System (SCS) designed to enhance vehicle control during challenging driving conditions. This system helps prevent skidding and loss of control by selectively applying brakes to individual wheels. The SCS works in conjunction with traction control to maintain optimal grip.

The system’s indicator light on the instrument panel will illuminate when activated. While SCS enhances safety, it doesn’t eliminate the need for cautious driving; Always adjust your speed for road and weather conditions. Refer to the owner’s manual for detailed information on system operation and limitations.

Maintenance

Regular maintenance is crucial for your GMC Sierra’s longevity and performance; follow the scheduled maintenance plan outlined in this manual diligently.

Scheduled Maintenance

Your GMC Sierra requires routine maintenance to ensure optimal performance and reliability. This manual details a comprehensive schedule, outlining services like oil and filter changes, tire rotations, and fluid level checks. Adhering to these intervals, based on mileage or time, helps prevent costly repairs and maintains your vehicle’s warranty.

Specific tasks vary depending on driving conditions – severe duty (towing, off-roading) necessitates more frequent attention. Consult the maintenance schedule within this manual for detailed guidance. Keeping records of completed services is also highly recommended for future reference and resale value.

Fluid Checks and Replacements

Regularly checking and replenishing your GMC Sierra’s fluids is crucial for smooth operation. This includes engine oil, coolant, brake fluid, power steering fluid, transmission fluid, and windshield washer fluid. Low fluid levels can lead to component damage and reduced performance.

This manual specifies the correct fluid types for your vehicle; using incorrect fluids can cause serious issues. Inspect fluid levels periodically and top off as needed. Scheduled fluid replacements – oil changes, coolant flushes – are vital for long-term reliability, detailed within the maintenance schedule.

In-Vehicle Technology

Explore the GMC Sierra’s advanced infotainment system, seamless connectivity features like Bluetooth and USB, enhancing your driving experience with modern technology.

Infotainment System

Your GMC Sierra features a cutting-edge infotainment system designed for intuitive control and seamless integration with your digital life. Access music, navigation, and vehicle settings through a responsive touchscreen display. The system supports Apple CarPlay and Android Auto compatibility, allowing you to mirror smartphone functionalities directly onto the vehicle’s screen. Explore various apps, stream music, and make hands-free calls for a connected and enjoyable journey. Customize your preferences and discover advanced features like voice recognition for a truly personalized experience. Regular software updates ensure optimal performance and access to the latest innovations.

Connectivity Features (Bluetooth, USB)

Stay connected on the go with your GMC Sierra’s advanced connectivity options. Seamlessly pair your smartphone via Bluetooth for hands-free calling and audio streaming. Multiple USB ports allow for charging devices and connecting external media players. The infotainment system supports various file formats, ensuring compatibility with your music library. Utilize the available Wi-Fi hotspot to connect multiple devices to the internet while traveling. These features enhance convenience and entertainment, keeping you connected and informed throughout your journey. Enjoy a modern, integrated driving experience.

Troubleshooting

This section offers solutions for common issues, explains warning lights, and provides guidance to quickly resolve problems with your GMC Sierra.

Common Issues and Solutions

Experiencing difficulties? This guide addresses frequent GMC Sierra concerns. A dead battery can often be jump-started following the procedure in the owner’s manual. If your infotainment system freezes, try a soft reset by holding the power button. Tire pressure monitoring system alerts may indicate a simple inflation need. For persistent issues, consult a qualified technician. Remember to check fluid levels regularly – low levels can cause performance problems. Detailed troubleshooting steps for various systems are available within the complete owner’s manual, downloadable in PDF format.

Warning Lights and Indicators

Understanding your dashboard is crucial for safe operation. The GMC Sierra utilizes various warning lights. A solid check engine light signals a potential mechanical issue requiring diagnosis. A flashing light indicates a severe problem – stop driving immediately. Low oil pressure, high engine temperature, and brake system warnings demand prompt attention. Refer to your owner’s manual for a comprehensive explanation of each indicator. Ignoring these signals could lead to costly repairs or unsafe driving conditions. Detailed descriptions and recommended actions are found within the manual.

Warranty Information

Your GMC Sierra is protected by a comprehensive warranty, detailed in this manual. Roadside assistance provides support, ensuring peace of mind during ownership.

GMC Sierra Warranty Details

The GMC Sierra warranty offers comprehensive coverage, beginning with a bumper-to-bumper warranty for 3 years/36,000 miles, whichever comes first. Powertrain coverage extends to 5 years/60,000 miles, safeguarding the engine, transmission, and drive systems.

Additionally, corrosion protection is included for 3 years/100,000 miles. Specific warranty terms and conditions are fully outlined within this manual, detailing what is covered and any limitations. Always refer to the official warranty document for complete details and to understand your rights as a vehicle owner. Maintaining proper vehicle maintenance is crucial for warranty validity.

Roadside Assistance

GMC provides valuable roadside assistance services for a specified period, offering peace of mind during unexpected situations. Services include towing, jump-starts, tire changes, fuel delivery, and lockout assistance. Coverage details, including duration and limitations, are thoroughly explained in this manual and the separate roadside assistance program documentation.

To access roadside assistance, simply contact the dedicated GMC hotline number provided within this guide. Be prepared to provide your vehicle identification number (VIN) and location. Review the terms and conditions to understand what is covered and any associated costs.

Specifications

This section details crucial GMC Sierra specifications, including engine details, dimensions, and capacities, providing a comprehensive technical overview of your vehicle.

Engine Specifications

Your GMC Sierra offers a range of powerful engine options designed for performance and capability. Available engines may include a 2.7-liter Turbo High-Output, a 5.3-liter EcoTec3 V8, or a robust 6.2-liter EcoTec3 V8. Each engine delivers varying horsepower and torque figures, catering to diverse towing and hauling needs.

Specific output varies by model year and configuration. Consult your vehicle’s documentation for precise details regarding your engine’s specifications, including compression ratio, fuel requirements, and recommended oil type. Understanding these details ensures optimal engine performance and longevity.

Dimensions and Capacities

The GMC Sierra boasts impressive dimensions and capacities, varying based on cab style (Regular, Double, Crew) and bed length. Overall length ranges significantly, impacting maneuverability and cargo space. Payload capacity depends on engine choice and configuration, reaching substantial limits for heavy-duty tasks.

Maximum towing capacity also varies, often exceeding 13,000 pounds when properly equipped. Interior passenger volume and cargo bed volume are key considerations. Refer to your vehicle’s specific specifications for precise measurements and weight ratings to maximize its utility.