Little Giant Pump Manual: A Comprehensive Guide
This manual details troubleshooting, maintenance, and repair for Little Giant pumps, including sump, pool cover, and condensate models.
It covers topics like GFCI resets, oil changes with AW32 hydraulic oil, and component replacements like the CV-10 check valve.
Understanding Little Giant Pumps
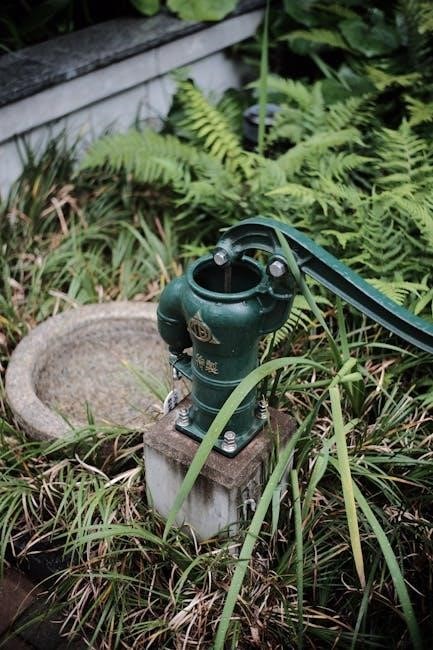
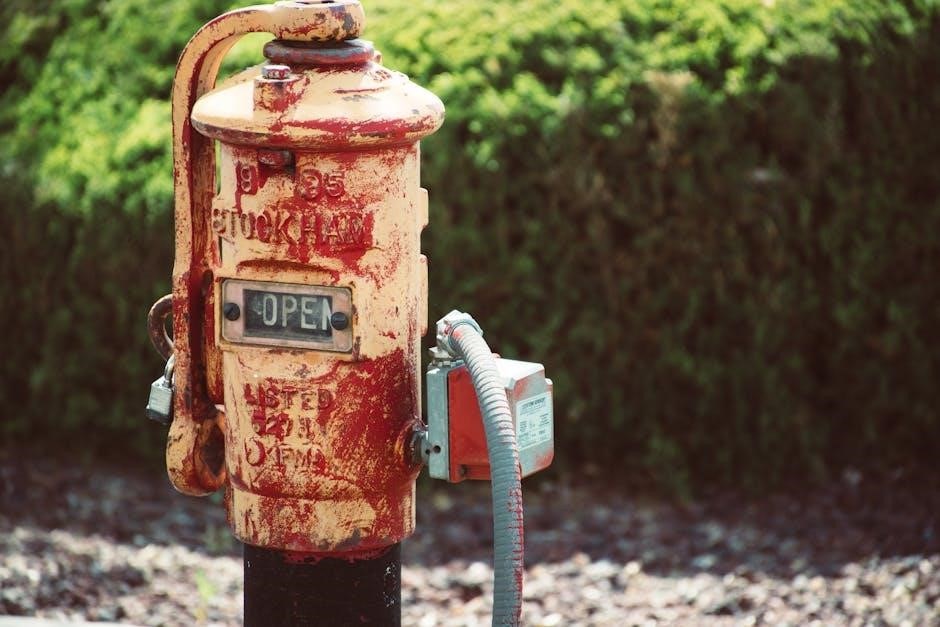
Little Giant pumps are renowned for their durability and reliability across various applications, from basement sump pits to pool covers and HVAC condensate removal. These pumps utilize different switching mechanisms, notably internal and tethered float switches, as seen in the 6-CIA model, to automatically activate and deactivate pumping cycles based on water levels.
Proper operation relies on understanding the pump’s specific design and intended use. Regular inspection is crucial, alongside awareness of potential issues like GFCI tripping, indicating electrical concerns. Furthermore, recognizing warranty limitations, such as those concerning brush wear in specific models (like the 35-OM) or impeller/cam issues in others (PP-1, PP-12, PP-230), is vital for informed ownership.
Pump Types and Applications
Little Giant offers diverse pumps for specific needs: sump pumps (like the 6-CIA), pool cover pumps, and condensate pumps (VCC, VCMA, VCL series) each serve unique purposes.
Sump Pump Models (e.g., 6-CIA)
Little Giant sump pumps, such as the popular 6-CIA model, are designed to effectively remove water from basements and crawl spaces. These pumps utilize either an internal or tethered float switch to automatically activate when water levels rise, preventing flooding.
If a sump pump fails to operate, a common issue is being undersized for the incoming water volume. Proper sizing is crucial for reliable performance. Troubleshooting includes verifying the pump isn’t straining to keep up with inflow.
Regular inspection of the intake and impeller is vital; clogs can significantly reduce pumping capacity. Remember to always allow the pump to cool before any servicing or inspection procedures are undertaken for safety.
Pool Cover Pump Models
Little Giant pool cover pumps are specifically engineered to efficiently remove accumulated rainwater and debris from swimming pool covers. These pumps prevent excessive water weight, which can damage the cover and potentially the pool structure itself.
A frequently encountered issue with these pumps is erratic behavior, often stemming from a blockage. A simple yet effective solution, as demonstrated by user experiences, involves cleaning the small hole located above the hose outlet.
This clears any obstructions hindering proper water flow and restores the pump to optimal functionality. Regular cleaning and inspection of this outlet hole are recommended preventative maintenance steps to ensure consistent performance.
Condensate Pump Models (VCC, VCMA, VCL)
Little Giant condensate pumps, including the VCC, VCMA, and VCL series, are designed to remove water generated by air conditioning, refrigeration, and dehumidification systems. These pumps prevent water damage and ensure efficient operation of HVAC equipment.
The CV-10 check valve is a crucial component for these models, preventing backflow and maintaining prime. Replacement is straightforward, with the CV-10 readily available (approximately $10.95 as of a recent report).
Proper installation and maintenance, including regular inspection of the check valve and ensuring clear drainage lines, are vital for reliable performance. These pumps are covered under warranty, excluding brush wear and impeller/cam issues.
Troubleshooting Common Issues
Diagnosing problems involves checking for electrical faults (GFCI tripping), ensuring proper pump sizing, and clearing obstructions in the intake or impeller.
Pump Not Starting
If the Little Giant pump fails to start, initial troubleshooting should focus on the electrical supply. First, verify that the pump is receiving power and check if the Ground Fault Circuit Interrupter (GFCI) has been activated. Resetting the GFCI is a crucial first step.
Next, meticulously inspect all electrical connections for looseness, corrosion, or damage. Ensure proper wiring and secure connections. If the pump still doesn’t start, consider whether the float switch is functioning correctly, as it controls pump activation. Remember to always allow the pump to cool before any servicing or inspection of electrical components to prevent potential hazards.
GFCI Tripping and Resetting
A frequently encountered issue is a tripping GFCI (Ground Fault Circuit Interrupter). This safety device protects against electrical shock, and tripping indicates a potential ground fault. Before assuming a pump failure, always attempt a GFCI reset. Locate the GFCI outlet serving the pump and press the “Reset” button.
If the GFCI immediately trips again, do not continue attempting resets. This signals a persistent electrical issue requiring investigation. Inspect the pump’s power cord for damage and check for moisture near the electrical connections. A recurring trip suggests a fault within the pump itself, necessitating professional evaluation or repair. Prioritize safety and avoid repeated resets.
Electrical Connection Inspection
Thoroughly inspect all electrical connections associated with the Little Giant pump. Begin by ensuring the pump is disconnected from power before any inspection. Examine the power cord for cuts, abrasions, or exposed wiring. Check the connections at the GFCI outlet, ensuring they are secure and free from corrosion.
Verify the wiring within the pump’s housing (if accessible and you are qualified to do so) is intact and properly connected. Look for loose wires or signs of overheating. If any damage is found, do not attempt a repair yourself; consult a qualified electrician. Proper electrical connections are crucial for safe and reliable pump operation.
Pump Running But Not Pumping
If the Little Giant pump is running but failing to move water, several issues could be present. A common cause is an undersized pump – if more water enters than the pump can handle, it will run continuously without effectively removing the liquid.
Another frequent problem is a clogged intake or impeller. Debris can obstruct the pump’s inlet, preventing water from being drawn in. Similarly, obstructions within the impeller housing can hinder its rotation and pumping action. Inspect and clear any blockages. Ensure the pump’s capacity matches the water volume requirements to avoid this frustrating situation.
Undersized Pump for Water Volume
An undersized Little Giant pump struggles to keep up with incoming water, leading to continuous operation without noticeable water removal. This occurs when the pump’s capacity (gallons per hour) is insufficient for the volume of water needing to be pumped.
JustAnswer Plumbing experts confirm this is a primary cause of pump failure to effectively drain. Carefully assess the water inflow rate and select a pump with a higher capacity if necessary. Consider factors like rainfall intensity, drainage area size, and potential for groundwater seepage when determining the appropriate pump size for your application.
Clogged Intake or Impeller
A common reason for a Little Giant pump running but not pumping is a blockage in the intake or around the impeller. Debris like leaves, dirt, or small objects can obstruct water flow, hindering the pump’s ability to function correctly.
Trouble Free Pool forums highlight a specific issue: a clogged hole above the hose outlet. Regularly inspect and clear the intake screen and impeller area. Disconnect the power before any inspection! Carefully remove any obstructions to restore proper water flow and pump performance. A clean impeller ensures efficient operation and prevents motor strain.
Erratic Pump Behavior
If your Little Giant pump exhibits inconsistent or unpredictable operation, several factors could be at play. This can manifest as intermittent pumping, reduced flow, or unusual noises. A key area to investigate, as noted in online forums, is the small hole located above the hose outlet.
This hole can become clogged, disrupting the pump’s vacuum and causing erratic behavior. Cleaning this opening often resolves the issue. Additionally, ensure the float switch is functioning correctly and isn’t obstructed. Inspect for any loose connections or damaged wiring that might contribute to inconsistent performance.
Cleaning the Hose Outlet Hole
A frequently reported solution for erratic Little Giant pump behavior involves cleaning the small hole situated directly above the hose outlet. This seemingly minor detail is crucial for proper pump function, as it maintains the necessary vacuum for efficient water removal.
Debris can easily accumulate in this opening, hindering airflow and causing inconsistent pumping. To clean it, disconnect the pump from power and carefully remove any obstructions using a small tool – avoid damaging the surrounding plastic. Trouble Free Pool forums highlight this as a common fix, often restoring the pump to full operational capacity after cleaning.

Maintenance and Repair
Regular inspections, oil changes using AW32 hydraulic oil, and gasket replacements are vital for extending the lifespan of your Little Giant pump.
Regular Inspection Procedures
Consistent inspection is key to preventative maintenance and avoiding costly repairs. Begin by visually checking the pump’s exterior for any cracks or damage. Ensure all electrical connections are secure and free from corrosion; promptly address any issues.
Inspect the pump’s intake and discharge for obstructions. Regularly examine the float switch, verifying its free movement and proper operation – whether internal or tethered. Listen for unusual noises during operation, which could indicate impeller issues or bearing wear.
Don’t forget to check the hose outlet hole for any buildup, as this can cause erratic behavior. Document these inspections to track pump performance over time and identify potential problems early on, maximizing its operational life.
Oil Change (AW32 Hydraulic Oil)
Maintaining proper lubrication is crucial for Little Giant pump longevity. Use only AW32 hydraulic oil for optimal performance; a 4-litre jug typically costs around $47.00. Before beginning, disconnect the pump from the power source. Locate the oil drain plug and carefully remove it, allowing the old oil to drain completely into a suitable container.
Once drained, replace the plug with a new gasket, applying gasket sealer for a watertight seal. Then, add fresh AW32 hydraulic oil through the fill port until the appropriate level is reached – consult your specific model’s documentation for capacity.
Dispose of the used oil responsibly, following local environmental regulations. Regular oil changes, typically annually, ensure smooth operation and prevent premature wear.
Gasket Replacement
Replacing gaskets is essential during pump repair to maintain a watertight seal and prevent leaks. When disassembling the pump for maintenance, carefully inspect all gaskets for signs of wear, cracking, or deterioration. Before installing a new gasket, ensure all mating surfaces are clean and free of debris.
Apply a thin, even coat of gasket sealer to both sides of the new gasket. This enhances the seal and prevents future leaks. Align the gasket correctly and securely fasten the components together, tightening bolts to the manufacturer’s specified torque.
A new gasket, alongside AW32 hydraulic oil, can significantly extend the life of your Little Giant pump, costing around $10.00 ― $10.95.
Component Replacement
Replacing worn components, such as check valves (CV-10) and float switches, restores pump functionality. Proper replacement ensures optimal performance and extends the pump’s lifespan.
Check Valve Replacement (CV-10)
The Little Giant CV-10 check valve is crucial for preventing backflow in condensate pumps (VCC, VCMA, VCL-14, and VCL-24). When replacing, ensure the 1/4-inch MNPT x 3/8-inch barbed connections are secure. Begin by disconnecting power to the pump. Carefully remove the old CV-10, noting its orientation.
Apply a suitable gasket sealer to the threads of the new CV-10 before installation. Hand-tighten initially, then use a wrench for a snug fit – avoid over-tightening, which can damage the valve or pump housing. A new CV-10 typically costs around $10.95. Proper installation prevents water from draining back into the collection tank when the pump shuts off, maintaining prime and efficient operation.
Float Switch Functionality (Internal/Tethered)
Little Giant pumps, like the 6-CIA sump pump model, utilize either an internal or tethered float switch to automatically activate pumping operations. The float switch rises with the water level, triggering the pump when it reaches a predetermined height.
Internal float switches are contained within the pump housing, while tethered floats move more freely on an arm. Regularly inspect the float’s range of motion, ensuring it isn’t obstructed by debris. A malfunctioning float switch is a common cause of pump failure. If the pump doesn’t activate or cycles erratically, check the float for damage or binding before considering other repairs.

Warranty Information

Little Giant offers warranty coverage on its pumps (PP-230, Cooler King) from the user’s purchase date. However, brush wear and impeller/cam issues are excluded.
Warranty Coverage Details
Little Giant warranties cover defects in materials and workmanship under normal use. This coverage extends to pumps like the PP-230 and Cooler King models, beginning from the original date of purchase by the end-user. The warranty ensures the product will be free from defects for a specified period, allowing for repair or replacement at Little Giant’s discretion.
However, it’s crucial to understand that certain components and conditions are specifically excluded from this warranty. These exclusions are in place due to the nature of wear and tear experienced during pump operation. Proper maintenance, as outlined in this manual, is essential to maintain warranty validity. Any alterations or misuse of the pump may also void the warranty.
Limitations of Warranty (Brush Wear, Impeller/Cam)
Specifically, Little Giant’s warranty does not cover wear on brushes within Model 35-OM. This is due to the inherent nature of brush-type motors and their expected lifespan with regular use. Similarly, the warranty excludes damage or failure of the impeller or cam in Models PP-1, PP-12, and PP-230.
These components are considered wear items and are subject to degradation over time. If a product fails due to brush wear or impeller/cam issues within the warranty period, Little Giant reserves the right to repair or replace the unit at their option, but may charge for the replacement of these specific parts. This ensures fair coverage while acknowledging typical operational wear.

Safety Precautions
Always allow the pump to cool completely before any servicing; Exercise extreme caution when working with electrical components to prevent shock or damage.
Allowing Pump to Cool Before Servicing
Prior to undertaking any inspection, maintenance, or repair procedures on your Little Giant pump, it is absolutely crucial to ensure the unit has been allowed to cool down completely. Operating on a hot pump presents a significant risk of burns from heated components and potentially damaging sensitive parts.
The pump motor generates substantial heat during operation. Disconnecting power is the first step, but residual heat remains. Allow ample time for the pump housing, motor, and any fluids within to dissipate heat before touching any part. This cooling period minimizes the risk of injury and ensures a safer working environment. Ignoring this precaution could lead to personal harm and compromise the pump’s functionality.
Always prioritize safety and allow sufficient cooling time before beginning any service work.
Working with Electrical Components
Extreme caution is paramount when working with the electrical components of your Little Giant pump. Electricity poses a serious safety hazard, and improper handling can result in severe injury or even fatality. Always disconnect the pump from its power source – unplug it or switch off the circuit breaker – before commencing any electrical work.
If a GFCI (Ground Fault Circuit Interrupter) device has been activated, thoroughly inspect all electrical connections for damage or corrosion. Resetting the GFCI should only occur after verifying the safety of the wiring and connections. Never attempt to bypass or disable a GFCI device.
If you are uncomfortable or lack experience working with electrical systems, consult a qualified electrician.
Little Giant Pump Parts
Locating the correct replacement parts is crucial for maintaining your Little Giant pump. Understanding part numbers, like the CV-10 check valve, ensures compatibility and proper function.
Locating Replacement Parts
Finding the right replacement parts for your Little Giant pump is essential for effective repairs and continued operation. Several avenues exist for sourcing these components. Online retailers specializing in plumbing and pump supplies often carry a comprehensive inventory of Little Giant parts. Local plumbing supply stores are also valuable resources, allowing for in-person consultation and immediate availability of common parts like check valves (CV-10) and gaskets.
When ordering, having the pump’s model number readily available is critical. This ensures you receive parts specifically designed for your unit. Detailed parts diagrams are often available online through the Little Giant website or distributor sites, aiding in accurate identification. Don’t hesitate to contact Little Giant’s customer support for assistance if you’re unsure about the correct part number or compatibility.
Understanding Part Numbers
Little Giant part numbers are crucial for accurate ordering and ensuring compatibility with your specific pump model. These numbers are typically found on the pump’s nameplate, in the parts list of the owner’s manual, or on the original packaging. The part number provides a unique identifier for each component, preventing confusion and ensuring the correct replacement is received.
Part numbers often consist of letters and numbers, sometimes including dashes or prefixes. These segments can indicate the part’s function, material, or the pump series it’s designed for. For example, CV-10 designates a specific check valve model. When contacting suppliers or searching online, always use the complete and exact part number to avoid errors and delays in receiving the correct replacement part.