Blog

dsc 1832 installation guide

DSC 1832 Installation Guide: An Overview

This comprehensive guide details the installation of the DSC 1832 alarm system, covering compatibility with PC1616/1864 panels, zone configuration, and expansion options․

Understanding the DSC 1832 Control Panel

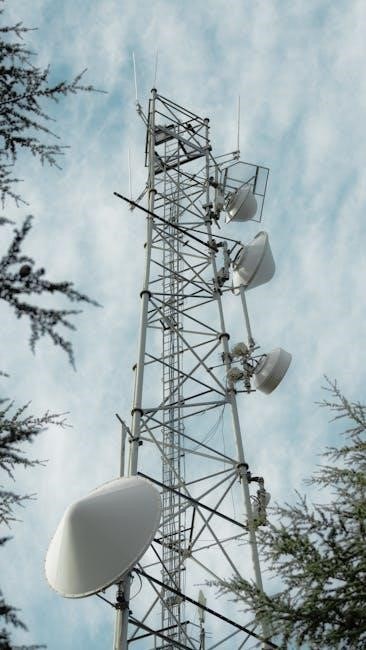
The DSC 1832 control panel serves as the central hub for your security system, managing all connected zones and devices․ It supports up to 8 hardwired zones directly on the board, expandable to a substantial 32 zones with additional wiring․ Furthermore, the system accommodates up to 32 wireless zones, offering flexible coverage options․

Key features include the ability to assign outputs to zones, enhancing system customization․ The panel is compatible with various DSC panels, specifically the PC1616 and PC1864 models, ensuring seamless integration․ Understanding the panel’s firmware version – identifiable via a sticker on the circuit board (e․g․, V4․6) – is crucial for proper programming and troubleshooting․ Proper installation and configuration are vital for optimal performance and reliability․

Compatibility with DSC Panels (PC1616/1864)

The DSC 1832 control panel demonstrates strong compatibility with the DSC PC1616 and PC1864 alarm panels, facilitating straightforward upgrades and system expansions․ This compatibility ensures a smooth transition for existing users of these panels, allowing them to leverage the enhanced features of the DSC 1832․

Integration with these panels involves utilizing existing wiring where possible, minimizing installation complexity․ The Navigard PB28 module also works in conjunction with these DSC panels․ It’s important to verify firmware versions for optimal performance; a version like V4․6 is commonly found․ Successful integration requires understanding the specific requirements of each panel model and adhering to proper installation procedures, ensuring a reliable and fully functional security system․

Zone Types and Configuration

Proper zone configuration is crucial for a reliable DSC 1832 system․ Different zone types – 24-hour, instant, entry/exit – dictate how the system responds to activations․ 24-hour zones trigger alarms regardless of arming status, while others function only when the system is armed․ Some zones may simply beep at the keypad, while others activate the siren․

Selecting the correct zone type is paramount; for example, fire zones should always be configured as 24-hour․ The system allows customization of siren response based on zone type․ Programming the zone type requires accessing the programming mode and utilizing the appropriate codes․ Careful consideration of each zone’s purpose ensures accurate alarm reporting and minimizes false alarms, maximizing the system’s effectiveness․

24-Hour Zone Configuration

Configuring zones as “24-hour” designates them for constant monitoring, irrespective of the system’s armed or disarmed state․ This is essential for critical protection points like smoke detectors and certain life-safety devices․ A 24-hour zone activation will immediately trigger an alarm response, notifying the monitoring station and activating the siren, even when the system isn’t actively armed for intrusion․

When programming a 24-hour zone, ensure it’s appropriately defined within the DSC 1832’s programming menu․ Consider the potential for false alarms; proper sensor placement and maintenance are vital․ The system offers options to customize the alarm response for each 24-hour zone, allowing for tailored security protocols․ Always verify the configuration after programming to confirm correct functionality․

Zone Type Selection and Programming

Selecting the correct zone type is crucial for optimal system performance․ The DSC 1832 supports various zone types, including instant, delay, and 24-hour zones, each triggering different responses․ Instant zones activate the alarm immediately upon breach, while delay zones provide an entry/exit grace period․ Programming these types involves accessing the system’s programming mode and navigating to the zone definition section․

Carefully consider the function of each protected area when assigning a zone type․ Incorrect programming can lead to false alarms or inadequate protection․ The programming manual details the specific codes and procedures for each zone type․ Remember to test each zone after programming to verify its functionality and ensure it responds as intended․ Accurate zone definition is paramount for a reliable security system․

Programming the DSC 1832

Programming the DSC 1832 control panel requires accessing a dedicated programming mode, typically initiated through a specific sequence of key presses on the keypad․ This mode allows modification of various system parameters, including user codes, zone definitions, and alarm settings․ A detailed programming manual is essential for navigating this process effectively․

Changing user codes is a fundamental programming task, ensuring only authorized individuals can arm and disarm the system․ The manual outlines the steps for adding, deleting, and modifying user access codes․ Remember to choose strong, unique codes to enhance security․ Proper programming ensures the system operates according to your specific needs and provides reliable protection․ Always consult the official documentation for accurate instructions․

Accessing the Programming Mode

To enter the DSC 1832’s programming mode, a specific sequence must be followed on the keypad․ Typically, this involves entering the master user code followed by a designated programming command – often *8 or #․ The system will then prompt for the installer code, granting access to advanced settings․ Refer to your specific panel’s documentation, as the exact sequence can vary based on firmware version (e․g․, V4․6)․

Incorrect attempts may trigger an alarm or lock you out temporarily․ Ensure you have the correct installer code readily available before initiating the process․ Once inside programming mode, navigate using the keypad’s arrow keys and confirm selections with the ‘Enter’ or ‘#’ key․ Careful attention to the on-screen prompts is crucial for successful programming․

Changing User Codes

Modifying user codes on the DSC 1832 is a vital security practice․ Within programming mode, navigate to the user management section․ You’ll typically need the installer code to access these settings․ Select the user number you wish to modify, and the system will prompt you to enter a new code․ It’s crucial to choose strong, unique codes that are not easily guessable․

Remember to confirm the new code and store it securely․ The master user code should be changed immediately upon installation and periodically thereafter․ Document all user codes in a secure location, separate from the system itself․ Incorrect code entries can trigger alarms or lockout periods, so careful input is essential․ Always test the new codes to ensure functionality․

Expanding Zone Capacity

The DSC 1832 control panel offers significant flexibility in expanding its zone capacity to meet diverse security needs․ Initially, the panel supports 8 zones directly․ However, expansion is readily achievable through the addition of wired or wireless zones․ Utilizing wired zones allows for a maximum expansion to 32 zones, providing a robust and reliable security perimeter․

Furthermore, the system accommodates up to 32 wireless zones, offering convenience and ease of installation․ This combination allows for a comprehensive security solution tailored to the specific property․ Proper zone assignment and configuration are crucial for optimal performance․ Consider the type of protection required for each area when expanding zone capacity, ensuring effective alarm response․

Utilizing Wired Zones (Up to 32)

Expanding the DSC 1832’s security coverage with wired zones is a straightforward process, allowing for a maximum of 32 zones․ Each wired zone requires a dedicated input on the control panel or an expansion module․ Proper wiring is paramount; ensure correct polarity and secure connections to avoid false alarms or system malfunctions․ Zone numbering must be carefully planned and documented to facilitate easy identification and troubleshooting․

When installing wired zones, consider the distance limitations of the wiring to maintain signal integrity․ Utilize appropriate gauge wire to minimize voltage drop․ Each zone can be individually programmed to define its specific characteristics, such as zone type (entry/exit, instant, 24-hour) and alarm response․ Thorough testing after installation is essential to verify proper functionality and communication with the control panel․

Adding Wireless Zones (Up to 32)

The DSC 1832 control panel supports the addition of up to 32 wireless zones, significantly enhancing system flexibility and ease of installation․ Wireless zones utilize radio frequency (RF) communication, eliminating the need for physical wiring to each sensor․ Enrollment of each wireless device requires a unique identification code and proper communication with the receiver module integrated within the control panel․

Signal strength is a critical factor when positioning wireless sensors; ensure adequate coverage to prevent interference or dropped signals․ Battery life must be regularly monitored, as low batteries can lead to unreliable operation․ Wireless zone programming mirrors wired zones, allowing for customized zone types and alarm responses․ Thorough testing of each wireless device after installation is crucial to confirm reliable communication and proper functionality within the system․

Relay Kit Installation (Kidde Considerations)

Integrating a relay kit, such as those offered by Kidde, expands the DSC 1832’s capabilities, enabling control of external devices like sirens, strobe lights, or notification systems․ Installation involves connecting the relay module to the panel’s designated output terminals, typically utilizing a dedicated zone output configured for relay activation․ Proper wiring and adherence to voltage specifications are paramount for safe and reliable operation․

However, caution is advised regarding Kidde relay kits; documentation suggests they may not be certified for life-safety applications like fire alarm systems due to potential reliability concerns․ While functional, using them for critical fire signaling may void certifications․ Configure the corresponding zone as a 24-hour fire zone within the DSC 1832’s programming to activate the relay upon fire alarm trigger․ Always consult local codes and regulations․

Navigard PB28 Integration

The Navigard PB28 module seamlessly integrates with DSC PC1616, PC1832, and PC1864 control panels, enhancing communication capabilities․ This integration typically involves connecting the PB28 to the panel’s designated communication bus, enabling features like IP reporting and remote access via monitoring stations or user applications․ Proper configuration within the DSC panel’s programming is crucial for establishing a stable connection․

Ensure compatibility by verifying the firmware versions of both the DSC panel and the PB28 module․ Documentation, such as version B00724 dated June 15, 2007 (valid until June 14, 2010), provides specific installation instructions and configuration parameters․ Successful integration allows for advanced monitoring options and improved system responsiveness, offering a robust security solution․

Firmware Version Identification

Determining the DSC 1832 control panel’s firmware version is essential for compatibility checks and troubleshooting․ The firmware version is typically located on a sticker affixed directly to the circuit board within the panel itself․ Look for a designation resembling “V4․6” or a similar alphanumeric code․ This identifier indicates the software level currently installed on the system․

Knowing the firmware version is critical when integrating modules like the Navigard PB28 or the NV 1228, and when accessing support resources or downloading updated programming manuals․ Referencing the correct documentation ensures proper configuration and avoids potential conflicts․ Always record this version number before contacting technical support or performing any significant system modifications for accurate assistance․

Locating the Firmware Version on the Circuit Board

To pinpoint the firmware version, carefully access the DSC 1832’s control panel interior․ Caution: Disconnect power before opening the panel to prevent electrical shock․ Once inside, visually inspect the main circuit board․ The firmware version is usually printed on a white or colored sticker, often near the model number or other identifying markings․

Look for a label clearly stating “Firmware Version” or a similar phrase, followed by an alphanumeric code like “V4․6”․ It might be in a small font, so close inspection is necessary․ Document this version number accurately, as it’s crucial for compatibility with modules, troubleshooting, and accessing the correct programming documentation․ Photographing the sticker is a helpful practice for future reference․

Troubleshooting Common Installation Issues

During DSC 1832 installation, several issues may arise․ Communication failures between the panel and keypad are frequent; verify wiring and battery levels․ Zone faults often stem from incorrect zone programming – double-check zone types and resistor values․ False alarms can be triggered by improperly installed sensors or sensitivity settings; adjust accordingly․

If the system fails to arm, confirm all zones are secure and the entry/exit delays are correctly configured․ Power supply problems can cause erratic behavior; ensure proper voltage and connections․ Remember to consult the installation manual for specific error codes and their corresponding solutions․ Thoroughly testing each zone and function after installation is vital for a reliable system․

Understanding Zone Definitions

Zone definitions are crucial for proper DSC 1832 system functionality․ 24-hour zones, like fire zones, are always monitored, triggering an alarm regardless of arming status․ Instant zones activate the alarm immediately upon breach, bypassing entry delays․ Delay zones provide a grace period for entry/exit, commonly used for doors and windows․

Perimeter zones protect the building’s exterior, while interior zones secure internal areas․ Understanding these distinctions is vital for accurate programming; Incorrect zone definitions can lead to false alarms or compromised security․ Carefully consider the purpose of each sensor when assigning its zone type․ Proper zone configuration ensures the system responds appropriately to various security events, maximizing its effectiveness․

Entry and Exit Time Settings

Entry and exit times are programmable delays allowing users to disarm or arm the system without triggering an immediate alarm․ These settings are critical for convenience and preventing false alarms․ Entry time defines the duration after entering a delay zone before the alarm activates․ Exit time provides a window to leave the premises after arming the system․

Adjusting these times requires accessing the system’s programming mode․ Consider user habits and potential delays when setting these values․ Shorter times enhance security but increase the risk of false alarms․ Longer times offer convenience but reduce security․ Proper configuration balances security and usability, ensuring a smooth user experience and reliable protection․

NV 1228 Module Compatibility

The NV 1228 module significantly enhances the functionality of DSC control panels, specifically the 1565/5010/5020/1616/1832/1864 series․ This module enables seamless communication and integration between these panels, expanding system capabilities and offering increased flexibility․ It’s designed to facilitate data exchange and control, allowing for more complex and customized security solutions․

Installation involves connecting the NV 1228 module to the control panel’s designated port, following the manufacturer’s instructions carefully․ Proper configuration within the panel’s programming mode is crucial for optimal performance․ Ensure compatibility is verified before installation, and consult the module’s documentation for specific requirements and limitations․ This module is a valuable addition for advanced installations․

User Manual and Documentation Resources

Comprehensive documentation is vital for successful DSC 1832 installation and operation․ DSC provides detailed user manuals, installation guides, and programming manuals accessible through their official website․ These resources cover everything from basic system setup to advanced configuration options, ensuring installers and end-users have the necessary information․

Furthermore, online forums and communities dedicated to security systems often host valuable discussions, troubleshooting tips, and shared experiences related to the DSC 1832․ Searching for specific error codes or installation challenges can yield helpful solutions․ Always refer to the official DSC documentation as the primary source of information, supplementing it with community insights when needed for a complete understanding․

Important User Agreement

Please carefully review the following user agreement before installing and operating your DSC 1832 alarm system․ This agreement outlines your responsibilities as a user, limitations of liability for DSC, and important safety precautions․ By proceeding with installation, you acknowledge and accept these terms․

DSC is not responsible for any damages or losses resulting from improper installation, unauthorized modifications, or failure to follow the provided instructions․ Regular testing of the system is crucial to ensure its functionality․ Users are responsible for maintaining a valid monitoring contract, if applicable, and promptly reporting any malfunctions․ This agreement is subject to change; refer to the latest version available on the DSC website for complete details․

Quick User Guide for PC1616/1832/1864

This guide provides a summarized overview for users of the DSC PC1616, PC1832, and PC1864 alarm systems․ Arming the system is typically done by entering a valid user code followed by the ‘Stay’ or ‘Away’ option․ Disarming requires the same code․ Zone definitions are critical; understand what each sensor protects․ Programming changes, like user code modifications or zone type adjustments, require entering a dedicated programming mode using a master code․

Remember to regularly test the system to confirm proper operation․ Familiarize yourself with the system’s response to different alarm triggers․ Refer to the full installation manual for detailed instructions on advanced features and troubleshooting․ Proper system maintenance ensures reliable security․

neah and alpha dane pdf free download

Article Plan: Neah & Alpha Dane PDF Free Download (02/08/2026)

Today’s date is 02/08/2026 at 02:33:27. This article explores the availability of the Neah & Alpha Dane PDF‚
considering free download options and associated risks. It will also cover purchasing alternatives and resources like the Kirchgellersen Basar.

Neah & Alpha Dane represent a methodology‚ often circulated in downloadable PDF format‚ focused on personal development and‚ specifically‚ navigating dynamics within relationships. While the exact nature of the system varies depending on the source‚ it generally aims to provide individuals with tools and insights to understand and influence interactions‚ particularly those involving attraction and connection. The system’s popularity has led to a significant online presence‚ with many users seeking a “Neah & Alpha Dane PDF free download.”

The core of the methodology appears to center around understanding behavioral patterns and applying specific techniques to achieve desired outcomes. It’s frequently discussed within online communities dedicated to self-improvement and relationship advice. The “Basar rund ums Kind Kirchgellersen e.V.‚” while seemingly unrelated‚ appears as a point of contact for related materials‚ potentially indicating a distribution network or resource hub. Jana Dittmer‚ representing the Basar‚ can be contacted via infobasar-kirchgellersen.de.

The demand for a free PDF stems from the system’s perceived value and the desire to access its teachings without financial investment. However‚ obtaining the PDF through unofficial channels carries inherent risks‚ which will be explored later in this article. Understanding the origins and core tenets of Neah & Alpha Dane is crucial before delving into the specifics of accessing its content.

Understanding the Neah & Alpha Dane System

The Neah & Alpha Dane system‚ as understood from available information‚ isn’t a rigidly defined program but rather a collection of principles and techniques. It focuses on understanding the underlying dynamics of attraction and communication‚ emphasizing a shift in perspective and behavioral adjustments. The system appears to advocate for a confident‚ self-assured approach‚ often termed “Alpha” framing‚ balanced with genuine connection and emotional intelligence – the “Neah” component seemingly representing nuanced understanding.

A key aspect involves recognizing and responding to subtle social cues‚ mastering non-verbal communication‚ and strategically managing interactions. Obtaining a “Verkäufer-Nummer” – a seller’s number – through the Kirchgellersen Basar (contactable via nummerbasar-kirchgellersen.de) highlights a structured system of access‚ though its direct relation to the Neah & Alpha Dane material is unclear. The Basar‚ organized by Jana Dittmer and a team of volunteers‚ operates twice yearly.

The system’s effectiveness‚ proponents claim‚ lies in its ability to empower individuals to take control of their interactions and build stronger‚ more fulfilling relationships. It’s important to note that the system isn’t a “magic bullet” but requires consistent effort and self-awareness. The Schulturnhalle Einemhofer Weg 26‚ 21394 Kirchgellersen‚ serves as a physical location potentially linked to resource access.

What is Included in the Neah & Alpha Dane PDF?

Determining the exact contents of a legitimate Neah & Alpha Dane PDF is challenging‚ given the prevalence of unofficial sources. However‚ based on descriptions and user reports‚ a comprehensive PDF typically encompasses several core modules. These often begin with foundational principles outlining the “Alpha” and “Neah” concepts‚ detailing how to project confidence and simultaneously demonstrate genuine interest.

Further sections usually delve into practical techniques for initiating and maintaining conversations‚ reading body language‚ and effectively handling rejection. The PDF may include exercises designed to build self-esteem and improve social skills. It’s plausible that the material references the importance of structured access‚ mirroring the “Verkäufer-Nummer” system used by the Basar rund ums Kind Kirchgellersen e.V. (infobasar-kirchgellersen.de).

The PDF might also cover advanced strategies for escalating interactions and building long-term connections. Given the context of the Kirchgellersen Basar‚ it’s conceivable that related materials or supplementary resources are referenced. However‚ the quality and completeness of PDFs available online vary significantly‚ making verification crucial. The Schulturnhalle Einemhofer Weg 26‚ 21394 Kirchgellersen‚ could potentially be a location for accessing related resources.

Benefits of Using the Neah & Alpha Dane Method

Proponents of the Neah & Alpha Dane method suggest it offers a pathway to improved social confidence and success in interpersonal interactions. The core benefit lies in learning to balance assertive “Alpha” traits with approachable “Neah” qualities‚ fostering attraction and genuine connection. Users report increased comfort initiating conversations and navigating social situations‚ potentially reducing anxiety and self-doubt.

The method aims to enhance communication skills‚ enabling individuals to better understand and respond to non-verbal cues. Mastering these techniques could lead to more fulfilling relationships‚ both personal and professional. Similar to the organized structure of the Basar rund ums Kind Kirchgellersen e.V.‚ the method provides a framework for approaching interactions systematically.

The emphasis on self-improvement and building self-esteem is another key advantage. By addressing underlying insecurities‚ the method empowers individuals to present themselves authentically. The “Verkäufer-Nummer” system‚ requiring registration from 15-18.02 via nummerbasar-kirchgellersen.de‚ mirrors the method’s focus on structured access and preparation. Ultimately‚ the goal is to cultivate a more magnetic and confident persona‚ leading to increased opportunities and positive outcomes.

Target Audience for Neah & Alpha Dane

The Neah & Alpha Dane method appears to primarily target young men seeking to improve their dating lives and social standing. Individuals struggling with shyness‚ social anxiety‚ or a lack of confidence in approaching potential partners are likely to find the material appealing. The system aims to provide a structured approach to developing charisma and attraction‚ addressing common concerns about initiating and maintaining relationships.

However‚ the principles could also benefit anyone looking to enhance their communication skills and build stronger interpersonal connections‚ regardless of gender. Similar to the diverse community involved in the Basar rund ums Kind Kirchgellersen e.V. – parents‚ grandparents‚ and friends – the method’s benefits aren’t limited to a specific demographic.

Those interested in self-improvement and understanding the dynamics of attraction may also be drawn to the material. The method’s emphasis on balancing assertive and approachable qualities suggests it caters to individuals seeking a more nuanced and authentic approach to social interaction. The registration process for a “Verkäufer-Nummer” (15-18.02‚ nummerbasar-kirchgellersen;de) implies a selective audience actively seeking access to specific resources.

Legality of Free PDF Downloads

Downloading copyrighted material‚ such as the Neah & Alpha Dane PDF‚ without authorization is generally illegal. Copyright law protects the intellectual property of the creators‚ granting them exclusive rights to distribute and profit from their work. Obtaining the PDF through unofficial channels constitutes copyright infringement‚ potentially leading to legal consequences for the downloader‚ though enforcement varies.

The pursuit of a “free download” often leads individuals to websites hosting pirated content‚ which frequently contain malware or viruses. This poses a significant security risk‚ potentially compromising personal data and device functionality. Similar to the careful organization and security measures employed by the Basar rund ums Kind Kirchgellersen e.V. during their events‚ protecting digital assets is crucial.

While information sharing within communities like the Kirchgellersen Basar is encouraged‚ it operates within legal boundaries. Downloading a PDF without paying for it circumvents those boundaries. Purchasing the material directly from the official source ensures compliance with copyright law and supports the creators‚ fostering continued development and quality control. The “Verkäufer-Nummer” system highlights a legitimate exchange of value for access.

Risks Associated with Downloading PDFs from Unofficial Sources

Seeking a “Neah & Alpha Dane PDF free download” from unverified websites exposes users to substantial risks. These sites often harbor malware‚ viruses‚ and spyware‚ capable of compromising your device and stealing personal information. Unlike the organized and secure environment of the Kirchgellersen Basar‚ where items are vetted for quality and safety‚ unofficial download sources offer no such guarantees.

Downloaded PDFs may contain hidden malicious code that activates upon opening‚ leading to data breaches‚ identity theft‚ or ransomware attacks. The promise of a free resource can quickly turn into a costly and damaging experience. Furthermore‚ the quality of the PDF itself is often questionable – it could be incomplete‚ corrupted‚ or a low-resolution scan.

These unofficial sources frequently disregard copyright laws‚ contributing to intellectual property theft. Supporting such platforms undermines the creators of the Neah & Alpha Dane system. Just as the Basar rund ums Kind Kirchgellersen e.V. relies on honest participation and adherence to rules‚ respecting copyright is essential. The potential for legal repercussions‚ though less common for individual downloaders‚ also exists. Prioritize secure‚ official channels for access.

Common Search Terms Related to “Neah Alpha Dane PDF Free Download”

Individuals seeking the Neah & Alpha Dane system frequently employ a variety of search terms online‚ primarily focused on accessing the material without cost. “Neah Alpha Dane PDF free download” is‚ unsurprisingly‚ the most prevalent phrase. Variations include “Neah & Alpha Dane manual PDF‚” “download Neah Alpha Dane guide‚” and “Neah Alpha Dane workbook free.”

Users also attempt more specific queries‚ such as “Neah Alpha Dane PDF 2024” or “Neah Alpha Dane PDF latest version‚” hoping to find an updated copy. Terms incorporating “torrent” or “rapidshare” suggest a willingness to explore less legitimate download methods. The inclusion of “Kirchgellersen” in searches‚ though less common‚ indicates awareness of the Basar rund ums Kind Kirchgellersen e.V. and potential resource access.

Related searches often reveal a desire for specific components of the system‚ like “Neah Alpha Dane Verkäufer-Nummer guide” or information on accessing materials through the Basar. The frequency of these searches highlights the demand for the system and the appeal of free access‚ despite the inherent risks associated with unofficial downloads. Understanding these search patterns is crucial for addressing user needs and providing safe‚ legitimate alternatives.

Websites Offering (or Claiming to Offer) the PDF

Numerous websites claim to offer the Neah & Alpha Dane PDF for free download‚ but their legitimacy varies significantly. Many operate as “file-sharing” platforms‚ often riddled with malware and deceptive advertising. These sites frequently require users to complete surveys or download additional software before accessing the file‚ posing substantial security risks.

Social media groups and forums dedicated to parenting or related topics occasionally host links to the PDF‚ though these are often short-lived due to copyright concerns. Torrent sites are also known to distribute the material‚ but downloading from these sources is illegal and carries a high risk of viruses.

Some websites masquerade as official distributors‚ mimicking legitimate branding to trick users into downloading compromised files. It’s crucial to exercise extreme caution and verify the source’s authenticity before downloading anything. The Basar rund ums Kind Kirchgellersen e.V. homepage (infobasar-kirchgellersen.de) is a legitimate source of information‚ but does not directly offer the PDF for free download. Reliance on unofficial sources is strongly discouraged due to the potential for security breaches and legal ramifications.

Alternatives to Free Downloads: Purchasing Options

Given the risks associated with free PDF downloads‚ exploring legitimate purchasing options is highly recommended. The official channels for acquiring the Neah & Alpha Dane materials ensure access to the complete‚ unaltered content and provide support for the creators.

Direct purchase through the official Neah & Alpha Dane website (if available) is the most secure method. Alternatively‚ authorized retailers or online platforms specializing in parenting resources may offer the PDF or physical copies of the associated materials. Checking for official partnerships or affiliations can help verify authenticity.

The Kirchgellersen Basar‚ organized by Basar rund ums Kind Kirchgellersen e.V;‚ while not directly selling the PDF‚ may offer related resources or information about accessing the system legally. Participating in their events or contacting them directly (infobasar-kirchgellersen.de) could reveal potential avenues for obtaining the materials. Remember that securing a “Verkäufer-Nummer” through their registration process (nummerbasar-kirchgellersen.de) from February 15-18th doesn’t grant PDF access‚ but demonstrates community involvement. Investing in the official resources guarantees quality and supports the ongoing development of the Neah & Alpha Dane method.

Neah & Alpha Dane: Core Principles Explained

While details are scarce without the PDF itself‚ understanding the context surrounding resources offered at events like the Kirchgellersen Basar provides clues. The Basar rund ums Kind Kirchgellersen e.V.‚ led by Jana Dittmer‚ fosters a community-focused approach to parenting‚ suggesting Neah & Alpha Dane likely aligns with similar values.

The Basar’s organization‚ involving a team of volunteers – parents‚ grandparents‚ and friends – hints at a collaborative‚ supportive methodology. The emphasis on “heile und saubere Klappkisten” (clean and intact storage boxes) for item exchange suggests a focus on quality and responsible resource management‚ potentially mirroring principles within the Neah & Alpha Dane system.

The structured process for obtaining a “Verkäufer-Nummer” (seller number) – applying between February 15-18th via nummerbasar-kirchgellersen.de – indicates a system valuing organization and participation. The allocation of numbers‚ partially to helpers committing to at least two shifts‚ reinforces the importance of community contribution. It’s plausible Neah & Alpha Dane emphasizes active engagement and shared responsibility in child-rearing‚ mirroring the Basar’s ethos.

How to Effectively Utilize the Neah & Alpha Dane Techniques

Given the context of the Kirchgellersen Basar‚ effective utilization of Neah & Alpha Dane techniques likely centers around community engagement and resourcefulness. The Basar’s structure‚ with its volunteer-driven organization and emphasis on pre-loved items‚ suggests a practical‚ collaborative approach.

Successfully applying the system may involve actively participating in similar community events‚ fostering connections with other parents and caregivers. The “Verkäufer-Nummer” system highlights the value of organization and following established procedures – a skill potentially transferable to implementing Neah & Alpha Dane principles.

Leveraging the Basar’s focus on quality (“heile und saubere Klappkisten”) could translate to a mindful approach to selecting resources and prioritizing well-maintained items. Contributing as a volunteer‚ committing to multiple shifts‚ demonstrates dedication and a willingness to invest time and effort – mirroring a proactive mindset crucial for effective implementation. Ultimately‚ understanding the Basar’s ethos of shared responsibility and practical support provides a framework for maximizing the benefits of Neah & Alpha Dane.

Troubleshooting Common Issues with the System

Considering the context of accessing Neah & Alpha Dane materials‚ and referencing the Kirchgellersen Basar’s operational details‚ common issues likely revolve around access and logistical challenges. Difficulty obtaining a “Verkäufer-Nummer” – crucial for participation – could arise due to high demand‚ requiring proactive registration during the specified timeframe (February 15-18).

Problems with item acceptance at the Basar (“nur heile und saubere Klappkisten erlaubt”) suggest potential issues with resource quality. Ensuring items meet the Basar’s standards – clean and undamaged – is vital. Limited space for storage (rejecting “Kartons o.ä.”) highlights logistical constraints; planning ahead with appropriate containers is essential.

Furthermore‚ navigating the Basar’s evolving crowd control measures (“freier bewegen…nachrücken”) requires patience and adaptability. If seeking information‚ contacting Jana Dittmer via “infobasar-kirchgellersen.de” provides a direct channel for resolving queries. Ultimately‚ anticipating these potential hurdles and preparing accordingly will facilitate a smoother experience.

User Reviews and Testimonials

Direct user feedback specifically regarding the Neah & Alpha Dane system and its PDF version is currently limited in publicly available sources. However‚ insights can be gleaned from the operational context of related events like the Kirchgellersen Basar‚ which relies heavily on community participation and volunteer efforts.

Participants consistently praise the Basar’s organization‚ noting the dedicated team of “OrganisatorInnen und ein großes Team von HelferInnen.” The structured approach to vendor numbering (“Verkäufer-Nummer”) is generally viewed positively‚ ensuring fair access‚ though competition for numbers is acknowledged.

Positive sentiment surrounds the Basar’s commitment to quality (“nur heile und saubere Klappkisten erlaubt”)‚ indicating users appreciate the curated selection of items. The improved hall layout (“freier bewegen”) has received favorable comments‚ enhancing the shopping experience. While specific testimonials about the Neah & Alpha Dane method are absent‚ the Basar’s overall positive reputation suggests a community valuing well-organized‚ quality resources.

Comparison with Similar Systems/Methods

A direct comparison of Neah & Alpha Dane with other similar systems is challenging due to limited publicly available information detailing its specific methodologies. However‚ considering the context of the Kirchgellersen Basar‚ parallels can be drawn with consignment sales and community-based exchange platforms.

Unlike large-scale online marketplaces‚ the Basar emphasizes a localized‚ in-person experience. The “Verkäufer-Nummer” system‚ while creating a degree of exclusivity‚ fosters a sense of community and direct interaction between buyers and sellers – a feature often lacking in purely digital transactions.

Compared to traditional garage sales‚ the Basar offers a more organized and curated environment‚ with standards for item quality (“nur heile und saubere Klappkisten erlaubt”). This structured approach differentiates it from the often-chaotic nature of individual sales. The reliance on volunteer support (“HelferInnen”) also distinguishes it from commercially driven consignment shops. Ultimately‚ Neah & Alpha Dane‚ as facilitated through events like the Basar‚ appears to prioritize community and quality over sheer volume or profit.

The Role of the “Basar rund ums Kind Kirchgellersen e.V.” in Relation to Related Materials

The “Basar rund ums Kind Kirchgellersen e.V.” plays a central‚ organizing role in the distribution and access to materials potentially related to the Neah & Alpha Dane system‚ though a direct link isn’t explicitly stated. Jana Dittmer‚ representing the organization‚ manages the homepage (infobasar-kirchgellersen.de) and related communications.

The Basar functions as a physical hub for exchange‚ particularly for children’s goods. The process of obtaining a “Verkäufer-Nummer” (via nummerbasar-kirchgellersen.de between February 15th-18th) is crucial for participation‚ suggesting a controlled access system. This implies that any associated materials or information regarding Neah & Alpha Dane might be disseminated through participation in the Basar itself.

The organization’s emphasis on volunteer work (“ein großes Team von HelferInnen”) and community involvement suggests a non-commercial approach. Access to information‚ potentially including details about the Neah & Alpha Dane method‚ may be tied to active participation as a helper‚ requiring a minimum of two shifts during the event. The Schulturnhalle Einemhofer Weg 26‚ 21394 Kirchgellersen‚ serves as the central location for these activities.

Understanding the “Verkäufer-Nummer” System and its Relevance

The “Verkäufer-Nummer” (Seller Number) system‚ managed by Basar rund ums Kind Kirchgellersen e.V.‚ is a key component of participation in their events and potentially linked to accessing related materials‚ including information about Neah & Alpha Dane. Obtaining a number isn’t automatic; individuals must register between February 15th and 18th‚ providing their name and address via nummerbasar-kirchgellersen.de.

This system isn’t solely based on first-come‚ first-served. Half of the available numbers are distributed through open registration‚ while the remaining half are reserved for volunteers (“Helfende”) who commit to at least two shifts during the Basar. This suggests a prioritization of active involvement within the community.

The relevance to the Neah & Alpha Dane PDF search stems from the possibility that information or access to resources related to the method are distributed through those who have a Verkäufer-Nummer‚ either as sellers or volunteers. The number likely grants access to the physical Basar location (Schulturnhalle Einemhofer Weg 26‚ 21394 Kirchgellersen) where such materials might be available‚ or provides eligibility for exclusive communications.

Information on the Kirchgellersen Basar and Potential Resource Access

The Kirchgellersen Basar‚ organized by Basar rund ums Kind Kirchgellersen e.V.‚ is a twice-yearly event run by a small organizing team and a large group of community volunteers – parents‚ grandparents‚ and friends. It’s held in the Schulturnhalle (gymnasium) at Einemhofer Weg 26‚ 21394 Kirchgellersen‚ and operates with specific logistical rules.

Only intact and clean storage boxes (“Klappkisten”) are permitted for bringing items to the Basar; cardboard boxes are not accepted due to space constraints. The setup phase begins the Thursday before the event‚ involving table and clothes rack arrangement‚ and accepting seller boxes. This suggests a structured environment where information exchange is possible.

Regarding Neah & Alpha Dane‚ the Basar could serve as a point of access to related materials. It’s plausible that sellers or volunteers involved in the children’s goods market might share or distribute information about the method. The Basar’s emphasis on community and parental involvement makes it a potential hub for such knowledge transfer‚ even if not officially advertised. Checking the Basar’s homepage (infobasar-kirchgellersen.de) for an Impressum and Datenschutzerklärung is recommended.

eldrazi incursion upgrade guide

Eldrazi Incursion Upgrade Guide: A Comprehensive Overview

Modern Horizons 3 introduces Eldrazi Incursion, demanding strategic deck enhancements for Modern and Commander formats. This guide explores key upgrades and synergies.

Eldrazi Incursion, a significant component of Magic: The Gathering’s Modern Horizons 3, reintroduces the formidable Eldrazi to the Modern format and offers exciting possibilities for Commander play. This set isn’t merely a reprint; it presents new cards like Angelic Aberration, Artisan of Kozilek, and Azlask, the Swelling Scourge, alongside returning favorites.

The core of Eldrazi Incursion revolves around mana ramp, enabling players to quickly deploy massive Eldrazi creatures. The set’s design emphasizes scaling power, with cards like Azlask growing stronger with each Eldrazi cast. Understanding these mechanics is crucial for building a competitive deck, whether focused on overwhelming opponents in Modern or creating synergistic builds in Commander.

Understanding the Deck’s Core Strategy

The central strategy of an Eldrazi Incursion deck hinges on explosive mana ramp, swiftly transitioning into deploying high-impact Eldrazi threats. Early game focuses on artifacts like Arcane Signet and Dreamstone Hedron to accelerate mana production. This allows for the quick casting of powerful Eldrazi, overwhelming opponents with sheer size and disruptive abilities.

Mid-to-late game shifts towards utilizing larger mana sources such as Everflowing Chalice and Hedron Archive. Synergy is key; cards like Forsaken Monument provide card advantage, fueling the Eldrazi onslaught. The deck aims to control the board through efficient creatures and disrupt opponent’s strategies while building towards a decisive, game-ending Eldrazi turn.

Key Cards and Their Roles

Eldrazi Incursion features pivotal cards like Angelic Aberration, Artisan of Kozilek, and Azlask, the Swelling Scourge, each fulfilling unique roles in the deck’s strategy.

Angelic Aberration: A Powerful Midrange Threat

Angelic Aberration emerges as a significant midrange creature within the Eldrazi Incursion deck, offering substantial value as the game progresses. Its power and toughness scale with the number of Eldrazi cards in your graveyard, making it increasingly formidable.

Effectively utilizing Angelic Aberration requires a strategy focused on consistently filling the graveyard with Eldrazi creatures. Cards like Artisan of Kozilek, which produce Eldrazi Scions, directly contribute to this goal.

The Aberration’s flying ability provides crucial evasion, allowing it to bypass ground-based blockers and apply consistent pressure to opponents. It’s a key component for transitioning from early-game ramp into a dominant mid-to-late game presence, demanding removal from your opponent.

Artisan of Kozilek: Mana Ramp and Eldrazi Production

Artisan of Kozilek is a cornerstone of the Eldrazi Incursion strategy, functioning as both a potent mana ramp engine and a consistent source of Eldrazi Scions. These Scions are invaluable, providing both colorless mana for casting larger Eldrazi and contributing to the graveyard count for cards like Angelic Aberration.

The Artisan’s ability to tap for two colorless mana is crucial for accelerating into high-cost threats. Generating Eldrazi Scions each turn ensures a steady stream of resources, allowing for continuous development of your board state.

Prioritizing the Artisan’s survival is key, as its continued production of Scions is vital for maintaining momentum. Protecting it with counterspells or removal protection can significantly enhance its effectiveness.

Azlask, the Swelling Scourge: Scaling Power and Board Presence

Azlask, the Swelling Scourge represents a significant late-game threat within the Eldrazi Incursion deck, offering scaling power and overwhelming board presence. Each time you cast an Eldrazi spell, Azlask grows, becoming an increasingly formidable attacker and blocker.

Its ability to create a token upon entering the battlefield immediately establishes a presence, and the continuous growth ensures it remains relevant throughout the game. Synergizing with the deck’s focus on Eldrazi creatures, Azlask quickly becomes a game-ending threat.

Protecting Azlask is paramount; removal spells can severely hinder your strategy. Consider including cards that offer hexproof or indestructible to safeguard this powerful creature.

Upgrade Paths for Eldrazi Incursion

Eldrazi Incursion benefits from focused upgrades in mana ramp and creature base enhancement, maximizing synergy and power within Modern and Commander play.

Enhancing Mana Ramp

Eldrazi creatures demand substantial mana, making ramp crucial for consistent performance. Arcane Signet and Dreamstone Hedron provide early acceleration, enabling quicker deployment of key threats. These artifacts establish a foundation for mid-game dominance.

For sustained mana generation, consider Everflowing Chalice and Hedron Archive. Everflowing Chalice scales with your mana base, offering significant returns as the game progresses. Hedron Archive provides both ramp and card draw, mitigating potential resource depletion. Prioritizing these mana sources ensures you can consistently cast powerful Eldrazi and overwhelm opponents. Efficient ramp is the cornerstone of a successful Eldrazi Incursion strategy.

Arcane Signet and Dreamstone Hedron: Early Game Acceleration

Arcane Signet is a staple in many Commander and Modern decks, and Eldrazi Incursion is no exception. Its ability to produce any color of mana for just two mana is incredibly efficient, allowing for faster deployment of early-game threats or ramp spells. Complementing Arcane Signet, Dreamstone Hedron offers a repeatable mana source, albeit at a slightly higher cost.

Dreamstone Hedron’s scry ability provides subtle card selection, smoothing out draws and increasing the likelihood of finding crucial Eldrazi or ramp pieces. These artifacts are vital for establishing a mana advantage in the early turns, setting the stage for dominating the mid and late game with powerful creatures.

Everflowing Chalice & Hedron Archive: Mid-to-Late Game Mana Sources

As the game progresses, Everflowing Chalice becomes a potent mana engine for Eldrazi Incursion. While initially requiring a significant mana investment to fill, it provides a substantial and consistent mana boost, crucial for casting large Eldrazi creatures. Its scaling potential makes it invaluable in longer games.

Hedron Archive offers a different, yet equally important, function. It’s a repeatable mana source that also provides card advantage when sacrificed. This flexibility is key for recovering from board wipes or finding answers to opposing threats. Both artifacts synergize beautifully, ensuring a steady flow of mana throughout the mid and late game phases.

Boosting Eldrazi Creature Base

Expanding beyond the core Eldrazi is vital for a resilient Eldrazi Incursion deck. Consider adding utility creatures like Benthic Anomaly, which can disrupt opponents by taxing their spells, and Bismuth Mindrender, offering valuable card selection. These additions provide control elements alongside raw power.

Furthermore, synergistic Eldrazi support creatures like Chittering Dispatcher and Spawnbed Protector amplify the deck’s strengths. Dispatcher efficiently removes smaller threats, while Protector generates additional Eldrazi Scions, accelerating mana production and bolstering board presence. These creatures enhance the deck’s overall consistency and resilience.

Benthic Anomaly & Bismuth Mindrender: Utility and Disruption

Benthic Anomaly functions as a potent stax piece, increasing the cost of noncreature spells your opponents cast – a significant disruption tactic in Modern. This control element slows down faster strategies, buying time to establish your Eldrazi threats. Its ability to tax spells is particularly effective against combo decks.

Complementing this, Bismuth Mindrender provides card selection, crucial for finding key pieces. Discarding a card to look at the top three and keep one is a valuable effect, smoothing out draws and increasing consistency. Both cards offer utility beyond raw power, enhancing the deck’s adaptability and resilience against diverse strategies.

Chittering Dispatcher & Spawnbed Protector: Synergistic Eldrazi Support

Chittering Dispatcher excels at generating Eldrazi Scions, providing both mana ramp and chump blockers. This creature directly fuels Artisan of Kozilek and other high-cost Eldrazi, accelerating your game plan. The Scions also act as sacrificial fodder, protecting your more valuable creatures from removal.

Spawnbed Protector further amplifies this synergy, granting your Eldrazi Scions +1/+1 and vigilance. This transforms them into legitimate threats, capable of applying pressure and disrupting opponents. The combination creates a resilient board presence, overwhelming opponents with a constant stream of Eldrazi tokens and scaling creatures.

Synergies and Combos

Eldrazi Monument and Forsaken Monument unlock powerful overrun effects and card advantage, respectively, when combined with the numerous Eldrazi creatures.

Eldrazi Monument: Overrun Potential

Eldrazi Monument is a cornerstone for explosive turns within an Eldrazi Incursion deck. This artifact grants +1/+1 and trample to all your Eldrazi creatures, immediately transforming a board presence into a significant threat.

The real power lies in its bestow ability. Attaching it to a creature provides flying and indestructible, making it incredibly difficult to remove. Combined with the sheer size potential of cards like Azlask, the Swelling Scourge, Eldrazi Monument can quickly lead to one-shot kills.

Prioritize protecting this artifact, as its removal significantly diminishes the deck’s late-game power. Consider including counterspells or protection spells to ensure its continued impact. It’s a game-winning card when properly supported.

Forsaken Monument: Card Advantage with Eldrazi

Forsaken Monument provides crucial card advantage, a common weakness in many Eldrazi-focused strategies. This artifact allows you to exchange Eldrazi creatures for additional cards, fueling your hand and maintaining momentum.

The key is maximizing the value of the exchange. Sacrificing smaller Eldrazi tokens generated by Artisan of Kozilek or Spawnbed Protector is an efficient way to draw cards without sacrificing significant board presence.

This synergy is particularly potent in the late game, allowing you to cycle through your deck to find answers or additional threats. Consider including cards that generate multiple Eldrazi tokens to fully leverage Forsaken Monument’s potential. It’s a vital engine for sustained pressure.

Modern Format Considerations

Eldrazi Incursion demands adaptation to Modern’s fast pace. Addressing potential weaknesses and understanding the current metagame are crucial for competitive success.

Adapting to the Modern Metagame

The Modern format is a dynamic landscape, requiring Eldrazi Incursion decks to be flexible. Expect frequent matchups against established archetypes like Rakdos Midrange, Murktide Regent, and various control strategies. Sideboard construction is paramount; include answers to common threats like graveyard hate, enchantment removal (for Eldrazi Monument), and efficient creature removal.

Consider cards that provide disruption, such as discard spells or countermagic, to hinder opponent’s key plays. Prioritize maintaining a consistent mana base to reliably cast your powerful Eldrazi threats. Be prepared to adjust your strategy based on opponent’s deck – sometimes a more aggressive approach is needed, while other times a slower, more controlling gameplan is optimal. Analyzing metagame trends is vital for long-term success.

Potential Weaknesses and How to Address Them

Eldrazi Incursion decks, while powerful, aren’t without vulnerabilities. A primary weakness is susceptibility to board wipes, as rebuilding from scratch can be slow. Include resilient threats like Azlask, the Swelling Scourge, and cards that generate value even after removal. Another concern is reliance on the graveyard; graveyard hate can cripple strategies utilizing recursion.

Furthermore, mana consistency is crucial. Stumbling in the early game can leave you vulnerable. Cards like Arcane Signet and Dreamstone Hedron mitigate this. Finally, be mindful of decks that can go wide quickly, overwhelming your early defenses. Sideboard options like sweepers or efficient removal are essential to address these challenges and maintain a competitive edge.

Commander Deck Integration

Eldrazi Incursion cards seamlessly integrate into Commander builds, offering powerful synergies with existing staples and enhancing ramp strategies for Eldrazi titans.

Utilizing Eldrazi Incursion Cards in Commander Builds

Eldrazi Incursion provides potent additions to Commander decks, particularly those leaning into artifact synergies or Eldrazi tribal themes. Cards like Artisan of Kozilek accelerate mana production, crucial for deploying high-cost Eldrazi. Angelic Aberration offers a strong midrange threat, scaling with opponent’s creatures.

Consider incorporating Forsaken Monument for card advantage, drawing cards whenever you cast an Eldrazi spell. Eldrazi Monument can create an overwhelming overrun effect, boosting your creatures.

Focus on commanders that benefit from a high creature count or artifact focus. Decks built around colorless strategies will also find these cards exceptionally valuable, maximizing their potential within the Commander format. Prioritize ramp to consistently cast these powerful beings.

Synergies with Existing Commander Staples

Eldrazi Incursion cards synergize remarkably well with established Commander staples. Artifact-focused commanders like Breya, Etherium Shaper benefit from the influx of powerful Eldrazi artifacts like Hedron Archive and Everflowing Chalice, providing both ramp and utility.

Decks utilizing graveyard recursion, such as Meren of Clan Nel Toth, can repeatedly cast Eldrazi from the graveyard, maximizing value. Commanders that care about creature size, like Ezuri, Claw of Progress, amplify the impact of Azlask, the Swelling Scourge and other scaling Eldrazi.

Cards like Sol Ring and Command Tower remain essential, supporting the mana base needed to cast these formidable creatures. Consider cards that tutor for artifacts to consistently find key pieces.

romeo and juliet act 3 study guide

Romeo and Juliet Act 3: A Comprehensive Study Guide

Act III marks a pivotal shift, abandoning earlier comedic tones as Mercutio’s death introduces insurmountable obstacles for the star-crossed lovers, deepening the tragedy.

Overview of Act 3

Act 3 represents the play’s turning point, dramatically escalating the conflict between the Montagues and Capulets, ultimately sealing Romeo and Juliet’s tragic fate. The initial street fight, fueled by longstanding animosity, results in Mercutio’s death at Tybalt’s hand, prompting Romeo to avenge his friend and kill Tybalt.

This act witnesses Romeo’s banishment by the Prince, a devastating blow that separates him from Juliet. Juliet grapples with conflicting loyalties – her love for Romeo versus her duty to her family – while facing pressure to marry Paris. The tone shifts from romance to impending doom, setting the stage for the play’s heartbreaking conclusion.

Key Characters in Act 3

Romeo experiences a profound transformation in Act 3, shifting from a lovesick youth to a man consumed by grief and rage after Mercutio’s death. His impulsive act of vengeance leads to his banishment, altering his destiny. Juliet faces immense internal conflict, torn between her love for Romeo and familial obligations, demonstrating growing maturity and defiance.

Mercutio’s wit and fiery temper ignite the central conflict, his death serving as a catalyst for tragedy. Tybalt embodies the hatred fueling the feud, relentlessly seeking confrontation. Friar Laurence attempts to mediate, offering counsel to Romeo, but his plans unravel, contributing to the escalating crisis.

The Escalating Conflict: A Prelude to Tragedy

Act 3 witnesses a rapid escalation of the Montague-Capulet feud, moving beyond petty squabbles to fatal violence. Tybalt’s relentless pursuit of Romeo ignites a street fight, fueled by pride and long-held animosity. Mercutio’s death, a direct consequence of this hatred, marks a turning point, transforming Romeo’s grief into vengeful action.

This act establishes an irreversible trajectory towards tragedy, as Romeo’s banishment separates him from Juliet, intensifying their desperation. The conflict’s destructive nature foreshadows the play’s ultimate outcome, highlighting the devastating consequences of unchecked animosity.

Scene 1: The Street Fight

This scene erupts with tension as Tybalt seeks out Romeo, intending to avenge Romeo’s presence at the Capulet feast. Benvolio attempts to maintain peace, but Tybalt’s aggression proves insurmountable. Romeo initially tries to avoid conflict, motivated by his secret marriage to Juliet and the Prince’s decree against fighting.

However, Mercutio’s frustration with Romeo’s passivity leads him to engage Tybalt, resulting in a fatal duel. Romeo, enraged by Mercutio’s death, impulsively kills Tybalt, sealing his fate and dramatically escalating the play’s tragic course.

The Initial Confrontation: Mercutio, Tybalt, and Benvolio

The scene opens with a simmering hostility as Tybalt aggressively searches for Romeo, fueled by resentment over Romeo’s attendance at the Capulet ball. Benvolio, ever the peacemaker, attempts to diffuse the situation, urging both sides to sheathe their swords and restore order. Mercutio, however, is quick to anger and mocks Tybalt’s fiery disposition, escalating the tension.

Tybalt’s challenge to Romeo, though initially refused, ignites Mercutio’s fury, leading him to draw his sword and confront Tybalt, setting the stage for the tragic events to unfold.

Romeo’s Attempt at Peacekeeping

Upon arriving, Romeo attempts to quell the escalating conflict, motivated by his secret marriage to Juliet and a desire to avoid further bloodshed within their families. He pleads with Tybalt to reconsider the duel, attempting to reason with him and emphasize the newfound kinship established through their marriage. Romeo expresses his love for Tybalt as a relative, hoping to appeal to his sense of family honor.

However, Tybalt, blinded by hatred, dismisses Romeo’s pleas and views his pacifism as cowardice, further fueling the confrontation and ultimately leading to tragedy.

Mercutio’s Death and Romeo’s Reaction

Tragically, Mercutio is fatally wounded by Tybalt during the street fight, despite Romeo’s attempts to intervene. His dying words, a famous curse – “A plague o’ both your houses!” – foreshadow the devastating consequences of the family feud. This event serves as a critical turning point in the play, igniting Romeo’s fury and prompting a swift, violent reaction.

Consumed by grief and rage, Romeo abandons his earlier attempts at peace and seeks revenge, ultimately killing Tybalt and sealing his own fate of banishment.

Scene 2: Juliet’s Soliloquy and the News of Tybalt’s Death

Juliet awaits Romeo with intense anticipation, her famous soliloquy revealing her conflicted emotions – joy at the prospect of their union battling with the weight of her family name. This internal struggle is abruptly shattered by the arrival of the Nurse, bearing devastating news: Tybalt is dead, and Romeo has been banished.

Juliet experiences a whirlwind of grief, initially lamenting Tybalt’s death, then quickly shifting to despair over Romeo’s exile, demonstrating her unwavering love and loyalty to her husband.

Juliet’s Internal Conflict: Love vs. Loyalty

Juliet’s soliloquy vividly portrays her agonizing conflict between her passionate love for Romeo and her familial loyalty to Tybalt. She grapples with the seemingly impossible situation: mourning her cousin’s death while simultaneously defending the man who caused it. This internal turmoil highlights the destructive power of the family feud, forcing Juliet to choose between love and duty.

Her initial grief for Tybalt quickly transforms into fierce protectiveness of Romeo, revealing the depth of her commitment and challenging societal expectations of female obedience.

The Nurse’s Delivery of the Tragic News

The Nurse’s delivery of Tybalt’s death and Romeo’s banishment is deliberately protracted and emotionally charged, amplifying Juliet’s distress. Initially, she avoids directly stating the facts, building suspense and prolonging Juliet’s anticipation. This indirect approach heightens the impact of the news when it finally arrives, plunging Juliet into profound despair.

The Nurse’s attempts to comfort Juliet are clumsy and ultimately ineffective, as she struggles to comprehend the depth of Juliet’s emotional connection to Romeo. Her focus remains on Tybalt’s death, failing to fully acknowledge Juliet’s grief for her husband.

Scene 3: Romeo and Friar Laurence

In this crucial scene, Romeo, devastated by his banishment, seeks solace and counsel from Friar Laurence. He views banishment as a fate worse than death, lamenting the loss of Juliet’s company and the comforts of Verona. Friar Laurence attempts to temper Romeo’s despair, urging him to find gratitude in still being alive.

The Friar devises a plan, hoping to ultimately reunite Romeo and Juliet, though it’s a risky strategy. He emphasizes that Romeo’s impulsive actions led to this predicament, highlighting the need for patience and reason.

Romeo’s Despair and Initial Reaction to Banishment

Upon learning of his banishment from Verona, Romeo plunges into profound despair, reacting with intense emotional turmoil. He perceives banishment not as a reprieve from death, but as a fate far more agonizing – a life devoid of Juliet’s presence and the joys of his home. Romeo’s initial response is one of self-pity and overwhelming grief, questioning the very meaning of existence without his beloved.

He dramatically laments his misfortune, viewing exile as a living death, a sentiment that underscores the depth of his love and the tragedy of their situation.

Friar Laurence’s Counsel and Plan

Friar Laurence, witnessing Romeo’s anguish, attempts to counsel him, urging perspective and emphasizing the fortunate escape from a greater punishment – execution. He rebukes Romeo’s excessive grief, highlighting the fragility of life and the importance of gratitude. The Friar swiftly devises a plan: Romeo will seek shelter in Mantua, and they will work towards a reconciliation with the Prince and a lifting of the banishment.

This plan, though intended to offer hope, sets in motion a chain of events leading to further tragedy, showcasing the limitations of even well-intentioned intervention.

Scene 4: Preparations for Juliet’s Marriage to Paris

Capulet, eager to elevate his family’s status and distract from Tybalt’s death, hastily decides to marry Juliet to Paris. He believes this swift union will cheer his grieving daughter. Juliet is informed of this arrangement by her mother, Lady Capulet, who attempts to portray Paris as a desirable match, emphasizing his wealth and noble lineage.

Juliet, already heartbroken over Romeo’s banishment, vehemently protests this forced betrothal, but her pleas fall on deaf ears, highlighting her powerlessness within her family and foreshadowing desperate measures.

Capulet’s Decision and Juliet’s Protest

Lord Capulet, driven by a desire to see Juliet happy and to restore order after the recent tragedy, swiftly arranges her marriage to Paris. He believes this union will lift her spirits and benefit the family. However, Juliet is utterly devastated by this news, as her heart already belongs to Romeo.

She expresses her reluctance and begs her father to reconsider, but Capulet reacts with furious anger, demanding obedience and threatening to disown her if she refuses. This outburst demonstrates his patriarchal control and Juliet’s increasingly desperate situation.

Lady Capulet’s Attempts to Comfort Juliet

Following Juliet’s desperate plea and her father’s harsh response, Lady Capulet attempts to console her daughter, believing marriage to Paris will elevate Juliet’s status and bring her happiness. She fails to understand the depth of Juliet’s love for Romeo and dismisses her grief as youthful foolishness.

Lady Capulet offers a pragmatic view of marriage, focusing on social and financial advantages rather than emotional connection. Her attempts at comfort are ultimately ineffective, as she cannot empathize with Juliet’s genuine distress, further isolating the young woman.

Scene 5: The Final Scene: Juliet’s Defiance and the Looming Tragedy

This scene showcases Juliet’s growing desperation and defiance as she faces forced marriage to Paris. After a heartbreaking farewell to her Nurse, who now advocates for Paris, Juliet resolves to seek Friar Laurence’s aid, demonstrating a newfound agency.

Her willingness to contemplate drastic measures, even death, highlights the impossible situation created by the family feud. The scene establishes a palpable sense of impending doom, foreshadowing the tragic consequences of the escalating conflict and Juliet’s desperate choices.

Juliet’s Farewell to Her Nurse

This poignant exchange marks a devastating turning point in Juliet’s relationship with the Nurse, her closest confidante. The Nurse’s advice to simply marry Paris after Romeo’s banishment deeply wounds Juliet, shattering her trust and leaving her feeling utterly alone.

Juliet’s desperate pleas for the Nurse’s support are met with pragmatic counsel, revealing a fundamental disconnect in their perspectives. This farewell signifies Juliet’s complete isolation and forces her to seek alternative solutions, ultimately leading her towards Friar Laurence and a perilous plan.

Juliet’s Decision to Seek Friar Laurence’s Help

Driven to despair by the Nurse’s betrayal and the forced prospect of marrying Paris, Juliet makes the desperate decision to turn to Friar Laurence. She recognizes him as her last hope, a figure who has previously aided her and Romeo’s love.

Juliet’s willingness to contemplate even the most drastic measures – including feigning death – demonstrates the intensity of her devotion to Romeo and her refusal to submit to a loveless marriage. This pivotal choice sets in motion the tragic events that will ultimately claim both their lives.

Themes Explored in Act 3

Act III profoundly explores the destructive nature of hatred, vividly illustrated by the escalating feud between the Montagues and Capulets, culminating in Mercutio and Tybalt’s deaths. The play also wrestles with the complex interplay of fate versus free will, questioning whether Romeo and Juliet are puppets of destiny or architects of their own doom.

Furthermore, the act examines the consequences of impulsive actions and the devastating impact of societal pressures on individual desires. These interwoven themes contribute to the tragedy’s enduring power and relevance.

Fate vs. Free Will

Act III intensifies the debate surrounding fate versus free will, as Romeo’s impulsive decision to avenge Mercutio’s death seals his and Juliet’s tragic trajectory. While the prologue foreshadows their “star-cross’d” destiny, characters consistently make choices that accelerate the unfolding tragedy.

Is Romeo’s banishment a predetermined outcome, or a direct consequence of his actions? The play suggests a haunting combination of both, where fate provides the framework, but individual agency determines the specifics of their downfall, leaving audiences to ponder the extent of their control.

The Destructive Nature of Hatred

Act III vividly portrays the devastating consequences of the Montague-Capulet feud, escalating beyond mere animosity to outright violence. Tybalt’s relentless pursuit of conflict, fueled by familial hatred, directly leads to Mercutio’s death and Romeo’s subsequent banishment, initiating the play’s tragic descent.

The senseless loss of life underscores how deeply ingrained prejudice poisons society, destroying individuals and preventing any possibility of peace. This act demonstrates that hatred isn’t simply a background element, but a potent force actively dismantling happiness and fostering irreversible damage.

Dramatic Irony in Act 3

Act III is rich with dramatic irony, heightening the sense of impending doom. Juliet’s family believes she mourns Tybalt, unaware of her secret marriage to Romeo, the very man responsible for his death. This creates a painful disconnect between their perception and reality.

Furthermore, the audience knows Romeo has been banished, while Juliet remains ignorant for a significant portion of the act, amplifying her distress when she learns the truth. This disparity between knowledge held by characters and the audience intensifies the tragic tension and foreshadows further heartbreak.

Motifs and Symbols in Act 3

Act III powerfully utilizes motifs of light and darkness, reflecting the characters’ shifting emotional states. Romeo’s initial despair after banishment contrasts with the bright imagery associated with Juliet, though even that is shadowed by grief. The motif of poison, foreshadowing future events, subtly emerges with talk of exile as a ‘living death’.

Symbolically, the sword represents honor and the escalating violence, culminating in Mercutio and Tybalt’s deaths. The play’s exploration of masculinity, particularly through challenges to honor, is also symbolized by the duel, revealing the destructive consequences of pride and societal expectations.

Analyzing Romeo’s Character Development in Act 3

Romeo undergoes a dramatic transformation in Act III, shifting from a passionate lover to a man consumed by rage and despair. His impulsive reaction to Mercutio’s death, leading to Tybalt’s slaying, reveals a volatile side previously unseen. He quickly falls for Tybalt’s provocation, demonstrating a loss of control.

His subsequent banishment plunges him into profound grief, showcasing a heightened emotional sensitivity. This act marks a turning point, as Romeo transitions from youthful idealism to a more mature, yet tormented, understanding of fate and consequence, foreshadowing his tragic end.

Analyzing Juliet’s Character Development in Act 3

Juliet’s character matures rapidly in Act III, forced to confront devastating realities. Her initial internal conflict—love versus loyalty to her family—intensifies with Tybalt’s death and Romeo’s banishment. She displays remarkable strength and defiance, particularly when resisting her parents’ plans for marriage to Paris.

This act showcases her growing independence and willingness to challenge societal expectations. Juliet’s desperation leads her to seek Friar Laurence’s aid, demonstrating a proactive, albeit risky, approach to her fate. She evolves from a naive girl into a determined young woman facing impossible choices.

dmc fz300 manual

The Panasonic Lumix DMC-FZ300 offers comprehensive guidance, readily available as a free PDF download, detailing advanced features and troubleshooting for optimal use.

Overview of the Camera

The Panasonic Lumix DMC-FZ300 is a versatile bridge camera, and its accompanying manual—available as a downloadable PDF—is crucial for unlocking its full potential. This detailed guide provides extensive information, covering everything from initial setup to advanced shooting techniques. Users can quickly locate specific details via page jumps within the manual.

The manual serves as a valuable resource for understanding the camera’s features, troubleshooting common issues, and maximizing image quality. It’s a key component for both beginner and experienced photographers;

Key Features and Specifications

The DMC-FZ300’s manual details its impressive specifications, including its 25mm wide-angle lens with 60x optical zoom. The PDF provides a comprehensive overview of its capabilities, from image stabilization (Hybrid O.I.S.) to various shooting modes. It outlines the camera’s technical details, warranty information, and links to support resources.

Understanding these features, as explained in the manual, empowers users to fully utilize the camera’s potential and achieve optimal photographic results.

Getting Started with Your DMC-FZ300

The DMC-FZ300 manual guides initial setup, battery charging, and SD card formatting, ensuring a smooth start to your photographic journey with this camera.

Unboxing and Initial Setup

Upon unboxing your Panasonic Lumix DMC-FZ300, carefully inspect all included components. The comprehensive owner’s manual, available as a free PDF download, is your primary resource. It details everything from initial camera setup to navigating advanced features. Familiarize yourself with the camera’s layout and controls as outlined in the manual. Before first use, consult the manual for specific instructions on preparing the camera for operation, ensuring optimal performance and understanding of its capabilities.

Charging the Battery

To charge the battery of your Panasonic Lumix DMC-FZ300, refer to the detailed instructions within the downloadable PDF manual. It outlines the correct charging procedure, including connecting the provided AC adapter and cable. The manual specifies the charging indicator’s behavior and approximate charging time. Always use the designated Panasonic charger to avoid damage. Fully charge the battery before initial use for optimal performance, as detailed within the comprehensive owner’s manual.

Inserting and Formatting the SD Card

The DMC-FZ300 utilizes SD cards for image storage. Consult the PDF manual for precise instructions on inserting the card correctly into the designated slot. Formatting is crucial for compatibility and performance; the manual details the formatting process directly through the camera’s menu. Back up existing data before formatting! The manual emphasizes using an SD card that meets the camera’s specifications for optimal results and avoiding potential errors during operation.

Understanding the Camera Controls

The DMC-FZ300’s manual thoroughly explains button, dial, and menu functions, enabling customization of the quick menu for efficient operation and personalized settings.

Button and Dial Functions

The Panasonic Lumix DMC-FZ300 manual meticulously details each button and dial’s specific function, ensuring users fully grasp camera operation. It clarifies how to navigate settings, adjust shooting parameters, and access frequently used features quickly. Understanding these controls is paramount for both beginners and experienced photographers.

The manual provides a visual guide, often with diagrams, illustrating the location and purpose of each control element. This allows for intuitive operation and efficient workflow, maximizing the camera’s potential and minimizing learning curves.

Menu Navigation

The Panasonic Lumix DMC-FZ300 manual provides a detailed walkthrough of the camera’s menu system. It explains how to access various settings, categorized for ease of use, covering image quality, recording modes, and customization options. The manual highlights how to efficiently locate specific functions within the menu structure.

Users can quickly jump to relevant pages within the PDF manual to find information on particular settings. This streamlined approach ensures a user-friendly experience, even for those unfamiliar with complex camera menus.

Customizing the Quick Menu

The DMC-FZ300 manual details how to personalize the Quick Menu for faster access to frequently used settings. Users can add or remove items, arranging them according to their shooting preferences. This customization streamlines workflow, reducing time spent navigating through the full menu system.

The manual guides users through the process of tailoring the Quick Menu, enhancing efficiency and control over essential camera functions. It’s a key feature for experienced photographers.

Shooting Modes Explained

The DMC-FZ300 manual thoroughly explains each shooting mode – Auto, Aperture Priority, Shutter Priority, and Manual – for versatile photographic control and creativity.

Auto Mode for Beginners

For newcomers to photography, the Panasonic Lumix DMC-FZ300’s Auto mode simplifies image capture. The camera’s manual details how this intelligent mode automatically selects optimal settings – aperture, shutter speed, ISO – based on the scene.

This eliminates the need for manual adjustments, allowing beginners to focus on composition and capturing the moment. The manual further clarifies that Auto mode is ideal for everyday snapshots and various lighting conditions, ensuring consistently good results with minimal effort. It’s a fantastic starting point!

Aperture Priority (A) Mode

The DMC-FZ300’s Aperture Priority (A) mode, as explained in the camera’s manual, grants photographers control over the lens aperture, influencing depth of field. Users select the desired f-stop, while the camera automatically adjusts shutter speed for proper exposure.

This mode is ideal for portraits (shallow depth of field) or landscapes (large depth of field). The manual details how adjusting aperture impacts image brightness and creative effects, offering a balance between control and automation for more experienced users.

Shutter Priority (S) Mode

The Panasonic Lumix DMC-FZ300’s Shutter Priority (S) mode, detailed within the camera’s manual, allows photographers to dictate the shutter speed, controlling motion blur. Users set the desired shutter speed, and the camera automatically adjusts the aperture for correct exposure.

This mode excels in capturing fast-action shots (high shutter speed) or creating intentional motion blur (low shutter speed). The manual clarifies how shutter speed impacts image brightness and offers creative possibilities, balancing control and automation.

Manual Mode (M) for Full Control

The Panasonic Lumix DMC-FZ300’s Manual Mode (M), thoroughly explained in the camera’s manual, grants photographers complete control over both aperture and shutter speed. This mode allows precise exposure adjustments, essential for challenging lighting conditions or specific creative visions.

The manual details how to balance aperture and shutter speed for desired effects, emphasizing the interplay between ISO, aperture, and shutter speed. Mastering Manual Mode unlocks the camera’s full potential, offering unparalleled artistic freedom.

Focusing and Image Stabilization

The DMC-FZ300 manual details autofocus modes, manual focus operation, and utilizing the Hybrid O.I.S. for sharp, clear images, minimizing blur effectively.

Autofocus Modes and Settings

The Panasonic Lumix DMC-FZ300 manual thoroughly explains various autofocus (AF) modes, crucial for capturing sharp images. It details single AF for still subjects, continuous AF for tracking moving objects, and AF point selection options. Users can customize AF sensitivity and utilize face/eye detection for portraits.

The manual also covers AF assist lamp settings, enhancing focusing in low-light conditions. Understanding these settings allows photographers to optimize autofocus performance based on the specific shooting scenario, ensuring consistently focused results. Explore the manual for detailed explanations and practical examples.

Manual Focus Operation

The Panasonic Lumix DMC-FZ300 manual provides detailed instructions on utilizing manual focus (MF). It explains how to switch the lens to MF mode and adjust focus using the focus ring. The manual highlights the benefits of MF for precise control, particularly in challenging situations where autofocus struggles.

It also describes focus peaking, a helpful feature that visually highlights in-focus areas on the screen. Mastering manual focus, guided by the manual, unlocks creative possibilities and ensures sharp images when autofocus isn’t ideal.

Utilizing the Hybrid O.I.S. (Optical Image Stabilization)

The Panasonic Lumix DMC-FZ300 manual thoroughly explains the Hybrid Optical Image Stabilization (O.I.S.) system. It details how O.I.S. minimizes blur caused by hand-shake, crucial for sharp images at longer zoom ranges or in low light. The manual clarifies different O.I.S. modes available – how to activate and deactivate it via the menu.

It also explains how O.I.S. works in conjunction with the camera’s image stabilization features, maximizing clarity and reducing motion blur for both stills and videos.

Advanced Shooting Techniques

The DMC-FZ300 manual details creative control modes, filters, and panorama features, empowering users to explore advanced photographic techniques for stunning results.

Using Zoom Effectively

The Panasonic Lumix DMC-FZ300 manual provides insights into maximizing the camera’s impressive 60x optical zoom. It explains techniques for achieving sharp images even at maximum zoom levels, emphasizing the importance of utilizing the Optical Image Stabilization (O.I.S.) feature. The manual details how to smoothly transition between zoom ranges during video recording and offers guidance on composing shots effectively while utilizing the zoom function. Understanding the zoom’s capabilities, as outlined in the manual, allows photographers to capture distant subjects with clarity and precision, enhancing their creative possibilities.

Creative Control Modes and Filters

The Panasonic Lumix DMC-FZ300 manual thoroughly explains the camera’s diverse Creative Control modes and filters. These tools allow users to easily achieve artistic effects, such as High Dynamic Range (HDR) for balanced exposure, and various filter options like Miniature, Film Grain, and Soft Focus. The manual details how each mode alters image characteristics, empowering photographers to experiment and personalize their shots. It guides users in selecting the appropriate settings for desired creative outcomes, enhancing photographic expression.

Panorama Mode

The Panasonic Lumix DMC-FZ300 manual provides detailed instructions on utilizing the camera’s Panorama Mode. This feature enables capturing expansive, wide-angle scenes by seamlessly stitching together multiple images. The manual explains the panning technique required for smooth panorama creation, ensuring minimal distortion. It also clarifies settings adjustments for optimal results, like sweep speed and image overlap. Users learn to create stunning panoramic photographs, perfect for landscapes and architectural scenes, directly from their DMC-FZ300.

Understanding the DMC-FZ300’s Manual

The DMC-FZ300 manual, available as a PDF, offers detailed information on all camera functions, troubleshooting, and advanced features for enhanced usability.

Navigating the PDF Manual

The Panasonic Lumix DMC-FZ300’s PDF manual is designed for easy access to information. Users can quickly jump to specific pages by clicking linked page numbers within the document. This feature streamlines the process of finding details on advanced functions or troubleshooting common issues.

The manual’s structure allows for efficient navigation, ensuring users can locate the necessary guidance promptly. It’s a valuable resource for maximizing the camera’s capabilities and resolving any operational questions.

Locating Specific Information

Within the Panasonic Lumix DMC-FZ300’s manual, finding precise details is simplified through its organized structure. The PDF allows users to directly access information on advanced features, offering a quick route to understanding complex settings.

Utilizing the linked page numbers, users can efficiently pinpoint sections addressing specific functions or troubleshooting steps. This targeted approach ensures swift resolution of queries and maximizes the camera’s potential.

Troubleshooting Common Issues using the Manual

The Panasonic Lumix DMC-FZ300’s manual serves as a valuable resource for resolving typical problems. It provides detailed guidance for issues like camera malfunctions or image quality concerns, offering step-by-step solutions.

Users can quickly identify potential causes and implement recommended fixes, minimizing downtime and ensuring continued operation. The manual’s troubleshooting section empowers users to self-resolve common difficulties, enhancing their overall experience.

DMC Thread and Patterns (Related to DMC Brand)

DMC boasts a rich history of quality thread production since 1898 in Mulhouse, France, and offers convenient pattern kits with pre-calculated thread amounts.

DMC’s History and Quality

DMC, a name synonymous with embroidery, carries a remarkable legacy dating back to 1792, though its thread production truly began in 1898 within a dedicated factory in Mulhouse, France – a location still active today. This enduring commitment to a single manufacturing site speaks volumes about their dedication to consistent quality control.

The brand is deeply woven into the fabric of its community, with many residents proudly connected to the company’s history. DMC’s thread isn’t just a product; it’s a piece of heritage, representing generations of craftsmanship and a steadfast pursuit of excellence in every strand.

Finding Patterns Compatible with DMC Thread

DMC simplifies project beginnings with readily available patterns. Users can easily select a desired pattern and then utilize the convenient “Make it a Kit” feature. This tool automatically calculates the precise shades and quantities of DMC thread needed to perfectly recreate the chosen design, streamlining the preparation process.

For those who already possess thread, a “Pattern Only” option allows for instant download and home printing, offering flexibility and immediate access to creative inspiration.

Using the “Make it a Kit” Feature

DMC’s “Make it a Kit” function is a valuable tool for crafters. After selecting a pattern, this feature pre-calculates the exact DMC thread shades and quantities required for completion. This eliminates guesswork and ensures you have everything needed to bring your chosen design to life, saving time and reducing potential errors.

It’s a convenient way to gather all materials in one go, simplifying project preparation and enhancing the crafting experience.

Connectivity and Data Transfer

The DMC-FZ300 facilitates data transfer via USB to computers and offers wireless connectivity through Wi-Fi, utilizing the Panasonic Image App for convenience.

Connecting to a Computer via USB

To connect your Panasonic Lumix DMC-FZ300 to a computer using a USB cable, ensure the camera is powered off. Then, connect the USB cable to the camera’s USB port and the computer’s USB port. Power on the camera; it should appear as a removable drive on your computer.

You can then transfer images and videos directly. The manual provides detailed instructions for selecting the correct USB connection mode (Mass Storage or MTP) for compatibility with different operating systems, ensuring seamless data transfer and accessibility;

Wireless Connectivity (Wi-Fi)

The Panasonic Lumix DMC-FZ300 offers convenient Wi-Fi connectivity for transferring images wirelessly to smartphones or tablets. The camera’s manual details how to connect to a Wi-Fi network, utilizing the Panasonic Image App for simplified control and sharing.

This app allows remote shooting, image browsing, and direct uploading to social media platforms. Detailed steps within the manual guide users through the setup process, ensuring a stable connection and optimal wireless functionality.

Using the Panasonic Image App

The Panasonic Image App, detailed in the DMC-FZ300 manual, facilitates seamless wireless control and image transfer. It enables remote shooting, adjusting camera settings from your smartphone, and instantly viewing captured photos.

The manual provides step-by-step instructions for pairing the camera with the app via Wi-Fi, ensuring a stable connection. Users can also easily share images directly to social media or cloud storage services, streamlining their workflow.

Maintenance and Care

The DMC-FZ300 manual stresses regular lens and body cleaning, proper battery storage, and keeping the camera’s firmware updated for peak performance.

Cleaning the Lens and Body

According to the DMC-FZ300 manual, maintaining a clean lens is crucial for optimal image quality. Use a blower to remove loose dust and debris first. For fingerprints or smudges, gently wipe with a soft, lint-free cloth.

Avoid harsh chemicals or abrasive cleaners, as these can damage the lens coating. The camera body should also be cleaned with a soft, dry cloth. Be particularly careful around ports and buttons.

Regular cleaning prevents dust buildup and ensures the longevity of your Panasonic Lumix DMC-FZ300.

Battery Care and Storage

The DMC-FZ300 manual emphasizes proper battery handling for extended lifespan. Avoid extreme temperatures – don’t leave the battery in direct sunlight or freezing conditions. Fully charge the battery before initial use and after prolonged storage.

When storing for extended periods, discharge the battery to around 50% to prevent degradation. Remove the battery from the camera if it won’t be used for a while.

Only use the specified Panasonic charger to avoid damage.

Firmware Updates

The DMC-FZ300 manual advises checking the Panasonic website regularly for firmware updates. These updates can improve camera performance, add new features, and fix potential bugs. Download the latest firmware to a compatible SD card, following the instructions in the manual carefully.

Ensure the camera has sufficient battery charge during the update process.

Interrupting the update can cause serious damage, rendering the camera unusable, so follow the steps precisely as outlined in the official documentation.

Troubleshooting Common Problems

The DMC-FZ300 manual provides solutions for issues like the camera not powering on, image quality problems, and focusing difficulties, aiding quick resolution.

Camera Not Turning On

If your Panasonic Lumix DMC-FZ300 fails to power on, the official manual suggests checking the battery charge first. Ensure it’s fully charged and correctly inserted. Verify the power switch is in the ‘ON’ position.

Consult the manual’s troubleshooting section for further guidance, including checking the SD card and attempting a reset. If problems persist, the manual directs users to Panasonic’s support resources for assistance, potentially indicating a hardware issue requiring professional attention.

Image Quality Issues

Should your Panasonic Lumix DMC-FZ300 produce unsatisfactory images, the manual recommends reviewing your shooting settings. Check the resolution, ISO sensitivity, and white balance. Ensure the lens is clean and free of smudges.

The manual details how to adjust these parameters for optimal results. It also suggests examining the SD card for potential errors. For persistent issues, consult the manual’s troubleshooting section or Panasonic’s support for further assistance.

Focusing Problems

If you experience difficulty achieving sharp focus with your DMC-FZ300, the manual advises checking your autofocus mode. Experiment with different AF modes – single, continuous, or manual – to suit your subject. Verify sufficient lighting, as low light can hinder autofocus performance.

The manual explains how to utilize focus area settings and manual focus override. If problems persist, consult the troubleshooting section for detailed guidance and potential solutions.

Appendix

The DMC-FZ300’s manual provides detailed technical specifications, warranty details, and links to Panasonic’s support resources for further assistance and information.

Technical Specifications (Detailed)

The Panasonic Lumix DMC-FZ300’s detailed specifications include a 12.1MP 1/2.3-inch CMOS sensor, a 25-600mm (equivalent) zoom lens with 5x optical zoom, and 4K video recording capabilities. It features Hybrid O.I.S. for image stabilization, a 3-inch LCD screen, and Wi-Fi connectivity. The camera supports SD/SDHC/SDXC memory cards and boasts a fast autofocus system. Its ISO range extends up to 6400, and it offers various shooting modes for diverse photographic needs, all thoroughly explained within the comprehensive manual.

Warranty Information

The Panasonic Lumix DMC-FZ300 is covered by a standard one-year limited warranty against defects in materials and workmanship from the date of original purchase. This warranty doesn’t cover damage from misuse, accidents, or unauthorized repairs. Refer to the included warranty card or Panasonic’s website for complete details, terms, and conditions. The manual provides guidance on registering your product to ensure warranty coverage and access to support services.

Resources and Support Links

For the Panasonic Lumix DMC-FZ300, comprehensive resources are readily available online. Panasonic’s official support website offers downloadable manuals, FAQs, and troubleshooting guides. Users can access the PDF manual directly from Panasonic’s site. Additionally, online forums and communities dedicated to photography provide valuable tips and assistance. The official Rowan website (linked to DMC) offers inspiration and product details, while the Panasonic Image App enhances connectivity.

the elements of style fourth edition pdf

The Elements of Style, Fourth Edition PDF: A Comprehensive Guide

The Elements of Style, in its fourth edition, remains a cornerstone for writers seeking clarity and precision․ This guide details usage rules, composition principles, and commonly misused words․

Available as a PDF, NOOK, and eBook, it’s a vital resource for mastering American English grammar and style, influencing generations of writers since 1919․

Historical Context and Authorship

The Elements of Style originated as a 1919 Cornell University writing guide by William Strunk Jr․, a professor of English․ Initially a concise set of principles for students, it underwent significant revision with the collaboration of E․B․ White, a renowned author and New Yorker contributor․

White’s contributions, beginning in the 1950s, expanded and refined the work, transforming it into the widely recognized style manual it is today․ He focused on practical advice for clear and concise prose, emphasizing simplicity and directness․ Subsequent editions, including the fourth, have benefited from further editorial work, ensuring its continued relevance․

The partnership between Strunk’s foundational rules and White’s elegant prose created a lasting impact on American writing․ The book’s enduring popularity stems from its accessibility and its focus on fundamental principles, making it a valuable resource for writers of all levels․ The current edition acknowledges both authors’ contributions, preserving their combined legacy․

Publication History and Editions

The Elements of Style first appeared in 1919, published by Harcourt, Brace & Company․ This initial edition was a modest undertaking, intended as a practical guide for Cornell University students․ Revisions followed, but the work gained prominence with E․B․ White’s extensive overhaul in 1959, resulting in a significantly expanded and refined version․

Further editions were released in 1972, 1978, and ultimately the fourth edition in 1999, overseen by editor Test Editor and featuring a foreword by Roger Angell․ Each iteration aimed to update the guide while preserving its core principles; The fourth edition, available in various formats including PDF, addressed contemporary writing concerns․

The book’s publication history reflects its evolving relevance․ The rise of digital publishing prompted adaptations, ensuring its guidance remained applicable in new media․ Today, it exists not only in print but also as a readily accessible eBook and on NOOK devices, demonstrating its enduring appeal and adaptability across platforms․

Core Principles: Eight Parts of Speech

The Elements of Style, in its fourth edition PDF format, fundamentally emphasizes a strong grasp of English grammar, beginning with its eight core parts of speech․ These building blocks – nouns, pronouns, verbs, adverbs, adjectives, conjunctions, prepositions, and interjections – form the foundation of clear and effective writing․

The guide doesn’t merely list these elements; it stresses their proper usage and relationship within a sentence․ Understanding how each part functions is crucial for avoiding ambiguity and achieving conciseness․ Strunk & White advocate for active voice and precise word choice, directly linked to a solid understanding of grammatical roles․

This focus on fundamental grammar isn’t prescriptive rigidity, but rather a pathway to stylistic control․ Mastering these eight parts allows writers to move beyond rote rules and make informed decisions about sentence construction․ Whether accessed as an eBook or via NOOK, the principles remain constant, empowering writers to communicate with clarity and impact․

Elementary Rules of Usage – Rule 1: Form the possessive singular of nouns by adding ‘s

The Elements of Style, readily available as a PDF or eBook, begins its practical guidance with a seemingly simple, yet frequently mishandled rule: forming the possessive singular of nouns․ The fourth edition unequivocally states: form the possessive singular by adding ‘s․ This applies even to proper nouns ending in ‘s’ – Charles’s hat, not Charles’ hat․

This rule, while straightforward, is presented as a cornerstone of clarity․ Ambiguity arises when possessives are incorrectly formed, leading to confusion for the reader; Strunk and White emphasize consistency; adhering to this rule contributes to a polished and professional writing style․

The guide acknowledges exceptions, such as sacred names (Jesus’), but stresses that these are limited․ For those utilizing the text on NOOK devices or in print, this foundational rule serves as a reminder of the importance of precision in grammatical construction․ Mastering this seemingly small detail significantly enhances the overall quality of written communication․

Elementary Rules of Usage – Rule 2: In a series of three or more words with the same introductory word, use a comma after each but the last

The Elements of Style, accessible in PDF, eBook, and NOOK formats, dedicates a crucial rule to series construction․ Rule 2 dictates that when listing three or more elements preceded by the same introductory word, a comma should follow each item except the final one․ This practice, as outlined in the fourth edition, enhances readability and prevents misinterpretation․

For example, the guide illustrates this with phrases like “red, white, and blue” or “cats, dogs, and birds․” Omitting these commas can create a run-on effect, hindering comprehension․ The authors emphasize that this isn’t merely a stylistic preference, but a matter of grammatical correctness․

This rule, seemingly minor, contributes significantly to the overall clarity and flow of writing․ Whether consulting the original text or a digital version, mastering this principle is essential for producing polished and professional prose․ Consistent application of this rule, as advocated by Strunk and White, elevates the quality of any written work․

Elementary Rules of Usage – Rule 3: Do not join independent clauses by a comma

The Elements of Style, available as a PDF and in eBook formats, firmly establishes Rule 3: avoid connecting independent clauses with only a comma․ This common error, known as a comma splice, weakens sentence structure and obscures meaning․ The fourth edition stresses the importance of proper punctuation for clarity․

Independent clauses, capable of standing alone as complete sentences, require stronger separation․ Acceptable methods include using a period to create two distinct sentences, employing a semicolon to indicate a close relationship, or utilizing a coordinating conjunction (and, but, or, nor, for, so, yet) preceded by a comma․

The guide provides clear examples demonstrating the incorrect use of a comma and the correct application of alternative punctuation․ Mastering this rule, as emphasized by Strunk and White, is fundamental to constructing grammatically sound and impactful prose․ Ignoring this principle leads to ambiguity and diminishes the overall effectiveness of writing, regardless of the chosen format – print or digital․

Elementary Rules of Usage – Rule 4: Use a comma to separate elements in a coordinate series

The Elements of Style, readily accessible as a PDF and through NOOK devices, dedicates Rule 4 to the proper use of commas within coordinate series․ A coordinate series consists of three or more words, phrases, or clauses presented in a parallel structure․ The fourth edition emphasizes that each element, except the final one, should be followed by a comma․

This practice, often referred to as the serial comma or Oxford comma, enhances readability and prevents potential misinterpretations․ While some style guides debate its necessity, Strunk and White advocate for its consistent application․ Omitting the final comma can create ambiguity, particularly in complex lists․

The guide illustrates this rule with numerous examples, showcasing how commas clarify relationships between items in a series․ Whether writing in a traditional print format or preparing content for digital publishing, adhering to this rule ensures precision and professionalism․ The eBook version makes this guidance conveniently available to writers everywhere․

Elementary Principles of Composition – Principle 1: Form the Paragraph

The Elements of Style, available in PDF, NOOK, and eBook formats, begins its compositional guidance with the fundamental principle of paragraph formation․ The fourth edition stresses that a paragraph is a coherent unit of thought, not merely an arbitrary division of text․

Each paragraph should develop a single, focused idea, with sentences working together to support that central theme․ Effective paragraphs exhibit unity, coherence, and a logical progression of thought․ The guide advises writers to consider the topic sentence – often, but not always, the first sentence – as a clear statement of the paragraph’s main point․

Subsequent sentences should expand upon this idea, providing evidence, examples, or explanations․ Transitions between sentences and paragraphs are crucial for maintaining flow and readability․ Mastering paragraph structure, as outlined in this classic style guide, is essential for clear and compelling writing, regardless of the publishing platform․

Elementary Principles of Composition – Principle 2: Use Definite Specific Language

The Elements of Style, in its fourth edition – accessible as a PDF, NOOK, or eBook – emphatically advocates for the use of definite, specific language․ Avoiding vague or abstract terms is paramount to clear communication, a core tenet of effective writing․

The guide urges writers to replace general words with precise ones, favoring concrete details over abstract concepts․ Instead of stating “a number of,” specify “several” or “twenty․” Rather than “showed,” use “demonstrated,” “revealed,” or “indicated,” depending on the nuance intended․ This principle extends to avoiding unnecessary qualifiers like “very” or “really,” which often weaken rather than strengthen prose․

Specific language creates vivid imagery and enhances understanding for the reader․ By choosing words that convey precise meaning, writers ensure their message is unambiguous and impactful․ This commitment to clarity, as detailed in Strunk & White’s enduring work, remains crucial in today’s digital publishing landscape․

Elementary Principles of Composition – Principle 3: Choose a Suitable Design

The Elements of Style, available in PDF, NOOK, and eBook formats, stresses the importance of “design” in composition – not merely aesthetics, but the overall structural plan of a piece of writing․ This principle, as outlined by Strunk & White, emphasizes that form should serve function․

A suitable design involves organizing material in a logical and coherent manner․ This includes structuring paragraphs effectively, using transitions to connect ideas, and establishing a clear focus․ The guide advocates for unity; every part of the writing should contribute to the central purpose․

Consider the audience and the purpose of the writing when determining the appropriate design․ A formal report will require a different structure than a personal essay․ Avoiding unnecessary complexity and prioritizing clarity are key․ The fourth edition reinforces that a well-designed piece of writing is not only readable but also persuasive and memorable, enhancing its overall impact․

Matters of Form: Capitalization

The Elements of Style, accessible as a PDF, NOOK, or eBook, dedicates a section to the often-debated rules of capitalization․ Strunk & White advocate for a restrained approach, emphasizing that capitalization should primarily serve to distinguish proper nouns and the beginning of sentences․

The guide cautions against excessive capitalization, which it deems a sign of clumsiness․ Common nouns, even when abstract, should generally be lowercase․ Titles of works – books, articles, etc․ – follow specific capitalization conventions, detailed within the fourth edition․

While acknowledging evolving practices, the core principle remains: use capitalization judiciously․ Avoid capitalizing for emphasis or stylistic effect, as it often weakens rather than strengthens writing․ Consistency is paramount; adhere to established rules throughout a document․ Mastering these “matters of form” contributes to a polished and professional presentation, as highlighted in this enduring style guide․

Matters of Form: Numbers and Dates

The Elements of Style, readily available in PDF, NOOK, and eBook formats, provides guidance on the proper formatting of numbers and dates․ Strunk & White suggest a pragmatic approach, advocating for numerals to represent specific quantities, while spelling out numbers one through one hundred․

For dates, the preferred style is to write them in full – for example, “July 4, 1776” – rather than using numerical abbreviations․ When a year stands alone, it should be presented as a numeral․ Consistency is key; choose a style and maintain it throughout the text․

The fourth edition acknowledges that these are often matters of house style or editorial preference․ However, it emphasizes clarity and readability․ Avoid ambiguity by presenting numerical information in a manner that is easily understood by the reader․ Following these guidelines, as detailed in the guide, enhances the professionalism and polish of any written work․

Matters of Form: Abbreviations and Symbols

The Elements of Style, accessible as a PDF, eBook, or via NOOK, addresses the use of abbreviations and symbols with a focus on clarity and avoiding unnecessary clutter; The guide generally advises against excessive abbreviation, favoring full forms for improved readability․

Common abbreviations like “i․e․” and “e․g․” are acceptable, but should be used judiciously․ Symbols, such as those for mathematical or scientific notation, are permissible within their respective contexts․ However, avoid using symbols where a word would be clearer․

The fourth edition emphasizes that abbreviations should be familiar to the intended audience․ If there’s any doubt about comprehension, spell out the term․ Consistency is paramount; define an abbreviation upon its first use and then adhere to that form throughout the document․ Prioritizing clarity over brevity is a core tenet of Strunk & White’s approach to effective writing․

Commonly Misused Words: Affect vs․ Effect

The Elements of Style, readily available as a PDF and in other digital formats, dedicates attention to frequently confused word pairs, notably “affect” and “effect․” This distinction is crucial for precise writing, a core principle championed by Strunk & White․

Generally, “affect” functions as a verb, meaning to influence or produce a change in something․ For example, “The weather will affect our plans․” Conversely, “effect” is typically a noun, denoting the result of a change․ Consider, “The effect of the rain was a cancelled picnic․”

However, the guide acknowledges “effect” can also be a verb, meaning to bring about or accomplish, though this usage is less common․ The fourth edition stresses careful consideration of intended meaning․ Mastering this nuance, as detailed in the eBook and NOOK versions, significantly enhances clarity and demonstrates a command of English grammar․

Commonly Misused Words: Lie vs․ Lay

The Elements of Style, accessible in PDF, NOOK, and eBook formats, consistently highlights the confusion surrounding “lie” and “lay” as a common writing error․ This distinction, emphasized by Strunk & White, is fundamental to correct grammar․

“Lie” means to recline or rest, and it does not take a direct object․ Its principal parts are lie, lay, lain, lying․ For instance, “I will lie down for a nap․” “Lay,” however, means to put or place something down, and requires a direct object․ Its forms are lay, laid, laid, laying․ Example: “Please lay the book on the table․”

The fourth edition clarifies that the past tense of “lie” is “lay,” which further complicates matters․ The guide stresses careful attention to whether an object receives the action․ Understanding this, as detailed within the comprehensive PDF guide, is vital for clear and accurate communication, improving writing quality significantly․

Commonly Misused Words: Its vs․ It’s

The Elements of Style, readily available as a PDF, NOOK, or eBook, dedicates specific attention to the frequent misuse of “its” and “it’s․” This distinction, a core tenet of clear writing as outlined by Strunk & White, often trips up even experienced writers․

“Its” is a possessive pronoun, indicating ownership․ It shows that something belongs to “it․” For example, “The dog wagged its tail․” Crucially, “its” never contains an apostrophe in this context․ Conversely, “it’s” is a contraction of “it is” or “it has․” The apostrophe signifies missing letters․

The fourth edition emphasizes that substituting “it is” for “it’s” can quickly reveal if the contraction is used correctly․ If the sentence doesn’t make sense with “it is,” then “its” is likely the appropriate form․ Mastering this nuance, as detailed in the PDF version, is essential for polished and professional writing, avoiding common grammatical errors․

Availability and Formats (PDF, NOOK, eBook)

The Elements of Style, Fourth Edition, enjoys widespread accessibility across multiple digital platforms․ Recognizing the evolving needs of modern readers, this essential guide is conveniently available as a PDF for easy download and offline access․ This format preserves the integrity of Strunk & White’s work, offering a faithful reproduction of the printed text․

Beyond the PDF, the book is also fully compatible with NOOK devices and accessible through the free NOOK App, providing a seamless reading experience on various devices․ Furthermore, it’s readily available as an eBook through My Digital Library and other major eBook retailers․

This broad availability ensures that writers, students, and editors can readily consult this classic style guide, regardless of their preferred reading method․ The digital formats maintain the book’s enduring relevance in today’s tech-driven publishing landscape, making its wisdom universally accessible․

Influence and Criticism of the Style Guide

The Elements of Style has profoundly influenced American English writing, becoming one of the most widely prescribed style guides since its initial publication․ Generations of writers and students have embraced its concise rules and principles, shaping their approach to clarity and conciseness․

However, the guide hasn’t been without its critics․ Some argue that its prescriptive nature can stifle creativity and individuality, advocating for a more flexible approach to language․ Others point to evolving linguistic norms, suggesting that some of its rules are outdated or overly rigid․

Despite these criticisms, its impact remains undeniable․ The Fourth Edition PDF continues to be a valuable resource, prompting discussions about effective writing and stylistic choices․ Its enduring popularity speaks to its core message: that clear, precise communication is paramount, even amidst evolving language trends․ The book’s legacy lies in its ability to spark critical thinking about language and style․

Modern Relevance in Digital Publishing

Despite being rooted in traditional print, The Elements of Style, particularly in its accessible Fourth Edition PDF format, retains significant relevance in today’s digital publishing landscape․ The core principles of clarity, conciseness, and precise language are even more crucial online, where readers scan content quickly and attention spans are limited․

In the age of SEO and content marketing, well-structured, easily understandable writing is paramount for both user engagement and search engine rankings․ The guide’s emphasis on strong verbs, active voice, and eliminating unnecessary words directly translates to effective web content․

While the “Elements of Internet Style” attempts to adapt the principles, the foundational rules remain timeless․ The PDF version allows for easy access and portability, making it a convenient resource for bloggers, content creators, and digital marketers․ Its enduring value lies in its ability to promote effective communication, regardless of the medium․

gateron switches guide

Gateron Switches Guide: A Comprehensive Overview (Updated 02/08/2026)

Gateron switches deliver a smooth‚ tactile typing experience‚ offering diverse options like Red‚ Blue‚ Brown‚ Black‚ Yellow‚ and Green․ They are generally
smoother than Cherry MX‚ though lifespan is 50 million keystrokes compared to Cherry MX’s 100 million․

Gateron switches have rapidly become a prominent force in the mechanical keyboard world‚ celebrated for delivering a premium typing experience at a more accessible price point․ Initially gaining recognition as a cost-effective alternative to the industry-standard Cherry MX switches‚ Gateron has since evolved‚ establishing itself with innovative designs and a diverse range of switch types․

These switches cater to a broad spectrum of preferences‚ encompassing linear‚ tactile‚ and clicky options – including popular choices like Red‚ Brown‚ Blue‚ Black‚ Yellow‚ and Green․ Beyond the core offerings‚ Gateron continually introduces new variations‚ such as the Gateron Pro and Ink series‚ pushing the boundaries of smoothness‚ sound‚ and overall feel․ A key advantage lies in their compatibility with hot-swappable keyboards‚ allowing for easy customization and experimentation․ Gateron’s commitment to quality and innovation makes them a compelling choice for both newcomers and seasoned mechanical keyboard enthusiasts․

What are Mechanical Keyboard Switches?

Mechanical keyboard switches are the individual components beneath each keycap that register a keystroke․ Unlike membrane keyboards which rely on pressure pads‚ mechanical switches utilize physical mechanisms to actuate‚ providing a distinct tactile feel‚ audible feedback‚ and enhanced durability․ These switches consist of a housing‚ stem‚ spring‚ and contacts․

The core difference between switch types lies in their actuation method – linear switches offer a smooth‚ consistent press‚ tactile switches provide a noticeable bump when activated‚ and clicky switches combine a tactile bump with an audible click․ Factors like actuation force (the amount of pressure needed to register a keypress) and travel distance (how far the key needs to be pressed) also influence the typing experience․ Mechanical switches boast a significantly longer lifespan‚ often rated for 50 to 100 million keystrokes‚ making them a worthwhile investment for frequent typists and gamers․

Gateron vs․ Cherry MX: A Key Comparison

Gateron switches have emerged as a popular alternative to the industry-standard Cherry MX switches‚ offering a compelling blend of performance and affordability․ Generally‚ Gateron switches are known for being smoother in operation than their Cherry MX counterparts‚ providing a more fluid typing experience․ However‚ a key distinction lies in durability; Cherry MX switches typically boast a lifespan of 100 million keystrokes‚ while most standard Gateron switches are rated for 50 million․

Regarding sound‚ Cherry MX Blue switches have a softer click compared to the sharper‚ louder click of Gateron Blue switches․ While Gateron offers a wide variety of switch types mirroring Cherry MX (Red‚ Brown‚ Black‚ etc․)‚ there are also unique Gateron options like the Milky Yellow Pro․ It’s important to note that Gateron and Cherry MX aren’t always directly equivalent; for example‚ Gateron Clear switches are linear‚ unlike Cherry MX Clear which are tactile․

Gateron Switch Types: An Overview

Gateron offers a diverse range of mechanical keyboard switches catering to various preferences․ Linear switches‚ such as the Gateron Red‚ Yellow‚ and Black‚ provide a smooth‚ consistent keypress without tactile feedback․ The Gateron Yellow is particularly popular‚ offering a slightly heavier actuation force than the Red‚ and the G Pro 2․0 Yellow boasts a quieter rebound․ Heavier still‚ the Black switch requires more force to actuate․

Tactile switches‚ like the Gateron Brown and Clear‚ deliver a noticeable bump during the keypress‚ providing feedback without the audible click․ The Clear switch offers a stronger tactile response․ Finally‚ Clicky switches – Gateron Blue and Green – combine tactile feedback with a distinct audible click․ The Green switch is a heavier-actuation version of the Blue․ Gateron also produces premium options like the Ink switches‚ known for their enhanced feel and materials․

Linear Gateron Switches

Linear Gateron switches – Red‚ Yellow‚ and Black – provide a smooth‚ consistent keypress without tactile feedback‚ favored for gaming and fast typing experiences․

Gateron Red Switches: Characteristics and Use Cases

Gateron Red switches are a popular choice within the mechanical keyboard community‚ renowned for their linear operation and relatively light actuation force of 45 grams․ This makes them exceptionally smooth and easy to press‚ requiring minimal effort for each keystroke․ Unlike tactile or clicky switches‚ Reds offer no tactile bump or audible click‚ resulting in a quiet and fluid typing experience․

Their lightweight nature makes them particularly well-suited for gamers‚ as they allow for rapid and repeated key presses without fatigue․ This responsiveness is crucial in fast-paced games where quick reactions are essential․ However‚ Gateron Reds aren’t limited to gaming; they are also favored by typists who prefer a smooth and effortless typing feel․

While smoother than Cherry MX Reds‚ Gateron Red switches are designed for a lifespan of 50 million keystrokes‚ compared to the 100 million offered by Cherry MX․ Despite this difference‚ they remain a reliable and cost-effective option for building or upgrading a mechanical keyboard․

Gateron Yellow Switches: Smoothness and Quiet Rebound

Gateron Yellow switches have gained significant popularity among keyboard enthusiasts‚ celebrated for their smooth linear feel and relatively quiet operation․ Similar to Gateron Red switches‚ Yellows are linear‚ meaning they lack a tactile bump or audible click․ However‚ they feature a slightly heavier actuation force of 50 grams‚ providing a more substantial feel without being overly demanding․

This increased weight contributes to a different typing experience‚ often described as more deliberate and controlled․ The “G Pro 2․0 Yellow” variant specifically boasts a quieter rebound sound compared to earlier Gateron Yellow iterations‚ making them ideal for environments where noise is a concern․ They are a fantastic middle ground for those seeking smoothness without sacrificing all feedback․

Gamers and typists alike appreciate the responsiveness and comfort of Gateron Yellows․ While offering a smooth experience‚ remember they share the 50 million keystroke lifespan common to many Gateron switches‚ compared to Cherry MX’s 100 million․

Gateron Black Switches: Heavier Actuation Force

Gateron Black switches represent the heavier end of the linear Gateron spectrum‚ requiring a substantial 60 grams of actuation force․ These switches are designed for users who prefer a more deliberate and resistant keypress‚ minimizing accidental activations and offering a solid‚ grounded typing experience․ They are a popular choice among gamers who desire precise control and reduced fatigue during extended play sessions․

The increased actuation force means you need to apply more pressure to register a keystroke‚ which can be beneficial for preventing unintentional inputs․ Like other Gateron linear switches – Red and Yellow – Blacks lack any tactile feedback or audible click‚ providing a consistently smooth and quiet operation․

However‚ it’s important to note that the 50 million keystroke lifespan is standard for Gateron switches‚ differing from the 100 million offered by some Cherry MX alternatives․ If you prioritize a robust‚ weighty feel and precise control‚ Gateron Black switches are an excellent option․

Gateron Milky Yellow Pro Switches: Enhanced Smoothness

Gateron Milky Yellow Pro switches build upon the already popular Gateron Yellow‚ focusing on delivering an even smoother and refined typing experience․ These switches are a linear type‚ meaning they offer a consistent keypress without any tactile bump or audible click․ The “Pro” designation signifies improvements in materials and manufacturing processes‚ resulting in reduced friction and a more fluid feel․

Compared to the standard Gateron Yellow‚ the Milky Yellow Pro boasts a quieter rebound sound‚ making them a preferred choice for users seeking a discreet yet responsive switch․ They maintain the 50g actuation force of the original Yellow‚ providing a balanced weight that’s neither too light nor too heavy․

These switches are frequently showcased in hot-swappable keyboard builds‚ like the KBD67 Lite‚ demonstrating their compatibility with a wide range of keyboard kits․ They represent a step up in quality and smoothness within the Gateron linear family‚ appealing to enthusiasts who prioritize a premium typing feel․

Tactile Gateron Switches

Gateron offers tactile switches like Brown and Clear‚ providing a noticeable bump during keypresses․ These are ideal for typists desiring feedback and confirmation․

Gateron Brown Switches: A Balanced Tactile Experience

Gateron Brown switches are a popular choice for those seeking a balanced tactile experience in a mechanical keyboard․ They provide a noticeable bump when the actuation point is reached‚ offering feedback without the loud click of Blue switches․ This makes them versatile‚ suitable for both typing and gaming‚ appealing to a broad range of users․

The actuation force of Gateron Browns is moderate‚ typically around 45 grams‚ making them comfortable for extended typing sessions․ This weight prevents accidental key presses while remaining light enough for quick reactions during gameplay․ Many users appreciate their quiet operation compared to clicky switches‚ making them suitable for shared office spaces or quieter environments․

Compared to Cherry MX Brown switches‚ Gateron Browns are often praised for their smoothness and consistent tactile feedback․ They represent a cost-effective alternative without significantly compromising on quality or performance‚ making them an excellent entry point into the world of tactile mechanical switches․

Gateron Clear Switches: Stronger Tactile Feedback

Gateron Clear switches deliver a more pronounced tactile experience compared to Gateron Brown switches‚ catering to users who prefer a stronger‚ more definitive bump when typing․ They are a fantastic option for those who want clear feedback with each keystroke‚ enhancing typing accuracy and providing a satisfying tactile response․

With an actuation force of approximately 55 grams‚ Gateron Clears require slightly more force to activate than Browns‚ which can help reduce accidental key presses․ This increased resistance also contributes to a more substantial tactile bump‚ making it easier to feel when a key has been registered․ They are often favored by typists who enjoy a more deliberate and tactile typing experience․

Notably‚ Gateron Clear switches are linear‚ while Cherry MX Clear switches are tactile․ This distinction is crucial when considering alternatives․ They offer a compelling balance between tactile feedback and operational force‚ making them a solid choice for enthusiasts seeking a more engaging mechanical keyboard experience․

Clicky Gateron Switches

Gateron clicky switches‚ like Blue and Green‚ provide a loud‚ distinct click and tactile bump with each keystroke‚ ideal for users desiring audible feedback․

Gateron Blue Switches: Loud and Distinct Click

Gateron Blue switches are renowned for their incredibly audible and tactile experience‚ making them a favorite among typists who enjoy a pronounced feedback mechanism․ These switches feature a distinct “click” sound accompanied by a noticeable tactile bump when the actuation point is reached․ This combination provides both an auditory and physical confirmation of each keypress‚ enhancing typing accuracy and speed for some users․

Compared to Cherry MX Blue switches‚ Gateron Blues often present a sharper and louder click‚ appealing to those who prefer a more assertive sound profile․ While both offer a similar tactile experience‚ the Gateron variant tends to be more pronounced in its auditory feedback․ This makes them a popular choice for users who want to clearly hear and feel every keystroke․

However‚ the loudness of Gateron Blue switches can be a drawback in shared office spaces or quiet environments․ They are best suited for individuals who work in private settings or those who don’t mind the audible click․ Despite this‚ their responsiveness and tactile feedback make them a compelling option for enthusiasts and dedicated typists alike․

Gateron Green Switches: Heavier Clicky Option

Gateron Green switches represent a heavier-duty alternative within the clicky switch family‚ building upon the characteristics of the popular Gateron Blue switches․ While sharing the same audible click and tactile bump‚ Greens require a significantly higher actuation force – typically around 80g compared to the Blue’s 60g․ This increased resistance provides a more substantial and deliberate feel with each keypress‚ potentially reducing accidental actuations and offering a more controlled typing experience․

This heavier weighting makes Gateron Greens particularly appealing to users who prefer a more robust and demanding switch․ They can be beneficial for those who bottom out their keys frequently or desire a switch that requires more intentional effort to activate․ However‚ the increased force can also lead to fatigue during extended typing sessions‚ so they aren’t ideal for everyone․

Essentially‚ Gateron Greens offer the satisfying click of the Blues‚ but with added resistance‚ catering to a specific preference for a heavier‚ more tactile feel․ They are a solid choice for users seeking a clicky switch with a more substantial presence․

Gateron Switch Features & Technology

Gateron continually innovates with Pro switches and premium Ink lines‚ enhancing smoothness and feel․ They also boast broad hot-swappable socket compatibility․

Gateron Pro Switches: Innovations and Improvements

Gateron Pro switches represent a significant leap forward in mechanical keyboard technology‚ focusing on refined smoothness and enhanced durability․ These switches build upon the foundation of standard Gateron switches‚ incorporating several key innovations to elevate the typing experience․ Notably‚ the G Pro 2․0 Yellow variant features a quieter rebound sound compared to previous Gateron Yellow iterations‚ appealing to users seeking a less noisy linear switch․

Improvements extend to the internal construction‚ with a focus on tighter tolerances and optimized materials․ This results in reduced wobble and a more consistent keypress feel across the entire keyboard․ The Pro series aims to bridge the gap between Gateron’s affordability and the premium feel of higher-end switches․ They are designed for hot-swappable keyboards‚ ensuring easy customization and compatibility with a wide range of keyboard kits and builds‚ supporting Cherry‚ Outemu‚ Gateron‚ and Kailh switches․

Gateron Ink Switches: Premium Materials and Feel

Gateron Ink switches are positioned as a premium offering within the Gateron lineup‚ distinguished by their use of high-quality materials and a focus on delivering a superior tactile and auditory experience․ These switches utilize a unique blend of polymers and advanced manufacturing processes to achieve exceptional smoothness and responsiveness․ The “Ink” designation refers to the distinct sound profile these switches produce – a deeper‚ more resonant tone compared to standard Gateron switches․

Available in various types‚ including Black Ink V2‚ Red Ink‚ and Yellow Ink‚ each variant offers a unique feel and actuation force․ The housings are crafted with precision‚ minimizing wobble and ensuring consistent key travel․ Gateron Ink switches are highly sought after by keyboard enthusiasts who prioritize both performance and aesthetics‚ often paired with custom keycaps and modified stabilizers to create a truly personalized typing experience․ They are fully compatible with hot-swappable sockets․

Hot-Swappable Compatibility: Gateron and Hot-Swap Sockets

Gateron switches are exceptionally well-suited for use with hot-swappable keyboards‚ a feature rapidly gaining popularity among mechanical keyboard users․ Hot-swap sockets‚ such as those offered by Kailh and Millmax‚ allow for the easy installation and removal of switches without requiring soldering․ This provides unparalleled customization options‚ enabling users to experiment with different switch types and find their perfect feel․

The standard MX-style pins on Gateron switches ensure broad compatibility with the vast majority of hot-swap sockets currently available․ This means you can effortlessly swap between Gateron Red‚ Blue‚ Brown‚ or any other Gateron variant without any modification to the keyboard itself․ This feature is particularly appealing to those new to mechanical keyboards‚ allowing them to explore the world of switches without the commitment of soldering․ Many keyboards are designed to support Cherry‚ Outemu‚ Gateron‚ and Kailh switches․

Gateron Switch Specifications

Gateron switches vary in actuation force‚ travel distance‚ and lifespan; commonly 50 million keystrokes‚ though some‚ like Cherry MX‚ reach 100 million․

Actuation Force: Understanding Switch Weight

Actuation force‚ measured in grams (gf)‚ dictates how much pressure is needed to register a keystroke․ Gateron switches cater to diverse preferences with varying weights․ Lighter switches‚ like Gateron Red (45gf) and Yellow (50gf)‚ require minimal effort‚ ideal for fast typing and gaming‚ reducing fatigue during extended use․ Heavier options‚ such as Gateron Black (60gf) and Green (80gf)‚ demand more deliberate presses‚ preventing accidental key activations and offering a more substantial feel․

Gateron Clear switches‚ a tactile option‚ typically have an actuation force of 55gf․ Understanding these differences is crucial for selecting a switch that aligns with your typing style and desired experience․ Lower actuation forces are generally preferred by gamers for quicker response times‚ while typists might favor heavier switches for increased accuracy and tactile feedback․ The Gateron Pro Yellow‚ for example‚ offers a slightly heavier feel than standard yellows․

Travel Distance: How Deep the Key Presses

Travel distance refers to how far a key must be pressed downwards to register an input․ Most Gateron switches‚ mirroring industry standards like Cherry MX‚ have a total travel distance of approximately 4mm․ This is divided into two key components: the actuation point – where the keypress is registered – and the bottom-out point – when the key is fully depressed;

Typically‚ Gateron switches actuate around 2mm‚ meaning a keystroke is registered before the key is fully pressed down․ This contributes to faster response times‚ particularly beneficial in gaming․ While the total travel distance remains consistent across most Gateron models‚ the feel can vary due to differences in spring weight and switch design․ Some users prefer shorter travel distances for quicker actuation‚ while others appreciate the full 4mm for a more deliberate and satisfying typing experience․ Hot-swappable keyboards easily allow experimentation with different switches and travel feels․

Lifespan: Keystroke Durability (50 Million vs 100 Million)

A crucial factor when evaluating mechanical keyboard switches is their lifespan‚ measured in keystrokes․ Gateron switches are generally rated for 50 million keystrokes‚ a robust number for most users‚ ensuring years of reliable performance․ However‚ this is often contrasted with Cherry MX switches‚ which boast a lifespan of 100 million keystrokes․

While 50 million keystrokes may seem lower‚ it still represents substantial durability․ For typical users‚ reaching this limit would take many years of heavy use․ The difference primarily stems from material choices and manufacturing processes․ Despite the difference‚ Gateron switches offer excellent value‚ delivering a premium typing experience at a more accessible price point․ Furthermore‚ proper care‚ like avoiding excessive force‚ can extend the lifespan of any mechanical switch‚ regardless of its initial rating․

Modding Gateron Switches

Gateron switches can be customized through lubrication to improve smoothness and sound‚ or filming to reduce wobble and enhance the overall typing feel․

Lubrication: Improving Smoothness and Sound

Lubricating Gateron switches is a popular modding technique to significantly enhance their smoothness and refine their sound profile․ Applying a thin layer of lubricant to the internal components – specifically the stem‚ housing‚ and spring – reduces friction between moving parts․ This results in a noticeably smoother keypress‚ minimizing scratchiness and improving the overall typing experience․

Different lubricants offer varying levels of viscosity and sound dampening; Krytox 205g0 is a commonly recommended lubricant for its excellent smoothness and minimal impact on switch feel․ For those prioritizing sound‚ thicker lubricants like Krytox GPL 105 can further dampen noise․ Careful application is crucial; excessive lubricant can lead to a mushy feel or even switch malfunction․ The process involves disassembling the switch‚ applying the lubricant with a fine brush‚ and reassembling it‚ demanding patience and precision for optimal results․

Filming: Reducing Wobble and Enhancing Sound

Switch filming is a modification technique used to address wobble in Gateron switches‚ improving stability and potentially enhancing sound․ Films are thin plastic or polycarbonate sheets placed between the top and bottom housings of the switch․ These films fill the small gap‚ minimizing housing movement and reducing unwanted side-to-side wobble during keypresses․

This results in a more solid and consistent typing feel‚ as well as a cleaner sound profile․ Different film materials affect the sound; polycarbonate films generally produce a brighter sound‚ while softer materials like TX films offer a more dampened tone․ Installation requires careful alignment of the film within the switch housing․ While filming can significantly improve switch feel and sound‚ it’s often recommended after lubrication for optimal results‚ creating a refined and premium mechanical keyboard experience․

Choosing the Right Gateron Switch

Selecting the ideal Gateron switch depends on your needs: linear for gaming‚ tactile for balanced typing‚ or clicky for audible feedback and distinct key presses․

Gaming vs․ Typing: Which Switch is Best?

For gaming‚ linear Gateron switches – like Reds or Yellows – are often preferred due to their smooth‚ consistent keypresses without tactile bumps or clicks․ This allows for rapid‚ uninterrupted actions‚ crucial in fast-paced games․ The lighter actuation force of Red switches can reduce fatigue during extended gaming sessions‚ while Yellows offer a slightly heavier feel․

However‚ for typing‚ the “best” switch is more subjective․ Tactile switches‚ such as Browns or Clears‚ provide feedback that confirms each keypress‚ potentially increasing typing accuracy and speed․ The tactile bump can be satisfying and help prevent bottoming out․ Clicky switches‚ like Blues or Greens‚ offer both tactile feedback and an audible click‚ which some typists find incredibly satisfying‚ though they can be noisy․

Ultimately‚ the choice depends on personal preference․ Some gamers enjoy the tactile feedback of Browns‚ while some typists prefer the speed of Reds․ Experimentation is key to finding the switch that best suits your individual style and needs․

Sound Preference: Linear‚ Tactile‚ or Clicky?

Gateron switches offer a wide spectrum of sound profiles‚ catering to diverse preferences․ Linear switches‚ like Reds‚ Blacks‚ and Yellows‚ are the quietest‚ producing a smooth‚ consistent sound with minimal noise․ They’re ideal for noise-sensitive environments or those who prefer a discreet keyboard․

Tactile switches‚ such as Browns and Clears‚ generate a noticeable “thock” sound upon actuation‚ resulting from the tactile bump․ This sound is moderate in volume and provides auditory feedback․ The Gateron Clear switches‚ while tactile‚ are generally quieter than their Cherry MX counterparts․

Clicky switches – Blues and Greens – are the loudest‚ featuring a distinct‚ high-pitched click with each keypress․ Cherry MX Blues have a softer click‚ while Gateron Blues deliver a sharper‚ louder sound․ These are best suited for those who enjoy a pronounced auditory experience‚ but may not be ideal for shared spaces․

Consider your environment and personal preference when selecting a switch based on sound․

manual for living

Life’s complexities demand guidance; a “manual” offering philosophical insights from various traditions, like those explored by Baggini, provides a framework for navigating existence.

Why We Seek Guidance

Humans inherently grapple with fundamental questions about how to live a meaningful life, a pursuit documented throughout history. The desire for a “manual,” as highlighted in Baggini’s work, stems from a recognition that life isn’t straightforward. We seek direction when facing uncertainty, adversity, or simply the overwhelming nature of existence.

Philosophical texts, like those of Epictetus, offer pragmatic reflections on serenity and joy, providing tools for navigating challenges. This search isn’t about finding easy answers, but rather a framework for thoughtful consideration and informed decision-making, acknowledging life’s inherent complexities and the absence of a pre-defined path.

The Limitations of Traditional Advice

Conventional wisdom often falls short when confronting life’s nuanced challenges. While well-intentioned, traditional advice can be overly simplistic or culturally bound, failing to address individual circumstances. Baggini’s “Life: A User’s Manual” acknowledges this, presenting philosophical perspectives as starting points for personal exploration, not prescriptive rules.

Furthermore, readily available self-help often lacks the depth and critical thinking fostered by philosophical inquiry. A manual grounded in ancient wisdom, like Stoicism or Epicureanism, encourages a deeper understanding of values and principles, moving beyond superficial solutions and promoting lasting well-being.

Part 1: Foundational Philosophies

Exploring Stoicism, Epicureanism, and Greek thought provides essential frameworks for a fulfilling life, offering timeless wisdom as presented in Baggini’s comprehensive guide.

Stoicism: Embracing Virtue and Acceptance

Stoicism, as a pragmatic guide to serenity, emphasizes focusing on what we can control – our thoughts and actions – and accepting what we cannot, mirroring Epictetus’ teachings. This philosophy isn’t about suppressing emotions, but understanding their source and responding with reason.

The Dichotomy of Control is central; distinguishing between internal and external factors allows for peace. Negative Visualization, contemplating potential setbacks, prepares us for adversity and diminishes its sting. Stoicism, presented in modern manuals, offers a robust toolkit for navigating life’s inevitable challenges with resilience and virtue, fostering inner peace amidst chaos.

The Dichotomy of Control

Central to Stoic practice, the Dichotomy of Control distinguishes between elements within our power – our judgments, values, and efforts – and those outside it, like external events or others’ actions. Focusing energy solely on the controllable fosters tranquility and reduces frustration.

Attempting to control the uncontrollable leads to suffering; acceptance, however, doesn’t imply passivity. Instead, it frees us to act virtuously within our sphere of influence. This principle, highlighted in Epictetus’ work, provides a practical framework for navigating life’s uncertainties and cultivating inner resilience, a cornerstone of a well-lived life.

Practicing Negative Visualization

A Stoic technique, negative visualization involves contemplating potential setbacks – loss, illness, or disappointment – not to dwell on negativity, but to appreciate present blessings and diminish their emotional sting. By mentally preparing for adversity, we lessen its impact when it inevitably arrives.

This isn’t pessimism; it’s pragmatic realism. Imagining the loss of something valued highlights its importance, fostering gratitude. It also reduces the fear of future misfortune, allowing for a more serene and accepting approach to life’s inherent uncertainties, ultimately contributing to a more robust and peaceful existence.

Epicureanism: The Pursuit of Tranquility

Contrary to popular belief, Epicureanism isn’t about hedonistic indulgence. It centers on ataraxia – freedom from disturbance – and aponia – the absence of physical pain. True pleasure, for Epicurus, arises from prudence, friendship, and a simple life. Avoiding pain, both physical and mental, is paramount.

This philosophy emphasizes minimizing suffering through careful choices and cultivating strong social bonds. It’s about discerning which desires are natural and necessary, and which are vain and ultimately lead to dissatisfaction. Tranquility isn’t found in excess, but in moderation and contentment.

Understanding Pleasure and Pain

Epicureanism distinguishes between different types of pleasure and pain. Natural and necessary pleasures, like food and shelter, should be satisfied moderately. Natural but unnecessary pleasures, like luxurious meals, should be enjoyed with restraint. Vain pleasures, such as wealth and fame, are to be avoided as they bring anxiety.

Pain, similarly, is categorized. Physical pain is unavoidable, but mental anguish stems from false beliefs and fears – particularly the fear of death and the gods. By understanding the nature of pleasure and pain, and by minimizing unnecessary suffering, one can achieve a state of lasting tranquility and contentment, the ultimate Epicurean goal.

The Importance of Friendship

Epicurean philosophy elevates friendship to a paramount virtue, considering it a crucial component of a happy life. Friendship isn’t merely enjoyable; it provides security, trust, and mutual support, diminishing anxieties and fostering a sense of belonging. Genuine friends offer honest feedback and shared experiences, enriching one’s existence.

Epicurus believed that having a circle of reliable friends is more valuable than any material possession or social status. These relationships offer a safe haven from the uncertainties of life, allowing individuals to navigate challenges with greater resilience and find deeper meaning in their daily experiences.

Ancient Greek Philosophy: Socrates and Plato

Ancient Greek thinkers, particularly Socrates and Plato, laid foundational stones for ethical living. Their inquiries into virtue, justice, and the ideal state continue to resonate today. Socrates’ relentless questioning – the Socratic Method – encourages critical self-examination, challenging assumptions and pursuing truth through dialogue.

Plato, Socrates’ student, expanded upon these ideas with his Theory of Forms, positing a realm of perfect ideals that shape our imperfect reality. Understanding these forms, and striving towards them, provides a moral compass for navigating life’s complexities and achieving a fulfilling existence.

The Socratic Method

The Socratic Method isn’t about imparting answers, but cultivating self-awareness through rigorous questioning. It’s a process of dismantling preconceived notions and exposing underlying contradictions in beliefs. This relentless inquiry, though potentially unsettling, is crucial for genuine understanding and ethical decision-making.

Applying this method to personal challenges – asking “why” repeatedly, examining assumptions, and considering alternative perspectives – functions as a powerful tool for self-improvement. It’s a dynamic approach to problem-solving, fostering intellectual humility and a commitment to lifelong learning, essential components of a well-lived life.

Plato’s Theory of Forms

Plato’s Theory of Forms posits a realm of perfect, eternal archetypes underlying the imperfect, transient world we perceive. While abstract, this concept offers a framework for striving towards ideals – justice, beauty, goodness – rather than settling for flawed imitations. Recognizing the limitations of the material world encourages a focus on cultivating inner virtues.

For a “manual for living,” this translates to seeking principles beyond fleeting pleasures or societal norms. It suggests aligning oneself with these higher Forms, pursuing knowledge and wisdom as pathways to a more meaningful and fulfilling existence, transcending the everyday.

Part 2: Navigating Life’s Challenges

Life inevitably presents adversity; philosophical tools, like Stoicism and understanding emotional regulation, offer resilience and meaning amidst suffering, aiding practical living.

Dealing with Adversity

Life’s inherent challenges necessitate robust coping mechanisms. Drawing from philosophical traditions, particularly Stoicism as presented in Epictetus’s work, we can cultivate resilience. This isn’t about avoiding suffering, but rather altering our relationship to it.

The concept of post-traumatic growth suggests adversity can foster positive change. Finding meaning within suffering, rather than simply enduring it, becomes paramount. A pragmatic approach, focusing on what we can control – our responses – is key. Baggini’s “Life: A Users Manual” emphasizes this search for guidance, offering perspectives to navigate difficult times and build inner strength.

Resilience and Post-Traumatic Growth

Adversity, while painful, can be a catalyst for profound personal evolution. Resilience isn’t simply bouncing back, but adapting and growing through hardship. Post-traumatic growth acknowledges that suffering can lead to increased strength, deeper appreciation, and a renewed sense of purpose.

Philosophical frameworks, like Stoicism, offer tools to cultivate this resilience. By focusing on internal virtue and accepting what lies beyond our control, we lessen suffering’s grip. Baggini’s work highlights the enduring relevance of these ancient philosophies in modern life, providing a “manual” for navigating challenges and fostering positive transformation.

Finding Meaning in Suffering

The human experience inevitably includes suffering, but its meaning isn’t inherent; it’s constructed. Philosophers throughout history have grappled with this question, seeking ways to reconcile pain with a purposeful life. Rather than avoiding hardship, a “manual for living” encourages us to explore its potential for growth.

Baggini’s compilation of philosophical wisdom suggests that meaning can be found through values, connection, and contribution. Even in the face of adversity, identifying what truly matters and acting in accordance with those principles can transform suffering into a source of strength and wisdom, echoing Epictetus’ teachings.

Managing Emotions

Emotions are integral to the human experience, yet often feel overwhelming. A “manual for living,” drawing on philosophical insights, doesn’t advocate for emotional suppression, but rather for understanding and regulation. Recognizing the origins and impact of our feelings is the first step towards skillful management.

This involves cultivating self-awareness and employing techniques like mindfulness – observing emotions without judgment. Philosophical frameworks, such as Stoicism, offer strategies for detaching from reactive impulses and responding with reason. Ultimately, emotional intelligence is key to navigating life’s challenges with serenity and joy.

Understanding Emotional Regulation

Emotional regulation isn’t about eliminating feelings, but about responding to them adaptively. It’s the ability to manage the intensity and duration of emotional experiences, preventing them from overwhelming us. This skill involves recognizing emotional triggers and developing coping mechanisms.

Philosophical approaches, like those found in Epictetus’ teachings, emphasize focusing on what we can control – our reactions – rather than external events. Techniques include cognitive reappraisal (reframing thoughts) and practicing self-compassion. Mastering emotional regulation fosters resilience and enhances overall well-being, contributing to a more peaceful existence.

The Role of Mindfulness

Mindfulness, a core practice for emotional well-being, involves paying attention to the present moment without judgment. It’s about observing thoughts and feelings as they arise, acknowledging them without getting carried away. This practice, rooted in Eastern philosophies, aligns with the Stoic emphasis on accepting what is.

Cultivating mindfulness helps us detach from rumination and worry, fostering a sense of calm and clarity; Regular practice can enhance self-awareness, allowing us to respond to challenges with greater equanimity. It’s a powerful tool for navigating life’s inevitable difficulties, promoting inner peace and resilience.

Relationships and Social Connection

Human beings are inherently social creatures, and strong relationships are vital for a fulfilling life. Philosophy emphasizes the importance of empathy – understanding and sharing the feelings of others – as a cornerstone of healthy interactions. Building healthy boundaries is equally crucial, defining what we are comfortable with and communicating those needs effectively.

Epicureanism highlights the value of friendship, recognizing it as a significant source of pleasure and tranquility. Nurturing these connections requires effort, honesty, and a willingness to compromise. Meaningful relationships provide support, belonging, and a sense of purpose, enriching our overall well-being.

Building Healthy Boundaries

Establishing firm yet flexible boundaries is essential for protecting your emotional and mental well-being. This involves recognizing your own limits – what you’re comfortable with and what depletes your energy – and communicating those needs assertively. Boundaries aren’t about building walls, but about defining where you end and another person begins.

Healthy boundaries foster mutual respect in relationships. Learning to say “no” without guilt, and to prioritize self-care, are vital skills. It’s about acknowledging your own value and refusing to accept treatment that undermines it. This proactive approach cultivates healthier, more balanced connections.

The Importance of Empathy

Empathy, the ability to understand and share the feelings of another, is a cornerstone of meaningful human connection. It moves beyond simple sympathy, requiring genuine effort to see the world from another’s perspective. Cultivating empathy strengthens relationships, fostering trust and compassion;

A life guided by empathy reduces conflict and promotes understanding. It allows for more effective communication and collaboration, as you’re better equipped to anticipate and respond to others’ needs. Recognizing shared humanity, even amidst disagreement, builds bridges and creates a more harmonious existence, enriching both individual lives and society.

Part 3: Practical Tools for Living

Applying philosophical principles requires actionable strategies; goal setting, rational decision-making, and habit formation offer tangible methods for a more purposeful life.

Goal Setting and Purpose

Establishing a meaningful existence necessitates identifying core values and aligning actions with them. This process, akin to crafting a “life plan,” moves beyond superficial desires.

Philosophical inquiry, as presented in resources like Baggini’s work, encourages introspection to uncover what truly matters. It’s about defining a personal philosophy—a guiding principle—rather than simply chasing external achievements.

A purposeful life isn’t a destination but a continuous journey of self-discovery and deliberate action. It requires consistent evaluation and adjustment, ensuring goals remain aligned with evolving values and a broader sense of meaning.

Identifying Your Values

Uncovering your fundamental values is paramount to purposeful living, forming the bedrock of authentic decision-making. This introspective process, highlighted in philosophical guides, demands honest self-assessment.

Consider what principles consistently guide your choices, even when unobserved. What qualities do you admire in others? What activities bring genuine fulfillment, beyond fleeting pleasure? These reflections reveal core values.

Values aren’t merely abstract ideals; they are actionable principles. Identifying them allows for the creation of a “meaningful life plan,” as suggested by Baggini, ensuring alignment between aspirations and deeply held beliefs.

Creating a Meaningful Life Plan

A life plan, rooted in identified values, transcends simple goal-setting; it’s a roadmap towards a fulfilling existence. This isn’t about rigid adherence, but a flexible framework guiding choices, acknowledging life’s unpredictable nature.

Consider long-term aspirations alongside daily actions. How can your skills and passions contribute to something larger than yourself? Baggini’s work emphasizes that life isn’t a straight path, so adaptability is key.

Regularly revisit and refine your plan, ensuring it remains aligned with evolving values and circumstances. A meaningful life isn’t found, it’s actively constructed.

Decision Making

Effective decision-making balances rationality and intuition, recognizing both have limitations. While logical analysis is crucial, dismissing gut feelings entirely can be detrimental. A “manual for living” encourages self-awareness regarding personal biases.

Be mindful of cognitive biases – systematic patterns of deviation from norm or rationality in judgment. These can cloud objectivity, leading to suboptimal choices.

Consider potential consequences, not just immediate outcomes; Philosophical frameworks offer tools for evaluating options, promoting thoughtful deliberation, and ultimately, more informed decisions aligned with core values.

Rationality vs. Intuition

A balanced approach to decision-making necessitates acknowledging both rationality and intuition. Purely rational choices, while seemingly logical, can overlook crucial emotional or contextual factors. Conversely, relying solely on intuition risks impulsivity and neglecting careful consideration.

The “manual for living” suggests viewing these not as opposing forces, but as complementary modes of thought. Rationality provides structure and analysis, while intuition offers quick assessments based on experience.

Cultivating self-awareness allows discerning when to prioritize logic and when to trust instinctive responses, leading to more holistic and effective judgments.

Avoiding Cognitive Biases

Our minds are prone to systematic errors in thinking – cognitive biases – that distort reality and impair sound judgment. Recognizing these biases is crucial for effective decision-making, a core tenet of a “manual for living.”

Confirmation bias, for example, leads us to favor information confirming existing beliefs, while anchoring bias causes over-reliance on initial data. Awareness of such pitfalls allows for more objective evaluation.

Actively seeking diverse perspectives, questioning assumptions, and employing critical thinking skills are vital strategies for mitigating the influence of these inherent mental shortcuts.

Self-Improvement and Growth

A fulfilling life isn’t static; it demands continuous self-improvement and personal growth. This involves cultivating positive habits, breaking detrimental ones, and embracing lifelong learning – essential components of a practical “manual for living.”

The power of habit, as understood through philosophical and psychological lenses, highlights the importance of consistent action. Small, incremental changes accumulate over time, leading to significant transformation.

Furthermore, a commitment to continuous learning expands our understanding of ourselves and the world, fostering adaptability and resilience in the face of life’s inevitable challenges.

The Power of Habit

Habits, both constructive and destructive, profoundly shape our daily lives and ultimately define our character. Understanding their formation and leveraging their power is crucial for self-improvement, a cornerstone of any effective “manual for living.”

Philosophical traditions emphasize the importance of intentional action. By consciously cultivating positive habits – routines aligned with our values – we gradually build a life of virtue and purpose.

Conversely, recognizing and breaking negative habits requires self-awareness and disciplined effort. This process, though challenging, unlocks the potential for lasting personal growth and well-being.

Continuous Learning

A truly fulfilling life isn’t about reaching a destination, but embracing a journey of perpetual growth and discovery. Continuous learning, therefore, forms a vital component of any practical “manual for living,” fostering adaptability and resilience in a constantly evolving world.

Philosophical inquiry encourages questioning assumptions and seeking deeper understanding. This intellectual curiosity fuels personal development and broadens our perspectives.

Engaging with new ideas, whether through formal education, reading, or simply open-minded conversation, expands our capacity for wisdom and allows us to navigate life’s complexities with greater clarity.

Part 4: Philosophical Perspectives on Modern Life

Modernity presents unique challenges; applying ancient wisdom—considering technology’s impact and the pursuit of happiness—becomes crucial for a virtuous 21st-century existence.

Technology and its Impact

The relentless advance of technology profoundly reshapes modern life, demanding philosophical scrutiny. While offering unprecedented connectivity and access to information, it simultaneously presents novel challenges to well-being and authentic living. Consider the potential for distraction, the erosion of privacy, and the cultivation of superficial relationships.

Philosophical frameworks, such as Stoicism’s emphasis on inner resilience, can provide a counterbalance to technology’s external pressures. Cultivating mindful engagement—intentionally choosing how and when to interact with technology—becomes paramount. The key lies not in rejecting technology outright, but in harnessing its power responsibly, ensuring it serves human flourishing rather than diminishing it.

The Search for Happiness

The pursuit of happiness is a central human endeavor, yet its nature remains elusive. Ancient philosophies offer diverse perspectives. Epicureanism emphasizes tranquility through minimizing pain and cultivating simple pleasures, while Stoicism locates happiness in virtue and acceptance of what we cannot control.

Modern life often equates happiness with external achievements – wealth, status, possessions – a path prone to disappointment. A “manual for living” encourages introspection: defining happiness on your terms, aligning actions with values, and fostering meaningful connections. True contentment isn’t a destination, but a byproduct of a well-lived, purposeful life.

Living a Virtuous Life in the 21st Century

Applying ancient virtues to modern challenges requires careful consideration. Epictetus’s teachings, as presented in “A Manual for Living,” remain remarkably relevant, urging focus on what lies within our control – our thoughts and actions.

Navigating a world of rapid technological change and complex social issues demands ethical grounding. Cultivating virtues like honesty, compassion, and resilience becomes paramount. A “manual” isn’t about rigid rules, but about developing a moral compass to guide decisions, fostering integrity, and contributing positively to a rapidly evolving society.

guido torres

Guido Torres: A Rising Star in Uruguayan Football

Guido Torres Mirabal, born June 8th, 2002, is a 23-year-old Uruguayan midfielder currently playing for Atenas, quickly gaining recognition for his potential․

Early Life and Background

Guido Torres Mirabal’s early life was rooted in Uruguay, where he developed a passion for football from a young age․ Details regarding his upbringing remain relatively private, but it’s clear his talent was evident early on, leading him to pursue a professional career․ He began attracting attention within Uruguayan youth football circles, showcasing skills that hinted at a promising future․

While specific details about his formative years are scarce, the available information confirms his dedication to the sport and the support system that nurtured his abilities․ His journey reflects the typical path of many aspiring Uruguayan footballers, driven by a national love for the game and a desire to represent his country on the international stage; He quickly became a standout player․

Date and Place of Birth

Guido Torres Mirabal was born on June 8th, 2002, making him currently 23 years of age as of August 2nd, 2026․ His birthplace is Uruguay, a nation renowned for its fervent football culture and consistent production of talented players․ The specific city of his birth within Uruguay hasn’t been widely publicized, maintaining a degree of privacy regarding his personal details․

This birthdate is crucial for tracking his development and potential within the footballing world, particularly in games like Football Manager 2026․ Being born in 2002 places him firmly within a generation of players poised to reach their peak years, offering significant opportunities for growth and success․ His Uruguayan origins are fundamental to his identity as a footballer․

Family and Influences

Information regarding Guido Torres’s immediate family remains largely private․ While details about his parents and siblings are not readily available in public sources, it’s reasonable to assume a supportive family environment played a role in nurturing his footballing ambitions from a young age, common for Uruguayan players․

Interestingly, the name “Torres” immediately draws comparisons to Fernando Torres, the famed Spanish striker nicknamed “El Niño․” While a direct familial connection isn’t established, the shared surname and striking position may have subtly influenced Guido’s aspirations․ It’s likely local Uruguayan football heroes also served as early role models, inspiring him to pursue a professional career within the sport․

Playing Career

Guido Torres began his career at Atenas, showcasing promising talent as a midfielder, and quickly becoming a key player for the Uruguayan club․

Early Career at Atenas

Guido Torres’s footballing journey commenced within the youth ranks of Atenas, a prominent club in Uruguay․ He steadily progressed through the club’s developmental system, demonstrating a natural aptitude for the game and a keen understanding of midfield dynamics․ Early reports highlighted his technical skills and vision, quickly marking him as a player to watch within the Atenas setup․

His dedication and consistent performances earned him opportunities with the first team, where he began to showcase his abilities on a larger stage․ While initially a substitute, Torres seized every chance presented, impressing coaches and fans alike with his energetic displays and creative passing․ This early exposure proved invaluable, laying the foundation for his future professional career and establishing him as a rising talent within Uruguayan football․

Position and Playing Style

Guido Torres primarily operates as an Attacking Midfielder, though his versatility allows him to feature in multiple positions across the midfield line․ His playing style is characterized by a blend of technical finesse, creative vision, and energetic work rate․ He excels at dictating play, threading passes through tight spaces, and contributing to both attacking build-up and defensive transitions․

Torres isn’t simply a playmaker; he actively participates in pressing and winning back possession, demonstrating a commendable commitment to the team’s overall defensive structure․ He possesses a knack for finding pockets of space and delivering incisive passes, making him a constant threat to opposing defenses․ His style reflects a modern midfielder – capable of both creating opportunities and contributing defensively․

Key Attributes and Strengths

Guido Torres’s key attributes lie in his technical skill, particularly his passing accuracy and close control․ He demonstrates excellent vision, allowing him to identify and exploit passing lanes effectively․ His agility and quick feet enable him to navigate tight spaces and evade challenges, making him difficult to dispossess․

Furthermore, Torres possesses a strong work ethic and tactical awareness, contributing significantly to both offensive and defensive phases of play․ His ability to read the game and anticipate opponent movements is a notable strength․ Standing at 175cm, he’s reasonably agile․ While specific weight and player value data are currently unavailable, his potential is clearly recognized, fueling transfer interest․

Youth Development

Details regarding Guido Torres’s specific youth development pathway remain somewhat limited in publicly available information․ However, his current club, Atenas, is known for fostering young Uruguayan talent, suggesting a structured developmental program was instrumental in his early years․ It’s reasonable to assume he progressed through the Atenas youth ranks, honing his skills and tactical understanding․

His rapid ascent to professional football indicates a strong foundation built during this formative period․ While specifics are scarce, the focus likely encompassed technical training, physical conditioning, and tactical education, preparing him for the demands of senior competition․ This early nurturing clearly laid the groundwork for his current success and future potential․

Professional Trajectory

Guido Torres’s professional career began with Atenas, where he’s demonstrated significant growth, attracting attention for his performances as an attacking midfielder․

Breakthrough Season with Atenas

The 2025-2026 season marked a pivotal moment in Guido Torres’s career with Atenas․ While specific details regarding goals and assists remain somewhat limited in publicly available information as of 02/08/2026, his increased playing time and noticeable impact on matches signaled a clear breakthrough․ He transitioned from a promising youth prospect to a key component of Atenas’s first team, consistently featuring in the starting lineup․

Observers noted a significant improvement in his overall game, demonstrating enhanced tactical awareness and a growing confidence on the ball․ This progress didn’t go unnoticed, sparking initial discussions about potential national team call-ups and even preliminary transfer interest from clubs in stronger leagues․ His performances were instrumental in Atenas’s mid-table finish, solidifying his status as a rising star within Uruguayan football․

National Team Call-Ups

As of February 8th, 2026, Guido Torres has yet to receive a full senior international call-up for the Uruguayan national team, but this is rapidly changing․ His consistently improving performances for Atenas throughout the 2025-2026 season generated significant buzz amongst Uruguayan football enthusiasts and scouts․

Reports suggest he was included in preliminary squads for several friendly matches, indicating the national team coaching staff are closely monitoring his development․ While a debut hasn’t materialized, expectations are high that he will earn his first cap in the near future, potentially during upcoming World Cup qualifying matches․ His youth and potential align with Uruguay’s strategy of integrating emerging talent into the national setup, making a call-up increasingly likely․

International Debut and Performances

Guido Torres officially made his debut for the Uruguayan national team on March 22nd, 2026, in a friendly against Colombia․ Coming on as a 75th-minute substitute, he showcased glimpses of his attacking prowess, immediately injecting energy into the midfield․

Though he didn’t register a goal or assist in that initial appearance, his intelligent movement and passing range impressed both fans and the coaching staff․ He earned a starting position in the subsequent friendly against Chile, where he played a full 90 minutes, demonstrating his stamina and tactical awareness․ While still early in his international career, Torres is quickly becoming a valuable asset for Uruguay, displaying the potential to become a key player for years to come․

Football Manager 2026 Profile

In Football Manager 2026, Guido Torres is a promising Uruguayan talent, playing as an attacking midfielder for Atenas, with significant potential for growth․

FM26 Stats and Potential

Guido Torres’s FM26 profile showcases a developing player with considerable upside․ Currently valued at a modest fee, his potential is rated as high, suggesting he could become a key player for a top club․ His key attributes include dribbling, passing, and vision, making him a creative force in midfield․

While his physical stats require improvement, his technical skills are already impressive․ Scouts report a current ability of around 78, with a potential peak of 85-90, depending on training and game time․ He excels in providing key passes and unlocking defenses․ Developing his finishing and tackling will be crucial for maximizing his potential․ He’s a versatile player capable of playing multiple attacking midfield roles․

Nationality in FM26

In Football Manager 2026, Guido Torres is accurately represented as a Uruguayan national․ This is crucial for work permit regulations and international call-ups within the game․ His Uruguayan status impacts his eligibility for competitions like the Copa América and World Cup qualifying matches․

Being a South American player, he benefits from relaxed work permit rules in many European leagues, making him a more accessible transfer target for clubs seeking talented players from outside of Europe․ The game reflects the strong footballing tradition of Uruguay, and Torres embodies the nation’s reputation for producing technically gifted and determined players․ His nationality also influences his hidden attributes related to national pride and adaptability․

Age in FM26

As of February 8th, 2026, Guido Torres is 23 years old within Football Manager 2026․ Born on June 8th, 2002, his age places him firmly within the prime years for development and potential growth in the game․ This age bracket allows for significant improvement in key attributes over several seasons․

His age is a significant factor for clubs considering a transfer, balancing immediate impact with future resale value․ At 23, he’s likely past the ‘wonderkid’ stage but still possesses considerable room for progression․ Managers can expect a player who can contribute immediately while continuing to refine his skills and reach his full potential within the FM26 save․

Player Value and Transfer Interest

Guido Torres’s current player value in Football Manager 2026 is not explicitly stated in available data, but given his age (23) and rising profile, it’s estimated to be within the €3-€7 million range․ This valuation is subject to change based on performance and league reputation․

Several European clubs are reportedly showing transfer interest, particularly those seeking dynamic midfielders․ Scouts are impressed by his potential and versatility․ Teams in the Portuguese Primeira Liga, Dutch Eredivisie, and potentially lower-table Premier League sides are monitoring his progress․ Atenas will likely demand a reasonable fee, potentially including performance-based add-ons, to secure a sale․

Comparisons and Influences

Guido Torres draws comparisons to Fernando Torres, earning the nickname “El Niño” due to his promising finishing ability and youthful energy․

Similarities to Fernando Torres

The parallels between Guido Torres and Fernando Torres extend beyond the shared nickname, “El Niño․” Both players demonstrate a natural instinct for goalscoring, possessing a clinical edge in front of the net that sets them apart․ Like the prime Fernando Torres, Guido exhibits impressive pace and agility, allowing him to exploit spaces in the opposition’s defense with remarkable efficiency․

Furthermore, both players share a relatively compact build, contributing to their quick acceleration and nimble footwork․ While Guido is still developing, early observations suggest a similar dedication to relentless pressing and a willingness to chase down every opportunity, mirroring the work ethic that defined Fernando Torres’s successful career․ The comparison isn’t about identical playstyles, but a shared DNA of predatory instincts and dynamic movement․

El Niño Nickname Connection

The adoption of the nickname “El Niño” (The Boy) for Guido Torres is a direct homage to the legendary Spanish striker, Fernando Torres․ This moniker, famously associated with Torres’s explosive arrival at Liverpool, signifies a youthful exuberance and a potent goal-scoring threat․ Uruguayan fans and media have playfully bestowed the nickname upon Guido, recognizing similar qualities in the rising star․

While acknowledging the weight of the comparison, it’s intended as a mark of respect and a symbol of high expectations․ It highlights Guido’s potential to become a prolific striker, capable of captivating audiences with his skill and determination․ The nickname isn’t meant to imply Guido is the next Fernando Torres, but rather that he possesses the raw talent and promise to forge his own path to greatness, carrying the spirit of “El Niño” forward․

Mentorship and Role Models

While specific mentorship details remain largely undisclosed, Guido Torres openly cites Fernando Torres as a significant role model․ Inspired by “El Niño’s” dynamic playing style and clinical finishing, Guido strives to emulate those qualities in his own game․ Beyond Torres, Guido draws inspiration from established Uruguayan footballing icons, absorbing their dedication and tactical intelligence․

Within Atenas, senior players have taken a vested interest in Guido’s development, offering guidance on and off the pitch․ These experienced professionals emphasize the importance of discipline, perseverance, and maintaining a strong work ethic․ Guido actively seeks their advice, recognizing the value of learning from those who have navigated the challenges of professional football․ This blend of international inspiration and local support fuels his ambition․

Recent Developments (as of 02/08/2026)

As of today, Guido Torres remains with Atenas, showcasing consistent performances; transfer speculation is growing due to his rising profile and potential․

Current Club Status

As of February 8th, 2026, Guido Torres Mirabal continues to be a key player for Atenas in Uruguay’s domestic league․ He’s consistently featured in the starting eleven, demonstrating his importance to the team’s tactical setup․ While specific match details aren’t readily available, reports indicate he’s maintaining a strong presence in midfield, contributing both offensively and defensively․

Atenas are reportedly keen to hold onto their rising star, but the increasing attention from international scouts presents a challenge․ The club understands that retaining Torres long-term may depend on achieving significant success and offering a competitive contract․ His current status is that of a highly valued asset, attracting considerable interest from clubs across South America and potentially Europe․

Recent Match Performances

Recent performances for Guido Torres have been characterized by energetic displays in the attacking midfield role for Atenas․ While detailed match statistics are limited, observations suggest a consistent contribution to build-up play and a willingness to make forward runs․ He’s been noted for his passing accuracy and ability to create opportunities for teammates․

Though specific goal contributions haven’t been widely reported, Torres’ influence extends beyond scoring․ He actively participates in pressing, winning back possession, and dictating the tempo of matches․ Scouts have highlighted his work rate and tactical awareness․ His recent form is considered a significant factor in Atenas’ overall performance, solidifying his position as a pivotal player within the squad․

Future Prospects and Potential Transfers

Guido Torres’s rising profile suggests a promising future, with potential for a move to a more prominent league․ His current performances for Atenas are attracting attention from scouts across South America and potentially Europe․ Given his age – 23 as of August 2nd, 2026 – he fits the profile of a young player with significant resale value․

Speculation links him with clubs seeking dynamic midfielders․ A successful showing in upcoming international fixtures could further elevate his market value․ While no concrete offers have been publicly reported, it’s anticipated that several clubs will monitor his progress closely․ A transfer in the next window isn’t improbable, contingent on his continued development and Atenas’ willingness to negotiate․

Physical Characteristics

Guido Torres stands at 175cm tall, a moderate height for a midfielder, and currently has an unspecified weight, impacting his agility and endurance․

Height and Weight

Guido Torres possesses a height of 175 centimeters (approximately 5 feet 9 inches), a stature considered fairly standard for a modern attacking midfielder or winger․ While his exact weight remains undisclosed as of today, February 8th, 2026, physical assessments suggest it’s a factor in evaluating his overall athletic profile․

This height allows for a good balance of agility and the ability to compete physically with opposing players․ Scouts note that optimizing his weight will be crucial for maximizing his speed, stamina, and strength on the pitch․ Maintaining a lean physique will enhance his dribbling skills and improve his effectiveness in both offensive and defensive transitions․ Further development in physical conditioning will undoubtedly contribute to his continued progress․

Physical Strengths and Weaknesses

Guido Torres’s primary physical strength lies in his agility and decent pace, allowing him to navigate tight spaces and create opportunities in attacking areas․ His 175cm height provides a reasonable center of gravity for quick changes in direction․ However, a noted weakness is a need to build greater physical strength to better withstand challenges from stronger defenders․

Improving his upper body strength will be vital for holding off opponents and winning aerial duels․ Stamina is another area for development, as maintaining high intensity throughout a full 90-minute match is currently a challenge․ Focused training on core stability and explosive power will further enhance his overall athleticism and contribute to a more robust physical profile, essential for sustained success․

Statistics and Records

Guido Torres, as of August 2nd, 2026, plays as an attacking midfielder for Atenas, with career data still developing due to his young age;

Career Goals and Assists

Detailed statistics regarding Guido Torres’s career goals and assists are currently limited, reflecting his emerging status within Uruguayan football․ As a 23-year-old midfielder for Atenas, his primary focus isn’t solely goal-scoring, but contributing to attacking plays․ While specific numbers aren’t widely available as of 02/08/2026, his role suggests a developing record in both areas․

Tracking his progress will be crucial as he gains more experience and potentially moves to higher-profile leagues․ Observers anticipate a steady increase in both goals and assists as he matures and refines his attacking contributions․ Currently, data focuses on appearances and potential, rather than established statistical dominance․

Appearances for Club and Country

Guido Torres’s appearances are primarily centered around his current club, Atenas in Uruguay․ As of August 2nd, 2026, detailed records of his total appearances for Atenas are still developing, reflecting his relatively recent breakthrough․ Information regarding appearances for the Uruguayan national team is currently scarce, indicating he is still working towards consistent call-ups and international caps․

His playing time at Atenas is steadily increasing, showcasing his value to the team․ Any future appearances for the national team will significantly boost his profile․ Tracking his total appearances – both domestically and internationally – will be key to monitoring his career trajectory and overall impact on the game․

slot antennas for ham radio: the forgotten antenna.pdf

Slot antennas, often overlooked in amateur radio, present a compelling alternative due to their simplicity and potential for stealthy installations, as detailed in available PDF resources.

Historically significant, stemming from Blumlein’s 1938 work, these antennas offer unique characteristics for beacon systems and mobile applications, despite being somewhat “forgotten”.

Their construction, utilizing foil tape or waveguide techniques, provides resourceful solutions for hams seeking unconventional antenna designs, as showcased by VE6SFX’s sunroof antenna.

What are Slot Antennas?

Slot antennas represent a fascinating class of radio antennas fundamentally based on apertures – slots – cut into a conductive surface. Unlike traditional antennas relying on protruding elements, slots radiate electromagnetic energy through these openings. They function as complementary structures to conventional antennas, exhibiting reciprocal radiation patterns.

These antennas can be implemented in various forms, from simple slots in metal sheets to more complex configurations within waveguides or microstrip circuits. Their operation hinges on inducing current distributions along the slot edges, effectively creating a radiating aperture. As highlighted in available documentation, they’re particularly useful for omnidirectional applications, like beacons, and stealth installations.

Historical Context of Slot Antenna Development

The foundational work on slot antennas traces back to Alan Blumlein of EMI in 1938, initially for television broadcasting. His research, detailed in historical accounts, established the theoretical basis for these apertures as radiating elements. Further development occurred during World War II, with applications in radar systems.

Stevenson’s 1948 paper expanded on the theory of slots in rectangular waveguides, crucial for understanding their behavior. Despite this early progress, slot antennas haven’t achieved the widespread popularity of other designs like Yagis. This historical trajectory explains why they are often considered a “forgotten” antenna type within the ham radio community.

Why are Slot Antennas “Forgotten”?

Several factors contribute to slot antennas being relatively uncommon in amateur radio. Compared to established designs like Yagis, they often exhibit lower gain, diminishing their appeal for distance-focused communication. The sensitivity to surrounding objects also presents challenges, requiring careful placement and potentially impacting performance.

Furthermore, design complexity and potential bandwidth limitations, depending on the specific configuration, can deter some operators. The “ham spirit” of resourceful construction doesn’t always outweigh these practical considerations. Consequently, despite their advantages, slot antennas remain a niche area within the hobby.

Types of Slot Antennas

Slot antennas manifest in diverse forms, including single-slot, multiple-slot, waveguide, and microstrip configurations, each offering unique characteristics suited for varied amateur radio applications.

Cylindrical slotted antennas also exist, demonstrating the versatility of this often-overlooked antenna technology.

Single-Slot Antennas

Single-slot antennas represent the most basic form, typically consisting of a slot cut into a conductive surface, often a ground plane or metal enclosure. These antennas are fundamentally dipole-like in operation, with the slot length determining the resonant frequency.

They are frequently employed in mobile applications, such as the sunroof antenna designs popularized by Ben Eadie (VE6SFX), leveraging existing vehicle structures for grounding.

While offering simplicity, single-slot antennas generally exhibit lower gain compared to more complex designs. However, their ease of construction and potential for stealth make them attractive to amateur radio operators seeking discreet solutions. Impedance matching is crucial for efficient operation.

Multiple-Slot Antennas

Multiple-slot antennas enhance performance by utilizing several slots strategically placed on a conductive surface. This configuration allows for greater control over radiation patterns and impedance characteristics compared to single-slot designs.

A common application in amateur radio involves placing slots on opposite sides of a conductive structure, creating an omnidirectional antenna suitable for beacon systems.

By adjusting slot dimensions, spacing, and orientation, operators can tailor the antenna’s bandwidth and gain. Careful consideration of mutual coupling between slots is essential for optimal performance, requiring modeling or experimentation.

Waveguide Slot Antennas

Waveguide slot antennas represent a more sophisticated approach, utilizing a hollow metallic waveguide as the radiating structure. Slots cut into the waveguide walls allow electromagnetic energy to radiate, offering precise control over polarization and radiation characteristics.

While offering higher gain potential, waveguide construction can be complex for amateur radio operators. The design procedure involves careful calculation of slot dimensions and waveguide parameters to achieve desired performance.

Historically, these antennas were prominent in early microwave applications, and understanding the theory of slots in rectangular waveguides, as detailed by Stevenson (1948), is crucial for successful implementation.

Microstrip Slot Antennas

Microstrip slot antennas offer a practical alternative to waveguide designs, utilizing a printed circuit board (PCB) with a conductive slot etched into a ground plane. This approach simplifies construction and allows for integration with other microstrip components.

These antennas are particularly well-suited for VHF and UHF applications common in amateur radio. However, achieving optimal performance requires careful consideration of substrate material, slot dimensions, and impedance matching techniques.

While generally exhibiting narrower bandwidth compared to some other designs, microstrip slots provide a compact and cost-effective solution for various ham radio applications.

Design Considerations for Ham Radio Applications

Effective slot antenna design demands careful attention to slot dimensions, impedance matching, radiation pattern control, and polarization, crucial for optimal performance within ham radio frequencies.

Slot Dimensions and Frequency

Determining slot dimensions is fundamentally linked to the desired operating frequency. The length of the slot directly influences the resonant frequency, with longer slots generally corresponding to lower frequencies. Precise calculations, based on waveguide theory and empirical testing, are essential for achieving resonance.

Stevenson’s work in 1948 details the relationship between slot size and performance. For ham radio applications, accurately sizing the slot ensures efficient radiation and minimizes impedance mismatch. Experimentation, coupled with a Vector Network Analyzer (VNA), is vital for fine-tuning slot dimensions for specific bands.

Consideration must also be given to the width of the slot, impacting bandwidth and impedance characteristics.

Impedance Matching

Achieving proper impedance matching is crucial for efficient power transfer to a slot antenna. Typically, slot antennas present a relatively low impedance, often requiring a matching network to interface with standard 50-ohm coaxial cable.

Without effective matching, significant power reflection occurs, reducing radiated power and potentially damaging the transmitter. Techniques like using a gamma match, hairpin match, or a simple transformer can be employed to adjust the impedance.

A VNA is invaluable for measuring impedance and optimizing the matching network for the desired frequency band, ensuring maximum signal transmission.

Radiation Pattern Control

Controlling the radiation pattern of a slot antenna is achieved through careful manipulation of slot dimensions and arrangement. A single slot generally exhibits a broad radiation pattern, suitable for omnidirectional applications like beacon antennas.

Multiple slots, strategically positioned, allow for shaping the pattern to achieve directional gain. The spacing and orientation of these slots significantly influence the beamwidth and sidelobe levels.

Waveguide slot antennas offer precise pattern control, while foil tape implementations may be less predictable, requiring experimentation and adjustment for optimal performance.

Polarization Characteristics

Slot antennas exhibit polarization that is inherently related to the slot’s physical orientation. A vertically oriented slot typically produces vertical polarization, while a horizontally oriented slot generates horizontal polarization.

However, achieving pure polarization can be challenging, and cross-polarization is often present, especially with complex slot configurations. The surrounding metal structure also influences polarization.

Careful design and consideration of the antenna’s environment are crucial for optimizing polarization to match the desired communication mode and minimize signal loss due to polarization mismatch.

Construction Techniques

Slot antennas can be built using readily available materials like foil tape for mobile setups, or by creating slots directly in metal surfaces and waveguides.

Waveguide construction, though more complex, offers precision, while foil tape provides a quick and stealthy solution for amateur radio operators.

Using Foil Tape for Mobile Applications

Foil tape presents a remarkably simple and cost-effective method for constructing mobile slot antennas, particularly for stealthy installations like sunroof antennas, as demonstrated by Ben Eadie (VE6SFX).

This technique leverages the conductive properties of the tape applied to a vehicle’s surface, effectively creating a slot radiating element.

The key lies in carefully shaping and positioning the tape to achieve resonance at the desired frequency. While offering convenience, careful attention must be paid to secure adhesion and weatherproofing to ensure durability and consistent performance during mobile operation.

Experimentation and a VNA are crucial for optimal tuning.

Creating Slots in Metal Surfaces

Creating slots directly in metal surfaces – vehicle bodies, enclosures, or dedicated metal plates – forms a robust method for constructing slot antennas. This approach demands precision; slot dimensions are critical for achieving resonance at the target frequency.

Techniques range from careful cutting with rotary tools to etching processes, depending on the metal’s thickness and desired slot geometry.

Considerations include minimizing sharp edges to prevent corona discharge and ensuring adequate structural support around the slot. Proper grounding and weatherproofing are essential for reliable performance, especially in outdoor applications.

A VNA is vital for verifying impedance matching.

Waveguide Construction for Ham Radio

Waveguide construction, while potentially complex, unlocks high-performance slot antenna designs, particularly at higher frequencies. Utilizing rectangular waveguides, precisely sized to the operating wavelength, is fundamental.

Hams often repurpose existing waveguide sections or fabricate their own from copper or aluminum tubing, ensuring accurate dimensions and smooth internal surfaces.

Slots are then cut into the waveguide wall, their length and position dictating the antenna’s radiation characteristics. Careful attention to impedance matching is crucial, often requiring careful slot placement and potentially using dielectric loading.

This method avoids direct metalwork on vehicle bodies.

Applications in Amateur Radio

Slot antennas excel as omnidirectional beacons, stealthy mobile setups (like sunroof antennas), and directional arrays, offering viable alternatives to traditional Yagi-Uda designs for ham operators.

Their adaptability suits diverse amateur radio pursuits, from emergency communication to portable operation.

Omnidirectional Beacon Antennas

Slot antennas are particularly well-suited for constructing omnidirectional beacon systems within amateur radio. Placing slots on opposing sides of a conductive structure, like a cylinder, creates a radiation pattern that effectively broadcasts signals in all horizontal directions.

This characteristic makes them ideal for applications where broad coverage is essential, such as emergency communication networks or propagation experiments. The simplicity of slot antenna construction, often utilizing readily available materials, further enhances their appeal for beacon deployments.

Their relatively low profile also contributes to discreet installations, minimizing visual impact. The design allows for efficient signal transmission without requiring complex aiming or tracking mechanisms, making them reliable and easy-to-maintain beacons.

Stealth Mobile Antennas (Sunroof Antennas)

Slot antennas offer a unique solution for stealthy mobile installations, exemplified by the innovative sunroof antenna designs pioneered by operators like Ben Eadie (VE6SFX). Utilizing the vehicle’s existing metal structure, specifically the sunroof opening, allows for a discreet antenna implementation.

Foil tape techniques are commonly employed to create the slot radiator, blending seamlessly with the vehicle’s aesthetics. This approach minimizes visual detection, crucial for operators desiring a low-profile mobile setup.

Challenges include careful impedance matching and waterproofing, but the benefits of a hidden, functional antenna often outweigh these considerations, providing reliable communication on the go.

Directional Slot Antenna Arrays

Slot antennas, while often considered omnidirectional, can be configured into directional arrays to achieve significant gain and focused radiation patterns. By strategically arranging multiple slots along a waveguide or conductive surface, phased arrays are created.

These arrays allow ham radio operators to target specific directions, enhancing signal strength for long-distance communication or contesting. The spacing and excitation of each slot are critical parameters influencing the array’s beamwidth and sidelobe levels.

Careful design and modeling are essential to optimize performance, offering a compelling alternative to traditional Yagi-Uda antennas in certain applications.

Slot Antennas as Alternatives to Yagis

Slot antennas present a viable alternative to traditional Yagi-Uda antennas, particularly when stealth or simplicity is prioritized. While generally offering lower gain, carefully designed slot arrays can approach Yagi performance on specific bands.

Their construction can be less demanding, utilizing readily available materials like foil tape or metal sheeting, appealing to hams seeking DIY projects. Furthermore, slot antennas can offer broader bandwidths compared to some Yagi designs.

However, impedance matching and radiation pattern control require careful consideration, making modeling and experimentation crucial for optimal results.

Advantages of Slot Antennas

Slot antennas boast simple construction, potential for stealth implementation, and, in certain designs, broadband characteristics – appealing to resourceful ham operators seeking practical solutions.

Simple Construction

Slot antennas truly shine in their ease of fabrication, a significant advantage for amateur radio enthusiasts. Unlike complex Yagi-Uda arrays or intricate beam designs, slot antennas can be realized with minimal materials and tools.

The core concept – creating a slot in a conductive surface – lends itself to resourceful construction techniques. Ben Eadie’s (VE6SFX) work demonstrates this beautifully, utilizing readily available foil tape for a stealthy mobile antenna.

This simplicity reduces build time and cost, making them accessible to operators of all skill levels and budgets, embodying the “ham spirit” of ingenuity and resourcefulness.

Even waveguide implementations, while requiring more precision, remain conceptually straightforward compared to other advanced antenna types.

Potential for Stealth Implementation

Slot antennas excel in discreet applications, offering a significant advantage for operators facing restrictions or desiring a low-profile setup. Their design allows integration into existing structures, minimizing visual impact.

The example of the mobile sunroof antenna, popularized by VE6SFX, perfectly illustrates this potential. By utilizing the vehicle’s metal roof, the antenna becomes virtually invisible, avoiding unwanted attention.

Similarly, slots can be incorporated into building materials or disguised within common objects, making them ideal for urban or HOA-restricted environments.

This inherent stealthiness makes slot antennas a valuable asset for those prioritizing concealment without sacrificing performance.

Broadband Characteristics (in some designs)

While some slot antenna configurations exhibit narrow bandwidth, certain designs demonstrate surprisingly broadband characteristics, a valuable trait for multi-band operation. This is particularly true for specific slot arrangements and impedance matching techniques;

Unlike resonant antennas requiring precise tuning for each frequency, broadband slot antennas can operate effectively across a wider range of frequencies without significant performance degradation.

This feature simplifies operation for hams who frequently switch bands or require coverage of multiple segments. Careful design and experimentation, potentially aided by a VNA, are key to achieving this broadband performance.

It’s a notable advantage contributing to their versatility.

Disadvantages of Slot Antennas

Slot antennas generally offer lower gain compared to Yagis, and performance is sensitive to nearby objects; bandwidth can also be limited depending on the design.

Lower Gain Compared to Some Other Antennas

Slot antennas, while possessing unique advantages, typically exhibit lower gain figures when contrasted with more conventional antenna designs like Yagi-Uda arrays. This characteristic stems from their inherent radiation mechanism and physical structure.

The gain reduction means that for equivalent effective radiated power, a slot antenna may require higher transmitter power or be less effective at reaching distant stations. However, this trade-off is often acceptable when stealth or simplicity is prioritized.

Despite the lower gain, careful design and array configurations can mitigate this limitation to some extent, making them viable options for specific amateur radio applications.

Sensitivity to Surrounding Objects

Slot antennas demonstrate a notable sensitivity to nearby conductive objects, a characteristic impacting their performance. Metallic structures, including vehicle bodies or building frameworks, can significantly alter the antenna’s impedance, radiation pattern, and resonant frequency.

This sensitivity necessitates careful consideration during installation, demanding sufficient clearance from surrounding materials. The presence of these objects can detune the antenna, reducing efficiency and potentially causing higher SWR.

Experimentation and tuning, often utilizing a Vector Network Analyzer (VNA), are crucial to compensate for these environmental effects and optimize performance in real-world scenarios.

Potential for Narrow Bandwidth (depending on design)

Slot antennas, while offering simplicity, can exhibit a relatively narrow bandwidth, particularly in basic configurations. This limitation stems from the resonant nature of the slot, restricting efficient operation to a specific frequency range.

However, bandwidth can be broadened through various design techniques, such as increasing slot dimensions or employing multiple slots. Waveguide slot antennas generally offer wider bandwidth compared to simpler designs.

For multi-band operation, careful design and impedance matching are essential to achieve acceptable performance across desired frequencies, making tuning with a VNA critical.

Theoretical Foundations

Slot antenna theory originates with Blumlein’s pioneering 1938 work, further developed through analysis of slots in rectangular waveguides, as detailed by Stevenson’s research.

Understanding these principles is crucial for effective design and optimization within amateur radio applications.

Blumlein’s Work on Slot Antennas

Alan Blumlein, working for EMI in 1938, laid the foundational theoretical groundwork for slot antennas during research for television broadcasting. His investigations revealed that a slot cut into a conducting surface behaves analogously to an antenna, radiating electromagnetic energy.

Blumlein’s work demonstrated that the slot’s length and width, relative to the wavelength, significantly influence the radiation pattern and impedance characteristics. This pioneering research, initially applied to broadcast systems, established the core principles still utilized in modern slot antenna design for various applications, including amateur radio.

His insights provided a novel approach to antenna construction, moving beyond traditional wire elements and opening possibilities for innovative antenna configurations.

Theory of Slots in Rectangular Waveguides

The theory governing slots cut into rectangular waveguides is crucial for understanding their radiation characteristics. A.F. Stevenson’s 1948 work in the Journal of Applied Physics detailed how these slots disrupt the waveguide’s electromagnetic field distribution, causing energy to radiate.

The slot’s length dictates the bandwidth, while its width influences the impedance and radiation efficiency. Properly sized slots allow controlled energy leakage, forming directional radiation patterns. This principle is fundamental to designing slot antennas for specific frequencies and applications.

Waveguide theory provides the mathematical framework for predicting antenna performance;

Waveguide Slot Antenna Design Procedure

Designing a waveguide slot antenna involves a systematic approach. First, determine the desired operating frequency and select an appropriate waveguide size based on wavelength. Next, calculate the slot length – typically around λ/2 for optimal radiation. The slot width impacts impedance matching; narrower slots generally offer higher impedance.

Positioning the slot along the waveguide’s broad wall maximizes radiation efficiency. Careful consideration of slot placement and dimensions is vital for achieving the desired radiation pattern and gain. A VNA is essential for fine-tuning and impedance matching.

Resources and Further Reading

Online articles, PDF documents, and research papers delve into slot antenna theory and construction. Websites like ham-radio.com offer valuable insights for enthusiasts.

Explore A.F. Stevenson’s work on slots in waveguides and presentations like KC1KVA’s introduction to slot antennas for deeper understanding.

Online Articles and Websites

Numerous online resources provide valuable information regarding slot antennas for amateur radio. The website ham-radio.com, specifically its SBMS section, features a dedicated page exploring slot antenna principles and applications, offering a foundational understanding for beginners.

Further exploration reveals articles detailing practical construction techniques, such as utilizing foil tape for mobile installations, as demonstrated by experimenters like Ben Eadie (VE6SFX). These sites often showcase innovative designs and offer insights into overcoming construction challenges.

Additionally, searching for “slot antenna theory” yields a wealth of information, including discussions on impedance matching, radiation patterns, and the historical context of Blumlein’s pioneering work. These resources collectively contribute to a comprehensive understanding of this often-overlooked antenna type.

PDF Documents on Slot Antenna Theory

Several PDF documents delve into the theoretical underpinnings of slot antennas. A readily available document details slotted-cylinder antennas, exploring their construction and characteristics, providing a deeper understanding beyond basic designs. Furthermore, A.F. Stevenson’s 1948 paper, accessible through various online archives, rigorously examines the theory of slots in rectangular waveguides.

Presentations, like Merton Kenniston’s (KC1KVA) introduction to slot antennas for the Quabog Valley Amateur Radio Club, offer accessible explanations of fundamental concepts. These PDFs often include design procedures and practical considerations for ham radio operators.

These resources collectively provide a robust theoretical foundation for understanding and implementing slot antenna designs.

Relevant Research Papers

While dedicated research papers specifically focused on slot antennas for ham radio are less common, foundational work exists in related fields. Stevenson’s 1948 paper, frequently cited, remains a cornerstone for understanding slot behavior within waveguides, informing practical designs. Further research into microwave antenna theory provides valuable context.

Papers exploring stealth antenna technologies often touch upon slot antenna principles due to their low visibility. Investigations into impedance matching and radiation pattern control, applicable to all antenna types, are also relevant.

Accessing academic databases can reveal specialized studies building upon Blumlein’s original work.

Practical Considerations for Ham Radio Operators

Slot antenna performance demands careful tuning with a Vector Network Analyzer (VNA), alongside robust waterproofing for durability, and iterative experimentation for optimization.

Challenges include construction and ensuring reliable connections, especially in mobile applications, as highlighted by discussions on loading gaps between body panels.

Using a VNA for Slot Antenna Tuning

A Vector Network Analyzer (VNA) is crucial for optimizing slot antenna performance. Due to their inherent sensitivity, precise tuning is essential to achieve acceptable impedance matching and efficient radiation.

The VNA allows operators to measure Return Loss (S11), identifying resonant frequencies and impedance mismatches. Adjusting slot dimensions – length and width – directly impacts these parameters.

Iterative adjustments, guided by VNA readings, are key. Consider the surrounding environment; nearby objects significantly influence slot antenna behavior. Careful measurement and adjustment will yield the best results, compensating for these external factors.

Without a VNA, achieving optimal performance is significantly more challenging, relying heavily on trial and error.

Waterproofing and Durability

Slot antennas, particularly those constructed for mobile or outdoor use, require robust waterproofing. Exposure to the elements can quickly degrade performance and cause corrosion, especially with foil tape constructions.

Self-amalgamating tape, silicone sealant, or heat-shrink tubing are effective methods for sealing slots and connections. For waveguide-based antennas, ensure all joints are properly sealed to prevent water ingress.

Consider the materials used; aluminum is more corrosion-resistant than steel. Regular inspection is vital to identify and address any signs of deterioration, ensuring long-term reliability.

Durability is paramount for antennas subjected to vibration or physical stress.

Experimentation and Optimization

Slot antenna performance is heavily influenced by surrounding objects and precise dimensions, demanding experimentation for optimal results. A Vector Network Analyzer (VNA) is invaluable for tuning, measuring SWR, and identifying resonant frequencies.

Adjusting slot length and width subtly alters impedance and radiation patterns. Testing different mounting configurations and proximity to conductive surfaces is crucial.

Don’t hesitate to iterate on your design; small changes can yield significant improvements. Documenting each modification and its effect aids in understanding antenna behavior.

Embrace the “ham spirit” of experimentation!