Australia

pacific adventure cabins to avoid pdf

Pacific Adventure Cabin Avoidance: A Comprehensive Guide (2026)

Navigating Pacific Adventure requires careful cabin selection; reports detail issues with cleanliness, size, and dining access, particularly in standard cabins. Reviewers highlight cabin 5308.

Embarking on a Pacific Adventure cruise promises relaxation, yet numerous reports suggest potential cabin-related disappointments. This guide addresses prevalent concerns, stemming from traveler feedback gathered through 2024 and 2025. Common complaints center around cabin size, cleanliness standards, and the disparity between advertised luxury and actual experiences.

Specifically, issues arise with Oceanview cabins, particularly 5308, and balcony privacy on decks 9 & 10. Understanding these potential drawbacks is crucial for informed decision-making, ensuring your voyage aligns with expectations. Prioritize thorough research before finalizing your booking.

Common Complaints About Pacific Adventure Cabins

Recurring themes in Pacific Adventure feedback highlight significant cabin-related issues. Guests frequently report cabins as being small, unclean, and uncomfortable, falling short of advertised standards. Dining experiences, especially at waterfront venues, receive consistent criticism for poor food quality.

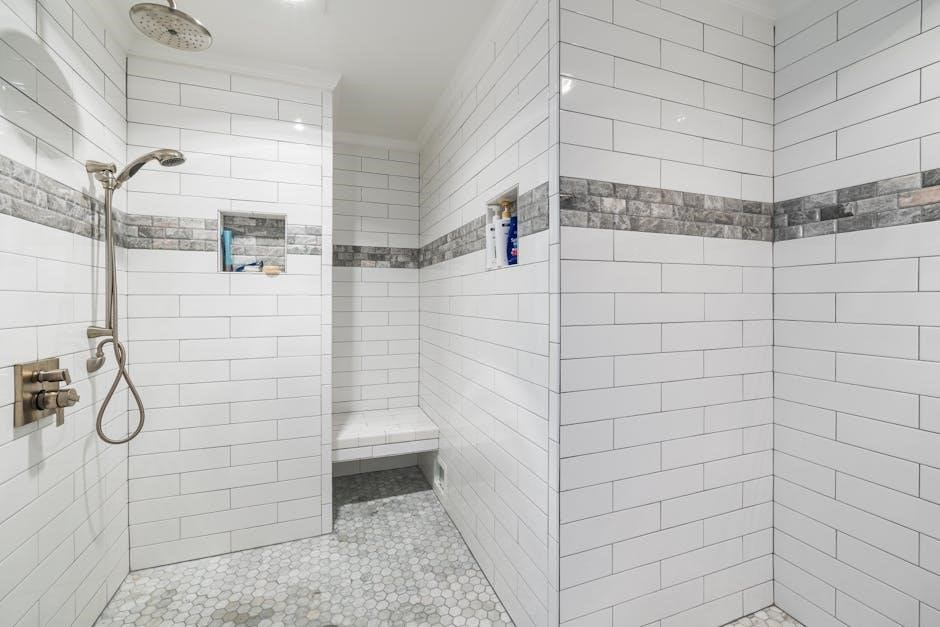
Balcony cabins on decks 9 & 10 lack privacy due to limited overhead cover. “Priority” or upgraded cabins often fail to deliver commensurate value, with stale amenities and unremarkable service. Cleaning services are often minimal, primarily bed-making.

Cabin Size and Layout Issues

A prevalent complaint centers on the constrained dimensions of many Pacific Adventure cabins. Numerous travelers describe them as notably small, impacting overall comfort, especially for longer voyages. Layouts often feel inefficient, maximizing minimal space.

Specific cabin numbers are flagged as particularly problematic, though details are scattered across online forums. Cabin location significantly influences the experience; interior cabins naturally lack views, while some balcony cabins offer limited usable space.

Specific Cabin Numbers to Consider Avoiding

While a definitive list remains elusive, cabin 5308, an Oceanview cabin, receives consistent negative feedback regarding its overall condition and perceived value. Online discussions suggest potential issues with noise levels in cabins near public areas, like stairwells or elevators.

Travelers advise researching specific cabin numbers before booking, as experiences vary drastically. Unfortunately, detailed, consolidated data is scarce; relying on recent TripAdvisor reviews and forum posts is crucial for informed decision-making.

Impact of Cabin Location on Comfort

Cabin placement significantly impacts the Pacific Adventure experience. Balcony cabins on Decks 9 & 10 suffer from limited privacy and inadequate shade, exposing guests to the elements.

Cabins near the Waterfront dining area may experience increased noise levels during operating hours. Interior cabins, while budget-friendly, lack natural light and can feel claustrophobic. Proximity to elevators and stairwells can also introduce unwanted noise and foot traffic, disrupting peaceful relaxation.

Cleanliness and Maintenance Problems

Numerous reports detail concerning cleanliness and maintenance issues aboard Pacific Adventure. Guests frequently cite cabins as small, unclean, and generally uncomfortable, falling short of expected standards. Daily cleaning often consists solely of bed-making, with deeper sanitation seemingly infrequent.

Specific cabin categories have garnered more complaints regarding uncleanliness, suggesting inconsistent housekeeping practices. These issues detract from the overall cruise experience, prompting concerns about hygiene and guest wellbeing.

Reports of Uncleanliness in Specific Cabin Categories

While widespread, reports of uncleanliness appear more concentrated within standard cabin categories on Pacific Adventure. Guests consistently mention issues with bathroom sanitation, stained carpets, and dusty surfaces. Some reviews specifically detail unpleasant odors and lingering grime, even after initial cleaning requests.

These concerns suggest potential inconsistencies in housekeeping protocols across different cabin types, impacting guest satisfaction. Further investigation into cleaning standards for interior and oceanview cabins is warranted.

Frequency of Cleaning Services – Guest Experiences

Guest experiences regarding cleaning frequency are mixed, with many noting a basic service level. Cabin stewards are generally described as friendly and busy, but daily cleaning often limited to bed-making. Deeper cleaning, addressing dust or bathroom sanitation, appears infrequent without specific requests.

Several cruisers reported needing to proactively request thorough cleaning, indicating a potential gap between expected and delivered service standards. This inconsistency impacts the overall cabin comfort and hygiene levels experienced by passengers.

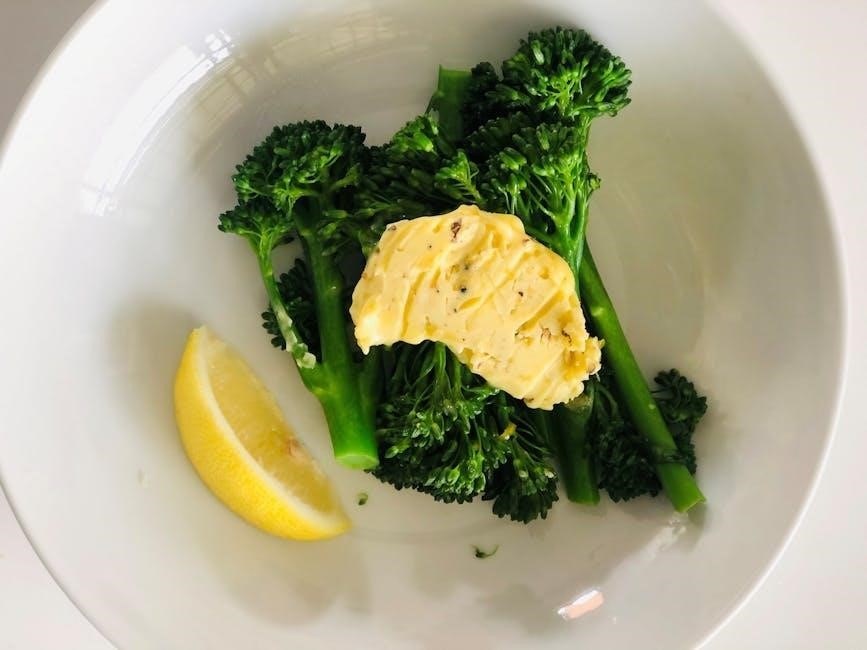
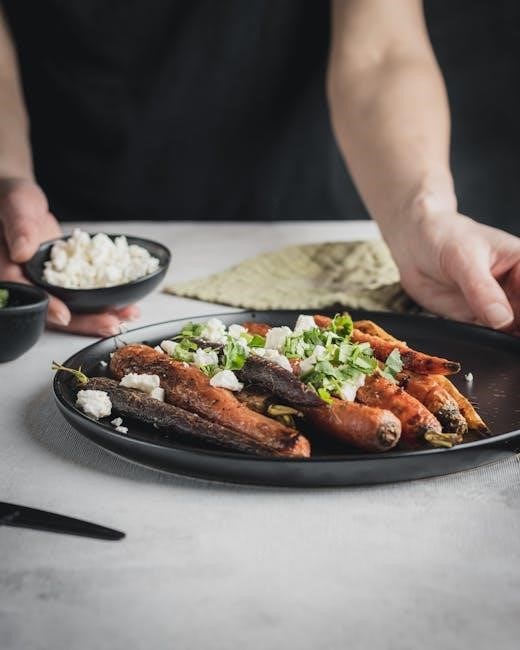
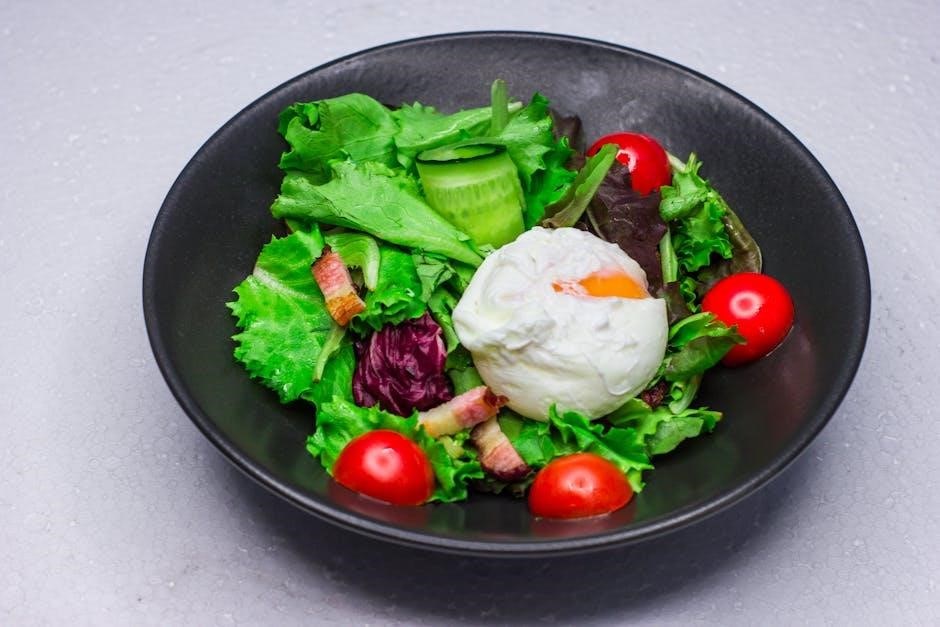
Food Quality and Dining Experiences

Reports consistently criticize the food quality aboard Pacific Adventure, falling short of advertised “gourmet” standards. Numerous guests describe the food as simply “terrible,” with significant disappointment expressed regarding waterfront dining experiences. While staff are praised for friendliness, culinary offerings are a recurring negative theme.

There’s a perceived disconnect between cabin category and dining access, with no clear benefit for those in upgraded cabins. Overall, dining appears to be a substantial area for improvement.

Connection Between Cabin Category and Dining Access

A significant complaint revolves around the lack of discernible dining benefits tied to higher cabin categories on Pacific Adventure. Guests paying a premium for upgraded cabins report no preferential treatment or exclusive access to dining venues. The expectation of enhanced culinary experiences, commensurate with the increased cost, remains largely unmet.

This perceived inequity fuels dissatisfaction, suggesting a missed opportunity to elevate the experience for those investing in superior accommodations.

Complaints Regarding Waterfront Dining

Numerous reviews consistently criticize the waterfront dining experience aboard Pacific Adventure, labeling it a “definite fail.” Guests express disappointment with the food quality, stating it falls far short of advertised “gourmet” standards. Specific concerns include stale fruit offered as amenities and an overall lack of culinary excellence.

The waterfront venue, intended as a highlight, frequently receives negative feedback, impacting overall cruise satisfaction and diminishing the value proposition.

Balcony Cabin Drawbacks

Balcony cabins on decks 9 and 10 of the Pacific Adventure present notable drawbacks for some passengers. A significant complaint centers around a lack of privacy, as these decks offer limited or no overhead cover. This exposes guests to direct sunlight and the elements, reducing usable balcony space during inclement weather.

Furthermore, the open nature diminishes the sense of seclusion, impacting the overall balcony experience and potentially detracting from relaxation.

Lack of Privacy on Decks 9 & 10

Passengers consistently report a diminished sense of privacy when occupying balcony cabins situated on decks 9 and 10 of the Pacific Adventure. The primary issue stems from the limited or complete absence of overhead covering. This design flaw allows for direct lines of sight from neighboring balconies, and even from public areas above.

Consequently, guests seeking a secluded outdoor experience may find these cabins unsatisfactory, impacting their overall enjoyment and relaxation during the cruise.

Limited Shade and Weather Exposure

Balcony cabins on decks 9 and 10 of the Pacific Adventure suffer from a significant lack of shade, directly impacting comfort levels, especially during sun-drenched days at sea. The absence of substantial overhead coverage leaves balconies fully exposed to the elements.

This translates to intense sun exposure, and vulnerability to rain or wind. Guests desiring shaded relaxation on their balconies may find these cabins impractical, necessitating constant retreat indoors.

“Priority” Experience Disappointments

Despite the premium price tag, the “priority” or upgraded cabin experiences on the Pacific Adventure frequently fall short of expectations. Many guests report a negligible difference in value, beyond a marginally more spacious cabin layout.

Complaints center around underwhelming service and disappointing amenities – stale fruit platters were specifically mentioned. The promised elevated experience doesn’t materialize, leaving passengers feeling the surcharge isn’t justified by the delivered benefits.

Value Assessment of Upgraded Cabins

A critical evaluation reveals that the financial investment in upgraded cabins aboard the Pacific Adventure often yields a poor return. While offering slightly increased square footage, the core issues – inconsistent service and subpar dining – remain prevalent.

Guests question whether the added cost genuinely translates into a superior cruise experience, or simply a larger room. Considering alternative cabin categories or even different cruise lines presents a more fiscally responsible approach.

Issues with Service and Amenities in Premium Cabins

Despite the premium price tag, guests frequently report disappointments regarding service and amenities within upgraded cabins on the Pacific Adventure. Complaints center around a lack of personalized attention and underwhelming offerings.

Specifically, stale fruit platters were cited as a recurring issue, failing to meet expectations for a “priority” experience. Basic cabin upkeep, beyond bed-making, also proved inconsistent, diminishing the perceived value of the upgrade.

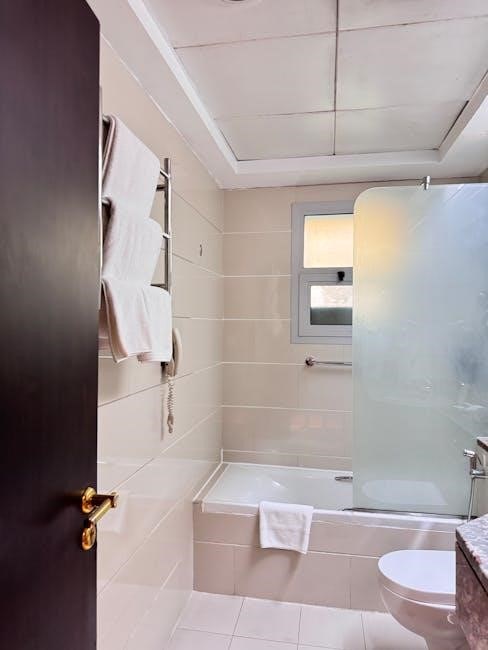
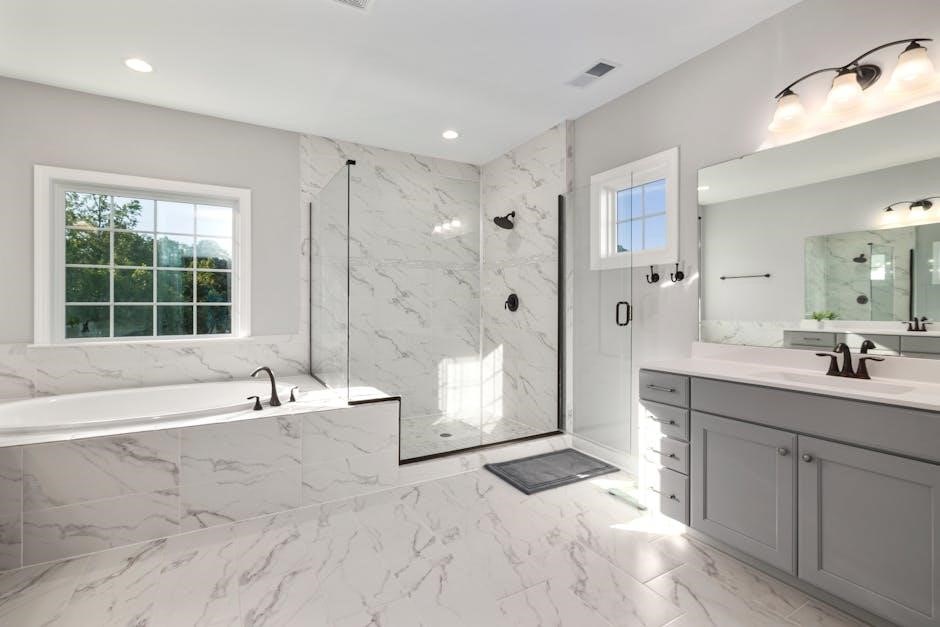
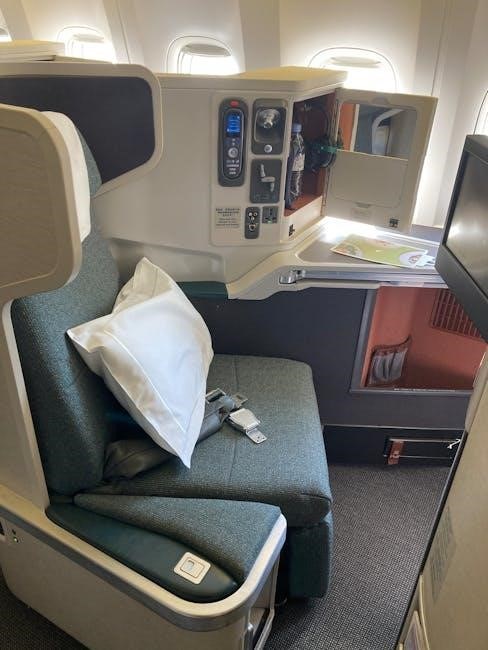
P&O Adventure Oceanview Cabin 5308 – A Detailed Review

Cabin 5308, an Oceanview stateroom on the Pacific Adventure, has garnered specific attention in recent traveler feedback. A video review details a three-night stay, offering insights into the cabin’s overall condition and suitability.

While not explicitly flagged as a cabin to avoid, the review provides a realistic assessment, allowing potential bookers to manage expectations. Guests should consider this detailed account when weighing their cabin options and researching potential drawbacks.

Cabin Steward Performance – Expectations vs. Reality

Reports indicate cabin stewards aboard the Pacific Adventure are generally friendly and visibly busy, yet the depth of daily cleaning services appears limited. Many guests found cleaning primarily consisted of bed-making, a task some passengers proactively handled themselves each morning.

This discrepancy between expected thoroughness and actual service levels suggests a potential area for improvement, impacting overall cabin comfort and cleanliness perceptions. Manage expectations accordingly.

XO 44 Yacht Comparison – A Luxury Alternative

For travelers seeking a significantly elevated experience compared to potential shortcomings on the Pacific Adventure, the XO 44 yacht presents a compelling alternative. This adventure yacht isn’t merely modern; it redefines industry standards, offering a premium level of comfort and personalized service.

While a substantial investment, the XO 44 promises privacy, bespoke itineraries, and a level of luxury demonstrably absent in some Pacific Adventure cabin experiences.

TripAdvisor Reviews: Analyzing Negative Feedback

A comprehensive analysis of TripAdvisor reviews reveals recurring themes of dissatisfaction among Pacific Adventure passengers. Common complaints center around small, unclean cabins and subpar food quality, failing to meet advertised gourmet standards.

Negative feedback, particularly from 2024 and 2025, consistently highlights issues with cabin comfort and dining experiences. Many reviewers express disappointment, noting a disconnect between expectations and reality regarding cabin cleanliness and service levels.

Identifying Recurring Themes in Negative Reviews

Detailed examination of negative Pacific Adventure reviews consistently points to several key concerns. Uncleanliness within specific cabin categories is frequently cited, alongside complaints about limited cabin size and uncomfortable layouts.

Furthermore, a significant number of guests report dissatisfaction with the waterfront dining experience, labeling it a “definite fail.” Privacy concerns on decks 9 & 10, due to limited balcony cover, also emerge as a recurring issue, impacting overall guest satisfaction.

Review Dates and Trends (2024, 2025)

Analysis of TripAdvisor reviews reveals a concerning trend. Negative feedback regarding Pacific Adventure cabins began escalating in mid-2024, with numerous reports surfacing throughout the latter half of the year.

This dissatisfaction continued into 2025, with archived posts and recent comments consistently echoing complaints about cabin cleanliness, inadequate maintenance, and disappointing food quality. The volume of negative reviews suggests these aren’t isolated incidents, but systemic issues.

Booking Strategies to Mitigate Risks

Proactive planning is crucial when booking a Pacific Adventure cruise. Thoroughly research specific cabin numbers, utilizing online forums and review sites to identify potentially problematic rooms. Consider contacting Pacific Cruisers directly to request a cabin away from reported trouble spots.

If concerns persist, explore alternative cruise lines offering comparable itineraries. Prioritize flexibility in your booking, allowing for potential cabin changes if necessary.

Importance of Researching Specific Cabin Numbers

Diligent research into individual cabin numbers is paramount before finalizing your Pacific Adventure booking. Numerous reports detail inconsistencies in cabin quality, with specific numbers – like 5308 – receiving negative feedback regarding cleanliness and comfort. Online forums and TripAdvisor reviews are invaluable resources.

Scrutinize recent reviews (2024, 2025) for recurring themes. Understanding past guest experiences can prevent disappointment and ensure a more enjoyable cruise. Don’t rely solely on cabin category descriptions.

Considering Alternative Cruise Lines

If consistent negative feedback regarding Pacific Adventure cabins persists, exploring alternative cruise lines warrants serious consideration. Numerous companies offer comparable itineraries and destinations with potentially superior cabin standards and service.

Researching competitors like Princess Cruises, Royal Caribbean, or Carnival may reveal options better aligned with your expectations for comfort and cleanliness.

Prioritize reading detailed reviews focusing on cabin quality and overall guest satisfaction before making a final decision.

Contacting Pacific Cruisers for Cabin Requests

Directly contacting Pacific Cruisers’ customer service is crucial when attempting to secure a specific cabin or express concerns. Politely request information regarding cabin maintenance records and recent guest feedback for your desired cabin number.

Be prepared to advocate for your preferences, referencing documented complaints and potential issues.

While guarantees are unlikely, a proactive approach may increase your chances of receiving a more satisfactory cabin assignment.

Document all communication for future reference, should issues arise during your cruise;

Understanding Cabin Categories: Inside, Oceanview, Balcony, Suite

Pacific Adventure offers diverse cabin categories, each with trade-offs. Inside cabins are the most affordable, lacking windows. Oceanview cabins provide a porthole or window, enhancing the experience. Balcony cabins offer private outdoor space, though decks 9 & 10 lack sufficient shade.

Suites provide premium amenities and space, but “priority” upgrades haven’t consistently delivered value. Consider your budget and priorities; cleanliness concerns span categories, but are frequently reported in standard options.

The Great Divide Nature Interpretation – A Distraction from Cabin Issues?

While Pacific Adventure promotes enriching experiences like the “Great Divide Nature Interpretation,” some guests suggest it diverts attention from underlying issues. TripAdvisor reviews consistently mention cabin shortcomings – cleanliness, size, and balcony privacy – overshadowing positive onboard activities.

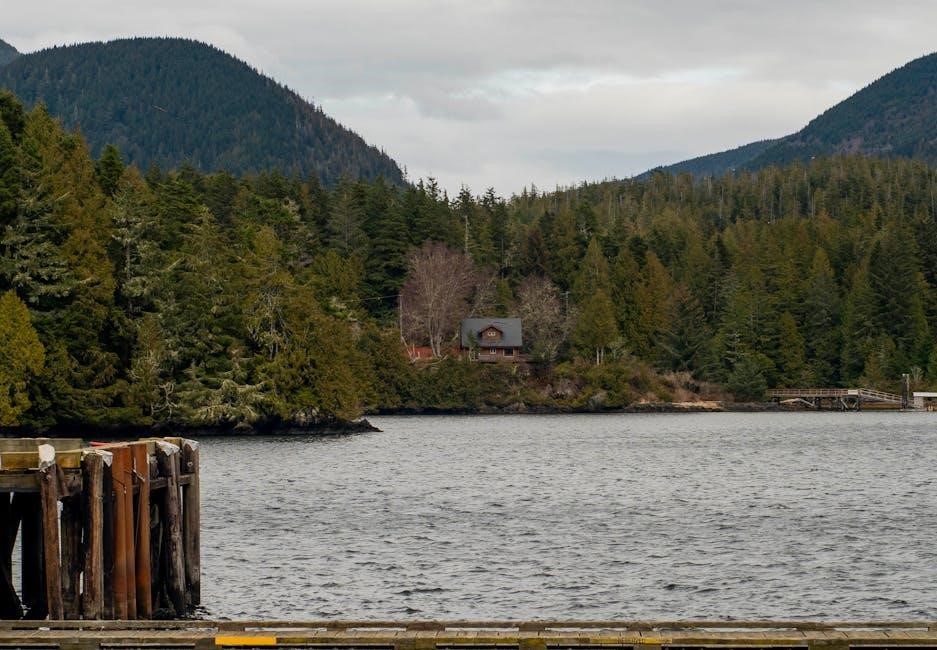
Despite “excellent naturalists” leading tours, recurring complaints about cabin quality persist. The interpretation may be a valuable addition, but shouldn’t overshadow the need for P&O to address fundamental cabin concerns for a truly enjoyable cruise.

Future Cruise Considerations: Lessons Learned

Planning another Pacific Adventure cruise necessitates a proactive approach, informed by recent guest experiences. Thoroughly research specific cabin numbers, prioritizing those not mentioned in negative reviews regarding cleanliness or maintenance. Consider alternative cruise lines if cabin quality is paramount.

Don’t solely rely on cabin category descriptions; delve into detailed feedback. Request cabin assignments strategically through Pacific Cruisers, but be prepared to advocate for your preferences. Prioritize realistic expectations regarding service and amenities.

highgrove frameless shower screen installation instructions

Highgrove Frameless Shower Screen Installation Instructions: A Comprehensive Guide

Today’s date is 02/08/2026 01:51:36. These instructions detail the installation of Highgrove frameless shower screens‚ adhering to AS/NZS 2208:1996 standards.

Understanding Highgrove Shower Screen Features

Highgrove Bathrooms’ frameless shower screens are designed for modern bathrooms‚ offering a sleek and minimalist aesthetic. These screens utilize toughened safety glass‚ manufactured to meet the stringent requirements of the Australian standard AS/NZS 2208:1996‚ ensuring safety and durability.

Available in various sizes – including 850x850x2000mm‚ 1200x1000mm‚ 1150x850x2000mm‚ and 1200x900mm – and hinge panel configurations (250mm‚ 600mm‚ 550mm)‚ Highgrove screens provide flexibility to suit diverse bathroom layouts. The screens boast a frameless design‚ maximizing light and creating a spacious feel.

Furthermore‚ Highgrove offers a range of signature finishes‚ including Chrome‚ Matte Black‚ Brushed Brass‚ Brushed Nickel‚ and Gunmetal‚ allowing for customization to complement any bathroom décor. It’s crucial to consult your local Highgrove Bathrooms store for specific configurations and size options beyond those readily available‚ ensuring a perfect fit for your space.

Available Finishes and Configurations

Highgrove Bathrooms provides a comprehensive selection of finishes for its frameless shower screens‚ catering to diverse aesthetic preferences. Customers can choose from classic Chrome‚ contemporary Matte Black‚ warm Brushed Brass‚ sophisticated Brushed Nickel‚ and modern Gunmetal. These finishes are applied to all shower fittings‚ ensuring a cohesive look throughout the shower enclosure.

Regarding configurations‚ Highgrove offers various screen sizes to accommodate different bathroom spaces. Common dimensions include 850x850x2000mm‚ 1200x1000mm‚ 1150x850x2000mm‚ and 1200x900mm. The hinge panel size also varies‚ with options like 250mm‚ 550mm‚ and 600mm‚ influencing the screen’s opening mechanism and accessibility.

For bespoke bathroom designs‚ it’s recommended to contact your local Highgrove Bathrooms store. They can advise on additional configurations and size options not typically listed‚ ensuring a tailored solution. Remember‚ all screens adhere to AS/NZS 2208:1996 standards‚ regardless of finish or configuration.

Safety Standards Compliance (AS/NZS 2208:1996)

Highgrove frameless shower screens are meticulously engineered to comply with the stringent Australian/New Zealand Standard AS/NZS 2208:1996‚ specifically concerning safety glazing materials utilized in building applications. This standard dictates the properties and performance requirements for glass used in potentially hazardous locations‚ such as shower enclosures.

Crucially‚ all Highgrove shower screens employ toughened safety glass. This glass undergoes a specialized heat treatment process‚ significantly increasing its strength and‚ importantly‚ altering its breakage pattern. Instead of shattering into large‚ sharp shards‚ toughened glass breaks into small‚ relatively harmless granular pieces‚ minimizing the risk of severe injury.

However‚ adherence to AS/NZS 2208:1996 isn’t solely about the glass itself. To ensure full compliance and maintain warranty validity‚ installation of the toughened safety glass must be performed by a licensed glazier. This guarantees correct installation techniques and proper sealing‚ upholding the safety integrity of the shower screen.

Importance of Licensed Glazier Installation

Employing a licensed glazier for your Highgrove frameless shower screen installation isn’t merely a recommendation; it’s a fundamental requirement for safety‚ warranty adherence‚ and compliance with Australian standards (AS/NZS 2208:1996). Licensed glaziers possess the specialized knowledge‚ skills‚ and tools necessary to handle and install toughened safety glass correctly.

Incorrect installation can compromise the structural integrity of the shower screen‚ potentially leading to glass failure and serious injury. A licensed glazier understands the precise techniques for securing the glass panels‚ ensuring proper support‚ and achieving a watertight seal. They are trained to identify and address potential issues that an inexperienced installer might overlook.

Furthermore‚ Highgrove Bathrooms’ warranty is contingent upon professional installation by a licensed glazier. Attempting a DIY installation or using an unqualified installer will void the warranty‚ leaving you financially responsible for any future repairs or replacements. Prioritize safety and peace of mind – choose a licensed professional.

Pre-Installation Checklist

Before starting‚ verify all components are present‚ gather necessary tools‚ and meticulously prepare the shower area for a smooth‚ safe installation process.

Tools Required for Installation

Successful installation of your Highgrove frameless shower screen demands specific tools to ensure precision and safety. A spirit level is crucial for verifying plumb and level surfaces‚ guaranteeing a stable and aesthetically pleasing installation. You’ll need a high-quality silicone gun for applying sealant‚ creating a watertight barrier against leaks.

A measuring tape is essential for accurate measurements throughout the process‚ while a pencil allows for marking drill points and alignment guides. A power drill with appropriate drill bits (for tile‚ glass‚ or wall material) is necessary for securing brackets and hinges. Don’t forget safety glasses to protect your eyes from debris.

A rubber mallet can be useful for gently adjusting panels into place without causing damage. Screwdrivers (Phillips and flathead) are needed for tightening screws. Finally‚ a clean cloth is vital for wiping surfaces and ensuring proper adhesion of silicone. Remember‚ using the correct tools contributes significantly to a professional and long-lasting result.

Checking Package Contents

Before commencing installation of your Highgrove frameless shower screen‚ a thorough inventory of package contents is paramount. Carefully unpack all components and cross-reference them against the provided packing list. You should find the glass panels (hinge panel‚ fixed panel)‚ support brackets‚ and all necessary mounting hardware – screws‚ wall plugs‚ and potentially shims.

Verify the presence of the hinge mechanism and ensure it corresponds to the specified size (e.g.‚ 250mm‚ 550mm‚ or 600mm hinge panel). Locate the silicone sealant and confirm its expiration date. Check for any damage to the glass panels – chips‚ cracks‚ or imperfections – and report any issues immediately to Highgrove Bathrooms.

Confirm you have received the correct finish (Chrome‚ Matte Black‚ Brushed Brass‚ Brushed Nickel‚ or Gunmetal) as per your order. Missing components or damaged parts will delay the installation process. A complete and undamaged inventory ensures a smooth and successful installation‚ adhering to AS/NZS 2208:1996 standards.

Preparing the Shower Area

Prior to installing your Highgrove frameless shower screen‚ meticulous preparation of the shower area is crucial for a secure and watertight installation. Ensure the shower base is level and structurally sound‚ capable of supporting the weight of the glass panels. Thoroughly clean the walls where the screen will be mounted‚ removing any existing soap scum‚ mildew‚ or debris.

Verify that the wall surfaces are plumb and free from irregularities. Uneven surfaces may require shimming to ensure the screen sits flush. Protect the surrounding floor and fixtures with drop cloths or protective sheeting to prevent damage during installation. Confirm the availability of appropriate wall anchors based on your wall type (tile‚ plasterboard‚ or concrete).

Double-check that all necessary tools are readily accessible. A properly prepared shower area guarantees a stable and aesthetically pleasing installation‚ compliant with AS/NZS 2208:1996 safety standards. Remember‚ a licensed glazier is required for warranty purposes.

Installation Steps

Follow these steps carefully: begin with the hinge panel‚ then mount the fixed panel‚ secure support brackets‚ and finally‚ meticulously seal and waterproof all joints.

Installing the Hinge Panel

Begin by carefully positioning the hinge panel‚ ensuring it’s perfectly aligned with the shower base and wall. Utilize a level to confirm verticality before proceeding. The hinge panel‚ available in sizes like 250mm or 550mm‚ is crucial for smooth operation.

Secure the hinges to both the glass panel and the wall using the provided screws. Ensure these screws are tightened adequately‚ but avoid over-tightening‚ which could damage the glass or wall. Double-check the hinge alignment; proper alignment is vital for preventing future issues.

For brushed brass‚ chrome‚ brushed nickel‚ matte black‚ or gunmetal finishes‚ verify the screw heads match the chosen aesthetic. Remember‚ a licensed glazier is required for installation to meet Australian standards (AS/NZS 2208:1996) and maintain warranty validity. Incorrect installation can compromise safety.

Mounting the Fixed Panel

Carefully position the fixed panel adjacent to the installed hinge panel‚ ensuring a snug and level fit against the shower base and adjacent wall. Precise alignment is paramount for a watertight seal and structural integrity. Use shims if necessary to achieve perfect leveling.

Apply a high-quality silicone sealant along the edges where the fixed panel meets the shower base and wall. This sealant is critical for preventing water leakage and maintaining a hygienic environment. Smooth the sealant with a sealant smoothing tool for a professional finish.

Secure the fixed panel using appropriate wall anchors and screws‚ ensuring they are compatible with your wall type. Highgrove shower screens‚ available in configurations like 850x850mm or 1200x900mm‚ require robust anchoring. Remember‚ a licensed glazier must handle installation to comply with AS/NZS 2208:1996 and uphold warranty terms.

Attaching the Support Brackets

Support brackets are crucial for stabilizing the fixed panel and distributing weight evenly‚ especially for larger configurations like 1200x1000mm screens. Locate the pre-drilled holes on the fixed panel and corresponding wall locations.

Using appropriate screws and wall anchors – selected based on your wall material – securely attach the support brackets. Ensure the brackets are perfectly aligned to provide maximum support and prevent any future movement. Double-check bracket placement before fully tightening screws.

Highgrove Bathrooms offers shower screens in finishes like Chrome‚ Matte Black‚ and Brushed Brass. Regardless of finish‚ proper bracket installation is vital. Remember‚ installation must adhere to AS/NZS 2208:1996 and be performed by a licensed glazier to maintain warranty validity and ensure safety. Inspect brackets for stability after installation.

Sealing and Waterproofing

Achieving a watertight seal is paramount to prevent leaks and maintain the integrity of your Highgrove frameless shower screen. Apply a high-quality‚ mildew-resistant silicone sealant along all edges where the glass meets the wall‚ floor‚ or other glass panels.

Pay close attention to the base of the screen and around the hinge panel‚ as these areas are most prone to water penetration. Smooth the sealant with a wet finger or a sealant smoothing tool for a professional finish. Ensure complete coverage without gaps or voids.

Highgrove Bathrooms’ screens‚ available in finishes like Brushed Nickel and Gunmetal‚ require meticulous sealing. Remember‚ adherence to AS/NZS 2208:1996 is essential. Crucially‚ a licensed glazier must perform installation to validate the warranty and guarantee a safe‚ waterproof installation. Allow the sealant to cure completely before using the shower.

Post-Installation Checks & Maintenance

Following installation‚ thoroughly test for stability and leaks. Regular cleaning with mild detergent preserves the finish‚ ensuring longevity of your Highgrove shower screen.

Testing for Stability and Leaks

After completing the installation of your Highgrove frameless shower screen‚ a rigorous testing phase is crucial to guarantee both safety and performance. Begin by gently applying pressure to various points of the glass panels – the hinge panel‚ fixed panel‚ and any support brackets – to assess overall stability. Ensure there is no noticeable flex or movement.

Next‚ conduct a water test. Run the shower at a typical pressure and duration‚ observing carefully for any signs of leakage around the seals‚ hinges‚ and where the glass meets the shower base or walls. Pay particular attention to the corners and edges. Any detected leaks should be immediately addressed by re-applying sealant or tightening fixings.

Remember‚ Highgrove shower screens are manufactured to meet Australian standards (AS/NZS 2208:1996)‚ but proper installation by a licensed glazier is essential for warranty validity and safety. If instability or persistent leaks are observed‚ consult a qualified professional. Consistent monitoring after initial testing will help identify and resolve any emerging issues promptly.

Cleaning and Care Instructions

Maintaining the pristine appearance of your Highgrove frameless shower screen is simple with regular care. After each use‚ a quick rinse with clean water helps prevent the build-up of soap scum and water spots. For more thorough cleaning‚ use a mild‚ non-abrasive detergent and a soft cloth or sponge. Avoid harsh chemicals‚ scouring pads‚ or abrasive cleaners‚ as these can damage the glass and finishes – Chrome‚ Matte Black‚ Brushed Brass‚ Brushed Nickel‚ and Gunmetal.

To enhance water repellency and minimize spotting‚ consider applying a glass protectant specifically designed for shower screens. This creates a barrier that makes cleaning easier and keeps your screen looking newer for longer. Regularly inspect the seals and hinges for any signs of deterioration and address them promptly.

Remember‚ Highgrove shower screens are crafted to Australian standards (AS/NZS 2208:1996). Proper care not only preserves their aesthetic appeal but also contributes to their longevity and performance. Always follow these guidelines to ensure your shower screen remains a beautiful and functional feature of your bathroom.

Troubleshooting Common Issues

Minor leaks are sometimes encountered post-installation. First‚ re-examine all sealing points‚ ensuring silicone is fully applied and free of gaps. Check the alignment of the glass panels; slight adjustments may resolve water escaping. If leaks persist‚ verify the shower wall is perfectly plumb and square – an uneven surface can compromise the seal.

Stability concerns should be addressed immediately. Ensure support brackets are securely fastened and haven’t loosened. If the screen feels wobbly‚ double-check hinge panel installation and tighten all fixings. Remember‚ Highgrove screens adhere to AS/NZS 2208:1996‚ requiring licensed glazier installation for warranty validity.

Difficult cleaning often stems from hard water deposits. Utilize a dedicated shower cleaner or a vinegar-water solution. For stubborn stains‚ gently scrub with a non-abrasive pad. If issues continue‚ consult a professional glazier. Available in finishes like Chrome‚ Matte Black‚ Brushed Brass‚ Brushed Nickel‚ and Gunmetal‚ proper maintenance ensures lasting beauty.

free carb cycling meal plan pdf

What is Carb Cycling?

Carb cycling strategically alternates carbohydrate intake with workout intensity, potentially aiding weight loss and athletic performance; downloadable PDF plans offer guidance.

The Core Principles of Carb Cycling

Carb cycling revolves around manipulating carbohydrate intake to optimize glycogen stores and metabolic function. The fundamental idea is to strategically alternate between higher-carb days, typically coinciding with intense workout sessions, and lower-carb days to encourage fat utilization. A free carb cycling meal plan PDF often illustrates this principle, showcasing how to rotate between these phases.

These plans usually incorporate training days with elevated carb consumption, rest days with reduced carbs, and sometimes even no-carb days. This isn’t about eliminating carbs entirely, but rather timing their intake to fuel activity and support recovery. The goal is to prevent metabolic adaptation and maintain insulin sensitivity, potentially leading to improved body composition. Finding a well-structured PDF is key to understanding these nuances.

Benefits of a Carb Cycling Diet

A carb cycling approach, often detailed in a free carb cycling meal plan PDF, may offer several advantages beyond traditional dieting. Potential benefits include improved insulin sensitivity, allowing the body to utilize carbohydrates more effectively. This can lead to enhanced energy levels, particularly during workouts, and potentially support muscle growth and recovery.

Furthermore, carb cycling may help prevent metabolic slowdown, a common issue with prolonged calorie restriction. By strategically varying carb intake, the body is less likely to adapt and reduce its metabolic rate. Many downloadable plans emphasize this aspect. While research is limited, athletes may find it beneficial for performance. A well-designed PDF will outline these potential benefits and guide implementation.

Understanding Macronutrient Ratios

Free carb cycling meal plan PDFs detail varying protein, fat, and carbohydrate percentages, adjusted based on daily carb levels and activity.

Carb Intake Levels: High, Moderate, and Low

Free carb cycling meal plan PDFs typically categorize intake into three primary levels. High-carb days, often around 200g or more, fuel intense workouts, utilizing sources like rice and quinoa. Moderate-carb days, approximately 100-150g, support recovery and maintain energy, incorporating sweet potatoes and vegetables.

Low-carb days, generally below 50g, encourage fat burning and insulin sensitivity, focusing on non-starchy vegetables. Some plans even include no-carb days for advanced cycling. These PDF resources often provide specific gram ranges for each level, tailored to individual needs and goals. Understanding these distinctions is crucial for effectively implementing a carb cycling strategy, as detailed within the downloadable plans.

Protein and Fat Consumption During Carb Cycling

Free carb cycling meal plan PDFs emphasize consistent protein intake throughout all phases, typically around 0.8-1 gram per pound of body weight, supporting muscle maintenance and recovery. Fat consumption adjusts based on carb levels; high-carb days generally see lower fat intake to manage overall calories.

Conversely, low-carb days often increase healthy fat sources – avocados, nuts, and olive oil – to promote satiety and provide energy. These PDF guides frequently detail macronutrient ratios for each carb level, ensuring balanced nutrition. Maintaining adequate protein is paramount, while strategically adjusting fat intake complements the carb cycling approach, as outlined in downloadable resources.

Sample 4-Week Carb Cycling Meal Plan

Free PDF plans typically structure a four-week progression, starting with higher carb intake and gradually reducing it, including a refeed day each week.

Week 1: Initial Carb Load (200g Carbs/Day)

Free carb cycling meal plan PDFs often begin with a high-carb phase, around 200 grams daily, to replenish glycogen stores. This week focuses on fueling intense workouts. Expect meals featuring rice, quinoa, and sweet potatoes. Sample options include rice and veggies, or quinoa paired with lean protein.

The goal isn’t unrestricted eating, but strategic carbohydrate consumption timed with exercise. Many plans suggest distributing carbs throughout the day, rather than concentrating them in one meal. This initial load prepares the body for subsequent carb restriction. Careful tracking of intake is crucial, even with a pre-made PDF. Prioritize complex carbohydrates over simple sugars during this phase to sustain energy levels and support optimal performance.

Week 2: Reducing Carb Intake

Free carb cycling meal plan PDFs typically transition to lower carbohydrate levels during week two, often around 100-150 grams per day. This phase aims to encourage fat utilization for fuel. Expect a shift towards more vegetables and moderate portions of complex carbs. Baby carrots can be included as a snack, but portion control is key.

Workouts remain intense, but the body begins adapting to rely less on glucose. Protein intake should be maintained to preserve muscle mass. Many plans suggest alternating between moderate-carb and low-carb days. Monitoring energy levels is vital; adjustments may be needed based on individual response. A well-structured PDF will provide guidance on these modifications.

Week 3: Further Carb Restriction

Free carb cycling meal plan PDFs often demonstrate a significant reduction in carbohydrate intake during week three, typically falling between 50-100 grams daily. This phase intensifies fat burning and metabolic adaptation. Focus shifts to non-starchy vegetables and lean protein sources. Handfuls of baby vegetables can still be incorporated, but starchy carbohydrates like rice are minimized.

Workout intensity should be maintained, though some individuals may experience slight energy fluctuations. Careful monitoring of performance is crucial. A quality PDF plan will emphasize adequate hydration and electrolyte intake. This week tests adherence and prepares the body for the final low-carb focus, requiring discipline and mindful eating.

Week 4: Low-Carb Focus & Refeed

Free carb cycling meal plan PDFs typically conclude with a week prioritizing very low carbohydrate intake (under 50g) for most days, coupled with a strategic refeed day. The refeed, often around 200g carbs, replenishes glycogen stores and boosts leptin levels, aiding metabolic function. This phase maximizes fat loss and enhances insulin sensitivity.

A well-structured PDF will detail appropriate refeed food choices – think quinoa and sweet potatoes. Monitoring energy levels is vital; the low-carb days may require adjustments. This final week solidifies adaptations and prepares the body for maintenance. It’s a crucial step for long-term success, preventing metabolic slowdown.

Food Choices for Each Carb Level

Free carb cycling meal plan PDFs detail food selections: high-carb days feature rice, quinoa; moderate days include sweet veggies; low/no-carb days prioritize proteins.

High-Carb Day Food Options

Free carb cycling meal plan PDFs typically emphasize complex carbohydrates on high-carb days, strategically timed around intense workouts to replenish glycogen stores and fuel performance. Excellent choices include brown rice, quinoa, sweet potatoes, and various vegetables like carrots. These provide sustained energy release.

Many plans suggest incorporating fruits, though portion control is key due to their natural sugar content. Consider berries, bananas, or apples. Lean protein sources, such as chicken breast or fish, should still be included to support muscle recovery. A sample meal might be grilled chicken with a side of brown rice and steamed broccoli. Remember to prioritize whole, unprocessed foods for optimal results, as detailed in downloadable plans.

Moderate-Carb Day Food Options

Free carb cycling meal plan PDFs often designate moderate-carb days as a bridge between high and low-carb phases, supporting continued energy levels without excessive calorie intake. Good choices include smaller portions of sweet potatoes, quinoa, or brown rice compared to high-carb days.

Vegetables remain a staple, with a slightly broader selection allowed than on low-carb days. Think squash, peas, or larger servings of leafy greens. Lean proteins like turkey or white fish are ideal. A sample meal could be a turkey breast salad with a small serving of quinoa and mixed vegetables. These plans emphasize balance, ensuring adequate nutrients while managing carbohydrate consumption for continued progress.

Low-Carb & No-Carb Day Food Options

Free carb cycling meal plan PDFs typically focus low-carb/no-carb days on maximizing fat burning and recovery. Protein intake remains high, utilizing sources like chicken breast, fish, or lean beef. Non-starchy vegetables are crucial – broccoli, spinach, kale, and asparagus are excellent choices, providing essential nutrients with minimal carbohydrates.

Healthy fats, such as avocado, olive oil, and nuts (in moderation), become primary energy sources. A no-carb day might consist of a large salad with grilled chicken, avocado, and an olive oil dressing. These plans often suggest strategic timing with rest days or lighter activity to optimize results and minimize fatigue.

Workout Integration with Carb Cycling

Free carb cycling meal plan PDFs emphasize timing high-carb days with intense workouts to fuel performance and recovery effectively, maximizing glycogen stores.

Timing Workouts with High-Carb Days

Free carb cycling meal plan PDFs consistently recommend aligning your most strenuous workouts with your designated high-carbohydrate days. This strategic timing is crucial because carbohydrates are the body’s primary fuel source, especially during high-intensity exercise. Consuming a sufficient amount of carbs before, during, and after intense training sessions replenishes glycogen stores depleted during activity.

These PDF resources often detail specific pre-workout carb intake suggestions, like easily digestible sources such as rice or sweet potatoes, to provide immediate energy. Post-workout, they advocate for continued carb consumption to aid muscle recovery and optimize glycogen resynthesis; Properly timed carbohydrate intake, as outlined in these plans, can significantly enhance workout performance, reduce fatigue, and accelerate recovery, ultimately maximizing the benefits of your training regimen.

Rest Days and Low-Carb Intake

Free carb cycling meal plan PDFs universally emphasize pairing rest days with periods of lower carbohydrate consumption. The rationale behind this approach is to encourage the body to tap into fat stores for energy when glycogen reserves aren’t being actively replenished through carbohydrate intake. This can be particularly effective for weight management goals.

These downloadable plans typically suggest focusing on protein and healthy fats on rest days, while significantly reducing carbohydrate portions. Some PDF guides even incorporate “no-carb” days for advanced practitioners. It’s important to note that these plans often advise against complete carb elimination for extended periods, advocating for cyclical reintroduction to prevent metabolic slowdown and maintain hormonal balance.

Finding a Free Carb Cycling Meal Plan PDF

Numerous websites offer free carb cycling meal plan PDFs, but evaluating their source and content quality is crucial for safe and effective implementation.

Reliable Sources for Downloadable Plans

Locating trustworthy free carb cycling meal plan PDFs requires careful consideration. V Shred LLC, as of 2026, provides resources, though terms and privacy policies should be reviewed. Websites specializing in nutrition and fitness, like those offering keto diet plans (Keto Vale is mentioned), sometimes include carb cycling options as extensions of their low-carb content.

However, exercise caution. General health and fitness websites may offer plans, but verifying the author’s credentials – registered dietitians or certified trainers are ideal – is essential. YouTube, while a source of information, requires discerning viewers to assess the credibility of content creators. Always prioritize plans from established sources with a reputation for accuracy and safety, avoiding those with overly restrictive or unsubstantiated claims.

Evaluating the Quality of a PDF Plan

When assessing a free carb cycling meal plan PDF, several factors are crucial. A high-quality plan should detail macronutrient ratios – carbohydrates, protein, and fats – for each day, aligning with the carb cycling principles. Look for clarity regarding carb intake levels (high, moderate, low, or no-carb) and corresponding food choices.

The plan should integrate with workout schedules, specifying timing for high-carb days relative to exercise intensity. Beware of plans lacking personalization; individual needs vary. A good plan won’t promote extreme restriction but rather a strategic rotation. Finally, scrutinize the source – is it authored by a qualified professional, and does it cite credible scientific references, like those referencing wheat and rice studies?

manufacturing and associated industries award pay guide

Manufacturing and Associated Industries Award Pay Guide ー 2026

This comprehensive guide details 2026 pay rates for the Manufacturing and Associated Industries Award (MA000010)‚ covering Australian employees in relevant sectors.
It ensures compliance with Fair Work Commission rulings and annual wage reviews‚ including the 3.75% increase effective July 1‚ 2025.

The Manufacturing and Associated Industries and Occupations Award 2020 (MA000010) is a legally binding document established under Australia’s Fair Work Act 2009. It outlines the minimum employment terms and conditions for a broad spectrum of employees engaged in manufacturing‚ engineering‚ and related technical roles across the nation. This award serves as a cornerstone for fair labor practices within these vital industries.

Its primary function is to define minimum pay rates‚ applicable allowances‚ and essential work conditions‚ ensuring a baseline standard for employee welfare. The award’s scope extends to employers operating throughout Australia who employ personnel within the specified occupations. A detailed listing of covered occupations‚ alongside any exclusions‚ can be found within Clause 4 of the award itself.

Understanding this award is crucial for both employers and employees to guarantee adherence to legal requirements and foster a productive‚ equitable work environment. Regular reviews by the Fair Work Commission ensure the award remains relevant and responsive to evolving economic conditions and industry standards.

Coverage of the Award

The Manufacturing and Associated Industries and Occupations Award 2020 (MA000010) broadly encompasses employees involved in manufacturing‚ production‚ processing‚ and a diverse range of associated industries throughout Australia. This includes roles within engineering‚ technical trades‚ and various operational functions supporting these core activities.

Specifically‚ the award covers employers operating within these sectors nationwide. However‚ it’s vital to consult Clause 4 of the award for a comprehensive and definitive list of covered occupations. This clause details the specific job titles and classifications that fall under the award’s jurisdiction‚ as well as outlining any potential exclusions.

Determining coverage requires careful consideration of the employee’s primary duties and the nature of the employer’s business. The award’s application isn’t solely based on industry classification; the specific work performed is paramount. Employers are responsible for accurately classifying their workforce to ensure compliance with the award’s provisions and avoid potential underpayment issues.

Key Dates and Pay Review Cycles

The Manufacturing and Associated Industries and Occupations Award operates on established key dates and review cycles‚ crucial for employer compliance. A significant date is July 1st‚ marking the typical effective date for annual wage adjustments determined by the Fair Work Commission. In 2025‚ a 3.75% wage increase took effect from this date.

The Fair Work Commission undertakes annual reviews of modern awards‚ including this one‚ to ensure minimum pay rates remain aligned with economic conditions and cost of living adjustments. These reviews typically conclude in the late June/early July timeframe‚ with decisions published shortly thereafter.

Employers must proactively monitor Fair Work Commission announcements and updates to implement any changes promptly. Pay rates are subject to change‚ and adherence to the correct rates is legally mandated. Regular internal audits of payroll systems are recommended to verify accurate application of award provisions throughout each pay cycle. Staying informed is key to avoiding penalties.

General Minimum Wage Adjustments (July 1‚ 2025)

Effective July 1‚ 2025‚ the Manufacturing and Associated Industries and Occupations Award experienced a general minimum wage adjustment of 3.75%. This increase‚ determined by the Fair Work Commission‚ applies to all employees covered under the award‚ impacting base rates of pay across all classification levels.

This adjustment reflects the Commission’s assessment of economic factors and the need to maintain fair compensation for workers. Employers were required to update their payroll systems to reflect these new rates‚ ensuring all employees receive the correct entitlements from the specified date.

It’s crucial to note that this percentage increase is applied to the existing base rate for each classification level‚ as defined in Schedule A of the award. Employers should consult the official pay guide and relevant documentation to accurately calculate the revised pay rates for their workforce. Failure to comply with these adjustments can result in significant penalties.

Understanding Classification Structures (Schedule A)

Schedule A of the Manufacturing and Associated Industries and Occupations Award 2020 details the classification structure used to determine appropriate pay rates for employees. This schedule outlines various levels – currently ranging from Level 1 to Level 5 – each defined by specific skill sets‚ responsibilities‚ and levels of autonomy.

Correct classification is paramount; employers must accurately assess each employee’s duties against the criteria outlined in Schedule A. Misclassification can lead to underpayment or overpayment of wages‚ resulting in legal repercussions. The platform does not automatically update employee levels after three months at a lower level; manual updates are required.

Understanding these definitions is vital for both employers and employees. The schedule provides a clear framework for determining fair compensation based on the complexity and demands of the role. Employers should regularly review classifications to ensure they remain accurate as job duties evolve.

Level 1 Classification ― Pay Rates

Employees classified as Level 1 under the Manufacturing and Associated Industries and Occupations Award generally perform routine tasks under close supervision. These roles typically involve limited skill and experience‚ focusing on basic operational duties. As of July 1‚ 2025‚ following the 3.75% increase‚ the minimum weekly pay rate for Level 1 is subject to specific conditions.

The base rate for Level 1 employees is dependent on whether they are covered by Vehicle Manufacturing provisions. It’s crucial to note potential rounding discrepancies when calculating casual loading and the all-purpose industry allowance‚ which may affect the final pay rate displayed on pay guides. Employers must verify calculations carefully.

Important Note: Always consult the official Fair Work Commission pay rates and schedules for the most accurate and up-to-date information. These rates are minimums‚ and employers may choose to pay above the award rate. Regular review of pay rates is essential for compliance.

Level 2 Classification ― Pay Rates

Level 2 classifications within the Manufacturing and Associated Industries Award encompass roles requiring a degree of experience and skill‚ often involving work under general supervision. Employees at this level typically handle more complex tasks than those in Level 1‚ demonstrating increasing competence and responsibility. The minimum weekly pay rate for Level 2‚ adjusted by the 3.75% increase from July 1‚ 2025‚ requires careful consideration.

Unlike automatic progression from Level 1‚ advancement to Level 2 necessitates a manual update to each employee’s profile. The base rate may vary‚ particularly for those in Vehicle Manufacturing‚ due to potential rounding issues affecting casual loading and the all-purpose industry allowance calculations. Accurate record-keeping is vital.

Crucially‚ employers should always cross-reference pay rates with official Fair Work Commission resources to ensure full compliance. Award rates represent minimum standards‚ and employers retain the option to offer higher remuneration.

Level 3 Classification ー Pay Rates

Level 3 classifications within the Manufacturing and Associated Industries Award signify a substantial increase in skill and responsibility. Employees at this level generally operate with limited supervision‚ exercising independent judgment and contributing to problem-solving within their teams. They often possess specialized knowledge relevant to their specific role. The updated pay rates‚ reflecting the 3.75% increase from July 1‚ 2025‚ are critical for compliant payroll management.

As with Level 2‚ progression to Level 3 isn’t automatic; manual updates to employee profiles are essential. Discrepancies may arise in Vehicle Manufacturing due to rounding impacts on casual loading and allowances. Employers must prioritize accuracy in calculations.

Remember‚ these rates are minimums established by the Fair Work Commission. Employers are encouraged to consult official sources and may choose to exceed these minimums based on performance and experience. Consistent monitoring of Fair Work updates is paramount.

Level 4 Classification ー Pay Rates

Level 4 employees within the Manufacturing and Associated Industries Award demonstrate considerable expertise and often take on mentoring or training responsibilities for lower-level staff. They typically handle complex tasks requiring in-depth technical knowledge and contribute significantly to process improvements. Accurate classification is vital for ensuring fair compensation and legal compliance‚ especially considering the 3.75% wage increase effective July 1‚ 2025.

It’s crucial to remember that the platform doesn’t automatically advance employees; manual profile updates are necessary. Potential rounding discrepancies affecting casual loading and all-purpose allowances may occur within Vehicle Manufacturing‚ demanding careful calculation.

Employers should consistently verify rates against official Fair Work Commission publications. While these represent minimum standards‚ exceeding them based on individual performance is encouraged. Staying informed about evolving regulations is essential for maintaining a compliant and motivated workforce.

Level 5 Classification ー Pay Rates

Level 5 classifications represent the highest skill level within many roles covered by the Manufacturing and Associated Industries Award. These employees possess advanced technical expertise‚ often leading projects‚ resolving complex issues‚ and driving innovation within their teams. They demonstrate independent judgment and require minimal supervision‚ contributing directly to organizational success. Remember the 3.75% wage increase from July 1‚ 2025‚ must be applied correctly.

Employers must ensure accurate classification‚ as underpayment can lead to significant penalties. Be aware of potential rounding issues‚ particularly in Vehicle Manufacturing‚ impacting casual loading and allowances. Manual updates to employee profiles are necessary for progression; the system doesn’t automate this process.

Always prioritize referencing official Fair Work Commission resources for the most up-to-date and accurate pay rate information. Maintaining compliance is paramount for a positive and productive work environment.

Vehicle Manufacturing Rate Considerations

Employees specifically engaged in Vehicle Manufacturing under the Manufacturing and Associated Industries Award require careful attention to pay rate calculations. Due to system limitations‚ the base rate displayed on standard pay guides may not precisely align with the actual amount payable. This discrepancy arises from the complex interaction between casual loading application and the All-Purpose Industry Allowance.

Employers must meticulously verify calculations‚ accounting for these factors to ensure accurate wage disbursement. The system’s rounding processes can introduce minor variations‚ necessitating manual adjustments in some cases. It’s crucial to understand that the award sets minimum standards‚ and employers can offer higher rates if desired.

Regularly consult official Fair Work Commission publications and resources to stay informed about any updates or clarifications regarding Vehicle Manufacturing rates. Accurate pay is vital for maintaining a compliant and motivated workforce.

Casual Loading Application

The Manufacturing and Associated Industries Award mandates a specific casual loading for all eligible casual employees. This loading compensates for the lack of benefits typically afforded to permanent staff‚ such as paid leave entitlements. Accurate application of this loading is paramount for compliance with Fair Work regulations and avoiding underpayment claims.

The standard casual loading percentage is determined by the Award and must be consistently applied to the base rate of pay for each casual employee. Employers should carefully review the Award’s provisions to confirm the current loading percentage. It’s important to note that casual loading is in addition to any applicable allowances or overtime payments.

System calculations‚ as noted‚ can sometimes introduce rounding discrepancies‚ particularly when combined with the All-Purpose Industry Allowance. Therefore‚ employers should routinely audit payroll data to ensure the casual loading is correctly calculated and applied to each casual employee’s wages.

All-Purpose Industry Allowance

The All-Purpose Industry Allowance‚ as defined within the Manufacturing and Associated Industries Award‚ provides an additional payment to employees recognizing the demands and conditions inherent in the manufacturing sector. This allowance is intended to compensate workers for tasks requiring versatility and adaptability across various roles and responsibilities.

The specific amount of the allowance is outlined in the Award’s schedules and may vary based on classification level. Employers must ensure they are applying the correct allowance amount corresponding to each employee’s designated classification. It’s crucial to understand that this allowance is separate from‚ and in addition to‚ base rates of pay and casual loading.

However‚ be aware that the system’s calculation of this allowance‚ when combined with casual loading‚ can sometimes result in rounding issues affecting the final pay rate. Regular verification of payroll calculations is recommended to guarantee accurate allowance application and prevent discrepancies.

Allowances Included in the Award

The Manufacturing and Associated Industries Award 2020 incorporates several allowances beyond the All-Purpose Industry Allowance‚ designed to address specific working conditions and employee responsibilities. These allowances aim to provide fair compensation for tasks or situations that deviate from standard duties.

While a comprehensive list is available within the full Award documentation‚ common allowances include provisions for shift work‚ overtime‚ and potentially hazardous work environments. Employers are legally obligated to correctly identify when these allowances apply and accurately incorporate them into employee pay.

It’s vital to consult the official Fair Work Commission resources and the Award itself for detailed information on eligibility criteria and payment rates for each allowance. Misinterpretation or incorrect application of allowances can lead to underpayment of wages and potential legal ramifications. Thorough understanding and diligent application are paramount for compliance.

Overtime and Penalty Rates

The Manufacturing and Associated Industries Award 2020 meticulously outlines provisions for overtime and penalty rates‚ ensuring employees are appropriately compensated for work performed outside standard hours. Overtime typically applies to hours worked beyond the ordinary span of hours‚ as defined by the Award and any relevant enterprise agreements.

Penalty rates are applicable for work performed on weekends‚ public holidays‚ and potentially during specific shift times. These rates are calculated as a percentage above the ordinary hourly rate‚ varying depending on the day and time worked. Accurate record-keeping of hours worked is crucial for correct overtime and penalty rate calculations.

Employers must adhere strictly to the Award’s stipulations regarding overtime authorization and limitations. Failure to do so can result in significant penalties. Consulting the official Fair Work Commission resources and the Award document itself is essential for understanding the complexities of overtime and penalty rate application.

Fair Work Commission Resources

The Fair Work Commission (FWC) serves as the primary authority for information regarding the Manufacturing and Associated Industries Award 2020 (MA000010). Their website (www.fwc.gov.au) provides direct access to the full Award document‚ ensuring employers and employees have the most up-to-date and legally sound information.

The FWC offers a range of resources‚ including detailed explanations of Award provisions‚ pay rate calculators‚ and guidance on interpreting complex clauses. They also provide access to decisions and rulings related to the Award‚ offering valuable insights into its application in specific scenarios.

Furthermore‚ the FWC’s Infoline (1300 799 722) offers direct assistance from experienced advisors who can answer questions and provide clarification on Award-related matters. Utilizing these resources is vital for maintaining compliance and fostering a fair and productive work environment. Always prioritize official FWC sources for accurate guidance.

Where to Find Official Pay Guides and Updates

Accessing official and current pay guides is crucial for compliance with the Manufacturing and Associated Industries Award 2020. The primary source is the Fair Work Ombudsman (FWO) website (www.fairwork.gov.au)‚ which hosts regularly updated pay rate tables and guides specifically for this Award.

The FWO also provides a Pay Calculator tool‚ simplifying the process of determining correct wages based on classification‚ experience‚ and any applicable allowances. Subscribing to the FWO’s email updates ensures you receive notifications regarding any changes to the Award or minimum wage adjustments.

Additionally‚ the Fair Work Commission (FWC) website (www.fwc.gov.au) publishes official Award documents and decisions. Regularly checking these sources‚ alongside the FWO‚ guarantees you’re utilizing the most accurate and legally compliant information available. Relying on unofficial sources can lead to costly errors.

Impact of Economic Factors on Wages (Q2 2025 Trends)

Economic conditions significantly influence wage trends within the Manufacturing and Associated Industries. Data from Q2 2025 reveals a decrease in average weekly wages‚ falling from AUD 1740.70 in Q4 2024 to AUD 1715.50. This decline reflects broader economic pressures impacting the sector‚ including fluctuating material costs and shifts in demand.

Despite the overall decrease‚ the Fair Work Commission’s mandated 3.75% wage increase from July 1‚ 2025‚ aims to mitigate the effects of inflation and maintain employee purchasing power. However‚ employers must carefully balance these increases with their own financial constraints.

Ongoing monitoring of key economic indicators – inflation rates‚ GDP growth‚ and industry-specific performance – is vital for informed wage planning; These factors will continue to shape wage expectations and negotiations throughout 2025 and beyond‚ impacting businesses and employees alike within the manufacturing landscape.

hydrotherapy exercises for knee replacement pdf

Hydrotherapy, utilizing water’s properties, offers a gentle yet effective approach to knee replacement rehabilitation. PDF guides detail exercises, enhancing recovery and function.

What is Hydrotherapy?

Hydrotherapy, also known as aquatic therapy, leverages the unique physical properties of water – buoyancy, resistance, and hydrostatic pressure – to facilitate movement and healing. It’s a specialized form of physical therapy conducted in a warm-water environment, typically a pool. Buoyancy reduces the impact of gravity on joints, easing stress during exercises, which is particularly beneficial post-knee replacement.

Resistance provided by the water strengthens muscles without the need for external weights. Hydrostatic pressure aids in reducing swelling and improving circulation. Many resources, including downloadable hydrotherapy exercises for knee replacement PDF guides, outline specific routines. These guides often detail exercises tailored to different phases of recovery, ensuring a safe and progressive rehabilitation process. The goal is to restore range of motion, strength, and function.

Benefits of Hydrotherapy Post-Knee Replacement

Hydrotherapy offers numerous advantages following knee replacement surgery. Reduced joint loading allows for earlier and more comfortable movement, minimizing pain and promoting faster recovery. Water’s resistance strengthens weakened muscles surrounding the knee, improving stability and function. Improved circulation, facilitated by hydrostatic pressure, reduces swelling and accelerates healing.

Furthermore, aquatic therapy enhances proprioception – your body’s awareness of its position in space – crucial for regaining balance and coordination. Accessing hydrotherapy exercises for knee replacement PDF resources provides structured programs for home practice, supplementing clinic sessions. These guides often incorporate exercises designed to improve gait, stair climbing, and other daily activities, ultimately leading to a better quality of life post-surgery.

Phase 1: Early Post-Operative Hydrotherapy (Weeks 1-6)

Initial hydrotherapy focuses on gentle movement and reducing swelling. PDF guides offer safe exercises, prioritizing pain management and establishing a foundation for recovery.

Goals of Phase 1

The primary objectives during the initial weeks post-knee replacement, as detailed in many hydrotherapy PDF guides, center around minimizing pain and inflammation. Early intervention aims to restore a basic range of motion, crucial for functional recovery. Gentle exercises, performed in water, facilitate this without excessive stress on the joint.

Another key goal is to regain quadriceps control, vital for stability. Hydrotherapy’s buoyancy reduces weight-bearing, allowing patients to activate muscles more easily. PDF resources emphasize the importance of establishing a comfortable and pain-free movement pattern. Improving circulation and preventing stiffness are also paramount, preparing the knee for more advanced rehabilitation phases. Ultimately, Phase 1 builds confidence and sets the stage for progressive loading and strengthening.

Gentle Range of Motion Exercises in Water

Hydrotherapy PDF guides frequently showcase exercises like heel slides and wall slides, performed in chest-deep water. These movements gently increase knee flexion and extension, minimizing joint impact. Emphasis is placed on slow, controlled motions, avoiding pain.

Water’s buoyancy supports body weight, enabling a greater range of motion with reduced stress. Leg lifts – front, side, and back – further enhance muscle activation and control. These exercises, often illustrated in PDF resources, focus on restoring normal gait mechanics. Circular leg movements and gentle knee bends are also incorporated. The warm water promotes muscle relaxation and reduces stiffness, facilitating improved mobility and preparing the knee for more challenging exercises.

Warm-Up and Cool-Down Protocols

Hydrotherapy PDF guides consistently emphasize the importance of proper warm-up and cool-down routines. A typical warm-up involves five to ten minutes of gentle walking in the water, followed by arm circles and leg swings. This increases blood flow and prepares muscles for exercise.

Cool-down protocols, also detailed in PDF resources, include similar low-impact movements, gradually decreasing intensity. Static stretches, holding each position for 20-30 seconds, are crucial for improving flexibility and preventing muscle soreness. Gentle knee flexion and extension exercises in the water aid recovery. These protocols minimize post-exercise stiffness and promote optimal healing, ensuring a safe and effective rehabilitation process following knee replacement.

Phase 2: Intermediate Hydrotherapy (Weeks 6-12)

PDF guides showcase progressive exercises, building strength and endurance. Water’s buoyancy supports increased weight-bearing, aiding pain management and functional recovery.

Increasing Strength and Endurance

Hydrotherapy during weeks 6-12 focuses on progressively challenging the knee joint to rebuild strength and stamina. PDF resources often detail exercises like water walking – forward, backward, and sideways – to engage various muscle groups.

Resistance is gradually increased using webbed gloves or ankle cuffs, maximizing muscle activation without excessive joint stress. Exercises targeting quadriceps, hamstrings, and calf muscles are crucial.

Repeated movements in water enhance endurance, preparing the knee for daily activities. These PDF guides emphasize controlled motions and proper form to prevent re-injury. The warm water reduces pain, allowing for a greater range of motion and longer exercise durations, ultimately improving functional capacity.

Weight-Bearing Exercises in Water

Hydrotherapy’s buoyancy significantly reduces stress on the knee joint, enabling earlier and safer weight-bearing exercises. PDF guides often illustrate exercises like partial and full squats in chest-deep water, gradually increasing the load as strength improves.

Step-ups onto low platforms and lunges are also incorporated, challenging balance and stability. Water provides gentle resistance, promoting muscle strengthening.

Progressive weight-bearing is key; starting with minimal contact and increasing it based on individual tolerance. These PDF resources emphasize maintaining proper alignment and controlled movements. The hydrostatic pressure aids circulation and reduces swelling, facilitating a quicker return to functional weight-bearing on land.

Hydrotherapy for Pain Management

Hydrotherapy effectively manages post-knee replacement pain through several mechanisms. Water’s warmth increases blood flow, relaxing muscles and reducing stiffness. Buoyancy minimizes joint loading, decreasing discomfort during movement. PDF guides often detail gentle, low-impact exercises specifically for pain relief.

Exercises like water walking and gentle range-of-motion movements stimulate endorphin release, the body’s natural painkillers. The hydrostatic pressure also helps reduce edema, a common source of pain.

These PDF resources emphasize slow, controlled movements and listening to the body’s signals. Consistent hydrotherapy sessions, as outlined in these guides, can significantly decrease reliance on pain medication and improve overall comfort.

Phase 3: Advanced Hydrotherapy (Weeks 12+)

Advanced sessions focus on functional movements and cardiovascular fitness. PDF guides provide complex exercises, building strength and preparing for daily life activities.

Proprioceptive Exercises in Water

Proprioception, your body’s awareness of its position in space, is crucial post-knee replacement. Water’s buoyancy reduces stress, allowing focused retraining. Exercises like single-leg stance with eyes closed, and controlled perturbations challenge balance and stability.

Hydrotherapy PDF guides often detail these progressions, starting with stable surfaces and advancing to unstable ones (foam pads, wobble boards). Dynamic movements, such as reaching in various directions while maintaining balance, are also included. These exercises enhance neuromuscular control, minimizing re-injury risk and improving functional performance.

Water resistance provides a natural challenge, further stimulating proprioceptive feedback. Consistent practice, guided by a physical therapist and utilizing detailed PDF resources, is key to restoring optimal joint awareness and function.

Functional Exercises for Daily Activities

Hydrotherapy bridges the gap between clinic and real-world living. Functional exercises simulate everyday tasks – walking, stair climbing, squatting, and lifting – within the supportive aquatic environment. Water’s buoyancy minimizes joint stress, enabling patients to practice movements previously limited by pain or weakness.

Knee replacement hydrotherapy PDF guides frequently include progressions for these activities. Initially, focus is on proper form and controlled movements. As strength and confidence improve, resistance is gradually increased using water’s natural drag.

Simulating activities like getting in and out of a chair, or navigating uneven surfaces, prepares patients for independent living. These exercises, detailed in PDF resources, promote independence and a return to a fulfilling lifestyle post-surgery.

Cardiovascular Training in Water

Hydrotherapy isn’t solely about strengthening; it’s also vital for rebuilding cardiovascular fitness post knee replacement. Water’s hydrostatic pressure aids venous return, improving circulation and reducing swelling. Aquatic exercises elevate heart rate without excessive joint impact, crucial for recovery.

Knee replacement hydrotherapy PDF guides often prescribe water walking, jogging, or cycling. These activities enhance endurance and overall well-being. The water provides support, allowing for a greater range of motion and longer exercise durations.

Interval training – alternating between high and low intensity – is frequently recommended, detailed within PDF resources. This approach maximizes cardiovascular benefits while minimizing stress on the healing joint, promoting a faster, more complete recovery.

Specific Hydrotherapy Exercises

Hydrotherapy utilizes targeted movements like heel slides and leg lifts, often detailed in knee replacement hydrotherapy PDF guides, to restore function and strength.

Heel Slides

Heel slides are a foundational hydrotherapy exercise for post-knee replacement patients, frequently illustrated within comprehensive hydrotherapy exercises for knee replacement PDF resources. Performed in chest-deep water, this exercise gently increases knee flexion and extension.

Begin by sitting or standing with your back supported, maintaining good posture. Slowly slide your heel towards your buttocks, bending your knee as far as comfortable without pain. Then, slowly straighten your leg, returning to the starting position. The water provides buoyancy, reducing stress on the joint.

PDF guides often recommend 10-15 repetitions, focusing on controlled movements. Progression involves increasing the range of motion and adding gentle resistance using the water’s natural drag. This exercise improves joint mobility and prepares the knee for more advanced movements.

Wall Slides

Wall slides are a crucial hydrotherapy exercise detailed in many hydrotherapy exercises for knee replacement PDF guides, focusing on strengthening the quadriceps and improving knee control. This exercise is typically performed with your back against a pool wall, in water reaching chest height.

Stand with your feet shoulder-width apart, slightly away from the wall. Slowly slide down the wall, bending your knees to approximately a 45-degree angle, keeping your back flat against the surface. Hold briefly, then slowly slide back up to the starting position.

PDF resources emphasize maintaining proper form and avoiding pain. Begin with a shallow bend and gradually increase the depth as strength improves. Aim for 10-15 repetitions, focusing on controlled movements and engaging the core for stability.

Leg Lifts (Front, Side, Back)

Leg lifts – front, side, and back – are foundational exercises frequently outlined in hydrotherapy exercises for knee replacement PDF materials. These exercises target different muscle groups surrounding the knee, promoting strength and stability. Water’s buoyancy reduces stress on the joint during execution.

For front lifts, hold onto the pool wall for balance and slowly lift one leg straight forward, keeping the knee extended. Side lifts involve lifting the leg laterally, while back lifts focus on extending the leg backward.

PDF guides recommend performing 10-15 repetitions for each variation, maintaining controlled movements. Focus on engaging the correct muscles and avoiding excessive strain. These lifts enhance hip and core stability, crucial for post-operative recovery.

Important Considerations & Safety

Hydrotherapy requires careful attention to water temperature, depth, and individual limitations; PDF guides emphasize consulting a physical therapist before starting exercises.

Water Temperature and Depth

Optimal water temperature for hydrotherapy following knee replacement typically ranges between 83-88°F (28-31°C). This warmth promotes muscle relaxation, reduces pain, and increases blood flow to the surgical site, facilitating healing.

Water depth is equally crucial. Initially, a depth allowing for partial or full body immersion while maintaining a stable base is recommended. As strength and confidence improve, depth can be adjusted to challenge balance and range of motion.

PDF guides detailing hydrotherapy exercises often specify appropriate depths for each exercise. Shallow water provides support for early-stage exercises, while deeper water increases resistance and challenges core stability. Always prioritize safety and comfort, adjusting depth as needed based on individual tolerance and the guidance of a qualified physical therapist.

Contraindications for Hydrotherapy

Hydrotherapy isn’t suitable for everyone post-knee replacement. Certain conditions necessitate caution or complete avoidance. Uncontrolled cardiovascular disease, active infections, open wounds, and significant skin conditions are absolute contraindications.

Individuals with unstable angina, severe respiratory problems, or uncontrolled hypertension require medical clearance before participating. Fever, recent DVT, or pulmonary embolism also preclude hydrotherapy.

PDF resources outlining hydrotherapy exercises emphasize the importance of screening for these conditions. Always consult with a physician and physical therapist to determine suitability. Even with clearance, monitor for adverse reactions during sessions. Prioritizing patient safety is paramount, and modifications or alternative therapies may be necessary.

Working with a Physical Therapist

Successful hydrotherapy for knee replacement hinges on collaboration with a qualified physical therapist. They’ll conduct a thorough assessment to tailor a program to your specific needs and recovery stage. PDF guides detailing exercises are valuable, but shouldn’t replace personalized instruction.

A therapist will demonstrate proper form, ensuring exercises are performed safely and effectively. They’ll monitor your progress, adjusting the program as you gain strength and mobility. Crucially, they’ll educate you on pain management techniques and potential complications.

Regular communication with your therapist is vital. Report any discomfort or concerns immediately. They can modify exercises or recommend alternative approaches. Their expertise maximizes benefits and minimizes risks, leading to optimal functional outcomes.

Resources & PDF Downloads

Numerous online resources and PDF guides offer detailed hydrotherapy exercises for post-knee replacement recovery, aiding patients and therapists alike in rehabilitation.

Finding Reliable Hydrotherapy Programs

Locating a trustworthy hydrotherapy program is crucial for optimal knee replacement recovery. Begin by consulting your orthopedic surgeon or physical therapist for recommendations within your area. Hospital-affiliated rehabilitation centers often provide supervised aquatic therapy, ensuring qualified personnel and safe environments.

Search for programs specifically designed for post-surgical patients, ideally those with experience in knee arthroplasty rehabilitation. Verify the credentials of the therapists – they should be licensed and certified in aquatic physical therapy. Online directories and patient reviews can offer valuable insights.

Consider programs offering individualized treatment plans, incorporating exercises tailored to your specific needs and progress. Access to downloadable PDF guides detailing exercises can supplement in-pool sessions and promote home practice, enhancing long-term outcomes. Prioritize programs emphasizing safety protocols and proper technique.

Example Knee Replacement Hydrotherapy PDF Guides

Numerous resources offer downloadable PDF guides detailing hydrotherapy exercises for knee replacement patients. These guides typically illustrate a progression of exercises, starting with gentle range-of-motion activities and advancing to strengthening and functional movements. Look for guides created by reputable hospitals or physical therapy organizations.

Content often includes detailed instructions, images, and modifications for varying fitness levels. Some guides focus on specific phases of recovery – early, intermediate, and advanced – aligning with your rehabilitation timeline. They may also cover warm-up and cool-down protocols, emphasizing safety.

Examples include guides from hospital systems offering orthopedic rehabilitation, and professional physical therapy associations. Always review the source’s credibility and consult your therapist before implementing any new exercise program based on a PDF guide, ensuring it aligns with your individual needs.

turbo 10 burning log manual

The Burning Log Turbo 10, a classic wood heater, often requires locating a manual for setup and maintenance due to its age and discontinued documentation.

Overview of the Turbo 10 Wood Heater

The Burning Log Turbo 10 is a renowned, older model wood-burning stove, frequently discussed in online forums like Arborist, Chainsaw & Tree Work Forum and Reddit’s r/firewood. Its enduring popularity stems from its robust construction and heating capabilities, yet finding a user manual can be challenging. Many owners seek guidance on preliminary setup, particularly regarding the air control valves, as detailed instructions are often missing.

The stove’s design incorporates a catalytic combustor, a key component requiring periodic replacement (typically every 7-10 years). Discussions highlight its potential use beyond basic heating, including applications as a water heater and cook stove, showcasing its versatility. Gumtree Australia listings also mention similar heaters, though not specifically the Turbo 10.

Historical Context and Popularity

The Burning Log Turbo 10 emerged as a popular wood heating solution, with a noted production date around 1983, as evidenced by discussions on online platforms. Its longevity is apparent through continued interest and troubleshooting requests found in forums and communities dedicated to firewood and wood stoves. The frequent need to locate a manual suggests a widespread initial adoption, followed by a period where documentation became scarce.

Despite its age, the Turbo 10 maintains a dedicated following, with users exploring alternative uses like water heating and cooking. Online resources, like those found on inenmanufor/no9ez, aim to provide access to user guides, highlighting the ongoing demand for information about this classic heater.

Understanding the Components

Turbo 10 components include the firebox, air control valves, catalytic combustor, and door frame—often requiring a manual for proper identification and function.

The Firebox and its Construction

The Turbo 10’s firebox is the central combustion chamber, typically constructed from heavy-duty cast iron for durability and heat retention. Understanding its construction is vital, especially when sourcing replacement parts or assessing damage. Online forums suggest older models may exhibit cracking or wear over time, potentially impacting efficiency and safety.

A user manual would detail the specific firebox dimensions and material specifications. Without one, careful inspection is crucial. Look for signs of warping, significant rust, or compromised refractory bricks (if present). The firebox design influences airflow and burn quality, making its integrity paramount for optimal performance. Proper maintenance, including regular cleaning, extends the firebox’s lifespan.

Air Control Valves: Function and Importance

Air control valves on the Turbo 10 regulate airflow to the fire, directly impacting burn rate, heat output, and emissions. A manual is essential for understanding their proper operation, as incorrect settings can lead to inefficient burning or smoke backdraft. These valves typically control both primary and secondary air supply.

Primary air fuels the initial combustion, while secondary air promotes complete burning of gases. Adjusting these valves allows users to fine-tune the fire for different wood types and desired heat levels. Many online discussions highlight the need to experiment with valve settings to achieve an optimal, clean burn. Proper valve function is critical for safety and efficiency.

Catalytic Combustor: Purpose and Location

The Turbo 10 often features a catalytic combustor, a key component for clean and efficient burning. Located within the firebox, typically near the top or back, it reduces emissions by oxidizing gases at lower temperatures. A manual is crucial for understanding its function and replacement schedule – generally every 7-10 years.

The combustor’s purpose is to ignite unburned wood gases, creating additional heat and minimizing smoke. Online forums confirm its presence in many Turbo 10 models, often referred to as “catalysts;” Regular inspection and eventual replacement are vital for maintaining optimal performance and adhering to environmental standards. Proper function ensures a cleaner, hotter fire.

Door Frame and Gasket System

The Turbo 10’s door frame and gasket system are critical for maintaining a proper seal during operation. A tight seal prevents air leaks that diminish efficiency and control. Finding a manual can help diagnose issues with the door’s closure and gasket integrity.

Gumtree Australia listings mention the heater door frame, highlighting its importance. A damaged or worn gasket allows air to enter, reducing heat output and potentially causing unsafe burning conditions. Inspecting the gasket regularly for cracks or deterioration is essential. Replacement gaskets are available, and the manual should detail the correct installation procedure for optimal performance and safety.

Initial Setup and Installation

Turbo 10 installation necessitates a proper chimney connection and careful attention to safety precautions, often detailed within the original user manual.

Safety Precautions Before Installation

Prior to installing your Burning Log Turbo 10, thoroughly review available resources, as a proper manual is crucial for safe operation. Ensure the installation area meets local building codes and regulations regarding clearances to combustible materials. A correctly installed chimney is paramount; inspect it for damage and ensure proper drafting capabilities.

Carbon monoxide detectors are essential, as improper installation or venting can lead to dangerous gas buildup. Before first use, perform a careful inspection of all components, verifying the door frame and gasket system are intact to prevent smoke leakage. Always prioritize safety when handling and positioning the stove, and consider professional installation if you are unsure about any aspect of the process. Remember, a safe installation is a long-lasting and enjoyable heating solution.

Proper Chimney Connection and Requirements

Connecting to a chimney is critical for the safe and efficient operation of your Burning Log Turbo 10. The chimney must meet the manufacturer’s specifications, often detailed within the original manual, regarding diameter and height. A properly sized chimney ensures adequate draft, preventing smoke backdraft into your home.

Inspect the chimney for cracks, obstructions, or deterioration before connecting. Use appropriate chimney connectors, ensuring a secure and airtight seal. Maintain proper clearances to combustible materials around the chimney and stovepipe. Regular chimney cleaning is vital to prevent creosote buildup, a significant fire hazard. Consult local building codes for specific requirements in your area, prioritizing safety and compliance.

Setting Up the Air Control Valves

Proper air control valve adjustment is essential for optimal burning in your Burning Log Turbo 10. Since the original manual may be unavailable, understanding their function is key. These valves regulate airflow to the firebox, controlling burn rate and heat output.

Typically, a fully open valve provides maximum airflow for starting and refueling, while closing it restricts air, slowing combustion for a longer burn. Experiment to find the ideal settings for different wood types and desired heat levels. Observe the flame – a lively, bright flame indicates sufficient air, while a sluggish, smoky flame suggests insufficient airflow. Careful adjustment maximizes efficiency and minimizes emissions.

Operating the Turbo 10

Successfully operating your Turbo 10 relies on mastering fire starting, air control adjustments, and efficient wood loading techniques, often guided by the user manual.

Starting a Fire: Step-by-Step Guide

Initiating a fire in your Burning Log Turbo 10 requires a methodical approach, often detailed within the original user manual. Begin with a generous bed of dry kindling – small twigs and wood shavings work best. Loosen the air control valves to allow ample airflow during startup.

Next, carefully layer progressively larger pieces of wood onto the kindling, creating a teepee or log cabin structure. Light the kindling at the base, ensuring sufficient oxygen reaches the flames.

Gradually add larger logs as the fire establishes itself, avoiding overfilling the firebox. Monitor the draft and adjust the air controls as needed to maintain a steady burn. Remember, a well-established fire is crucial for efficient and clean heating, and consulting the manual can provide specific guidance for your stove.

Adjusting Air Controls for Optimal Burn

Optimizing combustion in the Burning Log Turbo 10 hinges on precise air control adjustments, often explained in the user manual. Initially, open the air controls fully for a robust startup. Once the fire is established, gradually reduce airflow to achieve a slower, more efficient burn.

Experiment with different settings to find the sweet spot – a clean burn with minimal smoke. Too little air results in smoldering and creosote buildup, while too much air cools the fire.

The manual likely details specific indicator signs, like flame color, to guide your adjustments. Regularly monitoring and fine-tuning the air controls maximizes heat output and minimizes emissions, ensuring a safe and effective heating experience.

Loading Wood Efficiently

The Burning Log Turbo 10’s efficiency benefits from strategic wood loading, often detailed within its manual. Seasoned hardwood is crucial; avoid green or damp wood, as it creates excessive smoke and reduces heat. Load wood tightly, but allow for airflow around the pieces.

A top-down burn, where larger logs form the base and smaller kindling is layered on top, can promote cleaner combustion.

The manual may suggest specific loading patterns for optimal performance. Avoid overfilling the firebox, as this can restrict airflow and lead to incomplete burning. Consistent, efficient loading maximizes heat output and minimizes refueling frequency.

Maintenance and Troubleshooting

Turbo 10 upkeep, guided by the manual, involves regular inspections, chimney cleaning, and potential catalytic combustor replacement to ensure safe, efficient operation.

Regular Inspection Checklist

Prioritize safety with frequent checks, referencing your Turbo 10 manual when available. Inspect the door gasket for airtightness, crucial for efficient burning and preventing smoke leakage into the room. Examine the firebox for cracks or damage, addressing any issues promptly to maintain structural integrity.

Carefully assess the chimney connection, ensuring it remains secure and free from obstructions. Regularly check the air control valves for smooth operation, vital for regulating burn rate and heat output. Don’t forget to inspect the catalytic combustor (if equipped), noting its condition as replacement is typically needed every 7-10 years. Finally, always verify carbon monoxide detectors are functioning correctly.

Cleaning the Firebox and Chimney

Regular cleaning extends the life of your Turbo 10. After each burn, remove ash, ensuring it’s completely cool before disposal in a metal container. Inspect the firebox for buildup, scraping away any residue with appropriate tools – avoid harsh chemicals.

Crucially, chimney cleaning is paramount. A blocked chimney poses a severe fire hazard. Frequency depends on usage, but annual professional inspection is recommended. If self-cleaning, follow manual guidelines carefully. Accumulated creosote is flammable; removal prevents dangerous chimney fires. Proper maintenance ensures efficient and safe operation of your wood heater.

Replacing the Catalytic Combustor

The Turbo 10’s catalytic combustor significantly improves efficiency and reduces emissions, but requires periodic replacement – typically every 7-10 years, as indicated in available resources. Consult your manual, if obtainable, for specific instructions.

Carefully remove the old combustor, noting its orientation for correct installation of the new one. Ensure a proper seal to maximize performance. A failing combustor diminishes heating capacity and increases smoke output. Replacement restores optimal burning and environmental benefits. Proper handling and disposal of the old combustor are essential.

Addressing Issues with Smoke Backdraft

Smoke backdraft in the Turbo 10 often indicates insufficient draft, potentially caused by a blocked chimney, improper air control settings, or external factors like wind. A manual can offer troubleshooting steps. First, verify the chimney is clear of obstructions – creosote buildup is a common culprit.

Adjust air controls to increase airflow, and ensure the door gasket seals tightly. If the problem persists, consider chimney height or diameter. Negative air pressure within the home can also contribute; try opening a window slightly. Addressing backdraft is crucial for safe and efficient operation.

Troubleshooting Burning Issues (e.g., insufficient heat)

Insufficient heat from your Turbo 10 can stem from several issues, often addressable with guidance from a manual. Damp wood is a primary cause; ensure wood is properly seasoned. Inadequate airflow, controlled by the air valves, can also limit combustion. Experiment with valve adjustments to find the optimal setting.

Check the catalytic combustor (if equipped) – a failing combustor reduces efficiency. A blocked chimney restricts draft, hindering heat output. Finally, ensure a sufficient wood load is present, packed efficiently for complete burning. Consistent troubleshooting yields optimal performance.

Safety Considerations

A Turbo 10 manual emphasizes carbon monoxide detection and safe ash disposal, alongside preventing overheating—critical for safe operation and household well-being.

Carbon Monoxide Detection

Crucially, operating a Burning Log Turbo 10 necessitates diligent carbon monoxide (CO) detection due to the incomplete combustion inherent in wood burning. This stove, being an older model, may lack modern safety features, amplifying the risk. A properly functioning CO detector is paramount, ideally installed near sleeping areas and the stove itself.

Regularly test the detector’s functionality, ensuring batteries are fresh. Understand the symptoms of CO poisoning – headache, dizziness, nausea, and confusion – and act swiftly if detected. Proper chimney maintenance, as outlined in a Turbo 10 manual, is also vital to prevent CO buildup. Never ignore any warning signs, and prioritize ventilation during operation.

Safe Ash Disposal

Proper ash disposal from your Burning Log Turbo 10 is critical for fire safety. Even seemingly cold ashes can retain embers for days, posing a significant risk. A manual for the stove will likely emphasize this point. Always transfer ashes to a metal container with a tight-fitting lid, kept a safe distance from combustible materials – at least ten feet.

Wet the ashes thoroughly with water before disposal. Never dispose of ashes in plastic containers or directly into the trash. Consider using ashes as garden fertilizer, but only after complete cooling and proper assessment. Exercise extreme caution and prioritize safety throughout the entire process.

Preventing Overheating

Overheating your Burning Log Turbo 10 can be dangerous, potentially leading to chimney fires or stove damage. A manual will detail proper operation to avoid this. Never overload the firebox with wood; maintain adequate airflow using the air control valves. Regularly inspect the chimney for creosote buildup, a major fire hazard.

Monitor the stove’s temperature and adjust air controls to maintain a consistent, safe burn. Avoid using accelerants to start a fire, as they can cause rapid, uncontrolled heating. Ensure proper clearances around the stove, as specified in the installation instructions, to prevent combustible materials from igniting.

Finding a User Manual

Locating a Turbo 10 manual can be challenging; explore online resources and consider contacting the manufacturer directly for assistance with documentation.

Online Resources for Manuals

Finding a Burning Log Turbo 10 user manual online requires diligent searching, as official sources are scarce due to the stove’s age. Websites like forums dedicated to arborist and tree work, such as those discussing chainsaw maintenance, sometimes host scanned copies or shared knowledge. Reddit’s r/firewood community has also seen discussions regarding this model, with users suggesting manual retrieval or manufacturer contact.

Furthermore, platforms like GitHub, specifically repositories such as “no9ez/Burning-Log-Turbo-10-User-Manual,” may offer downloadable PDF versions. However, exercise caution when downloading from unofficial sources and verify the file’s safety. Online classifieds, like Gumtree Australia, while primarily for sales, occasionally mention manuals in listings, potentially leading to a source.

Contacting the Manufacturer

Directly contacting the Burning Log manufacturer presents a challenge, as information regarding their current operational status is limited. Given the stove’s age (dating back to 1983), the original company may no longer exist or have undergone significant restructuring. However, attempting to locate contact information through business directories or historical records is worthwhile.

If the original manufacturer is unreachable, researching potential successor companies or distributors of similar wood-burning stoves could yield results. These entities might possess archived documentation or be able to offer guidance. Online forums and communities dedicated to wood heating often contain shared experiences regarding manufacturer contact attempts and alternative support resources.

Turbo 10 vs. Similar Models

Compared to the Greenland GL10KV, the Turbo 10 often necessitates manual sourcing for parts and operational guidance due to its age and legacy.

Comparison with Greenland GL10KV

The Burning Log Turbo 10 and the Greenland GL10KV represent similar eras of wood-burning stove technology, yet distinct challenges arise when seeking information. Finding a manual for the Turbo 10 is frequently more difficult than locating documentation for the Greenland model, often requiring online forum searches or direct manufacturer contact.

Both stoves offer efficient heating, but the Turbo 10’s older design may necessitate more frequent maintenance, particularly concerning the catalytic combustor. Users often report needing a manual to understand proper combustor replacement procedures. The Greenland GL10KV generally has more readily available parts and support, simplifying long-term ownership. Ultimately, the Turbo 10’s appeal lies in its vintage charm, but demands proactive resourcefulness from its owner.

Turbo 10 and Other Wood Burning Stoves

The Burning Log Turbo 10, while a capable wood heater, differs significantly from modern stoves in terms of documentation availability. Obtaining a manual is often a hurdle, unlike newer models with easily accessible online resources. Compared to contemporary stoves, the Turbo 10 relies heavily on user knowledge and community forums for troubleshooting.

Many modern stoves feature advanced air control systems and automated features absent in the Turbo 10. Consequently, understanding the Turbo 10’s operation requires a deeper grasp of combustion principles, often gleaned from a manual or experienced users. While simpler in design, the Turbo 10 demands a more hands-on approach to maintenance and operation.

Additional Uses

The Turbo 10 can function as a water heater or cook stove, though a manual is crucial for safe and efficient implementation of these alternative uses.

Using the Turbo 10 for Water Heating

Adapting the Turbo 10 for water heating requires careful consideration and, ideally, a user manual for guidance. While possible, it’s not a standard feature and demands a safe setup. Users have experimented with placing a coil or tank near the firebox to heat water, but this must be done cautiously.

Without the manual’s specific instructions, understanding heat transfer and preventing overheating becomes paramount. Improperly installed systems can lead to scalding or damage to the stove. It’s vital to ensure the water heating component doesn’t compromise the stove’s structural integrity or airflow. Always prioritize safety and consult with a qualified professional if unsure about any aspect of this modification.

Utilizing the Stove as a Cook Stove

The Turbo 10 can function as a cook stove, though a manual isn’t always available to detail optimal methods. Its flat top surface provides a space for pots and pans, offering a rustic cooking experience; However, temperature control can be challenging without precise airflow adjustments detailed in the documentation.

Users should exercise caution, as the stove’s surface gets extremely hot. A manual would ideally outline safe cooking practices and suggest appropriate cookware. Maintaining a consistent cooking temperature requires experience and careful monitoring of the fire. Remember that soot and ash can contaminate food, so cleanliness is crucial when using the Turbo 10 for culinary purposes.