Highgrove Frameless Shower Screen Installation Instructions: A Comprehensive Guide
Today’s date is 02/08/2026 01:51:36. These instructions detail the installation of Highgrove frameless shower screens‚ adhering to AS/NZS 2208:1996 standards.
Understanding Highgrove Shower Screen Features
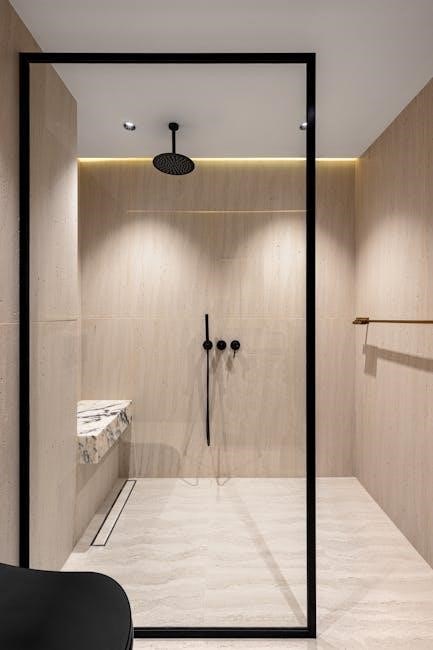
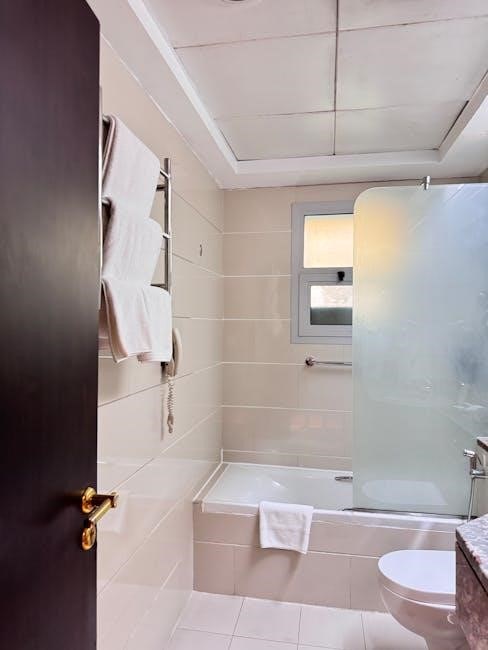
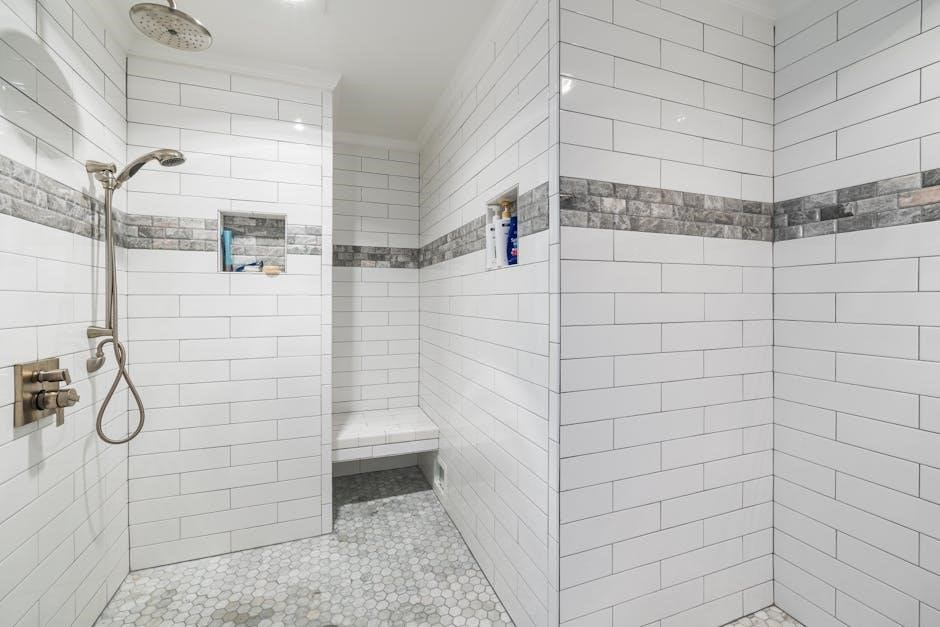
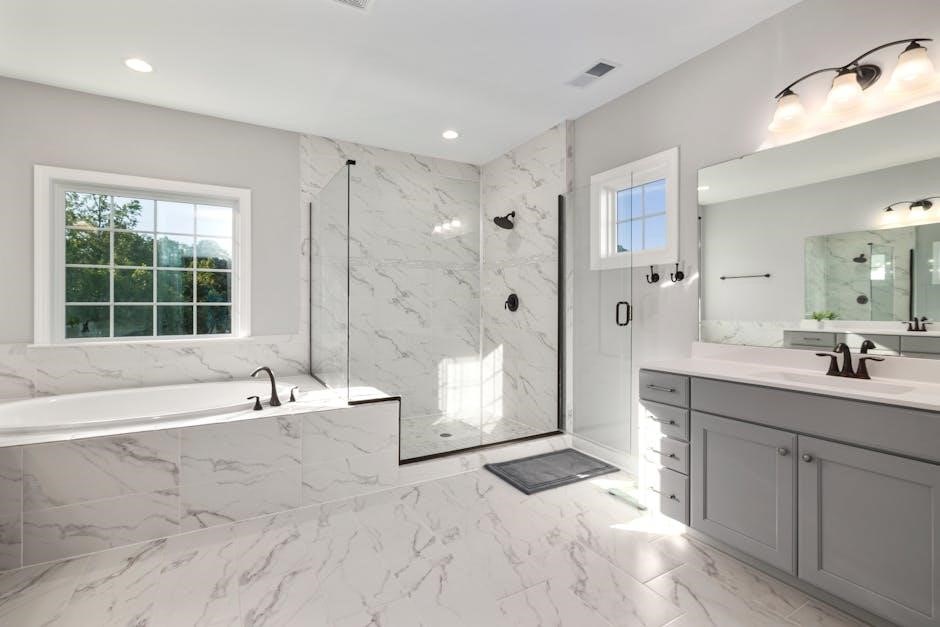
Highgrove Bathrooms’ frameless shower screens are designed for modern bathrooms‚ offering a sleek and minimalist aesthetic. These screens utilize toughened safety glass‚ manufactured to meet the stringent requirements of the Australian standard AS/NZS 2208:1996‚ ensuring safety and durability.
Available in various sizes – including 850x850x2000mm‚ 1200x1000mm‚ 1150x850x2000mm‚ and 1200x900mm – and hinge panel configurations (250mm‚ 600mm‚ 550mm)‚ Highgrove screens provide flexibility to suit diverse bathroom layouts. The screens boast a frameless design‚ maximizing light and creating a spacious feel.
Furthermore‚ Highgrove offers a range of signature finishes‚ including Chrome‚ Matte Black‚ Brushed Brass‚ Brushed Nickel‚ and Gunmetal‚ allowing for customization to complement any bathroom décor. It’s crucial to consult your local Highgrove Bathrooms store for specific configurations and size options beyond those readily available‚ ensuring a perfect fit for your space.
Available Finishes and Configurations
Highgrove Bathrooms provides a comprehensive selection of finishes for its frameless shower screens‚ catering to diverse aesthetic preferences. Customers can choose from classic Chrome‚ contemporary Matte Black‚ warm Brushed Brass‚ sophisticated Brushed Nickel‚ and modern Gunmetal. These finishes are applied to all shower fittings‚ ensuring a cohesive look throughout the shower enclosure.
Regarding configurations‚ Highgrove offers various screen sizes to accommodate different bathroom spaces. Common dimensions include 850x850x2000mm‚ 1200x1000mm‚ 1150x850x2000mm‚ and 1200x900mm. The hinge panel size also varies‚ with options like 250mm‚ 550mm‚ and 600mm‚ influencing the screen’s opening mechanism and accessibility.
For bespoke bathroom designs‚ it’s recommended to contact your local Highgrove Bathrooms store. They can advise on additional configurations and size options not typically listed‚ ensuring a tailored solution. Remember‚ all screens adhere to AS/NZS 2208:1996 standards‚ regardless of finish or configuration.
Safety Standards Compliance (AS/NZS 2208:1996)
Highgrove frameless shower screens are meticulously engineered to comply with the stringent Australian/New Zealand Standard AS/NZS 2208:1996‚ specifically concerning safety glazing materials utilized in building applications. This standard dictates the properties and performance requirements for glass used in potentially hazardous locations‚ such as shower enclosures.
Crucially‚ all Highgrove shower screens employ toughened safety glass. This glass undergoes a specialized heat treatment process‚ significantly increasing its strength and‚ importantly‚ altering its breakage pattern. Instead of shattering into large‚ sharp shards‚ toughened glass breaks into small‚ relatively harmless granular pieces‚ minimizing the risk of severe injury.
However‚ adherence to AS/NZS 2208:1996 isn’t solely about the glass itself. To ensure full compliance and maintain warranty validity‚ installation of the toughened safety glass must be performed by a licensed glazier. This guarantees correct installation techniques and proper sealing‚ upholding the safety integrity of the shower screen.
Importance of Licensed Glazier Installation
Employing a licensed glazier for your Highgrove frameless shower screen installation isn’t merely a recommendation; it’s a fundamental requirement for safety‚ warranty adherence‚ and compliance with Australian standards (AS/NZS 2208:1996). Licensed glaziers possess the specialized knowledge‚ skills‚ and tools necessary to handle and install toughened safety glass correctly.
Incorrect installation can compromise the structural integrity of the shower screen‚ potentially leading to glass failure and serious injury. A licensed glazier understands the precise techniques for securing the glass panels‚ ensuring proper support‚ and achieving a watertight seal. They are trained to identify and address potential issues that an inexperienced installer might overlook.
Furthermore‚ Highgrove Bathrooms’ warranty is contingent upon professional installation by a licensed glazier. Attempting a DIY installation or using an unqualified installer will void the warranty‚ leaving you financially responsible for any future repairs or replacements. Prioritize safety and peace of mind – choose a licensed professional.

Pre-Installation Checklist
Before starting‚ verify all components are present‚ gather necessary tools‚ and meticulously prepare the shower area for a smooth‚ safe installation process.
Tools Required for Installation
Successful installation of your Highgrove frameless shower screen demands specific tools to ensure precision and safety. A spirit level is crucial for verifying plumb and level surfaces‚ guaranteeing a stable and aesthetically pleasing installation. You’ll need a high-quality silicone gun for applying sealant‚ creating a watertight barrier against leaks.
A measuring tape is essential for accurate measurements throughout the process‚ while a pencil allows for marking drill points and alignment guides. A power drill with appropriate drill bits (for tile‚ glass‚ or wall material) is necessary for securing brackets and hinges. Don’t forget safety glasses to protect your eyes from debris.
A rubber mallet can be useful for gently adjusting panels into place without causing damage. Screwdrivers (Phillips and flathead) are needed for tightening screws. Finally‚ a clean cloth is vital for wiping surfaces and ensuring proper adhesion of silicone. Remember‚ using the correct tools contributes significantly to a professional and long-lasting result.

Checking Package Contents
Before commencing installation of your Highgrove frameless shower screen‚ a thorough inventory of package contents is paramount. Carefully unpack all components and cross-reference them against the provided packing list. You should find the glass panels (hinge panel‚ fixed panel)‚ support brackets‚ and all necessary mounting hardware – screws‚ wall plugs‚ and potentially shims.
Verify the presence of the hinge mechanism and ensure it corresponds to the specified size (e.g.‚ 250mm‚ 550mm‚ or 600mm hinge panel). Locate the silicone sealant and confirm its expiration date. Check for any damage to the glass panels – chips‚ cracks‚ or imperfections – and report any issues immediately to Highgrove Bathrooms.
Confirm you have received the correct finish (Chrome‚ Matte Black‚ Brushed Brass‚ Brushed Nickel‚ or Gunmetal) as per your order. Missing components or damaged parts will delay the installation process. A complete and undamaged inventory ensures a smooth and successful installation‚ adhering to AS/NZS 2208:1996 standards.
Preparing the Shower Area
Prior to installing your Highgrove frameless shower screen‚ meticulous preparation of the shower area is crucial for a secure and watertight installation. Ensure the shower base is level and structurally sound‚ capable of supporting the weight of the glass panels. Thoroughly clean the walls where the screen will be mounted‚ removing any existing soap scum‚ mildew‚ or debris.
Verify that the wall surfaces are plumb and free from irregularities. Uneven surfaces may require shimming to ensure the screen sits flush. Protect the surrounding floor and fixtures with drop cloths or protective sheeting to prevent damage during installation. Confirm the availability of appropriate wall anchors based on your wall type (tile‚ plasterboard‚ or concrete).
Double-check that all necessary tools are readily accessible. A properly prepared shower area guarantees a stable and aesthetically pleasing installation‚ compliant with AS/NZS 2208:1996 safety standards. Remember‚ a licensed glazier is required for warranty purposes.

Installation Steps
Follow these steps carefully: begin with the hinge panel‚ then mount the fixed panel‚ secure support brackets‚ and finally‚ meticulously seal and waterproof all joints.
Installing the Hinge Panel
Begin by carefully positioning the hinge panel‚ ensuring it’s perfectly aligned with the shower base and wall. Utilize a level to confirm verticality before proceeding. The hinge panel‚ available in sizes like 250mm or 550mm‚ is crucial for smooth operation.
Secure the hinges to both the glass panel and the wall using the provided screws. Ensure these screws are tightened adequately‚ but avoid over-tightening‚ which could damage the glass or wall. Double-check the hinge alignment; proper alignment is vital for preventing future issues.
For brushed brass‚ chrome‚ brushed nickel‚ matte black‚ or gunmetal finishes‚ verify the screw heads match the chosen aesthetic. Remember‚ a licensed glazier is required for installation to meet Australian standards (AS/NZS 2208:1996) and maintain warranty validity. Incorrect installation can compromise safety.
Mounting the Fixed Panel
Carefully position the fixed panel adjacent to the installed hinge panel‚ ensuring a snug and level fit against the shower base and adjacent wall. Precise alignment is paramount for a watertight seal and structural integrity. Use shims if necessary to achieve perfect leveling.
Apply a high-quality silicone sealant along the edges where the fixed panel meets the shower base and wall. This sealant is critical for preventing water leakage and maintaining a hygienic environment. Smooth the sealant with a sealant smoothing tool for a professional finish.
Secure the fixed panel using appropriate wall anchors and screws‚ ensuring they are compatible with your wall type. Highgrove shower screens‚ available in configurations like 850x850mm or 1200x900mm‚ require robust anchoring. Remember‚ a licensed glazier must handle installation to comply with AS/NZS 2208:1996 and uphold warranty terms.

Attaching the Support Brackets
Support brackets are crucial for stabilizing the fixed panel and distributing weight evenly‚ especially for larger configurations like 1200x1000mm screens. Locate the pre-drilled holes on the fixed panel and corresponding wall locations.
Using appropriate screws and wall anchors – selected based on your wall material – securely attach the support brackets. Ensure the brackets are perfectly aligned to provide maximum support and prevent any future movement. Double-check bracket placement before fully tightening screws.
Highgrove Bathrooms offers shower screens in finishes like Chrome‚ Matte Black‚ and Brushed Brass. Regardless of finish‚ proper bracket installation is vital. Remember‚ installation must adhere to AS/NZS 2208:1996 and be performed by a licensed glazier to maintain warranty validity and ensure safety. Inspect brackets for stability after installation.
Sealing and Waterproofing
Achieving a watertight seal is paramount to prevent leaks and maintain the integrity of your Highgrove frameless shower screen. Apply a high-quality‚ mildew-resistant silicone sealant along all edges where the glass meets the wall‚ floor‚ or other glass panels.
Pay close attention to the base of the screen and around the hinge panel‚ as these areas are most prone to water penetration. Smooth the sealant with a wet finger or a sealant smoothing tool for a professional finish. Ensure complete coverage without gaps or voids.
Highgrove Bathrooms’ screens‚ available in finishes like Brushed Nickel and Gunmetal‚ require meticulous sealing. Remember‚ adherence to AS/NZS 2208:1996 is essential. Crucially‚ a licensed glazier must perform installation to validate the warranty and guarantee a safe‚ waterproof installation. Allow the sealant to cure completely before using the shower.
Post-Installation Checks & Maintenance
Following installation‚ thoroughly test for stability and leaks. Regular cleaning with mild detergent preserves the finish‚ ensuring longevity of your Highgrove shower screen.
Testing for Stability and Leaks
After completing the installation of your Highgrove frameless shower screen‚ a rigorous testing phase is crucial to guarantee both safety and performance. Begin by gently applying pressure to various points of the glass panels – the hinge panel‚ fixed panel‚ and any support brackets – to assess overall stability. Ensure there is no noticeable flex or movement.
Next‚ conduct a water test. Run the shower at a typical pressure and duration‚ observing carefully for any signs of leakage around the seals‚ hinges‚ and where the glass meets the shower base or walls. Pay particular attention to the corners and edges. Any detected leaks should be immediately addressed by re-applying sealant or tightening fixings.
Remember‚ Highgrove shower screens are manufactured to meet Australian standards (AS/NZS 2208:1996)‚ but proper installation by a licensed glazier is essential for warranty validity and safety. If instability or persistent leaks are observed‚ consult a qualified professional. Consistent monitoring after initial testing will help identify and resolve any emerging issues promptly.
Cleaning and Care Instructions
Maintaining the pristine appearance of your Highgrove frameless shower screen is simple with regular care. After each use‚ a quick rinse with clean water helps prevent the build-up of soap scum and water spots. For more thorough cleaning‚ use a mild‚ non-abrasive detergent and a soft cloth or sponge. Avoid harsh chemicals‚ scouring pads‚ or abrasive cleaners‚ as these can damage the glass and finishes – Chrome‚ Matte Black‚ Brushed Brass‚ Brushed Nickel‚ and Gunmetal.
To enhance water repellency and minimize spotting‚ consider applying a glass protectant specifically designed for shower screens. This creates a barrier that makes cleaning easier and keeps your screen looking newer for longer. Regularly inspect the seals and hinges for any signs of deterioration and address them promptly.
Remember‚ Highgrove shower screens are crafted to Australian standards (AS/NZS 2208:1996). Proper care not only preserves their aesthetic appeal but also contributes to their longevity and performance. Always follow these guidelines to ensure your shower screen remains a beautiful and functional feature of your bathroom.
Troubleshooting Common Issues
Minor leaks are sometimes encountered post-installation. First‚ re-examine all sealing points‚ ensuring silicone is fully applied and free of gaps. Check the alignment of the glass panels; slight adjustments may resolve water escaping. If leaks persist‚ verify the shower wall is perfectly plumb and square – an uneven surface can compromise the seal.
Stability concerns should be addressed immediately. Ensure support brackets are securely fastened and haven’t loosened. If the screen feels wobbly‚ double-check hinge panel installation and tighten all fixings. Remember‚ Highgrove screens adhere to AS/NZS 2208:1996‚ requiring licensed glazier installation for warranty validity.
Difficult cleaning often stems from hard water deposits. Utilize a dedicated shower cleaner or a vinegar-water solution. For stubborn stains‚ gently scrub with a non-abrasive pad. If issues continue‚ consult a professional glazier. Available in finishes like Chrome‚ Matte Black‚ Brushed Brass‚ Brushed Nickel‚ and Gunmetal‚ proper maintenance ensures lasting beauty.